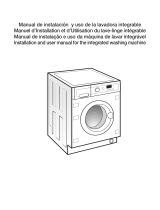
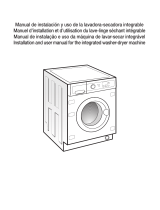
Manual de instalación y uso de la lavadora
Manuel d’installation et d’utilisation de l’appareil
Manual de instalação e utilização da máquina de lavar roupa
Washing machine installation and operation manual
Page is loading ...

70
71
72
76
86
88
91
WARNINGS
SPECIFICATIONS
INSTALLATION AND ASSEMBLY
USING THE APPLIANCE.
PRACTICAL TIPS
MAINTENANCE
AND CLEANING
SAFETY
AND TROUBLESHOOTING
ENVIRONMENTAL
WARNINGS
washing machine
contents
48
49
50
54
64
66
69
ADVERTÊNCIAS
QUADRO TÉCNICO
INSTALAÇÃO E MONTAGEM
UTILIZAÇÃO DO APARELHO
E CONSELHOS PRÁTICOS
MANUTENÇÃO
E LIMPEZA DO APARELHO
SEGURANÇA
E SOLUÇÃO DE PROBLEMAS
ADVERTÊNCIAS SOBRE
O MEIO AMBIENTE
máquina de lavar roupa
índice

4
advertencias
Esta lavadora se suministra con un manual
que incluye instrucciones de funcionamiento,
de mantenimiento e instalación. Leer todas
las instrucciones antes de utilizar la lavadora.
No lavar artículos que previamente hayan
sido limpiados, lavados, remojados o tratados
con gasolina, disolventes para limpieza en
seco, otras sustancias inflamables o
explosivas, ya que se producen vapores que
pueden inflamarse o explotar.
No agregue gasolina, disolventes para
limpieza en seco ni otras sustancias
inflamables o explosivas al agua de lavado
ya que se producen vapores que pueden
inflamarse o explotar.
No reparar o reemplazar ninguna parte
de la lavadora ni intentar cualquier tipo de
servicio a menos que haya sido
recomendado en las instrucciones de
mantenimiento del manual.
No subirse a la máquina ni apoyarse en
la puerta de carga abierta.
No usar una extensión o un adaptador
para conectar la lavadora a la red.
La máquina debe emplearse sólo para lo
que ha sido diseñada.
Seguir las instrucciones de lavado que
recomienda el fabricante de la prenda a lavar.
No poner la lavadora en funcionamiento
hasta asegurarse de que:
• Haya sido instalada de acuerdo con las
instrucciones de instalación.
• Todas las conexiones de agua, desagüe,
a la red eléctrica y a tierra estén de
acuerdo con las normas locales y/o
otras normas aplicables.
Para evitar riesgos de incendio, descargas eléctricas, daños personales u otros daños
al utilizar su lavadora, tome las siguientes precauciones:
Page is loading ...
Page is loading ...
Page is loading ...
Page is loading ...
Page is loading ...
Page is loading ...
Page is loading ...
Page is loading ...
Page is loading ...
Page is loading ...
Page is loading ...

16
4
SELECCIÓN DEL
CENTRIFUGADO
uso del aparato y consejos prácticos
CENTRIFUGADO
Las opciones de lavado se deben seleccionar
siempre después de elegir el programa de
lavado. Cualquier cambio de programa durante
la selección anula las opciones previamente
seleccionadas.
a Tecla de selección de centrifugado
y antiarrugas (flot)
El programa seleccionado tiene asociado
unas revoluciones de centrifugado, como
se visualiza en los modelos con pantalla.
En los modelos sin pantalla se enciende
el piloto correspondiente.
b Puede modificarla pulsando
sucesivamente la tecla centrifugado y el
número de revoluciones irá
descendiendo de 100 en 100 hasta 400
para los modelos con pantalla, o se
encenderá el piloto en los modelos sin
pantalla.
c Eliminación de centrifugado
Pulsando de nuevo la tecla centrifugado
llegamos a la opción eliminación de
centrifugado. Un programa sin
centrifugado final, se usa para evitar la
formación de arrugas de tejidos
especiales.
d Opción: flot/antiarrugas
Se para en el último aclarado,
quedándose la ropa con agua.
Cuando la función se desactiva la
lavadora continúa el programa
desaguando y centrifugando.
Se usa, por ejemplo, cuando no se está
en casa y se desea atrasar el
centrifugado hasta llegar, para evitar las
arrugas de la ropa tras el centrifugado
y su espera en el tambor para ser
extraída.
a
1100
700
400
3h 6
h
b
1100
700
400
3h
6
c
1100
700
400
3h
6
Select
d
Page is loading ...
Page is loading ...
Page is loading ...
Page is loading ...
Page is loading ...
Page is loading ...
Page is loading ...
Page is loading ...
Page is loading ...
Page is loading ...
Page is loading ...

28
lave-linge
a Dévissez les vis qui maintiennent les 3
traverses en plastique situées à l’arrière
du lave-linge.
b Dévissez les 3 brides métalliques
d’immobilisation de l’appareil et retirezes.
c Recouvrez les orifices avec les traverses
en plastique préalablement retirées.
installation et montage
Conservez les brides métalliques
d’immobilisation, elles vous seront
utiles si vous devez transporter
postérieurement votre appareil.
Important
a/c
a Retirer la base, les cornières et le capot
de protection supérieur.
1
DÉSEMBALLAGE ET
DÉBRIDAGE DU
LAVE-LINGE
DÉBRIDAGE
DÉSEMBALLAGE
a
Page is loading ...
Page is loading ...
Page is loading ...
Page is loading ...
Page is loading ...
Page is loading ...
Page is loading ...

(*)
Pour programmes de lavage et consommation conformes à
la Norme EN60456, appuyer sur la touche de lavage intensif.
36
Coton/Lin
Froid couleurs délicates OUI 5/6
linge très peu sale
Coton/Lin
blanc/couleur OUI
NON
OUI 1.5
linge très peu sale
Coton/Lin
couleurs délicates OUI 5/6
linge peu sale
Coton/Lin
couleurs résistantes OUI 5/6
linge peu sale
Coton/Lin
couleurs résistantes OUI 5/6
salissure normale
Coton/Lin
blanc OUI 5/6
linge très sale
Coton/Lin
blanc/couleurs résistantes OUI 5/6
linge très sale
Synthétique/mélange coton
Froid couleurs délicates OUI 3
linge très peu sale
Synthétique/mélange coton
couleurs délicates OUI 3
linge peu sale
Synthétique/mélange coton
couleurs délicates OUI 3
salissure normale
Synthétique/mélange coton
blanc/couleurs résistantes OUI 3
salissure normale
Laine/mélange laine
LAINE froid blanc/couleur OUI
NON
OUI 1
linge très peu sale
Laine/mélange laine
LAINE 35 blanc/couleur OUI
NON
OUI 1
linge peu sale
Coton/mélange coton
— Synthétique/Délicat OUI
NON
OUI 5/6
Laine/mélange laine
Coton/mélange coton
— Synthétique/Délicat
NON
OUI
NON
5/6
Laine/mélange laine
Coton/mélange coton
— Synthétique/Délicat
NON
5/6
Laine/mélange laine
Programme
Température
conseillée
Type de textile
Charge
de linge
max. (Kg)
Touches options possibles
Rinçage
extra
Lavage
intensif
Repassage
facile
Essorage
Elimination
de l’essorage
Antifroissage
1
2
3
4
5 (*)
6
7
8
9
10
11
12
13
14
15
16
Normal froid
Rapide 30ºC
Normal 30ºC
Normal 40ºC
Normal 60ºC
Normal 90ºC
Prélavage 60ºC
Délicat froid
Délicat 30ºC
Délicat 40ºC
Délicat 60ºC
Laine froid
Laine 35ºC
Rinçages
Essorage
Vidange/Fin
Prog. normauxProg. délicatsProg. laine
Prog. complémentaires
30
30
40
60
90
60
40
60
40
3030
Page is loading ...

38
4
FONCTION ESSORAGE
utilisation de l’appareil et conseils pratiques
ESSORAGE
Sélectionner toujours les fonctions de lavage
après avoir sélectionné le programme de
lavage. Toute modification du programme
durant la sélection annulera les options
préalablement sélectionnées.
a Touche fonction essorage et
antifroissage (flot)
Le programme sélectionné est associé
à un certain nombre de tours d’essorage,
tel que visualisé sur les modèles avec
écran. Sur les modèles sans écran, le
témoin lumineux correspondant s’allume.
b Pour le modifier, appuyer successivement
sur la touche essorage et le nombre de
tours diminuera de 100 à chaque fois
jusqu’à atteindre les 400 sur les modèles
avec écran, ou le témoin lumineux
s’allumera sur les modèles sans écran.
c Élimination de l’essorage
Appuyer sur la touche essorage pour
sélectionner la fonction élimination de
l’essorage. Le lave-linge effectue un
programme sans essorage final. À utiliser
pour éviter de froisser les textiles
spécialement délicats.
d Fonction: flot/antifroissage
L’appareil s’arrête après le dernier
rinçage, l’eau demeurant à l’intérieur de
la cuve.
Si l’on désactive cette fonction, la
machine complète le programme et
procède à la vidange et à l’essorage. À
utiliser si vous souhaitez retarder
l’essorage, en cas d’absence du foyer,
pour éviter que le linge ne se froisse
après l’essorage, en attendant que vous
le retiriez du tambour.
a
1100
700
400
3h 6
h
b
1100
700
400
3h
6
c
1100
700
400
3h
6
Select
d
Page is loading ...
Page is loading ...
Page is loading ...
Page is loading ...
Page is loading ...
Page is loading ...
Page is loading ...
Page is loading ...
Page is loading ...
Page is loading ...
Page is loading ...

50
máquina de lavar roupa
a Desaperte os parafusos que fixam as 3
placas de plástico à parte de trás da
máquina de lavar roupa.
b Desaperte os 3 parafusos de bloqueio
e retire-os.
c Tape os orifícios com as placas de
plástico anteriormente retiradas.
instalação e montagem
Guarde os parafusos de bloqueio para
uma possível futura deslocação da
máquina.
Importante
a/c
a Retire a base, esquinas e a cobertura
superior.
1
PARA DESEMBALAR
E DESBLOQUEAR A
MÁQUINA DE LAVAR
ROUPA
PARA DESBLOQUEAR
PARA DESEMBALAR
a
Page is loading ...
Page is loading ...
Page is loading ...
Page is loading ...
Page is loading ...
Page is loading ...
Page is loading ...
Page is loading ...

NOTA: os consumos de kWh e litros, assim como a duração dos programas podem
variar em função do tipo e quantidade de roupa, pressão da rede de água, etc.
59
6 Kg
Compartimento
produtos
de lavagem
Descrição
do programa
TURBO TIME TURBO TIME PLUS
Duração
aprox.
(minutos)
Consumo total KWh / litros
5 Kg 6 Kg
Consumo
total
KWh/litros
Duração
aprox.
(minutos)
Lavagem normal, enxaguamentos,
absorção automática de aditivos se 0,15/46 0,15/49 60 0,10/49 50
se quiser e grande centrifugação final
Lavagem CURTA, enxaguamentos,
absorção automática de aditivos se 0,20/25 0,20/30 30 0,20/30 30
se quiser e grande centrifugação final
0,35/46 0,40/49 82 0,20/49 52
Lavagem normal, enxaguamentos, 0,60/46 0,65/49 87 0,50/49 57
absorção automática de
aditivos se se quiser e
grande centrifugação final
A: 0,95/46 1,02/49 91 1,02/49 70
A+: 0,85/46
1,60/51 1,90/55 120 1,90/53 110
Pré-lavagem, lavagem normal, enxaguamentos,
absorção automática de aditivos se 1,40/55 1,45/60 105 1,40/53 100
se quiser e grande centrifugação final
0,15/50 0,15/55 50 0,10/49 50
Lavagem delicada, enxaguamentos, 0,35/50 0,35/55 50 0,20/49 50
absorção automática de
aditivos se se quiser e
centrifugação final suave
0,55/50 0,60/55 55 0,40/49 55
0,95/50 1,00/55 70 0,90/49 70
Lavagem de LÃ, enxaguamentos, 0,05/60 0,05/60 30 0,05/52 30
absorção automática de
aditivos se se quiser e
centrifugação final suave
0,45/60 0,50/60 40 0,40/52 40
Aclarados, absorção automática
de aditivos se se quiser e 0,05/25 0,05/30 23 0,05/30 23
grande centrifugação final
—
Descarga e grande centrifugação final
0,05/0 0,05/0 10 0,05/0 10
Descarga e fim do programa.
— Leva o programa 0,00/0 0,00/0 2 0,00/0 2
à posição final
Verifique no painel de comandos se a máquina de lavar roupa é Turbo Time Plus ou Turbo Time

60
4
SELECÇÃO DA CENTRIFUGAÇÃO
utilização do aparelho e conselhos práticos
CENTRIFUGAÇÃO
As opções de lavagem devem ser sempre
seleccionadas depois de seleccionar o
programa de lavagem. Qualquer alteração de
programa durante a selecção anula as opções
previamente seleccionadas.
a Tecla de selecção de centrifugação
e anti-vincos (flot)
O programa seleccionado tem
associadas umas revoluções de
centrifugação, visualizadas nos modelos
com display. Nos modelos sem display
acende o piloto correspondente.
b Pode alterar a centrifugação premindo
sucessivamente a tecla correspondente,
e o número de rotações reduzir-se-á de
100 em 100 até o valor 400 nos modelos
com display, ou acenderá o piloto nos
modelos sem display.
c Eliminação de centrifugação
Premindo novamente a tecla de
centrifugação chegamos à opção
eliminação de centrifugação. Um
programa em centrifugação final é
utilizado para evitar a formação de vincos
de tecidos especiais.
d Opção: flot/anti-vincos
Para-se no último enxaguamento,
ficando a roupa com água. Quando a
função se desactivar a máquina de lavar
roupa continua o programa
descarregando e centrifugando. Utiliza-
se, por exemplo, quando não se está
em casa e pretende-se atrasar a
centrifugação, para evitar os vincos na
roupa depois da centrifugação e a sua
espera no tambor para ser retirada.
a
1100
700
400
3h 6
h
b
1100
700
400
3h
6
c
1100
700
400
3h
6
Select
d
Page is loading ...
Page is loading ...
Page is loading ...
Page is loading ...
Page is loading ...
Page is loading ...
Page is loading ...
Page is loading ...
Page is loading ...
Page is loading ...

71
washing machine
Water inlet hose.
specifications
Power
cord
Control
panel
Detergent
dispenser
Stainless
steel drum
Accesible filter
(behind kickplate)
Kickplate
Drain hose
Hatch
Adjustable
feet
Work top
ACCESSORIES

72
washing machine
a Remove the screws holding the plastic
covers to the back of the washing
machine.
b Loosen and remove the 3 blocking
screws.
c Cover the holes with the plastic covers
you have just removed.
installation and assembly
Do not throw the blocking screws
away. You may need to move the
washing machine at a later date.
Important
a/c
a Remove the base, corner protectors and
top cover.
1
UNPACKING AND
UNBLOCKING THE
WASHING MACHINE
UNBLOCKING
UNPACKING
a

DRAINAGE
CONNECTION
73
CONNECTION TO THE MAINS WATER SUPPLY AND
DRAINAGE
The water supply hose is inside the drum:
a Connect the bent end of the hose to the
threaded inlet of the electrovalve located
at the rear of the washing machine.
b Connect the other end of the hose to
the water intake. Then securely tighten
the connection nut.
installation and assembly
It is important that the drain hose
bend is correctly fastened to the
outlet, to prevent any risk of it
becoming detached and causing
flooding.
If your washing machine has a hot
water intake, connect the hose with
the red threaded end to the hot water
tap, and to the electrovalve with the
red filter.
The washing machine must be
connected to the mains water supply,
using the new supply hoses supplied
with the appliance. Do not use water
supply hoses that have been used
before. For your washing machine to
work properly, the mains water
pressure must be between 0.05 and
1MPa (0.05 and 10 Kgr/cm
2
).
a
a It is recommended that you have a fixed
drainage outlet 50 to 70 cm from the
floor.
Avoid the drain hose being too tight,
kinked or restricted.
2
Important
CONNECTION TO THE
MAINS WATER SUPPLY

Important
Use the adjustable feet to level the
washing machine. This will reduce
the noise level and prevent it from
moving during use.
Do not bring the feet too far out, you
will achieve better stability.
You need to use a spanner for the
models that have a nut.
Important
74
LEVELLING THE WASHING MACHINE AND CONNECTING
IT TO THE MAINS ELECTRICITY SUPPLY
installation and assembly
3
Consult the specifications plate located on the
hatch door of the washing machine before
making the electrical connections. Ensure that
the voltage reaching the plug is the same as
that on the plate.
Do not remove the specifications plate.
The information on it is important.
ELECTRICAL CONNECTION
LEVELLING
It is very important to correctly earth the
washing machine. The electrical
installation, plug, socket, fuses or
automatic switch and counter must be
correctly dimensioned for the maximum
power indicated on the specifications
plate.
Do not plug the washing machine plug
into the socket with wet or damp hands.
To remove the power cord, pull on the
body of the plug.
If the power cord is damaged, it must be
replaced by a cord or special unit provided
by either the manufacturer or your after-
sales service.
With built-in washing machines, the plug
must be accessible after installation.

When your washing machine has been
correctly installed, we recommend that you
pre-clean the machine.
This is to check that the installation, the
connections and the drainage are all correct,
and to thoroughly clean the inside of the
washing machine before any wash
programmes are run (see the operating
instructions on the following pages).
a Press ON/OFF button.
b Select the normal programme at 60ºC.
c Press the start/pause button.
75
INSTALLING THE WASHING MACHINE UNDER A KITCHEN
WORKTOP AND PRE-CLEANING
INSTALLATION UNDER
A WORKTOP
4
PRE-CLEANING
c
a
Your washing machine may be fitted
underneath a kitchen worktop.
If you need to remove the washing machine’s
worktop, for safety reasons you need to fit a
protection plate which you can obtain from
your Dealer or Technical Assistance Service.
Follow these steps to fit the plate:
a Remove the washing machine work top
by taking out the side screws and moving
it gently back.
b Take out the screws and remove the
parts holding the worktop in place.
c Put the protection plate into place and
screw it to the washing machine so it
can then be inserted in the place you
wish, fitting spongy adhesive all around
the perimeter first to prevent noise.
c
b
b
a

PREPARATION
76
washing machine
a Sort the clothes according to fabric
and how they are made:
We recommend using the delicate
programmes for sensitive fabrics. There
is a special wool programme for
woollens.
b Sort clothes according to how soiled
they are.
• Wash lightly soiled garments using a
short programme.
• Use a programme without prewash
for medium-soiled garments.
• Wash heavily soiled garments using a
long programme with prewash.
a Sort your clothes according to colour.
Wash whites and coloured separately.
using the appliance and practical tips
Important
Make sure
beforehand
that your
woollens can
be machine-
washed.
Before placing the clothes in the
drum, make sure all the pockets are
empty.
Any small objects may block the drain
pump.
Prewash
Wash
Wash
1
PREPARING
GARMENTS FOR
WASHING
30
60
90
40
Cold
Important
We recommend loading the washing
machine to its full capacity. This
means savings on water and energy.
Whenever possible, we recommend
that you wash garments of different
sizes within the same wash
programme. This improves the
washing action and also aids the
correct distribution of the garments
in the drum when spin-drying, and
the washing machine will therefore
be quieter.
It is a good idea to put small garments
in a wash bag.
SORTING THE CLOTHES
Important

DETERGENT AND
ADDITIVES
77
a Your washing machine’s detergent
dispenser has three compartments.
b Put the detergent or additive into the
detergent dispenser before starting the
wash programme.
c Liquid detergents may also be used in
this washing machine. An optional
detergent dispenser is to be used for
this, which can be obtained from the
Technical Service Network.
Place this optional dispenser inside the
wash compartment.
The level of liquid must never be
higher than the MAX mark printed on
the dispenser wall.
Remember that the amount of detergent to
be used will always depend on:
The amount of clothes to be washed.
How heavily the clothes are soiled.
The hardness of the water (Information on
water hardness in your area can be obtained
from the competent local authorities).
We recommend the use of a
decalcifying product if the water
hardness is high in your area.
2
USING DETERGENT AND ADDITIVES
eco-note
using the appliance and practical tips
Remember that concentrated detergents
exist which are more environment- and
nature-friendly.
The use of more detergent than
necessary will not improve you
washing results, and apart from costing
you money it will have a negative effect
on the preservation of the
environment.
We therefore recommend you follow
the detergent manufacturer’s
instructions.
Wash
Fabric softener
Prewash
a
ImportantImportant
b
c

3
SELECTING THE WASH
PROGRAMME
using the appliance and practical tips
To select a wash programme, proceed as
follows:
a Switch the washing machine on by
pressing ON / OFF.
b Activate the programme selector by
pressing it to release it (depending on
the model).
c Select the wash programme by turning
the programme selector (see programme
table).
78
programme
selector
ON/
OFF
button
start/
pause
button
additional
function
button
time
delay
button
spin and
anti-crease
button
screen
detergent dispenser
1100
700
400
3h 6h 9h
display models
non-display models
a
b
detergent dispenser
ON/
OFF
button
programme
selector
start/
pause
button
additional
function
button
time
delay
button
spin
button
c

79
using the appliance and practical tips
When you select the programme, the following
information will be displayed:
1 Wash programme phases
- display models
Prewash
Wash
Rinse
Spin-drying
- non-display models
Wash
Rinse
Stop
2 No. of revolutions
3 Programme No. (for a few seconds)
and then its duration on display
models.
4 Additional functions
- display models
Easy iron
Extra rinse
Intensive wash
- non-display models
Extra rinse
Intensive wash
There are four types of programme:
Normal programmes
Delicate programmes
Wool programmes
Auxiliary programmes
1100
700
400
3h 6h 9h
1
234
1
234
23
4
1
We recommend you choose a wash
programme without prewash whenever
possible. This will save you money and
help protect the environment.
eco-note
Normal Delicate Wool Auxiliary
PROGRAMMES
Normal cold
Quick 30ºC
Normal 30ºC
Normal 40ºC
Normal 60ºC
Normal 90ºC
Prewash 60ºC
Delicate cold
Delicate 30ºC
Delicate 40ºC
Delicate 60ºC
Wool cold
Wool 35ºC
Rinses
Spin-drying
Drain/End
1
2
3
4
5
6
7
8
9
10
11
12
13
14
15
16

(*)
Programme for wash and energy consumption assessment
in accordance with standard EN60456, press intensive wash
button.
80
Cotton/Linen
Cold delicate colours YES 5/6
very light soil
Cotton/Linen
whites/colours
YES
NO YES 1.5
very light soil
Cotton/Linen
delicate colours YES 5/6
light soil
Cotton/Linen
fast colours YES 5/6
light soil
Cotton/Linen
fast colours YES 5/6
medium soil
Cotton/Linen
whites YES 5/6
heavy soil
Cotton/Linen
whites/fast colours YES 5/6
heavy soil
Synthetic/mix cotton
Cold delicate colours YES 3
very light soil
Synthetic/mix cotton
delicate colours YES 3
light soil
Synthetic/mix cotton
delicate colours YES 3
medium soil
Synthetic/mix cotton
whites/fast colours YES 3
medium soil
Wool/wool mix
WOOL cold whites/colours
YES
NO YES 1
very light soil
Wool/wool mix
WOOL 35 whites/colours
YES
NO YES 1
light soil
Cotton/cotton mix
— Synthetic/Delicate
YES
NO YES 5/6
Wool/wool mix
Cotton/cotton mix
— Synthetic/Delicate NO YES NO 5/6
Wool/wool mix
Cotton/cotton mix
— Synthetic/Delicate NO 5/6
Wool/wool mix
Programme
Recommended
temperature
Fabric type
Max load
of clothes
(Kg)
Possible option buttons
Extra
rinse
Intensive
wash
Easy-iron
Spin speed
selection
No spin
Anti-crease
1
2
3
4
5 (*)
6
7
8
9
10
11
12
13
14
15
16
Normal cold
Quick 30ºC
Normal 30ºC
Normal 40ºC
Normal 60ºC
Normal 90ºC
Prewash 60ºC
Delicate cold
Delicate 30ºC
Delicate 40ºC
Delicate 60ºC
Wool cold
Wool 35ºC
Rinses
Spin-drying
Drain/End
Normal prog.Delicate prog.Wool prog.Auxiliary prog.
30
30
40
60
90
60
40
60
40
3030
Page is loading ...
Page is loading ...
Page is loading ...
Page is loading ...
Page is loading ...
Page is loading ...
Page is loading ...
Page is loading ...
Page is loading ...
Page is loading ...
Page is loading ...
Page is loading ...
/