Page is loading ...

IMPORTANT
WASH CARAFE BEFORE
FIRST USE!
IMPORTANT
LAVER LA CARAFE AVANT
LA PREMIÈRE
UTILISATION!
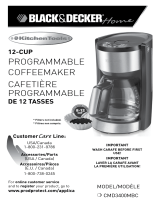
12-CUP PROGRAMMABLE COFFEEMAKER
CAFETIÈRE PROGRAMMABLE DE 12 TASSES
MODEL/MODÈLE
❍ CM9050C
Service Line à la clientèle :
Canada 1-800-231-9786
Accessoires/Pièces (Canada)
1-800-738-0245
Pour accéder au service à la clientèle en
ligne ou pour inscrire votre produit en ligne,
rendez-vour à
www.prodprotect.com/applica
Customer Care Line:
USA 1-800-231-9786
Accessories/Parts (USA)
1-800-738-0245
For online customer service
and to register your product, go to
www.prodprotect.com/applica

2
3
Please Read and Save this Use and Care Book.
IMPORTANT SAFEGUARDS
When using electrical appliances, basic safety precautions should always
be followed to reduce the risk of fire, electric shock and/or injury to
persons, including the following:
❍
Read all instructions.
❍
Do not touch hot surfaces. Use handle or knobs.
❍
To protect against electric shock, do not place cord, plug or appliance
in water or other liquids.
❍
Close supervision is necessary when any appliance is used by or near
children.
❍
Unplug from outlet when not in use and before cleaning. Allow to
cool before putting on or taking off parts and before cleaning the
appliance.
❍
Do not operate any appliance with a damaged cord or plug or after
the appliance malfunctions, or has been damaged in any manner.
Return the appliance to the nearest authorized service facility for
examination, repair or adjustment. or, call the appropriate toll-free
number on the cover of this manual.
❍
The use of an accessory not evaluated for use with this appliance may
cause injuries.
❍
Do not use outdoors.
❍
Do not let cord hang over the edge of table or counter, or touch hot
surfaces.
❍
Do not place on or near a hot gas or electric burner or in a heated
oven.
❍
To disconnect, turn any control to OFF (0), then remove plug from wall
outlet.
❍
Do not use this appliance for other than intended use.
❍
Keep lid on the carafe when in use.
❍
Scalding may occur if the lid is removed during the brewing cycles.
❍
The carafe is designed for use with this appliance. It must never be
used on a range top.
❍
Do not set a hot carafe on a wet or cold surface.
❍
Do not use a cracked carafe or a carafe having a loose or weakened
handle.
❍
Do not clean carafe with cleansers, steel wool pads or other
abrasive material.
SAVE THESE INSTRUCTIONS.
This product is for household use only.
POLARIZED PLUG (120V Models Only)
This appliance has a polarized plug (one blade is wider than the other). To
reduce the risk of electric shock, this plug is intended to fit into a polarized
outlet only one way. If the plug does not fit fully into the outlet, reverse the
plug. If it still does not fit, contact a qualified electrician. Do not attempt to
modify the plug in any way.
TAMPER-RESISTANT SCREW
Warning: This appliance is equipped with a tamper-resistant screw to
prevent removal of the outer cover. To reduce the risk of fire or electric
shock, do not attempt to remove the outer cover. There are no user-
serviceable parts inside. Repair should be done only by authorized service
personnel.
ELECTRICAL CORD
a) A short power-supply cord (or detachable power-supply cord) is to be
provided to reduce the risk resulting from becoming entangled in or
tripping over a longer cord.
b) Longer detachable power-supply cords or extension cords are available
and may be used if care is exercised in their use.
c) If a long detachable power-supply cord or extension cord is used,
1) The marked electrical rating of the detachable power-supply cord
or extension cord should be at least as great as the electrical rating
of the appliance,
2) If the appliance is of the grounded type, the extension cord should be
a grounding-type 3-wire cord, and
3) The longer cord should be arranged so that it will not drape over
the countertop or tabletop where it can be pulled on by children
or tripped over.
Note: If the power supply cord is damaged, it should be replaced by qualified
personnel.
ENGLISH

4
5
Product may vary slightly from what is illustrated.
† 1. Brew strength selection knob (Part # CM9050C-01)
2. Brew basket lid
† 3. Removable filter basket (Part # CM9050C-03)
4. Water reservoir
5. Power ( ) button
6. Digital display
7. Control panel
8. Sneak-A-Cup® feature
† 9. Glass carafe with water & brewed coffee markings (Part # CM9050C-04)
10. Adjustable warming plate
11. Adjustable retractable power cord (not shown)
Note: † indicates consumer replaceable/ removable parts
CONTROL PANEL
1. Power ( ) button: Use to turn coffeemaker on and start brewing
process. You can also turn coffeemaker off by pressing this button when
the brewing cycle is complete.
2. Digital display: Displays time, once set, as well as indicators for auto
programming, cup selection, warming plate, and auto clean.
3. Minute (MIN) button: Use to display the correct minute when setting
the time.
4. Auto (AUTO) button: Press to activate delayed brewing. You may also
press this button to make coffeemaker turn on at same preset time
the next day.
5. KEEP WARM button: Press to adjust temperature of keep warm carafe
plate. Temperature can be set from levels 1 – 7; default setting is 4.
Setting will show in display window.
6. 1 – 4 CUPS button: Press to select a low-volume brew setting for making
1 – 4 cups of coffee. Icon will appear in display window.
7. TIME SINCE BREWED button: Press to check freshness of brewed coffee.
When pressed, display will show how long since coffee was made; time
of day will reappear once button is released.
8. AUTO CLEAN button: Sets auto clean function. Follow auto clean
instructions in CARE AND CLEANING.
9. Program (PROG) button: Use to program your coffeemaker to start
brewing at a specified time for delayed brewing.
10. Hour (HR) button: Use to display correct hour when setting time.
ENGLISH

6
7
How to Use
This product is for household use only.
GETTING STARTED
Warning: To reduce risk of fire or electric shock, do not immerse cord, plug or
appliance in water or any other liquid.
• Remove all packing material and any stickers from product.
• Remove and save literature.
• Please go to www.prodprotect.com/applica to register your warranty.
• Wash all removable parts as instructed in CARE AND CLEANING section of
this manual.
• Open water reservoir lid and using carafe, pour fresh
cold water up to 12-cup level mark in water reservoir
(C).
• Close water reservoir lid.
• Place an 8 to 12 cup basket style paper filter into
removable filter basket.
• Place basket into filter basket holder (D).
• Close filter basket lid.
• Close lid on carafe.
• Place empty carafe on adjustable warming plate.
• Pull power cord out from cord storage in back of
coffeemaker and plug into standard electrical outlet.
• Brew water through appliance following BREWING COFFEE instructions,
without adding coffee grounds.
Note: This removes any dust or residue that may remain in system during
manufacturing process.
• Discard water from carafe and paper filter from filter basket.
• Turn coffeemaker off, unplug and allow to cool down.
ADJUSTING POWER CORD LENGTH
Tip: You can adjust length of power cord to suit your needs.
1. To increase length of power cord, simply grasp cord (not plug) in rear of
coffeemaker and gently pull down and out of slot away from coffeemaker.
2. To decrease length of power cord, simply feed any excess cord into slot in
rear of coffeemaker.
SETTING THE CLOCK
1. Plug appliance into standard electrical outlet.
2. Digital clock display flashes 12:00 (E).
Note: You must set display clock in order to use Delayed
C
D
12:00
E
Brewing feature
3. To change time, press HOUR (HR) button until
correct time appears (F).
Note: When time passes noon, a small icon appears in
bottom right corner of digital display to let you know
you are in P.M. time. If P.M. indicator is not illuminated,
time is A.M.
4. Repeat with Minute (Min) button (G). (If minute
setting is not changed within 5 seconds, clock will
revert to default time and selection of hour and minute
must be repeated.)
Tip: Hold buttons down to make hours and minutes
change rapidly after a short delay. To change the time
in 1-digit increments, press and release buttons.
Note: If coffeemaker is unplugged or power is interrupted even momentarily,
display time may need to be reset.
BREWING COFFEE
Note: It is not necessary to set the clock to brew coffee unless you want
to use
Delayed Brewing feature
1. Open water reservoir lid.
2. Fill water reservoir with desired amount of cold tap
water using water markings on front of reservoir.
Do not exceed 12-cup (MAX) level (H). Close lid on
water reservoir.
3. Place an 8 to 12 cup basket style paper filter into the
removable filter basket, making sure it is centered.
4. Add desired amount of ground coffee.
5. Insert filter basket into filter basket holder following directions in GETTING
STARTED.
6. Close filter basket lid.
7. Place brew-thru lid on empty carafe.
Note: Coffee may overflow if brew-thru lid is not properly aligned.
8. Place empty carafe on adjustable warming plate.
9. Plug cord into standard electrical outlet.
10. Press power ( ) button; power light is illuminated.
Brewing begins OR, to delay brewing, set auto
function before pressing the power ( ) button (J).
See DELAYED BREWING.
11. When coffee stops flowing into carafe, brew cycle is
complete.
12. Once coffee grounds have cooled, carefully open
filter basket lid and using basket handle, remove
and discard used grounds and paper filter. Close
filter basket lid.
12:00
F
MAX
H
12:15
G
J
ENGLISH

8
9
13. Coffeemaker will keep brewed coffee hot for 2 hours and then automatically
turn off.
14. To turn off coffeemaker at any time, press power ( ) button.
15. Unplug appliance when not in use.
SNEAK-A-CUP
®
FEATURE
The Sneak-A-Cup
®
feature allows you to pour a cup of coffee from the carafe
while coffee is brewing. When carafe is removed, brewing process is paused.
Simply replace carafe on the adjustable warming plate within 30 seconds and
brewing resumes.
Note: If the carafe is not replaced within 30 seconds the filter basket may
overflow.
ADJUSTABLE WARMING PLATE
1. Once coffee has brewed, press KEEP WARM button to select desired holding
temperature of adjustable warming plate.
2. Temperature range is from 1 (lowest temp) to 7 (highest temp).
3. When button is pressed, number “4” (medium temp) will appear in digital
display.
4. Press HOUR (HR) button to increase setting and MINUTE (MIn) button to
decrease set temperature.
BREWING 1 – 4 CUPS
When brewing small amounts of coffee, press the 1 – 4
CUPS button. CUP
will appear on left side of digital
display (K).
TIME SINCE BREWED FEATURE
To check freshness of brewed coffee, press and hold TIME
SINCE BREWED button. The digital display will indicate
how long ago last brewing was completed. When button is
released, normal time display will appear. This feature will
function until coffeemaker is manually turned off or after
2 hours when coffeemaker automatically turns off (L).
DELAYED BREWING
1. Follow steps 1 through 9 under BREWING COFFEE.
2. Make sure clock has been set to correct time of day.
3. Press PROG button; clock icon appears on left side of digital display.
4. Digital clock displays 12:00 or previous preset delayed brewing start time.
5. To change time, press HR button until desired correct hour appears on
display. Repeat with MIn button within 5 seconds. (If minute setting is not
changed within 5 seconds, clock will revert to default time and selection of
hour and minute must be repeated.)
L
6:00
K
6. Press PROG button again. Delayed brewing time is set and digital display
returns to current time of day.
7. Press AUTO button to activate delayed brewing. AUTO indicator light will
illuminate on digital display screen.
8. To check preset delayed brew time, press PROG button and display will
show CLOCK ( )and time selected for delayed brewing to begin. Press
AUTO button to return to Delayed Brewing cycle.
9. To cancel AUTO brew, press AUTO button and then press power ( )
button to brew coffee, or press power ( ) button again and coffeemaker
will turn off; all lights will go out.
COFFEE BREWING TIPS
• Stir coffee in carafe before serving to evenly distribute flavor.
• Coffee that is poured during brewing cycle may vary in strength from
finished brew.
• Not sure how much coffee to use? Begin by using 1 level scoop of medium
grind coffee for each cup of coffee to be brewed.
• Never reuse coffee filters; they absorb flavors from brewed coffee and
will give newly brewed coffee a stale flavor. They may also tear and allow
grinds to drip into newly brewed coffee.
• Open coffee grounds are best stored in refrigerator in tightly sealed
container.
• Once opened coffee should be used within 1 month.
• If carafe filled with coffee is left on adjustable warming plate, be sure to
remove coffee grounds from filter basket as soon as they have cooled
slightly. This will keep coffee from developing bitter taste.
• For special occasions, whip some heavy cream with 1 or 2 tablespoons of
hazelnut, chocolate or almond liqueur. Use to top off each cup of coffee.
• Rinse the carafe and brew basket holder with warm water immediately
after each use to maintain good coffee flavor.
• Keep your coffeemaker very clean; it affects the flavor of coffee.
• For iced coffee, brew coffee with twice the normal amount of grounds. Ice
will dilute the coffee flavor. Or make coffee ice cubes from left over coffee
and brew your coffee at its normal strength.
• Remember when pouring hot liquid into a glass, always put a spoon in the
glass before adding the hot liquid.
ENGLISH

10
11
Care and Cleaning
This product contains no user serviceable parts. Refer service to qualified service
personnel.
CLEANING
Caution: Do not overexpose control panel to water. Water may cause permanent
damage and make coffeemaker inoperable.
1. Make sure coffeemaker is unplugged and cooled before cleaning.
2. Open water reservoir cover.
3. Remove filter basket by its handle and lift straight up.
4. Discard filter with grounds.
5. Clean parts as follows:
• Filter basket, carafe and lid are all top-rack dishwasher-safe; or they may be
hand-washed in warm, sudsy water.
• Wipe exterior and adjustable warming plate with a soft damp cloth.
Important: Do not use abrasive cleansers, scouring pads or steel wool. Never
immerse coffeemaker in water or any other liquid.
CARING FOR YOUR CARAFE
• Do not allow all of the liquid to evaporate from the carafe while on the
adjustable warming plate, or heat the carafe when empty.
• Discard the carafe if damaged in any manner.
• Never use abrasive scouring pads or cleansers; they will scratch the glass.
• Avoid rough handling and sharp blows.
AUTO CLEAN
This coffeemaker automatically records number of times coffee has been brewed,
to indicate when full decalcification cleaning is needed. When 60 cycles
of coffee have been brewed, CLeAn light on digital display will be illuminated.
1. Combine 6 cups of white vinegar and 4 cups of cold water in carafe.
2. Pour into water reservoir. Close the lid.
3. Place an 8 to 12 cup basket style paper filter in the removable filter basket.
Insert filter basket into filter basket holder and close lid.
4. Press AUTO CLEAN button to activate cleaning cycle. CLEAN light at bottom
of digital display will be illuminated.
5. Part of the mixture will brew through. Remaining mixture will be held in
coffeemaker for 30 minutes before completing its brew through.
6. Brew fresh water through appliance following instructions given in GETTING
STARTED before brewing coffee again.
Important: Auto Clean may be activated at any time, simply by pressing AUTO
CLEAN button.
ENGLISH
TROUBLESHOOTING
PROBLEM POSSIBLE CAUSE SOLUTION
Coffeemaker does
not turn on.
Coffeemaker is not
plugged in.
Check to be sure
appliance is plugged into
a working outlet and the
power (
) button is
powered on.
Coffeemaker is leaking. Water reservoir may
be overfilled. Carafe
may not be correctly
placed on adjustable
warming plate.
Make sure water
reservoir has not been
filled beyond MAX fill
line. Make sure carafe
is placed correctly on
adjustable warming plate
and is centered
under filter basket holder.
Brewing takes too long. Coffeemaker might
need cleaning.
Follow procedure in CARE
AND CLEANING.
Coffee is not brewing. Water reservoir might
be empty.
Make sure water
reservoir has sufficient
water to brew desired
number of cups of coffee.
Coffeemaker brews
clear water.
There may be no
coffee grounds in
removable filter
basket.
Add sufficient amount of
coffee grounds to paper
filter in removable filter
basket.
Filter basket does not
close.
Removable filter
basket may not be
correctly placed.
Remove filter basket and
replace correctly into
holder.
Filter basket overflows. Carafe may be
improperly placed on
adjustable warming
plate.
Remove carafe and
insert so that carafe
rests comfortably within
grooves on adjustable
warming plate.
Grounds in brewed
coffee.
Filter and/or filter
basket are not
properly placed.
Insert paper liner into
filter basket and insert
basket properly into
holder.
Coffeemaker is brewing
slowly; brewed coffee
tastes bad.
Coffeemaker needs
cleaning; wrong grind
being used.
Follow directions for
cleaning coffeemaker.
Use only coffee ground
for automatic drip
coffeemaker.

12
13
ENGLISH
NEED HELP?
For service, repair or any questions regarding your appliance, call the
appropriate 800 number on cover of this book. Please DO NOT return the
product to the place of purchase. Also, please DO NOT mail product back to
manufacturer, nor bring it to a service center. You may also want to consult the
website listed on the cover of this manual.
Two-Year Limited Warranty
(Applies only in the United States and Canada)
What does it cover?
• Any defect in material or workmanship provided; however, Applica’s liability
will not exceed the purchase price of product.
For how long?
• Two years from the date of original purchase with proof of such purchase.
What will we do to help you?
• Provide you with a reasonably similar replacement product that is either new
or factory refurbished.
How do you get service?
• Save your receipt as proof of date of sale.
• Visit the online service website at www.prodprotect.com/applica, or call
toll-free 1-800-231-9786, for general warranty service.
• If you need parts or accessories, please call 1-800-738-0245.
What does your warranty not cover?
• Damage from commercial use
• Damage from misuse, abuse or neglect
• Products that have been modified in any way
• Products used or serviced outside the country of purchase
• Glass parts and other accessory items that are packed with the unit
• Shipping and handling costs associated with the replacement of the unit
• Consequential or incidental damages (Please note, however, that some
states do not allow the exclusion or limitation of consequential or incidental
damages, so this limitation may not apply to you.)
How does state law relate to this warranty?
• This warranty gives you specific legal rights. You may also have other rights
that vary from state to state or province to province.
is a registered trademark of The Black & Decker Corporation,
Towson, Maryland, USA
Made in People’s Republic of China
Printed in People’s Republic of China
The lightning symbol refers to “dangerous voltage”; the exclamation symbol
refers to maintenance instructions. See below.
WARNING: To reduce the risk of fire or electric shock, do not remove the cover
of the coffeemaker. There are no user-serviceable parts inside. Repair should
be done by authorized service personnel only.
WARNING
RISK OF FIRE OR ELECTRIC SHOCK. DO NOT OPEN.

28
2010/9-7-4E/F
© 2010 Applica Consumer Products, Inc.
Printed on recycled paper.
Imprimé sur du papier recyclé.
/
