103
88 www.qmdrain.com
C Waterproof membrane
(supplied by others)
A Drain ange
(sold separately)
Drain Pipe
Hair strainer
Bolts
QM 316 Stainless
Steel Grate
Lifting key
D Clamping Ring
E QM 316 Stainless
Steel Drain Base
Delmar / Lagos Series Point Drain
Standard installation for wood sub-oor
B
A
D
C
F
G
H
For installation videos and more information visit us at www.qmdrain.com
I. Frame out shower
surround as required.
II. Connect drain
ange body
A to the
drain pipe, leaving
drain bolts in place.
Block drain opening
with rag to prevent
oor mortar blocking
pipe work.
III. Trowel mortar bed
over suboor B, pitch
at a 1/4” per foot
slope in four directions
towards the shower
base.
IV. Install waterproof
membrane C, reinforce
around outlet and cut
carefully to expose
heads of drain bolts
and outlet. Install
clamping ring D.
V. Test membrane for
leaks.
VI. Screw the QM
drain base E into the
drain ange, adjust
height as needed.
Proper height should
be determined by
ooring contractor.
VII. Trowel mortar to
required height F.
VIII. Once oor mortar
has cured, apply thin
set G and install tile
and grout H.
IX. Install the grate into
QM drain base.
* For Mist or Veil (Tile-
In): Spread a layer of
mortar into the grate,
allowing for thinset
and material to nish
ush with metal frame.
Note:
• Waterproof
membrane should be
installed and tested
per manufacturer’s
instructions, local
building and plumbing
codes.
• QM recommends this
product to be installed
by a licensed contractor.
• QM drain ts into most
common 2” ABS, PVC
or Cast Iron shower drain
ange.
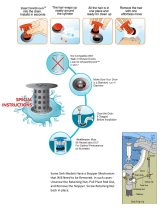
• Hair stainer basket fits
inside the drain
to collect hair and other
debris, preventing pipe
clogs. Empty basket
as needed to maintain
optimal performance.
The use of the basket is
optional.
• Lifting key assists with
grate removal.
• Failure to achieve
adequate floor slope will
result in standing water
problems or slow water
flow.
Installation InstructionsInstallation Instructions


