Polka Dots
Looking for an inexpensive way to decorate
your nursery? Try polka dots. All you need
is ScotchBlue™ Painter's Tape, a little bit of
paint, and a few supplies you may already
have at home. With a few simple steps,
you'll have a playful pattern that your kids
will grow to love.
TOOLS
ScotchBlue™ Painter's Tape
Paints, brush, roller & tray
5-in-1 tool/putty knife
Wax paper
Utility knife
PREPARATION
Remove any wall hangings (pictures, nails,
fixtures)
Fill nail holes, then use sandpaper to smooth
the wall
Make sure wall is clean, dust-free and dry
completely
Step By Step Guide:
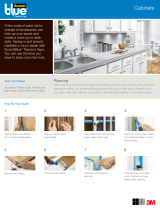
Step 1: Mask & Paint Base
Mask trim, baseboards and non-
textured ceilings with ScotchBlue™
Painter's Tape. Hint: use the chart on
page 2 to find the right tape for your
project. Paint the wall your lighter
base color, and let it dry for 24 hours.
Step 2: Draw Template
Overlap strips of tape on a piece of
wax paper. Seal the edges with long
strips of tape. Then trace a circle onto
the tape using a coffee can lid or plate
as a guide.
Step 3: Cut Out Circles
Cut out the circle with a utility knife.
You now have one polka dot template
and one polka dot center. Repeat
steps 2 and 3 to create enough
templates for each polka dot in your
wall pattern.

Step 4: Lay Out Design
Tape the polka dot centers (the circles
you cut out) along the wall to lay out
your design. This will allow you to
easily adjust the pattern and make
sure you like it before you set the
template and start to paint.
Step 5: Set the Pattern
Place polka dot templates over polka
dot centers, with the wax paper facing
the wall. Peel the wax paper from
back side of template and press
remaining tape to the wall. Remove
polka dot center.
Step 6: Seal Edges
Smooth the inner tape edges by
pressing with a 5-in-1 tool or flexible
putty knife. Hint: to enhance your
paint lines, seal the inner tape edges
with wall base paint. Allow 12-24
hours to dry.
Step 7: Paint the Dots
Apply the darker accent paint to the
polka dot templates. Let the paint dry
for 24 hours.
Step 8: Remove Tape
Carefully remove tape at a 45° angle.
If paint starts to lift, use a sharp tool
to cut along the painted tape edge.
Helpful Hints
SIZE AND SCALE SUGGESTIONS
Consider the size of the room as you determine how big or small your polka dots will be.
Larger dots may make a small room look and feel even smaller. If the dots are very small, they may get lost in a
larger room or get hidden in room full of large furniture.
Keep patterns to a minimum and low on the wall for a clean, uncluttered design.
PAINT POINTERS
When selecting a color palette for your nursery, consider non-traditional colors such as greens and yellows.
Choose colors that will complement or enhance the furnishings you already have in the room.
Before you buy, consider bringing home paint swatches or samples, to get an idea of how the colors will look together
in your space. It's a great way to avoid time-consuming painting mistakes.
TAPE TIPS
Run Tape in Circles
An alternate way to create the dots: use a template to draw
circles directly on the wall. Then use small pieces of tape to
mask around each circle.
Seal the Deal
To sharpen your paint lines and prevent seepage, seal
the inner tape edges with a coat of your base color. Allow
12-24 hours to dry.

-
 1
1
-
 2
2
-
 3
3
Ask a question and I''ll find the answer in the document
Finding information in a document is now easier with AI
Related papers
-
3M 2090-48TP6 Operating instructions
-
3M 2020-36A-BUS User manual
-
3M 2090-48J2 Installation guide
-
Scotch 2098-36CC-XS User guide
-
3M 2093EL-48N Installation guide
-
3M 2093EL-48N Installation guide
-
3M 2080EL-48N Installation guide
-
3M 2097-36EC Installation guide
-
Scotch 2093EL-24N User manual
-
3M 2080EL-48N Installation guide
Other documents
-
 ScotchBlue 2090-24N-XXS Installation guide
-
Suzuki SP-37 Owner's manual
-
KUHN RIKON 2776 Datasheet
-
ATEN UC9040 User manual
-
Badger Basket 0216 Assembly Instruction
-
Badger Basket Natural Hooded Moses Basket - Pink Gingham Bedding Safety & Assembly Instructions
-
 Electrolux - Gibson 134674800 User manual
-
DMT FWF User manual
-
Badger Basket Just Like Mommy 3-in-1 Doll Pram/Carrier/Stroller - Pink/Polka Dots Assembly Instruction
-
Gibson GWTR645RHS0 Owner's manual


