Coopers 10477 Instructions For Use Manual
- Category
- Alarm clocks
- Type
- Instructions For Use Manual
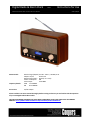
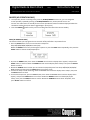
Coopers 10477 combines the convenience of digital radio with the timeless appeal of a traditional alarm clock. Its array of features offers a versatile and user-friendly audio experience.
Listen to your favorite stations in crystal-clear digital quality with DAB+ technology. The auto-scan function quickly finds available stations, while the manual tune option allows you to precisely navigate the frequency spectrum. Don't miss a beat with the real-time signal strength indicator, ensuring optimal reception.
Set multiple alarms to wake up to your preferred radio stations or a traditional buzzer sound. The snooze function provides a few extra minutes of slumber, while the sleep timer gently lulls you to sleep. Enjoy your music or podcasts privately through the headphone jack.
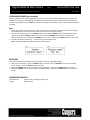


-
 1
1
-
 2
2
-
 3
3
-
 4
4
-
 5
5
-
 6
6
-
 7
7
-
 8
8
-
 9
9
-
 10
10
-
 11
11
-
 12
12


Coopers 10477 Instructions For Use Manual
- Category
- Alarm clocks
- Type
- Instructions For Use Manual
Coopers 10477 combines the convenience of digital radio with the timeless appeal of a traditional alarm clock. Its array of features offers a versatile and user-friendly audio experience.
Listen to your favorite stations in crystal-clear digital quality with DAB+ technology. The auto-scan function quickly finds available stations, while the manual tune option allows you to precisely navigate the frequency spectrum. Don't miss a beat with the real-time signal strength indicator, ensuring optimal reception.
Set multiple alarms to wake up to your preferred radio stations or a traditional buzzer sound. The snooze function provides a few extra minutes of slumber, while the sleep timer gently lulls you to sleep. Enjoy your music or podcasts privately through the headphone jack.
Ask a question and I''ll find the answer in the document
Finding information in a document is now easier with AI
Related papers
-
Coopers 10496 Instructions For Use Manual
-
Coopers H853 User manual
-
-
-
-
-
-
-
-

