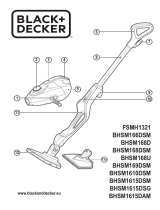
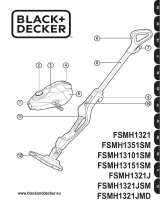
BLACK+DECKER FSH10SM User manual

Type
User manual

This manual is also suitable for

2
ENGLISH
(Original instructions)
1
7
6
23
3
4
8
9
10
5
11
12
13a
13c
13b
13d
3
ENGLISH
(Original instructions)
5
4
4
4b
14
15
13a,13b
13c, 13d
13a,13b
13c, 13d
B
D
A
4a
4
2
2a
3 3a
7
6
C
4
ENGLISH
(Original instructions)
1
E
F
G H
I
8
10
9
11
J
5
ENGLISH
(Original instructions)
12
K
6
ENGLISH
(Original instructions)
Intended use
Your BLACK+DECKER
TM
FSH10SM SteaMitt
TM
has been
designed for sanitising and cleaning tiles, work tops, kitchen
surfaces and bathroom surfaces. This appliance is intended
for indoor household use only.
The water tank (6) should only be used in a horizontal
position on a worktop or floor.
Safety Instructions
Warning! Read all of the 'Safety, Maintenance,
Service' manual carefully before operating this
appliance. Read all of this manual carefully
before operating this appliance.
Safety of others
This appliance can be used by persons with reduced
physical, sensory or mental capabilities or lack of
experience and knowledge if they have been given
supervision or instruction concerning use of the
appliance in a safe way and understand the hazards
involved.
Children shall not play with the appliance. Cleaning and
user maintenance shall not be made by children without
supervision.
If the supply cord is damaged, it must be replaced by the
manufacturer, its service agent or similarly qualified
persons in order to avoid a hazard.
The plug must be removed from the socket-outlet before
cleaning or maintaining the appliance.
The liquid or steam must not be directed towards
equipment containing electrical components, such as
the interior of ovens.
The appliance shall not be left unattended while it is
connected to the supply mains;
The appliance is not to be used if it has been dropped, if
there are visible signs of damage or if it is leaking;
Keep the appliance out of reach of children when it is
energized or cooling down.
Never point or direct the mitt at yourself or any other
person.
Labels on appliance
The following pictograms along with the date code are
shown on the appliance.
CAUTION Hot Steam
Water dripping when used upside down
Steam escapes from all sides
Do not leave unsupervised with young
children
Hand wash only
Features
1. Steam operate button
2. Steam nozzle
3. Hose
4. Mitt
5. ON/Off button
6. Water tank
7. Filler cap
8. Quick release tab
9. Squeegee accessory
(for use on shower screens / glass / mirrors / clothing /
upholstery)
10. Steam hose
(for use on its own, or with attachments (9) or (11)
11. Brush accessory
(for use on tiles / grout)
12. Shoulder strap
(only available with FSH10 SMP)
13a. Scouring pad.
(for use on tough stains and non delicate surfaces)
13b. Bathroom pad.
(for use on taps and other moulded bathroom surfaces)
13c. Standard pad.
(for use on all larger surfaces)
13d. Polishing pad.
(for use on delicate surfaces)
FSH10SM
(SteaMitt)
FSH10SM1
(SteaMitt+)
FSH10SMP
(SteaMitt Pro)
9
10
11
12
13a
x 2
13b
13c
x 2 x 2 x 2
13d
Configuration
7
ENGLISH
(Original instructions)
Assembly
Warning! Before attempting any of the following
instructions, make sure that the appliance is
switched off and unplugged and the appliance is
cold and does not contain any water.
Attaching the SteaMitt
TM
hose or attachment
hose and accessories (Fig. A,B and J)
Warning! Inspect the seal (2a) on the steam nozzle (2) and
hose (3) before each use. If the seal is missing or damaged
then please contact your nearest authorised repair agent.
Do not use the appliance. Inspect the seal (4a) on the
SteaMitt
TM
(4) and hose (3) If the seal is missing, damaged
or any steam is escaping then please contact your nearest
authorised repair agent. Do not use the appliance.
Ensure there is no blockage or impedence in the SteaMitt
TM
hose (3) or attachment hose (10). If any are detected then
please contact your nearest authorised repair agent. Do not
use the appliance.
Attaching the hose (Fig. A)
Press in the clips (3a) on either side of the hose (3).
Press the hose (3) onto the steam nozzle (2) and
release the clips (3a).
Important! Ensure that the hose (3) is securely fastened
before using SteaMitt
TM
. If steam escapes from the joint then
the SteaMitt
TM
is not correctly fitted, allow the unit to cool
then remove and re-fit the hose.
Attaching and removing accessories (Fig J)
Align the lugs on the steam nozzle (10) with the
recesses on the accessory.
Press the accessory onto the steam nozzle (17) and
twist anti-clockwise until the accessory clicks into place.
Removing the hose (Fig. A)
Warning! The Steam nozzle, hose and SteaMitt
TM
become
hot during use.
Allow the unit and all attachments to cool before removing.
Press in the clips (3a) on either side of the hose (3) and
pull away from the steam nozzle (2)
Filling the water tank (Fig. C)
Note! Fill the water tank with clean tap water. Do not use
chemicals or any other additives.
Note! In areas of very hard water, the use of de-ionised
water is recommended.
Switch off the unit and disconnect from the mains
supply.
Open the filler cap (7) by flipping it up.
Fill the water tank (6) with water.
Warning! Your water tank has a 0.10 litre capacity. Do not
over fill the tank.
Replace the filter cap.
Note: Ensure the filter cap is firmly secured.
Note: Do not use chemical cleaners with your SteaMitt
TM
.
Fitting the cleaning pad (Fig. B)
Warning! Ensure there is no blockage or impedence in the
steam release vents (4b) If any are detected then please
contact your nearest authorised repair agent. Do not use the
appliance.
Fit the required cleaning pad (13a, 13b, 13c or 13d) to
the SteaMitt
TM
(4) by attaching the 'loop' velcro strips (14)
on the upper side of the cleaning pad, to the 'hook' velcro
pads (15) on the underside of the SteaMitt
TM
(4). Press
down firmly.
Warning! The SteaMitt
TM
should not be used without fitting a
cleaning pad.
Use
Switching on and off
To switch the appliance on, press the ON/Off button (5). It
takes approximately 15 seconds for the SteaMitt
TM
to heat
up.
Note: always have your hand inside the SteaMitt
TM
before
you press the steam button.
To produce steam, press the steam button (1) on top of
the unit.
To switch the appliance off, turn off the steam switch
(1)then press the ON/OFF button (5).
Caution! Always empty the SteaMitt
TM
water tank after use.
Note! When first filled or after running dry, it can take up to
45 seconds for steam to be produced.
Hints for optimum use
General
For optimal cleaning results never use the SteaMitt
TM
without first attaching a cleaning pad.
Do not use chemical cleaners or any other additives with
your SteaMitt
TM
.
Delicate surfaces, mirrors for example, should be
cleaned first while the pad is at its driest, thereby
avoiding streaks.
Do not use the SteaMitt
TM
on cold glass, such as windows
as damage may be caused by the sudden change in
temperature.
Caution! It is important to monitor the water level in the water
tank (6). To refill the water tank and continue to sanitize/clean
turn the SteaMitt
TM
'OFF'. Unplug the unit from the electrical
wall outlet, refill the water tank (6).
Warning! Always use the SteaMitt
TM
as shown in figure E,
with your hand inside the protective glove.
Warning! Never attempt to use the SteaMitt
TM
by gripping it
externa lly as shown in figure F. This will result in scalding.
8
ENGLISH
(Original instructions)
Warning! Avoid using the SteaMitt
TM
in tight corners as
shown in figure H.
Warning! Should a problem occur during use, use the quick
release tab (8) to quickly remove the SteaMitt
TM
from your
hand as shown in figure I.
After use (Fig. E)
Turn the SteaMitt
TM
'OFF'. Turn the steam operation
button (1) to off and then press the ON/OFF button (5).
Wait until the SteaMitt
TM
cools down.
Unplug the SteaMitt
TM
from the electrical wall outlet.
Empty the water tank.
remove the cleaning pad (9) and wash it ready for next
use.
Protecting the environment
Separate collection. This product must not be
disposed of with normal household waste.
Should you find one day that your BLACK+DECKER
product needs replacement, or if it is of no further use to
you, do not dispose of it with other household waste. Make
this product available for separate collection.
BLACK+DECKER provides a facility for recycling
BLACK+DECKER products once they have reached the
end of their working life. This service is provided free of
charge. To take advantage of this service please return
your product to any authorised repair agent who will
collect them on our behalf.
You can check the location of your nearest authorised
repair agent by contacting your local BLACK+DECKER
office at the address indicated in this manual.
Alternatively, a list of authorized BLACK+DECKER
repair agents and full details of our after-sales service
and contact are available on the Internet at:
www.2helpU.com.
Troubleshooting
If your appliance seems not to operate properly, follow the
instructions below. If this does not solve the problem, please
contact your local BLACK+DECKER repair agent.
Warranty
BLACK+DECKER is confident of the quality of its products
and offers an outstanding warranty.
This warranty statement is in addition to and in no way
prejudices your statutory rights.
If a BLACK+DECKER product becomes defective due to
faulty materials, workmanship or lack of conformity, within 24
months from the date of purchase, BLACK+DECKER
warranty to replace defective parts, repair products subjected
to fair wear and tear or replace such products to ensure
minimum inconvenience to the customer unless:
The product has been used for trade, professional or hire
purposes;
The product has been subjected to misuse or neglect;
The product has sustained damage through foreign
objects, substances or accidents;
Repairs have been attempted by persons other than
authorised repair agents or BLACK+DECKER service
staff.
To claim on the warranty, you will need to submit proof of
purchase to the seller or an authorised repair agent. You can
check the location of your nearest authorised repair agent by
contacting your local BLACK+DECKER office at the address
indicated in this manual.
Alternatively, a list of authorised BLACK+DECKER repair
agents and full details of our after-sales service and contacts
are available on the Internet at: www.2helpU.com.
Technical data
FSH10SM FSH10SM1 FSH10SMP
Voltage V
ac
220-240 220-240 220-240
Power W 1000 1000 1000
Tank Capacity ml 100 100 100
Weight kg 1.65 1.65 1.65
Problem Step Possible solution
The SteaMitt
TM
is
not turning on
1.
2.
3. Check the fuse in the plug.
The SteaMitt
TM
is not
producing steam
4.
Turn on the steam switch
(1) After a few seconds
steam will be produced.
5.
The SteaMitt
TM
stops
producing steam
during use
6. Check step 5, then 3.
The SteaMitt
TM
is
producing too little
steam during use
7.
Check step 5.
Steam is escaping
from unexpected
areas of the unit.
8.
Refer to the assembly chapter
of the manual for correct fitting
instructions of all parts and
accessories. Check for any
signs of tears or rips in the
SteaMitt
TM
or cleaning pads.
If this continues, stop using
the unit.
Where can I get
further information /
accessories for my
steam mop
9.
www.blackanddecker.co.uk/
steammitt
Check the unit is plugged
in at the wall socket.
Check the unit is
switched on using the
ON/OFF switch (5)
Check that the water
tank is full.
  • Page 1 1
  • Page 2 2
  • Page 3 3
  • Page 4 4
  • Page 5 5
  • Page 6 6
  • Page 7 7
  • Page 8 8
  • Page 9 9
  • Page 10 10
  • Page 11 11
  • Page 12 12
  • Page 13 13
  • Page 14 14
  • Page 15 15
  • Page 16 16
  • Page 17 17
  • Page 18 18
  • Page 19 19
  • Page 20 20
  • Page 21 21
  • Page 22 22
  • Page 23 23
  • Page 24 24
  • Page 25 25
  • Page 26 26
  • Page 27 27
  • Page 28 28
  • Page 29 29
  • Page 30 30
  • Page 31 31
  • Page 32 32

BLACK+DECKER FSH10SM User manual

Type
User manual
This manual is also suitable for

Ask a question and I''ll find the answer in the document

Finding information in a document is now easier with AI