Page is loading ...

ASSEMBLY
INSTRUCTION
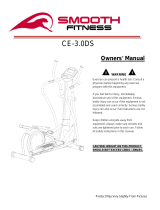
E-I.

1
IMPORTANT SAFETY INSTRUCTIONS
WARNING - Read all instructions before using this appliance.
1. Do not operate the elliptical on deeply padded, plush or shag carpet.
Inappropriate behavior may result in damages to both the carpet and
elliptical.
2. Keep children away from the elliptical. There are certain caution
areas that could cause harm.
3. Keep hands away from all moving parts.
4. Never operate the elliptical if it has a damaged cord or plug. If the
elliptical is not working properly, please call your dealer.
5. Keep the cord away from heated surfaces.
6. Never drop or insert any object into any openings.
7. Do not operate the elliptical outdoors.
8. To disconnect, turn all controls to the off position, and then remove
the plug from the outlet.
9. Wear proper shoes. Do not step on your elliptical wearing high heels,
dress shoes, sandals or barefooted. Quality athletic shoes are
recommended to avoid leg fatigue.
UNPACKING THE UNIT
1. To move the heavy parts safely, we strongly suggest to assemble this
product with assistance.
2. Make sure to locate the unit on flat, dry and clean ground.
3. Unpack the unit and remove all parts from the carton carefully, and
inspect for any damage or missing parts by assembly list below.
If damaged parts are found or parts are missing, contact your dealer
immediately.
4. Remove tools from the hardware package first and start assembling
this product by following instructions step by step.
Thank you for purchasing our product! Before assembly, please read the CAUTION carefully

2
NOTE Console type may differ from the illustration. Please refer to your order for the actual console.
(01) Assembly Frame
(02) Console Post
(07)&(08) Pedal Bracket(R)&(L)
(05)&(06) Handle Bar(R)&(L)
(108) Console
(66) Rear Stabilizer
Cover
Assembly List

3

4
STEP 1:
As shown in the illustration, lay
(01)
Assembly Frame
on the even ground
carefully, and take out (02) Console Post.
NOTE There is a round
cardboard on
the top of (02) Console Post. Do NOT
remove the cardboard before
assembling (67) &
(68) Upper Console
Post Cover (L) & (R)
. There are also
electrical cables running through
(02)
Console Post. Be careful not to break
the wires during this procedure, or
damages to the console could
be
resulted.
Connect (112) Post Cable
and cable of
(109) Motor, and then install (02)
Console
Post into the fillister of upper
(01)
Assembly Frame. Secure (02) Consol
e
Post and (01) Assembly Frame
with 4
pieces (121) Flat Washer 10x27mmx2T
and 4 pieces (122)
Hex Head Bolt
M6x10mm by (119) Hex Wrench M8.
NOTE Do not remove
the cardboard in
the fillister on Assembly Frame
. The
cardboard prevents screws from falling
into Assembly Frame. Secure
(02)
Console Post with cardboard directly.
A

5
STEP 2:
As
shown in the illustration, find 4 pieces
(133) Bolt M5x10mm on the back of
(108)
Console. Take the 4 pieces (133)
off for
the following steps. Put (108) Console
on
(09) Console Bracket, thread (108-1)
,
(108-2) and (108-3) Console Cable
through the round hole of (09)
, and
connect with (112) Post Cable and
(113)
Heart Rate Cable
in sequence. Secure
(108) Console and (09) Console Bracket
with 4 pieces (133) Bolt M5x10mm b
y
(118) Screw Driver 40mm.
NOTE
Console type may differ from the
illustration. Please refer to the order
and console manual for the actual
console.
STEP 3:
Take off the round cardboard
on the top of
(02) Console Post. As
shown in the
illustration, attach
(67) Upper Console
Post Cover(L) and
(68) Upper Console
Post Cover(R) to (02) Console Post
, aim
the screw hole of (67) & (68)
at the screw
hole of (02)
correctly, and secure them
with 4 pieces
(124) Round Head Bolt
M5x12mm by (118) Screw Driver 40mm.
A

6
STEP 4:
As shown in the illustration, attach
(54)
Lower Console Post Cover(L) and
(55)
Lower Console Post Cover(R) to (02
)
Console Post, aim the screw hole of (54)
& (55) at (02)
correctly, and secure them
with 2 pieces
(124) Round Head Bolt
M5x12mm and 2 pieces
(125) Self
Tapping Screw 3/16”x5/8” by
(118) Screw
Driver 40mm.
STEP 5:
As
shown in the illustration, find 1 piece of
(38) Flat Washer 26x8mmx2T and
(35)
Nut M8 assembly on the axle of (02
)
Console Post, and then take off (38)
&
(35) for following steps. Slide 1 piece
(56)
Handle Bar Connect Ring
through the axle
of (02), install (05) Handle Bar(R) and (38)
onto the axle in sequence, and then
secure them with (35) by
(117) Hex
Wrench. Attach
(58) Upper Handle Bar
Cover(A) and (59)
Upper Handle Bar
Cover(B) onto (05) Handle Bar(R)
and
secure with 4 pieces
(124) Round Head
Bolt M5x12mm by
(118) Screw Driver
40mm.
A

7
STEP 6:
As shown in the illustration, find
(131) Pedal
Axle and (28) Nut M10
assembly on the right
side of (04) Pedal Arm. Take off (131) & (28)
for following steps. Install
(07) Pedal
Bracket(R) onto the right side of (04)
on
the correct position. Insert in (131)
, and
secure them with (28) by (117) Hex Wrench.
NOTE
(29) Nut M10*8T
has been glued
onto one end of (131) Pedal Axle
. Do NOT
take it off! Just secure (28) Nut M10
on
the other end.
STEP 7:
As
shown in the illustration, find 1 piece of
(34) Hex Head Bolt M8x40mm and
(35) Nut
M8 assembly on the front of
(07) Pedal
Bracket(R). Take off (34) & (35) for
following
steps. Attach the front of (07)
to the lower
part of (05) Handle Bar(R). Insert (34)
into
the joint of (07) and (05)
, and secure the end
of (34) with (35) by (120) Hex Wrench M6
.
Attach (62) Lower Handle Bar Cover(A)
and
(63) Lower Handle Bar Cover(B)
to the joint,
and secure (62) and (63) with 2 pieces
(124)
Round Head Bolt M5x12mm
and 1 piece
(125) Self Tapping Screw 3/16”x5/8”
by
(118) Screw Driver 40mm.
A
A
NOTE Repeat Step 6 and 7 for the assembly of (06) Handle Bar(L) and (08) Pedal Bracket(L).

8
STEP 8:
As shown in the illustration, put (69) Pedal
over (07) Pedal Bracket(R)
. Aim the screw
hole correctly and secure them with 4
pieces (123) Truss Head Bolt M5x12mm
by (118) Screw Driver 40mm. Attach (66
)
Rear Stabilizer Cover o
nto the rear
stabilizer of (01) Assembly Frame
. Aim the
screw hole correctly, and secure them
with 2 pieces (124)
Round Head Bolt
M5x12mm by (118) Screw Driver 40mm.
STEP 9:
As shown in the illustration, attach
(88)
Bottle Rack onto (02) Console Post.
Aim
the screw hole correctly and secure them
with 2 pieces
(47) Truss Head Bolt
M5x10mm by (118) Screw Driver 40mm.
NOTE The (90) Water Bottle
is optional.
Please contact with your dealer if it is
needed.
A
A

9
FINAL ADJUSTMENT:
As shown in the illustration, adjust the horizontal height of elliptical
by turning (85) Foot Pad if needed.
A
Congratulation
s
! You
’ve finished the assembly, and could start using this functional product after
warm
-
up.
Please use and storage this product on the even and dry ground, and keep this manual for safety purpose.
NOTE While movement of the elliptical is needed, make
sure to move it the way shown in the illustration with
assistance.

10
PARTS LIST (E-I.)
NO.
NAME Q'TY NO.
NAME Q'TY NO.
NAME Q'TY
01
Assembly Frame
1
51
Chain Cover(R)
1
02
Console Post
1
52
Round Disk
2
03
Cross Bar
2
28
Nut M10
5
53
Round Disk Cap
2
04
Pedal Arm
2
29
Nut M10x8T
2
54
Upper Console Post Cover(L)
1
05
Handle Bar(R)
1
30
Washer ø 10xø 27x2T
2
55
Upper Console Post Cover(R)
1
06
Handle Bar(L)
1
31
Washer ø 10xø 36x1.5T
1
56
Handle Bar Connect Ring
2
07
Pedal Bracket(R)
1
32
Bolt M15xP1.75
2
57
Hand Pulse End Cap
2
08
Pedal Bracket(L)
1
33
Screw M8x45mm
2
58
Upper Handle Bar Cover(A)
2
09
Console Bracket
1
34
Hex Head Bolt M8x40mm
2
59
Upper Handle Bar Cover(B)
2
10
Pedal Joint Set
2
35
Nut M8
16
60
Pedal Tube Cover(L)
1
11
Self Generator Set
1
36
Hex Head Bolt M8x65mm
1
61
Pedal Tube Cover(R)
1
12
Hex Head Bolt M8x20mm
4 37
Flat Washer ø 8xø 16x2T
1 62
Lower Handle Bar Cover(A)
2
13
Ring S25
2
38
Flat Washer ø 8xø 26x2T
2
63
Lower Handle Bar Cover(B)
2
14
Ring S15
1
64
Front Stabilizer Cover
2
15
Ring R35
4
40
Hex Head Bolt 1/2"x95x28mm
2
65
Mid Stabilizer Cover
1
16
Fixing Pin
2
41
Nut 1/2"x13
2
66
End Stabilizer Cover
1
17
Hex Head Bolt M10x40mm
2
42
Self Tapping Screw 5/32"x1/2"
17
67
Lower Console Post Cover(L)
1
18
Hex Head Bolt M6x16mm
3
43
Self Tapping Screw 3/16"x1/2"
16
68
Lower Console Post Cover(R)
1
19
Flat Washer ø6xø16x1.5T
3
44
Self Tapping Screw M4x12mm
4
69
Pedal
2
20
Hex Head Bolt M8x16mm
4
45
Self Tapping Screw M5x12mm
20
70
PU Wheel
4
21
Ball Bearing
4
46
Self Tapping Screw 3/16"x5/8"
15
71
Moving Wheel
2
22
Hex Head Bolt M6x10mm
2
47
Truss Head Screw M5x10mm
2
72
Plastic Ring
2
23
Nut M6
2
73
Cushioned Pad
2
24
Controller
1 49
Hex Head Bolt M8x25mm
1
25
Battery
1
50
Chain Cover(L)
1
75
Idler
1

11
PARTS LIST (E-I.)
NO.
NAME Q'TY
NO.
NAME Q'TY NO.
NAME Q'TY
76
Hand Pulse Cover (Upper)
2
101
Flywheel
1
126
Rail Fixing Plate
4
77
Hand Pulse Cover (Lower)
2
102
Spring
1
127
Idler Bracket
1
78
Hand Pulse Ring
2
128
Idler Axle
1
79
Pedal Rack End Cap
2
129
Flywheel Axle
1
80
Bushing ø42
4
105
Aluminum Rail
4
130
PU Wheel Axle
2
81
Hand Pulse Foam
2
131
Pedal Axle
2
82
Handle Foam
2
132
Hand Pulse Tube
4
83
Base Cover
1
108
Console
1
133
Bolt M5x10mm
4
84
V-Belt
1
134
Console Bracket
1
85
Foot Pad
4
135
Flywheel Cable(3pin)
1
86
Base Cap
1
136
Flywheel Cable(2pin)
1
87
Bottle Rack
1 112
Post Cable
1
88
Round Cap
2
113
Heart Rate Cable
2
89
Water Bottle
1
114
Controller Cable
1
90
Bushing ø31.8
2
115
Battery Bracket
1
91
Ball Bearing 6005ZZ
2
92
Ball Bearing 6202ZZ
6
117
Hex Wrench
2
93
Ball Bearing 6004ZZ
8
118
Screw Driver 40mm
1
119
Hex Wrench M8
1
120
Hex Wrench M6
1
96
Bearing POS12R
2
121
Flat Washer 10x27mmx2T
4
97
Ball Bearing 6003ZZ
4
122
Hex Head Bolt M6x10mm
4
98
Bushing
4
123
Truss Head Bolt M5x12mm
8
99
Bushing
4 124
Round Head Bolt M5x12mm
24
100
V-Belt Disk Axle
1
125
Self Tapping Screw 3/16”x5/8”
4
/