Broil
2UL¿FH Oven
Light
Low setting adjustments must be made with other burners in
operation on a medium setting. This procedure prevents the
ORZÀDPHIURPEHLQJVHWWRRORZUHVXOWLQJLQWKHÀDPHEHLQJ
extinguished when other burners are turned on.
A. Turn on all surface burners to medium setting.
% 7XUQWKHNQRERQWKHEXUQHUEHLQJDGMXVWHGWR³/2´
& 5HPRYHWKHNQREDQGLQVHUWDVPDOOÀDWEODGHVFUHZGULYHU
into the valve shaft and/or side adjustment screw(s) as
shown and turn clockwise to fully tighten down the bypass
screw(s). Repeat for all valves.
' ,IÀDPHDSSHDUVWRRORZRUXQVWDEOHVORZO\WXUQE\SDVV
VFUHZFRXQWHUFORFNZLVHXQWLODVWDEOHÀDPHH[LVWVIRUHDFK
burner. Remember, other burners must be turned on to
medium.
( $GGLWLRQDOO\IRUHDFKEXUQHUEHLQJDGMXVWHGTXLFNO\RSHQ
DQGFORVHWKHRYHQGRRUZKLOHREVHUYLQJÀDPH,IÀDPHLV
extinguished, continue adjusting bypass screw for a larger
ÀDPH5HSHDWGRRURSHQLQJVXQWLOÀDPHLVVWDEOH
F. Replace the knob.
CONVERTING THE OVEN BURNERS
ADDITIONAL INFORMATION
BAKE BURNER ORIFICE
1. Remove oven racks, door and oven bottom. Remove the
1/4” hex screws securing the bake burner.
7KHEDNHEXUQHURUL¿FHLVRQWKHJDVYDOYHORFDWHGEHKLQG
WKHZDUPLQJGUDZHU/LIWWKHEXUQHURႇWKHRUL¿FHDQGDSSO\
D´VRFNHWRQDQH[WHQVLRQWRWKHKH[EDVHRIWKHRUL¿FH
RQWKHJDVYDOYH/RRVHQWKHRUL¿FHE\WXUQLQJFRXQWHU
clockwise and remove.
6HOHFWWKHSURSDQHEDNHRUL¿FHIURPWKHNLWDQGLQVWDOOLWRQ
the gas valve. Tighten until snug.
BROIL BURNER ORIFICE
1. Remove the 1/4” hex screw securing the broil burner and
DOORZLWWRKDQJGRZQIUHHRIWKHEURLORUL¿FH
$SSO\D´ZUHQFKWRWKHKH[EDVHRIWKHRUL¿FH/RRVHQ
WKHRUL¿FHE\WXUQLQJFRXQWHUFORFNZLVHDQGUHPRYH
6HOHFWWKHSURSDQHEURLORUL¿FHIURPWKHNLWDQGLQVWDOOLWRQ
the broil elbow. Tighten until snug.
5HSODFHWKHEURLOEXUQHURYHUWKHRUL¿FHDQGUHSODFHWKH
screw securing the burner.
Lift
Burner
%DNH%XUQHU2UL¿FH
ADJUSTING LOW FLAME SETTING
ON COOKTOP BURNERS
SPECIAL NOTE:
To convert the oven back to natural gas, reverse the
instructions given in making propane adjustments.
NOTICE:
This product cannot be converted to propane by adjusting
WKHRYHQRUL¿FHV7KHRUL¿FHVPXVWEHUHSODFHGIRUSURSDQH
NOTICE:
2QFHWKHFRQYHUVLRQLVFRPSOHWHDQGFRQ¿UPHG¿OORXW
the propane sticker and include your name, organization
and date conversion was made. Apply the sticker to
the range near the regulator to alert others in the future
that this appliance has been converted to propane. If
converting back to natural gas from propane, please
remove the sticker so others know the appliance is set to
use natural gas.
NOTICE:
6DYHWKHVHRUL¿FHVIRUIXWXUHFRQYHUVLRQEDFNWRQDWXUDOJDV
BURNER OUTPUT RATINGS: BTU/HR
NG (Natural) Gas 5” W.C.P.
BURNER BTU
RATE ORIFICE
SIZE (mm) COLOR MARKING
LF 15,000 0.070 Brown 178N
LR 5,000 0.040 :KLWH3XUSOH 101N
RF 15,000 0.070 Brown 178N
RR 9,500 0.0555 Yellow 141N
Broil 16,500 0.071 Black/Blue 071N
Bake 16,000 0.070 none 50
Center adjustment screw
PROPANE CONVERSION INSTRUCTIONS
31-2000969 Rev. 0 09-21 GEA
JGSS61
198
III
Denotes 1.98mm Orifice size opening
Denotes Natural Gas
N
ADJUSTING AIR SHUTTER SETTINGS
FOR OVEN BURNERS
:LWKD3KLOOLSVKHDGVFUHZGULYHUORRVHQWKHVFUHZV
securing the air shutter on the bake burner. Adjust the air
shutter to the dimension given in the above table.
2. Turn on the gas.
3. Turn on the electricity.
4. Reinstall the oven door.
5. Turn on the bake burner.
2YHQEXUQHUÀDPHPXVWEHREVHUYHGZLWKWKHGRRUFORVHG
WRSURSHUO\FKHFNÀDPHFKDUDFWHULVWLFV
$V\RXZDWFKWKHÀDPHZLWKWKHRYHQGRRUFORVHGFKHFN
the following through the oven door window.
D)RU1DWXUDO*DVLIWKHÀDPHVDUH\HOORZRSHQWKHDLU
shutter more.
E,IWKHÀDPHVEORZDZD\RUÀXWWHUIURPWKHEXUQHUFORVH
the air shutter slightly.
7XUQEDNHEXUQHURႇDQGUHSHDWZLWKEURLOEXUQHU
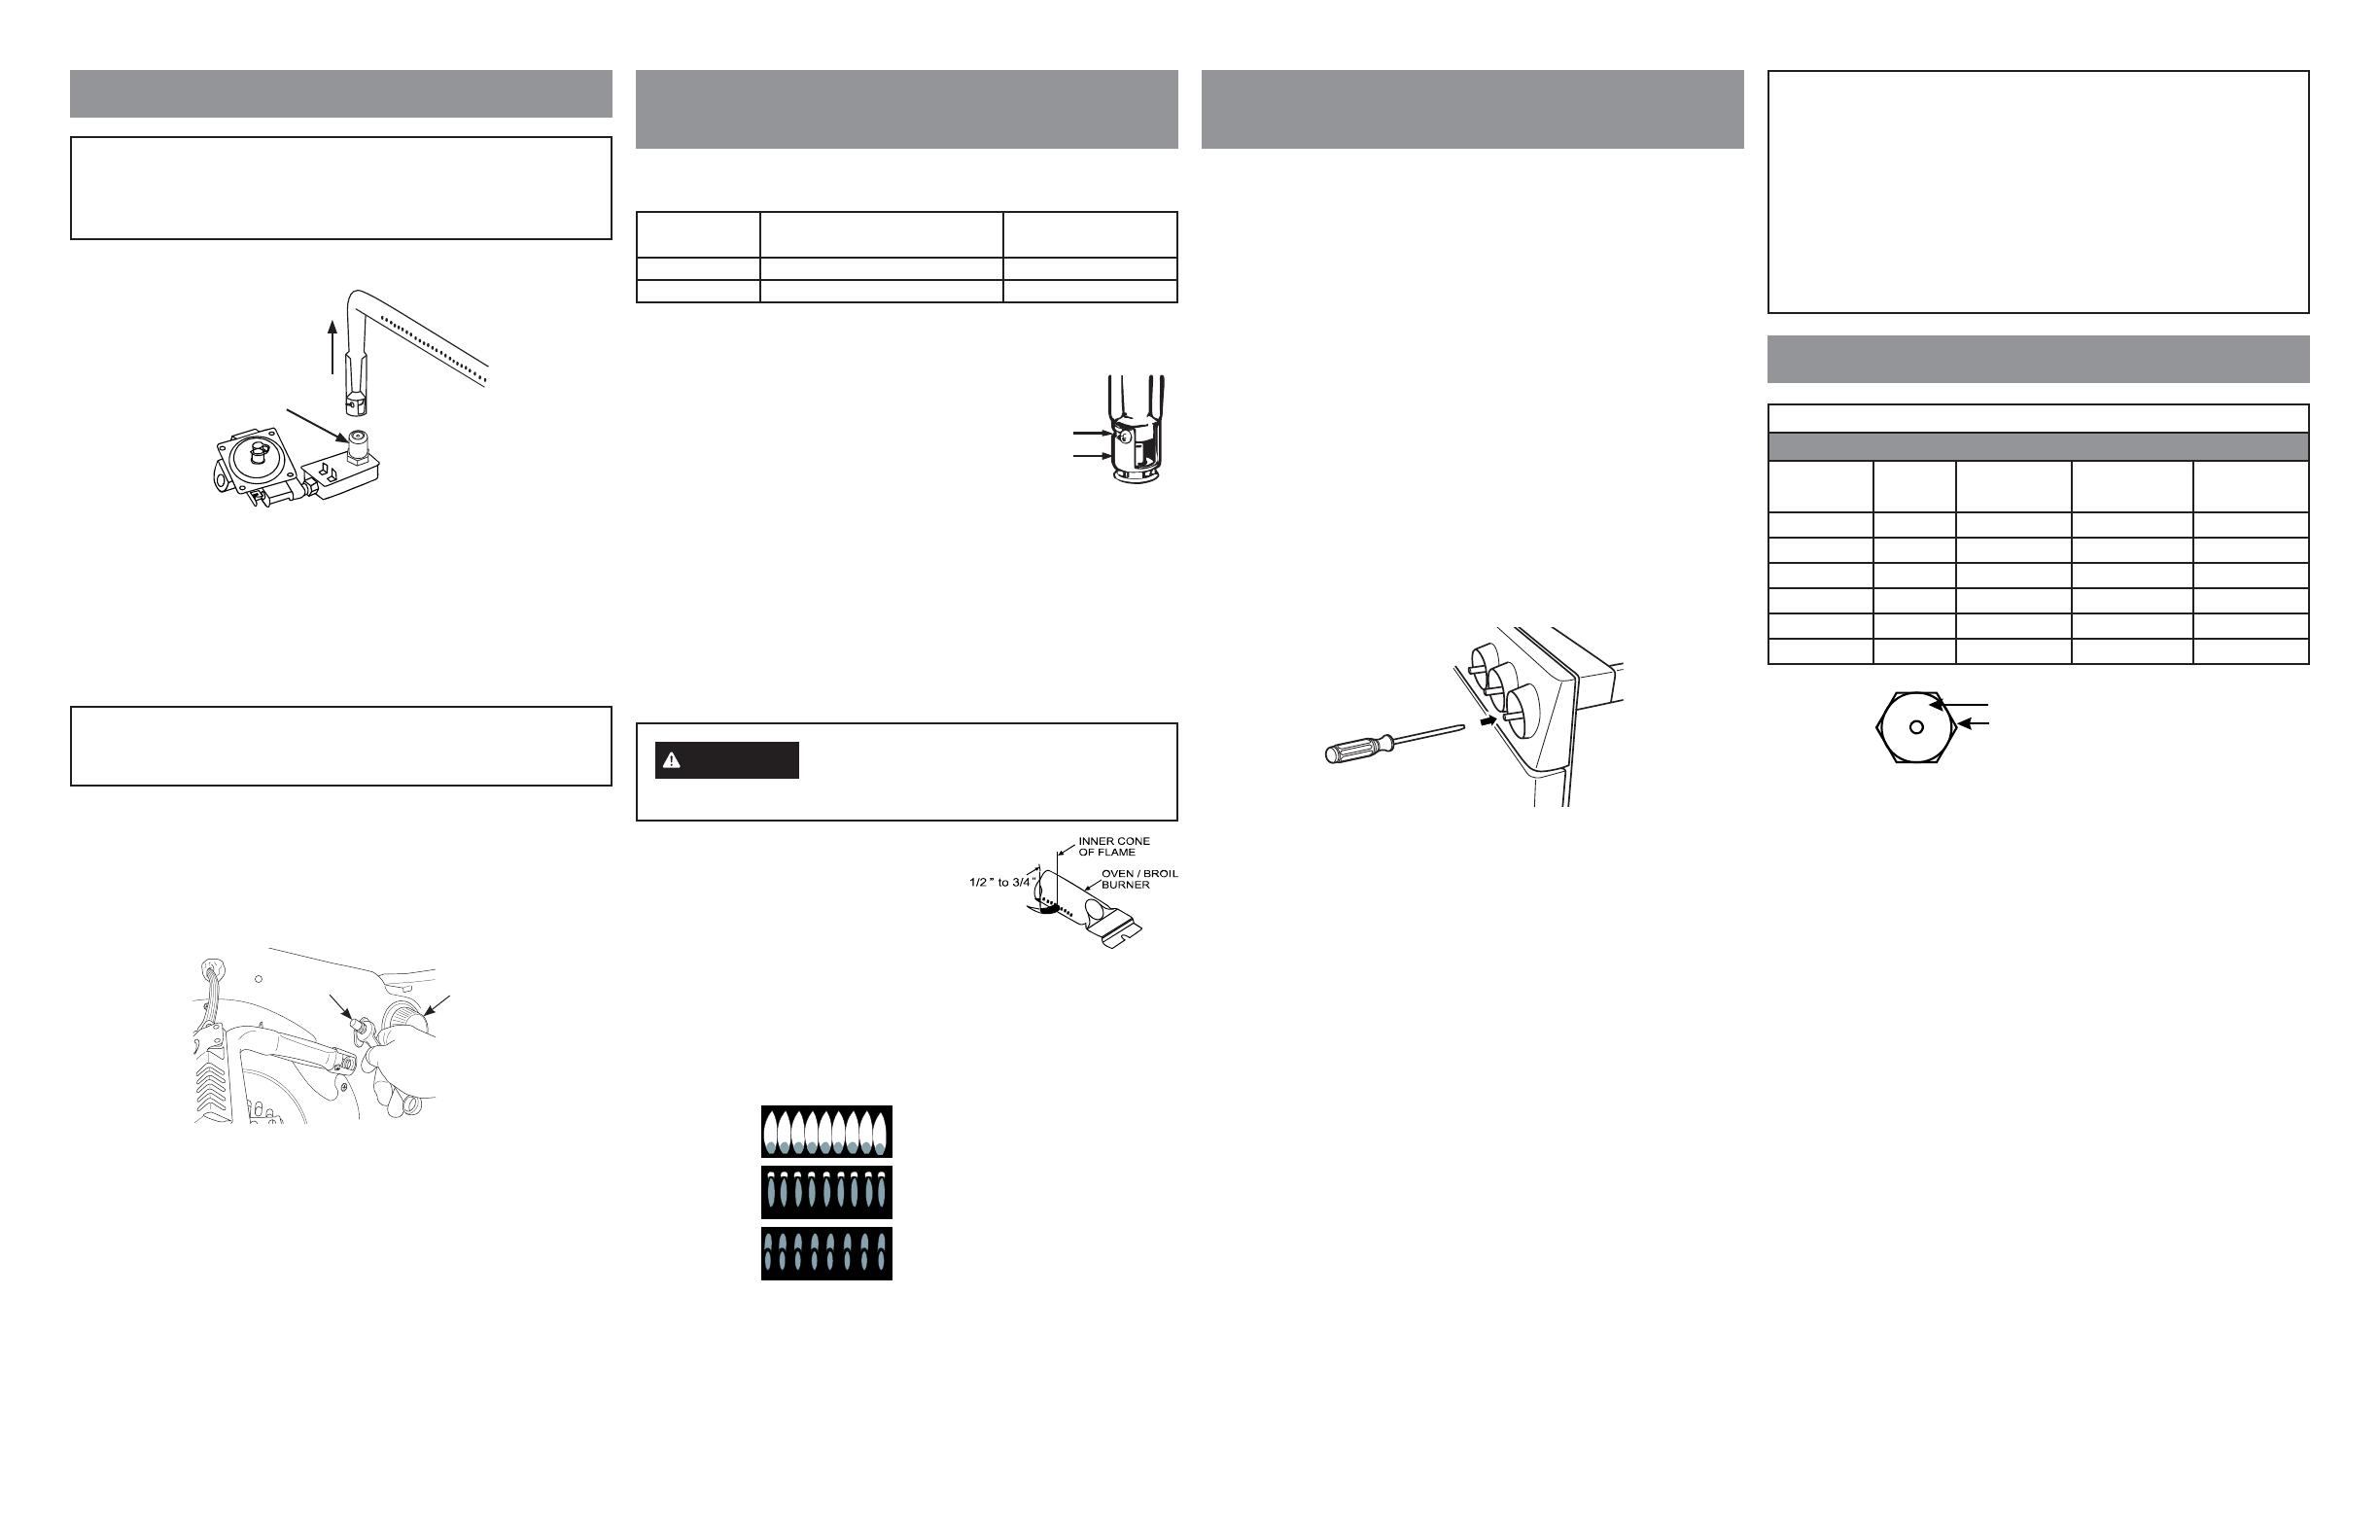
&KHFNLQJWKHÀDPHVL]H
It should be approximately 1/2”
to 3/4” long for the bake and broil
burners.
The combustion quality of the
EXUQHUÀDPHVQHHGVWREHGHWHUPLQHGYLVXDOO\
127(,IEXUQHUÀDPHVORRNOLNH$IXUWKHUDLUVKXWWHU
adjustment to the bake buner is required. Normal
EXUQHUÀDPHVVKRXOGORRNOLNH%RU&GHSHQGLQJ
on the type of gas you use. With propane gas, some
yellow tipping on the outer cones is normal.
)RUHLJQSDUWLFOHVLQWKHJDVOLQHPD\FDXVHDQRUDQJHÀDPHDW
¿UVWEXWWKLVZLOOVRRQGLVDSSHDU
9.
When all adjustments are made and the results are
satisfactory:
a. Retighten the air shutter screws.
b. Replace the oven bottom.
c. Replace the storage drawer.
WARNING If you attempt to measure the inner cone
RIWKHÀDPHSOHDVHXVHFDXWLRQEXUQVFRXOGUHVXOW
(A) Yellow flames:
Further Adjustment
Required
(B) Yellow tips on
outer cones:
Normal for Propane Gas
(C) Soft blue flames:
Normal for Natural Gas
The air shutters should be turned to the marked settings NG or
propane or set according to the following table.
BURNER AIR SHUTTER
SETTING FOR PROPANE AIR SHUTTER
SETTING FOR NG
Bake Full open 0.280”
Broil 0.690” 0.690”
Screw
Air shutter


