Page is loading ...

Neosonic Bracket
1
NEOSONIC BRACKET
REVISION 01-12-04-2020

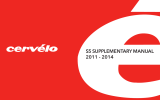
Neosonic Bracket
1
INTRODUCTION
Thank you for purchasing this Profile Design Bracket. These instructions apply to the Neosonic bracket, with Ergo, Race or Boom armrests and any
Profile Design 45AR extension only.
Please read these instructions thoroughly before attempting to install this item. Proper installation is required for compliance with Profile Design's
warranty policy. If you are not familiar with installation of Aerobars or their accessories, please seek the assistance of your local Profile design dealer
by logging on to www.profile-design.com and using "dealer search" or by calling Profile Design's customer service number p.# 888.800.5999.
Note to Dealers: If you install this product for the consumer, please provide him/her with this owner’s manual after installation.
Tools and materials required:
• 5mm Hex Wrench
• Torque Wrench with a 5mm hex bit
• Assembly compound such as Finishline Fiber Grip™
• Threadlocker such as Loctite® Threadlocker Blue 242®
• Isopropyl alcohol
• Cutting guide
• Hacksaw (18T Blade for aluminium)
• Half round file
• Electrical/Insulation tape
• Clean, lint free cloth

Neosonic Bracket
2
Your bracket kit should contain:
• Two (2) aerobar upper brackets (aluminium)
• Two (2) aerobar lower brackets (aluminium half round)
• Four (4) M6x18 bolts
• Two (2) M6x15 bolts preinstalled in the upper bracket
Optional accessories compatible with this Bracket
• Profile Design Aerobar Bracket Riser Kit
• Profile Design 45AR extension
• Profile Design Armrests
If anything is missing from the Bracket kit please contact your dealer.
Please note that threaded areas have been pre-treated by Profile Design during production with a special blue thread locking compound. This special
compound is easy to detect on the threads of all bolts provided. If you cannot detect this thread locking compound or you are re-installing the bolt,
re-apply a suitable blue thread locking compound as available from Loctite® or another company before assembly.
WARNING: Periodically check the Aerobar for damage, particularly for scratches through the anodised coating (aluminium parts) or clearcoat (carbon
parts) that could lead to degradation and weakening of the base material. Replace your Aerobar if you notice any damage from use or accident.

Neosonic Bracket
32
COMPONENT LIST
QTY.
Req. Part.# Ref.# Part Description
1 189384 Bracket - Neosonic Top Bracket 31.8mm Flat Black(L/A)
1189385Bracket - Neosonic Top Bracket 31.8mm Flat Black(R/B)
2 312615 Bolt - M6x15 Blk CP Mushroom Cap
4 919211 Bolt - M6x18 Blk CP Mushroom Cap
2 189366 Bracket - Bottom Bracket 31.8mm Non-thread Flat Black
6 550006 Washer-M6x9x0.8 SS
1
2
3
4
5
6
01
04 03 06 05
02

Neosonic Bracket
4
PART DRAWINGS
18.5 mm
15 mm
79 mm
14.1 mm
16.5 mm
42.5 mm

Neosonic Bracket
54
PRODUCT SPECIFIC SETUP LIMITATIONS
50 mm
50 mm

Neosonic Bracket
6
TORQUE SETTINGS
Ref.# Location Bolt Size Torque
1Handlebar clamp M6x18mm 6Nm (53 inlbf)
2Extension clamp M6x15mm 6Nm (53 inlbf)
02
01

Neosonic Bracket
76
BOLT LENGTHS
20 mm
40 mm
30 mm
10 mm
5 mm
50 mm
60 mm
70 mm
57 mm
ø17.5 mm
!
35mm 40mm 45mm 50mm 55mm 60mm 65mm 70mm 75mm 80mm 85mm 90mm 95mm30mm25mm20mm18mm
5101520253035404550556065707580
95
0
18 20 25 30 35 40 45 50 55 60 65 70 75 80 85 90
Bolt
(mm)
Risers
(mm)

Neosonic Bracket
8
INSTALLATION INSTRUCTIONS
1. Apply a thin coating of assembly compound to the inside faces of the handlebar clamp on both the
upper and lower parts of the bracket.
a. If you will be using an Aerobar Bracket Riser Kit apply assembly compound to all of the faces of
the risers and follow the instructions with the Riser kit.
b. If you are using 31.8 to 26.0 reducing shims apply assembly compound to both sides of the
shims.
2. Clasp the two halves of the handlebar clamp around the handlebar then use the 5mm Hex
Wrench to install the M6 bolts through the lower bracket into the upper. Take care that the first
thread engagement feels smooth to avoid cross threading the bolt.
3. Tighten the bolts until the aerobar bracket is firmly in place on the bar and repeat with the other side.

Neosonic Bracket
98
4. Apply assembly paste to the inside of the extension clamps.
5. Install the extension in the desired position and tighten the M3 extension fixing bolt using the
5mm Hex wrench so they are held snugly.
6. Check the placement of the brackets and extension then use the torque wrench with a 5mm
fitting to tighten the handlebar clamp to 6Nm.
7. Then use the torque wrench with the 5mm fitting to tighten the extension clamps to 6Nm.
WARNING:
Overtightening the handlebar clamp may lead to cracking
and possible failure of the handlebar.

Neosonic Bracket
10
8. Fasten the armrests to the brackets using the M6x12mm countersunk bolts, note that the armrests have an
offset design so care is required to ensure each side is positioned in the same way.
9. Apply a light coating of grease to the surface of the bolts as a protective layer against the effects of sweat.
10. Attach the cushion by placing carefully on hook and loop backing of the armrest and hold firmly for 30
seconds. Repeat for the other armrest. Note that the cushions on these models of armrest are symmetrical,
so it doesn’t matter which side each cushion is applied to.
HOW TO CUT THE EXTENSIONS
1. Carefully determine the required extension length by performing
a bike fit or measuring the existing extensions.
2. Mark the point at which you wish to make a cut.
3. We recommend checking your measurements after first marking
the cut line to ensure that you do not inadvertently cut the
extensions too short.
4. Mount the cutting guide securely in a vice. Then place the
extension in the guide and line up the marked cut line with the
slot in the cutting guide.
a. For aluminium an 18 tooth blade is recommended. Along with
eye protection.
5. Using the hacksaw, make firm strokes of the blade through the
guide, allowing the blade to do the work. Do not apply excessive
force to the hacksaw as you risk snapping the blade and the
possibility of injury.
6. Repeat the process for the other side of the extension
7. Once you have cut both sides of the extension, use the half
round file to remove any sharp edges from both the interior and
exterior faces of the extension.
RECOMMENDED ORIENTATION
PERMITTED ORIENTATION

Neosonic Bracket
1110
A
A
B
1. To fit the armrests first ensure the inner face of the armrest is free of lint and
grease, if the armrest has previously had a hook and loop sticker applied the
residue should first be removed either mechanically or with a citrus based solvent.
2. Before applying the hook and loop sticker, you may choose to wipe down the
surface with isopropyl alcohol to ensure good adhesion. Remove the backing from
the hook and loop sticker and apply it to the armrest, smoothing the sticker out to
ensure there are no air bubbles trapped under it.
3. Allow the sticker 24 hours to cure before use.
HOW TO INSTALL NEW ARMRESTS

Neosonic Bracket
12
ARMREST USAGE
Do not put force on the side of the armrests!
WARNING

Neosonic Bracket
1312
• Profile Design Worldwide Two Year Limited Warranty.
• Profile Design, LLC (distributor) warrants to the original retail purchaser ("you") that the Profile Design product for which you received
this warranty is free from defects in material and workmanship for (2) two years from the date of original retail purchase. For more
details on this warranty, its exclusions and/or how to make a claim under the warranty please call +1 310.747.0085 extension 161 or visit
www.profile-design.com/pages/warranty
WARNING

Neosonic Bracket
14
2677 El Presidio Street
Long Beach, CA 90810
Ph: 310-884-7756
w
ww.profile-design.com
© Profile Design LLC
/