
Quick Start Guide
Guide de démarrage rapide
Schnellstart-Handbuch
Guida di installazione rapida
Guía de instrucciones rápidas
Guia de uso rápido
Snel aan de slag
Snabbstartguide
Introduktion
Hurtigreferanse
Pikaopas
Gyors útmutató
Stručná příručka
Wprowadzenie
Краткое руководство по началу работы
Οδηγός γρήγορης εκκίνησης
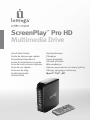
ScreenPlay
™
Pro HD
Multimedia Drive

2
Transferring Media Files to the ScreenPlay Pro HD
1. Use the included USB cable to connect the ScreenPlay Pro HD to a USB port on your computer.
2. Connect the power supply to the ScreenPlay Pro HD and an uninterruptible power supply (UPS) or power outlet.
3. Press the power button on the front of the ScreenPlay Pro HD to turn it on.
4. Copy and paste files to the ScreenPlay Pro HD just as you would with any other drive on your computer. See the
user’s manual for suggestions on organizing your multimedia files.
PC Users: Use My Computer or Windows Explorer to copy and paste files.
Mac Users: Since NTFS is read-only on Mac OS X, you will need to reformat the drive to MS-DOS (FAT) before
copying files to it. See the user’s manual if you need detailed instructions.
5. Use the safe removal procedure for your operating system to unmount the drive, then disconnect the
ScreenPlay Pro HD from your computer.
Playing Media Files on Your TV
1. Connect the ScreenPlay Pro HD to your TV. For best HD performance, use the HDMI cable to connect to an HDTV.
You can also connect the ScreenPlay Pro HD to a standard TV using the composite AV cable (yellow, red, and
white connectors) to connect video and RCA audio by matching the jack colors on the TV. See the user’s manual
for additional connection options (component video, coaxial audio).
2. Connect the power supply to the ScreenPlay Pro HD and an uninterruptible power supply (UPS) or power outlet.
3. Press the STANDBY key on the remote control or the power button on the front of the drive to activate the
ScreenPlay Pro HD for playback.
4. Turn on your TV and change the input setting as needed to receive input from the ScreenPlay Pro HD.
5. Wait for the ScreenPlay Pro HD menu to load, then select ScreenPlay Pro and press the ENTER key on the
remote control.
6. The ScreenPlay Pro menu will show folders and media files you have loaded to the ScreenPlay Pro HD. Use the
cursor keys on the remote control or front of the drive to navigate your folders and select and play your media
files. Refer to the user’s manual for more information on using the ScreenPlay Pro HD.
Viewing Media Files from Your Network
You can use the ScreenPlay Pro HD to play media files from your network on your TV. See the user’s manual for more
information on using the ScreenPlay Pro HD with your network.
1. Connect the ScreenPlay Pro HD to your TV as described in steps 1 through 4 in the previous section.
2. Connect the ScreenPlay Pro HD to your home network. Use an ethernet cable for a wired connection, or connect
a supported WiFi adapter to the host USB port on the back of the ScreenPlay Pro HD for use with a wireless
network. If you are using a wireless connection, refer to the HTML user’s manual for setup instructions.
NOTE: The package does not include either an ethernet cable or a WiFi adapter. Check the support area on
www.iomega.com for information on supported WiFi adapters.
3. From the ScreenPlay Pro HD HOME menu, select NETWORK and press the ENTER key.
4. The Network menu will show volumes available on your network. Use the cursor keys on the remote control or
front of the drive to browse to and select media files you want to play.
NOTE: If you need to enter a username and password to login to a network volume, press the ENTER key on the
remote control. This will bring up a virtual keyboard on the TV display. Use the remote control cursor keys and
the ENTER key to select the necessary characters.
Transferring Files to the ScreenPlay Pro HD via the Network
You can copy media files to the ScreenPlay Pro HD from a computer on your home network. This allows you to
transfer files to and from the ScreenPlay Pro HD while it’s connected to a TV.
1. Connect the ScreenPlay Pro HD to your TV and home network (see steps 1 and 2 in the previous section).
2. From the ScreenPlay Pro HD HOME menu, select Setup and press the ENTER key.
3. Select Network and press the ENTER key. The display will show the IP address assigned to the ScreenPlay Pro
HD on your network.
4. Connecting to the ScreenPlay Pro HD from a Windows PC
a. Using a computer on the network, right click on the My Computer icon and select Map Network Drive.
b. Select the drive letter you want to use for the ScreenPlay Pro HD, then enter the IP address for the
ScreenPlay Pro HD in the field next to Folder (for example, \\192.168.1.151).

3
c. You can now use My Computer or Windows Explorer to browse the ScreenPlay Pro HD and copy files from
your network volumes onto the ScreenPlay Pro HD.
Connecting to the ScreenPlay Pro HD from a Mac
a. Select Connect to Server from Finder’s Go menu.
b. Under Server Address, enter “smb://” followed by the IP address for the ScreenPlay Pro HD (for example,
smb://192.168.1.151).
c. Click Connect.
d. Select the shared folder to mount on your desktop.
Troubleshooting
TV screen rolls or does not display normally
• Press the NTSC/PAL button on the front of the ScreenPlay Pro HD drive to toggle the regional setting.
• Press the TV SYS key on the remote control repeatedly until the screen displays normally. This toggles the
video ouput setting on the ScreenPlay Pro HD as follows: NTSC
→
PAL
→
480p
→
576p
→
720p 50 Hz
→
720p 60 Hz
→
1080i 50 Hz
→
1080i 60 Hz.
ScreenPlay Pro HD does not respond to the remote control
• Make sure you are pointing the remote control directly at the receiver on the front of the drive.
• Make sure the ScreenPlay Pro HD is receiving power.
• Activate the ScreenPlay Pro HD by pressing the STANDBY key on the remote control or drive front.
• If you are using the remote control for the first time, pull out the tab on the side of the remote to enable battery
power.
• Check the orientation of the battery in the remote control. The “+” side of the battery should be up.
For additional troubleshooting help, see the user’s manual or visit the support area on www.iomega.com.
Complete User’s Manual
The Solutions CD includes a user’s manual in HTML format with additional information on installation, setup,
troubleshooting, and using the ScreenPlay Pro HD. The user’s manual may be updated from time to time. You can
download the latest version of the manual from the support area on www.iomega.com.
Transfert de fi chiers multimédia vers ScreenPlay Pro HD
1. Utilisez le câble USB inclus pour connecter le ScreenPlay Pro HD à un port USB de votre ordinateur.
2. Connectez l’alimentation au ScreenPlay Pro HD et à un onduleur (UPS) ou à une prise secteur.
3. Appuyez sur le bouton d’alimentation situé à l’avant du ScreenPlay Pro HD pour l’allumer.
4. Copiez et coller les fichiers vers le ScreenPlay Pro HD comme vous le feriez avec tout autre périphérique relié
à votre ordinateur. Consultez le guide de l’utilisateur pour obtenir des suggestions sur l’organisation de vos
fichiers multimédia.
Utilisateurs de PC : utilisez le Poste de travail ou l’Explorateur Windows pour copier et coller des fichiers.
Utilisateurs de Mac : le format NTFS étant en lecture seule sur Mac OS X, vous devez reformater le disque en
MS-DOS (FAT) avant d’y copier des fichiers. Consultez le guide de l’utilisateur pour obtenir des instructions
détaillées.
5. Utilisez la procédure de retrait sécurisé pour retirer le périphérique de votre système d’exploitation, puis
déconnectez le ScreenPlay Pro HD de votre ordinateur.
Lecture de fi chiers multimédia sur votre téléviseur
1. Connectez le ScreenPlay Pro HD à votre téléviseur. Pour obtenir de meilleures performances du disque dur,
utilisez le câble HDMI pour le connecter à HDTV. Vous pouvez également brancher le ScreenPlay Pro HD à un
téléviseur standard en utilisant un câble AV composite (connecteurs jaune, rouge et blanc) pour connecter le
câble vidéo et audio RCA en faisant correspondre les couleurs des prises sur le téléviseur. Consultez le guide
de l’utilisateur pour connaître les options de connexion supplémentaires (vidéo composant, audio coaxial).
2. Connectez l’alimentation au ScreenPlay Pro HD et à un onduleur (UPS) ou à une prise secteur.
3. Appuyez sur le bouton STANDBY de la télécommande ou sur le bouton d’alimentation à l’avant du disque pour
activer la lecture du ScreenPlay Pro HD.
4. Allumez le téléviseur et basculez sur le canal d’entrée approprié pour recevoir l’entrée du ScreenPlay Pro HD.
Page is loading ...
Page is loading ...
Page is loading ...
Page is loading ...
Page is loading ...
Page is loading ...
Page is loading ...
Page is loading ...
Page is loading ...
Page is loading ...

14
• Controleer of de batterij juist is geplaatst. De “+”-kant van de batterij moet naar boven zijn gericht.
Voor meer hulp bij het oplossen van problemen bekijkt u de gebruikershandleiding of gaat u naar het gedeelte voor
ondersteuning op www.iomega.com.
Volledige gebruikershandleiding
Op de cd Solutions vindt u een gebruikershandleiding in HTML-indeling met aanvullende informatie over
de installatie, instelling, gebruik en probleemoplossing met betrekking tot de ScreenPlay Pro HD. De
gebruikershandleiding wordt regelmatig bijgewerkt. U kunt de nieuwste versie van de handleiding downloaden in
het gedeelte voor ondersteuning op www.iomega.com.
Överföra mediafi ler till ScreenPlay Pro HD
1. Använd den medföljande USB-kabeln när du ska ansluta ScreenPlay Pro HD till en USB-port på datorn.
2. Koppla in strömförsörjningskabeln till ScreenPlay Pro HD och till en avbrottsfri spänningskälla (UPS) eller ett
vägguttag.
3. Slå på ScreenPlay Pro HD genom att trycka på strömknappen på baksidan.
4. Kopiera och klistra in filerna på ScreenPlay Pro HD, precis som du gör när du kopierar till en annan enhet på
datorn. I användarhandboken finns förslag på hur du kan organisera dina multimediafiler.
PC-användare: Använd Den här datorn eller Utforskaren när du ska kopiera och klistra in filer.
Mac-användare: Eftersom NTFS är skrivskyddad i Mac OS X måste du omformatera enheten till MS-DOS (FAT)
innan du kopierar filer till den. Mer information finns i användarmanualen..
5. Använd proceduren för säkert borttagning i operativsystemet när du tar bort enheten, koppla sedan från
ScreenPlay Pro HD från datorn.
Spela upp mediafi ler på TV:n
1. Anslut ScreenPlay Pro HD till TV:n. Använd HDMI-kabeln när du ansluter till en HDTV för att få bästa HD-
prestandan. Du kan även använda komposit AV-kabeln (gul, röd och vit) för att ansluta ScreenPlay Pro HD till
en standard-TV, anslut video och RCA audio genom att matcha färgerna på TV:ns uttag. I användarmanualen
finns information om ytterligare anslutningsalternativ (komponent, video, koaxial audio).
2. Koppla in strömförsörjningskabeln till ScreenPlay Pro HD och till en avbrottsfri spänningskälla (UPS) eller ett
vägguttag.
3. Tryck på STANDBY-knappen på fjärrkontrollen eller på strömbrytaren på enhetens framsida för att aktivera
ScreenPlay Pro HD för uppspelning.
4. Slå på TV:n och välj rätt inkanal för ScreenPlay Pro HD.
5. Vänta tills ScreenPlay Pro HD-menyn har öppnats, välj ScreenPlay Pro och tryck sedan på ENTER-knappen på
fjärrkontrollen.
6. ScreenPlay Pro-menyn visar mappar och mediafiler som du har laddat till ScreenPlay Pro HD. Använd
pilknapparna på fjärrkontrollen eller på framsidan av enheten för att välja mappar och spela upp mediafiler.
Om du vill kan du använda filtren i menyn tillvänster för att endast visa valda typer av mediafiler. (Alla mappar
visas fortfarande.) I användarmanualen finns mer information om hur du använder ScreenPlay Pro HD.
Visa mediafi ler från nätverket
Du kan använda ScreenPlay Pro HD när du ska spela upp mediafiler från nätverket på TV:n. I användarmanualen
finns mer information om hur du använder ScreenPlay Pro HD tillsammans med nätverket.
1. Anslut ScreenPlay Pro HD till TV:n enligt beskrivningen i steg 1 till 4 i det föregående avsnittet.
2. Anslut ScreenPlay Pro HD till ditt nätverk. Använd en Ethernet-kabel för kabelanslutning eller anslut en
WiFi-adapter (som stöds) till värd-USB-porten på baksidan av ScreenPlay Pro HD för att använda den med
ett trådlöst nätverk. Om du använder en trådlös anslutning ska du läsa installationsanvisningarna i HTML-
bruksanvisningen.
OBS! Paketet innehåller varken Ethernet-kabel eller WiFi-adapter. Läs supportsidorna på www.iomega.com för
information om WiFi-adaptrar som stöds.
3. I ScreenPlay Pro HD HOME-menyn väljer du NETWORK (NÄTVERK) och trycker sedan på ENTER-knappen.
4. Nätverksmenyn visar vilka volymer som är tillgängliga i nätverket. Använd pilknapparna på fjärrkontrollen eller
på framsidan av enheten för att välja de mediafiler du vill spela upp.
OBS! Om du måste ange användarnamn och lösenord för att logga in på en nätverksvolym trycker du på
Page is loading ...
Page is loading ...
Page is loading ...
Page is loading ...
Page is loading ...
Page is loading ...
Page is loading ...
Page is loading ...
Page is loading ...
Page is loading ...
Page is loading ...
Page is loading ...
Page is loading ...
Page is loading ...

29
τα πλήκτρα του δείκτη στο τηλεχειριστήριο ή στο μπροστινό μέρος της συσκευής για να αναζητήσετε και να
επιλέξετε τα αρχεία πολυμέσων που θέλετε να αναπαράγετε.
ΣΗΜΕΙΩΣΗ: Εάν χρειάζεται να εισαγάγετε όνομα χρήστη και κωδικό πρόσβασης για να συνδεθείτε σε
έναν τόμο δικτύου, πατήστε το κουμπί ENTER στο τηλεχειριστήριο. Στην οθόνη θα εμφανιστεί ένα εικονικό
πληκτρολόγιο. Χρησιμοποιήστε τα πλήκτρα του δείκτη στο τηλεχειριστήριο και το κουμπί ENTER για να
επιλέξετε τους απαραίτητους χαρακτήρες.
Μεταφορά αρχείων στο ScreenPlay Pro HD μέσω δικτύου
Μπορείτε να αντιγράψετε αρχεία πολυμέσων στο ScreenPlay Pro HD από έναν υπολογιστή στο οικιακό σας δίκτυο.
Αυτό σας επιτρέπει να μεταφέρετε αρχεία από και προς το ScreenPlay Pro HD, ενώ είναι συνδεδεμένο με την
τηλεόραση.
1. Συνδέστε το ScreenPlay Pro HD στην τηλεόραση και στο οικιακό σας δίκτυο (δείτε βήματα 1 έως 2 στην
προηγούμενη ενότητα).
2. Από το μενού του ScreenPlay Pro HD HOME, επιλέξτε Setup (Ρυθμίσεις) και πατήστε το κουμπί ENTER.
3. Επιλέξτε Network (Δίκτυο) και πατήστε το κουμπί ENTER. Στην οθόνη θα εμφανιστεί η διεύθυνση IP που
αντιστοιχεί στο ScreenPlay Pro HD στο δίκτυό σας.
4. Σύνδεση στο ScreenPlay Pro HD από ένα Windows PC
a. Χρησιμοποιώντας έναν υπολογιστή στο δίκτυο, κάντε δεξί κλικ στο εικονίδιο Ο Υπολογιστής Μου και
επιλέξτε Map Network Drive (Αντιστοίχιση Δίσκου Δικτύου).
b. Επιλέξτε το γράμμα μονάδας δίσκου που θέλετε να χρησιμοποιήσετε για το ScreenPlay Pro HD και, στη
συνέχεια, εισαγάγετε τη διεύθυνση IP για το ScreenPlay Pro HD στο πεδίο δίπλα στο Folder (Φάκελος)
(π.χ., \\192.168.1.151).
c. Τώρα μπορείτε να χρησιμοποιήσετε τα εικονίδια Ο Υπολογιστής Μου και Εξερεύνηση των Windows για
να περιηγηθείτε στο ScreenPlay Pro HD και να αντιγράψετε αρχεία από τους τόμους δικτύου σας στο
ScreenPlay Pro HD.
Σύνδεση στο ScreenPlay Pro HD από Mac
a. Επιλέξτε Σύνδεση με Διακομιστή από το μενού Go του Ανιχνευτή.
b. Στο πλαίσιο Διεύθυνση Διακομιστή, πληκτρολογήστε “smb://” και, στη συνέχεια, τη διεύθυνση IP για το
ScreenPlay Pro HD (π.χ., smb://192.168.1.151).
c. Κάντε κλικ στο Σύνδεση.
d. Επιλέξτε τον κοινόχρηστο φάκελο για να τον προσαρτήσετε στην επιφάνεια εργασίας σας.
Αντιμετώπιση προβλημάτων
Η οθόνη της τηλεόρασης εμφανίζει παράσιτα και δεν προβάλλει κανονική εικόνα
• Πατήστε το κουμπί NTSC/PAL στο μπροστινό μέρος του ScreenPlay Pro HD για αλλαγή της τοπικής ρύθμισης.
• Πατήστε κατ’ επανάληψη το κουμπί TV SYS στο τηλεχειριστήριο, μέχρι να αποκατασταθεί η εικόνα της οθόνης.
Με αυτήν την ενέργεια, πραγματοποιείται αλλαγή της ρύθμισης εξόδου βίντεο στο ScreenPlay Pro HD ως εξής:
NTSC
→
PAL
→
480p
→
576p
→
720p 50 Hz
→
720p 60 Hz
→
1080i 50 Hz
→
1080i 60 Hz.
Το ScreenPlay Pro HD δεν ανταποκρίνεται στο τηλεχειριστήριο
• Βεβαιωθείτε ότι το τηλεχειριστήριο είναι στραμμένο απευθείας στο δέκτη στο μπροστινό μέρος της συσκευής.
• Βεβαιωθείτε πως το ScreenPlay Pro HD τροφοδοτείται με ρεύμα.
• Ενεργοποιήστε το ScreenPlay Pro HD πατώντας το κουμπί STANDBY στο τηλεχειριστήριο ή στο μπροστινό μέρος
της συσκευής.
• Εάν χρησιμοποιείτε το τηλεχειριστήριο για πρώτη φορά, τραβήξτε τη γλωττίδα που βρίσκεται στο πλάι του
τηλεχειριστηρίου για να επιτραπεί η παροχή ισχύος από τη μπαταρία.
• Ελέγξτε την κατεύθυνση της μπαταρίας στο τηλεχειριστήριο. Η πλευρά “+” της μπαταρίας πρέπει είναι προς τα
επάνω.
Για περαιτέρω βοήθεια σχετικά με την αντιμετώπιση προβλημάτων, ανατρέξτε στο εγχειρίδιο χρήσης ή
επισκεφθείτε την ενότητα υποστήριξης στην ιστοσελίδα www.iomega.com.
Πλήρες εγχειρίδιο χρήσης
Το Solutions CD περιλαμβάνει ένα εγχειρίδιο χρήσης σε μορφή HTML, με συμπληρωματικές πληροφορίες
σχετικά με την εγκατάσταση, τη ρύθμιση, την αντιμετώπιση προβλημάτων και τη χρήση του ScreenPlay Pro HD.
Το εγχειρίδιο χρήσης ενδέχεται να ενημερώνεται κατά διαστήματα. Μπορείτε να λάβετε μέσω δικτύου την πιο
πρόσφατη έκδοση, από την ενότητα υποστήριξης στην ιστοσελίδα www.iomega.com.

30
$3d./ZecScreenPlayProHDHOMEC6?NETWORK/6Xd`laSNULb7ENTER
%3d./Zk[6ENetworkCG-d`;o5/XcA@6E\13J/@`3^2H`laSk9kd`enD@6`A<CT1
/jaoUH5Cd`N./Ek`/Xac/o6?;XK6`/j:`3j9laSAT1eSb^=6`A<k1k9kd`
A<A<l`k?A`_o:F6`Cc3da]A@6FcbE/?l`39/<mW4g]3R<tc
/6Xd`laSNUL3^2H`enD@5
ENTER;o5/Xc3<k`/HflaSBi_dToEAT1eSb^=6`A<k1
/6Xd`AT1eSb^=6`A<k1k9kd`CG-d`;o5/XcA@6EknDXoa6`3G/GlaS3o[o[<
ENTER
3ct`C=`/o6?s
/j9l`/Xac_[fScreenPlayProHD3^2H`C2S
/j9l`N./E/Xac>Ff\g^dnScreenPlayProHDBi\13J/@`3oa=d`3^2H`laSC5ko2d]/j9ec
/j9ecl`/Xac_[g1\`;dFn
ScreenPlayProHDknDXoa5/j:1haoJk5/g7
"/j9_oJk61bZScreenPlayProHDkP@`CRf3oa=d`3^2H`knDXoa6`/j:1kP@`mW
Y1/F`bF[`
#3d./ZecScreenPlayProHDHOMEC6?Setup/6Xd`laSNULb7ENTER
$C6?Network/6Xd`laSNULb7ENTERkgS3G/H`CT6EIP/j:`IK@d`ScreenPlayProHD
\13J/@`3^2H`laS
%/j9_oJk5ScreenPlayProHD_oUH6`/Rg1_dTnC5ko2d]/j:1Windows
DckWednq/d`D1C[f3^2H`edLk9kcC5ko2d]/j9A@6EAgS MyComputer
C6?b7C5ko2d^`/j9
MapNetworkDrive/K5s3^2GCZC=ceooT5
/j:`hcA@6EAnC5 B`CZqC=cC<C6?
ScreenPlayProHDk]k5C1kgS_?b7
4fC6fr
IP/j:1/@`ScreenPlayProHDk:1k9kd`_[=`mWFolder_8cAa:c
A@6Ep\g^dn 9
MyComputerC5ko2d^`/j9WindowsExplorerVH^6FcWindows;XK6`
/j9
ScreenPlayProHD/j9mW/j[K`3^2H`enD@5A<ec/Xac>FfScreenPlayProHD
/j9_oJk5
ScreenPlayProHDk6g]/c/j:1
C6?
ConnecttoServer3d./[`ecGo13J/@`Finder
mW
ServerAddress_?smb4fC6frk]k5C1kgS_?b7IP/j:1/@`ScreenPlay
ProHD_8csmb
kWC[f 9
Connect
06^d`;PElaS/jQrC6Hd`Aa:d`C6?
/j<tJ/P?q/H^6E
3oTo2O3[nCP1CT`ASknDXoa6`3G/H`kd5A<
D`laSNULNTSCPAL/j93j9laSk9kd`ScreenPlayProHDmdoaZrN2M`_nA26`
/6Xd`laSC^6c_^H1NULTVSYSmTo2O_^H13G/H`CjR5l`AT1eSb^=6`A<k1
/j9laSknAoX`C?N2L_nA25laS_dTnBi
ScreenPlayProHDman/d]
IHZIHZpHZpHZPPPALNTSC
/j931/:6EASScreenPlayProHDAT1eSb^=6`A<k`
/j:`3j9laSk9kd`/2[6Es/j9l`CG/2cAT1eSb^=6`A<ho9k5ecA],5
/j9l`3Z/P`kJecA],5ScreenPlayProHD
/j9NoHg61bZScreenPlayProHD/6Xd`laSNUM`/1STANDBYAT1eSb^=6`A<k1k9kd`
/j:`3j9laS
eSb^=6`A<0f/9laSk9kd`NnCH`0=E/WCcqAT1eSb^=6`A<A@6F54g]
3n/P2`ec3Z/P`AnD5eo^d6`AT1
laSq/!j:6c3n/P2`0f/9k^nmU2gnAT1eSb^=6`A<mW3n/P2`/:5I=W/5
Page is loading ...

32
Limited Warranty • Garantie Limitée
Eingeschränkte Garantie • Garanzia limitata
Garantía limitada • Garantia limitada • Beperkte garantie
Ограниченная гарантия
Iomega warrants this hardware product to be free from defects in materials and workmanship for the warranty period. This non-transferable,
limited warranty is only to you, the first end-user purchaser. The warranty begins on the date of purchase and lasts for a period of one (1)
year for product purchased in the Americas or the Asia-Pacific region; ninety (90) days for Iomega reconditioned products purchased in these
regions; or, two (2) years for product purchased by an end-user in Europe, the Middle East, or Africa.
This warranty does not apply to: (a) Iomega software products; (b) expendable components such as fuses or bulbs; or (c) third party products,
hardware or software, supplied with the warranted product. Iomega makes no warranty of any kind on such products which, if included, are
provided “AS IS.” This warranty also excludes damage caused by accident, misuse, abuse, use of non-Iomega approved media, exposure of
media to excessive magnetic fields, or external environmental causes.
Your sole and exclusive remedy for a covered defect is repair or replacement of the defective product, at Iomega’s sole option and expense
(shipping may be charged), and Iomega may use new or refurbished parts or products to do so. The replaced part/product will be warranted for
the remainder of the original warranty or three (3) months from the date of shipment of such parts/products, whichever is longer. If Iomega is
unable to repair or replace a defective product, your alternate exclusive remedy shall be a refund of the original purchase price.
The above is Iomega’s entire obligation to you under this warranty. IN NO EVENT SHALL IOMEGA BE LIABLE FOR INDIRECT, INCIDENTAL,
CONSEQUENTIAL OR SPECIAL DAMAGES OR LOSSES, INCLUDING LOSS OF DATA, USE, OR PROFITS EVEN IF IOMEGA HAS BEEN ADVISED OF THE
POSSIBILITY OF SUCH DAMAGES. In no event shall Iomega’s liability exceed the original purchase price of the drive or the media disk. Some
jurisdictions do not allow the exclusion or limitation of incidental or consequential damages, so the above limitation or exclusion may not apply
to you.
Obtaining Warranty Service
You must notify Iomega within the warranty period to receive warranty service. Just as technology and market conditions vary, Iomega’s specific
customer support policies (including fees for services) and procedures change over time. To obtain information about Iomega’s current policies
or warranty service, please visit our website at www.iomega.com/supportpolicy.html or write to: Iomega Customer Service, 4059 South 1900
West, Roy, UT 84067. Contact Information for Iomega Customer Service in Europe can be obtained on our Support website at www.iomega.
com/europe/support. If your product is eligible for warranty service, you will be required to return it to Iomega, along with proper identification,
a return authorization number obtained from the Iomega website or provided by the Iomega representative, and proof of purchase. Iomega will
not protect, recover, or return data during warranty service so you should duplicate your data before shipment.
Limitations
THE ABOVE WARRANTY IS EXCLUSIVE AND IN LIEU OF ALL OTHER WARRANTIES, EXPRESS OR IMPLIED. To the extent permitted by applicable
law, IOMEGA SPECIFICALLY DISCLAIMS ANY IMPLIED WARRANTIES, INCLUDING ANY IMPLIED WARRANTY OF MERCHANTABILITY OR FITNESS FOR
A PARTICULAR PURPOSE. Any implied warranty required by applicable law shall be limited in duration to the express warranty term. Some
jurisdictions do not allow disclaimers of implied warranties or limitations on how long an implied warranty lasts, so the above limitation may not
apply to you. This warranty gives you specific legal rights and you may also have other rights that vary from jurisdiction to jurisdiction. Any suit
for breach of any warranty on your Product must be filed within one (1) year of the first date the suit could have been brought.
Iomega garantit que ce produit est exempt de tout vice de fabrication ou de malfaçon pendant toute la période de garantie. Cette garantie
limitée n’est pas transférable et ne s’applique qu’à l’utilisateur final. La garantie est effective à partir de la date d’achat et reste ensuite valable
pendant une période de un (1) an à compter de cette même date sur le continent américain ou dans la région Asie-Pacifique, quatre-vingt dix
(90) jours pour les produits remis en état achetés dans les régions précédemment citées ou deux (2) ans dans le cadre d’un achat effectué par
un utilisateur final en Europe, au Moyen-Orient ou en Afrique.
Cette garantie ne s’applique pas : (a) aux produits logiciels Iomega, (b) aux composants consommables comme les fusibles ou les ampoules
ou (c) aux produits tiers, matériel ou logiciel, fournis avec le produit sous garantie. Iomega ne garantit en aucun cas ces produits qui, si inclus,
sont fournis “EN L’ETAT”. Sont exclus les dommages causés par un accident, une mauvaise utilisation, un usage abusif, l’utilisation de supports
non fournis ou non approuvés par Iomega, une exposition excessive des supports à un champ magnétique ou tout autre cause externe d’origine
naturelle.
Votre seul et unique recours en cas de défaut reconnu est la réparation ou le remplacement du produit défectueux, aux frais et à la discrétion
de Iomega (l’expédition pourra vous être facturée). Iomega se réserve le droit d’utiliser des pièces ou produits neufs ou remis en état pour
procéder à la réparation. L’élément/produit remplacé sera garanti pendant le reste de la garantie d’origine ou, au maximum, trois (3) mois à
dater de l’expédition desdits éléments/produits. S’il s’avère que Iomega est dans l’impossibilité de réparer ou remplacer un produit défectueux,
votre seul recours sera le remboursement du prix d’achat initial. L’obligation de garantie de Iomega envers vous se limite aux éléments cités
précédemment. EN AUCUN CAS IOMEGA NE POURRA ETRE TENUE POUR RESPONSABLE DES DOMMAGES OU PERTES INDIRECTS, ACCESSOIRES
OU SPECIAUX, Y COMPRIS LA PERTE DE DONNEES, DE L’IMPOSSIBILITE D’UTILISATION OU DE PROFIT ET CE MEME SI IOMEGA A ETE AVERTIE DE
L’EVENTUALITE DE TELS DOMMAGES. En aucun cas la responsabilité de Iomega ne pourra s’étendre au-delà du prix d’achat initial de l’appareil
ou du support. Certaines juridictions ne reconnaissent pas l’exclusion ou la limitation des dommages accessoires ou indirects. De ce fait, les
limitations ou les exclusions énoncées ci-dessus peuvent ne pas être applicables dans votre cas.
Obtention d’un service de garantie
Pour bénéficier des services sous garantie, vous devez en avertir Iomega pendant la période de garantie. A l’image des technologies et des
conditions du marché, les procédures et les politiques d’Iomega en matière d’assistance clientèle (notamment la tarification des services)
sont susceptibles de varier dans le temps. Afin d’obtenir des informations pertinentes sur les politiques actuelles ou sur le service de garantie
Page is loading ...
Page is loading ...
Page is loading ...
Page is loading ...

37
Manufacturer/Responsible Party
Iomega Corporation
4059 South 1900 West
Roy, UT 84067 USA
CE (European Community)
This Iomega product conforms to the following European Directive(s)and Standard(s): Application of Council Directive: 2004/108/EC. Standards
to which Conformity is declared: EN55022, EN55024, EN61000-3-2, EN61000-3-3. Importer’s Name: Iomega International, S.A. Type of
Equipment: Information Technology Equipment.
Waste Electrical and Electronic Equipment (WEEE)
In accordance with European Directive 2002/96/EC on Waste Electrical and Electronic Equipment (WEEE), the presence of the above symbol on
the product or on its packaging indicates that this item must not be disposed of in the normal unsorted municipal waste stream. Instead, it is
the user’s responsibility to dispose of this product by returning it to a collection point designated for the recycling of electrical and electronic
equipment waste. Separate collection of this waste helps to optimize the recovery and recycling of any reclaimable materials and also reduces
the impact on human health and the environment.
For more information concerning the correct disposal of this product, please contact your local authority or the retailer where this product was
purchased.
FCC
This equipment complies with Part 15 of the FCC Rules. Operation is subject to the
following conditions: (1) This device may not cause harmful interference, and (2) this
device must accept any interference received, including interference that may cause
undesired operation.
NOTE: This equipment has been tested and found to comply with the limits for a Class
B digital device, pursuant to part 15 of the FCC Rules. These limits are designed to provide reasonable protection against harmful interference
in a residential installation. This equipment generates, uses and can radiate radio frequency energy and, if not installed and used in accordance
with the instructions, may cause harmful interference to radio communications. However, there is no guarantee that interference will not occur in
a particular installation. If this equipment does cause harmful interference to radio or television reception, which can be determined by turning
the equipment off and on, the user is encouraged to try to correct the interference by one of more or the following measures:
• Reorient or relocate the receiving antenna.
• Increase the separation between the equipment and receiver.
• Connect the equipment into an outlet on a circuit different from that to which the receiver is connected.
• Consult the dealer or an experienced radio/TV technician for help.
For USA – California Only
This product contains a CR Coin Cell Lithium Battery which contains Perchlorate material – special handling may
apply. See www.dtsc.ca.gov/hazardouswaste/perchlorate.
Canadian Verifi cation
This Class B digital apparatus meets all requirements of the Canadian Interference-Causing Equipment Regulations (ICES-003, Class B).
Regulatory Information • Informations relatives à la réglementation
Gesetzliche Bestimmungen • Informazioni sulle regolamentazioni
Información reglamentaria • Informações regulamentares
Regulatieve informatie • Сведения о нормативных требованиях
Page is loading ...

39
CE (Comunidade Européia)
Este produto da Iomega está em conformidade com as Seguintes diretivas e padrões europeus: Aplicação da Directiva do Conselho:
2004/108/EC. Padrões em relação aos quais a conformidade foi declarada: EN55022, EN55024, EN61000-3-2, EN61000-3-3. Nome do
importador: Iomega International, S.A. Tipo de equipamento: Equipamento de tecnologia da informação.
CE (Europese Gemeenschap)
Dit Iomega-product voldoet aan de volgende Europese Richtlijn(en) en Norm(en): Toepassing van Richtlijn: 2004/108/EC van de Europese
Commissie. Normen waarmee de conformiteit wordt verklaard: EN55022, EN55024, EN61000-3-2, EN61000-3-3 en EN60825-1. Naam van
importeur: Iomega International, S.A. Type apparatuur: Informatietechnologie-apparatuur.
Afgedankte elektrische en elektronische apparatuur (WEEE)
In overeenstemming met de Europese richtlijn 2002/96/EG betreffende afgedankte elektrische en elektronische apparatuur (AEEA) geeft
de vermelding van het hierboven vermelde symbool op het product of de verpakking aan dat dit artikel niet in de normale, niet-gesorteerde
stedelijke afvalstroom mag worden verwerkt. In plaats daarvan ligt de verantwoordelijkheid van de afvoer van dit product bij de gebruiker,
die het dient aan te bieden bij een inzamelpunt voor de recyclage van afgedankte elektrische en elektronische apparatuur. De gescheiden
inzameling van dit afval helpt de eventuele te recupereren materialen terug te winnen of te recycleren en vermindert de impact ervan op het
milieu en de gezondheid van de mens.
Voor meer informatie betreffende de juiste afvoermethode voor dit product, neemt u contact op met de plaatselijke overheid of de winkelier bij
wie dit product is gekocht.
CE (Европейский Союз)
Данная продукция компании Iomega соответствует следующим директивам и стандартам Европейского
Союза: Директивы ЕС: 2004/108/EC. Стандарты, требованиям которых отвечает устройство: EN55022, EN55024,
EN61000-3-2, EN61000-3-3. Название поставщика: Iomega International, S.A. Тип оборудования: оборудование
для информационных технологий.
Утилизация электронного и электротехнического оборудования (WEEE)
В соответствии с директивой 2002/96/EC в отношении утилизации электронного и электротехнического
оборудования (WEEE), наличие вышеупомянутого значка на оборудовании или на его упаковке указывает
на то, что устройство должно утилизироваться специальных образом. Потребитель несет ответственность
за утилизацию данного устройства путем его доставки на сборный пункт, предназначенный для приемки
электронного и электротехнического оборудования на переработку. Отдельный сбор таких отходов помогает
оптимизировать их переработку и уменьшить вредное влияние на здоровье человека и окружающую среду.
Дополнительные сведения в отношении правильной утилизации данного устройства могут быть получены у
продавца устройства или у уполномоченного представителя компании-производителя.

Copyright © 2009 Iomega Corporation. All rights reserved. Iomega, the stylized “i” logo, and ScreenPlay are either registered trademarks or
trademarks of Iomega Corporation in the United States and/or other countries. Microsoft and Windows are either registered trademarks or
trademarks of Microsoft Corporation in the United States and/or other countries. Certain other product names, brand names, and company
names may be trademarks or designations of their respective owners.
31796902 1/23/09 b
English
If you have a problem, we can help. Please do NOT return this product to the store!
Your answer is on the web. Visit our award-winning web support site www.iomega.com.
Select your region, then select Support.
Français
Si vous avez un problème, nous pouvons vous aider. NE RENVOYEZ PAS ce produit au magasin !
Votre réponse est sur le Web. Site Web d’assistance primé www.iomega.com.
Sélectionnez votre région puis Support.
Deutsch
Wenn Sie ein Problem haben, können wir Ihnen helfen.
Bringen Sie dieses Produkt NICHT zu Ihrem Händler zurück!
Ihre Antwort steht im Netz. Preisgekrönte Support-Website www.iomega.com.
Wählen Sie Ihr Gebiet aus und klicken Sie auf Support.
Italiano
In caso di problemi, noi possiamo fornire assistenza. NON restituire questo prodotto al rivenditore!
La risposta è sul Web. Sito di supporto sul Web premiato www.iomega.com.
Selezionare la propria regione, quindi scegliere Assistenza.
Español
Si tiene algún problema, podemos ayudar. ¡Por favor, NO devuelva este producto a la tienda!
Su respuesta está en la web. Destacado sitio Web de atención al cliente www.iomega.com.
Elija su región y luego seleccione Suporte.
Português
Se você tiver um problema, nós podemos ajudar. NÃO devolva esse produto à loja!
A resposta para você está na web. Site da web vencedor de prêmios www.iomega.com.
Selecione a sua região e Suporte.
Русский
Возникли проблемы – обращайтесь за помощью. НЕ возвращайте этот продукт в магазин!
Решение можно найти в сети Интернет. Посетите наш отмеченный наградами веб-сайт службы
поддержки по адресу www.iomega.com/support.
-
 1
1
-
 2
2
-
 3
3
-
 4
4
-
 5
5
-
 6
6
-
 7
7
-
 8
8
-
 9
9
-
 10
10
-
 11
11
-
 12
12
-
 13
13
-
 14
14
-
 15
15
-
 16
16
-
 17
17
-
 18
18
-
 19
19
-
 20
20
-
 21
21
-
 22
22
-
 23
23
-
 24
24
-
 25
25
-
 26
26
-
 27
27
-
 28
28
-
 29
29
-
 30
30
-
 31
31
-
 32
32
-
 33
33
-
 34
34
-
 35
35
-
 36
36
-
 37
37
-
 38
38
-
 39
39
-
 40
40


Iomega ScreenPlay Pro HD Multimedia Drive Owner's manual
- Type
- Owner's manual
- This manual is also suitable for
Ask a question and I''ll find the answer in the document
Finding information in a document is now easier with AI
in other languages
- italiano: Iomega ScreenPlay Pro HD Multimedia Drive Manuale del proprietario
- français: Iomega ScreenPlay Pro HD Multimedia Drive Le manuel du propriétaire
- español: Iomega ScreenPlay Pro HD Multimedia Drive El manual del propietario
- Deutsch: Iomega ScreenPlay Pro HD Multimedia Drive Bedienungsanleitung
- русский: Iomega ScreenPlay Pro HD Multimedia Drive Инструкция по применению
- Nederlands: Iomega ScreenPlay Pro HD Multimedia Drive de handleiding
- português: Iomega ScreenPlay Pro HD Multimedia Drive Manual do proprietário
- dansk: Iomega ScreenPlay Pro HD Multimedia Drive Brugervejledning
- polski: Iomega ScreenPlay Pro HD Multimedia Drive Instrukcja obsługi
- čeština: Iomega ScreenPlay Pro HD Multimedia Drive Návod k obsluze
- svenska: Iomega ScreenPlay Pro HD Multimedia Drive Bruksanvisning
- suomi: Iomega ScreenPlay Pro HD Multimedia Drive Omistajan opas
Related papers
-
Iomega 35029 Quick start guide
-
-
-
Iomega ScreenPlay MX2 Quick start guide
-
-
-
-
-
-
Other documents
-
Infocus X17 Owner's manual
-
Infocus ScreenPlay 4800 User manual
-
JVC GY-DV5000U User manual
-
Philips PPX3417W/US User manual
-
Extreme Networks 16202 Datasheet
-
-
-
-
-