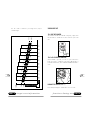
Vision Fitness VF-III The Vision Fitness VF-III is a heart rate monitor that can be used with almost any aerobic activity to help you achieve your fitness goals. It is a useful tool for monitoring the intensity of your workouts by displaying your heart rate. Below are some of the features and possible use cases of the Vision Fitness VF-III:
-
ECG accurate heart rate monitoring: The VF-III uses ECG technology to provide accurate heart rate readings. This information can be used to track your progress over time and ensure that you are working out at the correct intensity.
-
Target heart rate zone: The VF-III allows you to set a target heart rate zone, which is a range of heart rates that you want to stay within during your workout. This can help you to stay motivated and focused on your goals.


-
 1
1
-
 2
2
-
 3
3
-
 4
4
-
 5
5
-
 6
6
-
 7
7
-
 8
8
-
 9
9
-
 10
10
-
 11
11
-
 12
12
-
 13
13
-
 14
14
-
 15
15
-
 16
16
-
 17
17
-
 18
18
-
 19
19


Vision Fitness VF-I Owner's manual
- Type
- Owner's manual
Vision Fitness VF-III The Vision Fitness VF-III is a heart rate monitor that can be used with almost any aerobic activity to help you achieve your fitness goals. It is a useful tool for monitoring the intensity of your workouts by displaying your heart rate. Below are some of the features and possible use cases of the Vision Fitness VF-III:
-
ECG accurate heart rate monitoring: The VF-III uses ECG technology to provide accurate heart rate readings. This information can be used to track your progress over time and ensure that you are working out at the correct intensity.
-
Target heart rate zone: The VF-III allows you to set a target heart rate zone, which is a range of heart rates that you want to stay within during your workout. This can help you to stay motivated and focused on your goals.
Ask a question and I''ll find the answer in the document
Finding information in a document is now easier with AI
Other documents
-
Acumen EON-2027HS User manual
-
Polar Electro SmartEdge User manual
-
-
Vetta HR440 User manual
-
-
-
-
Polar M31 User manual
-
-