left
1:11 PM
11.13.17
continue
Position cleaning tube
under dispense tips.
Press continue
right
care & cleaning
stop
left
1:11 PM
11.13.17
continue
Press continue
right
care & cleaning
stop
Empty pitcher.
Wipe interior of fridge.
Wipe the milk tubes with
a clean cloth slightly
damp with sanitizer.
left
1:11 PM
11.13.17
continue
Position cleaning tube
under dispense tips.
Time to next step: 5:16
Prime milk?
Yes or No
Only use fresh milk.
Press continue
right
care & cleaning
stop
left
1:11 PM
11.13.17
continue
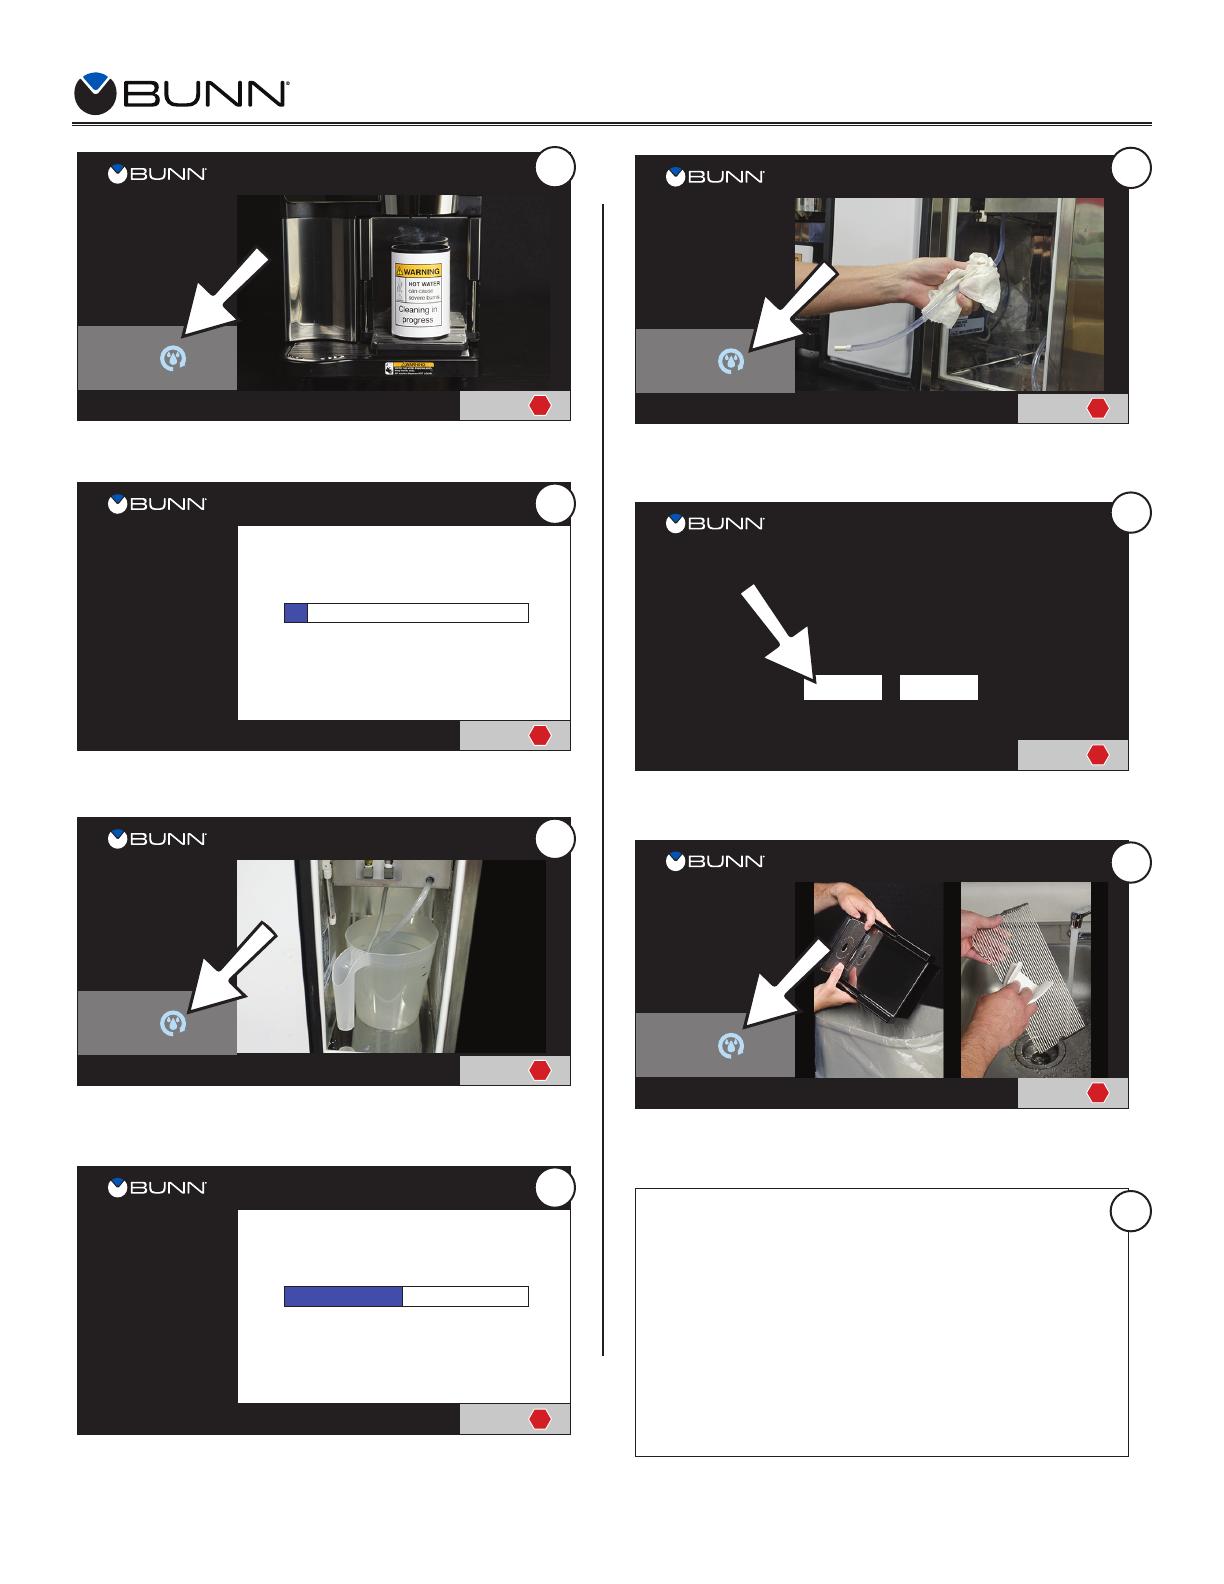
Empty and clean
the puck bin.
Wash the drip tray grate.
Clean drip tray
with a damp cloth.
Reinstall puck bin and
drip tray grate.
Press continue
right
care & cleaning
stop
stop
Screen deactivated
Wipe with a clean, slightly damp cloth
11
left
1:11 PM
11.13.17
continue
Position cleaning tube
under dispense tips.
Time to next step: 2:59
Milk and coee system
cleaning in process.
Press continue
right
care & cleaning
stop
left
1:11 PM
11.13.17
continue
Empty and rinse pitcher.
Add 64 oz (2 L) minimum
185
o
F (85
o
C ) water.
Reinsert tubes.
Place pitcher into fridge.
Press continue
right
care & cleaning
stop
left
1:11 PM
11.13.17
continue
Position cleaning tube
under dispense tips.
Time to next step: 5:16
Milk and coee system
cleaning in process.
Press continue
right
care & cleaning
stop
Page 2
Position cleaning tube under dispense tips.
Then press the “continue” button.
Wait approximately 3 minutes for the milk and coffee system cleaning
process to complete.
Empty and rinse pitcher. Add 64 oz. (2L) minimum 185° F (85° C)
water. Reinsert tubes. Place pitcher into the fridge. Then press the
“continue” button.
Wait approximately 5 minutes for the milk and coffee system cleaning
process to complete.
Empty pitcher. Wipe interior of fridge. Wipe the milk tubes with a clean
cloth slightly damp with sanitizer. Then press the “continue” button.
Do you want to prime milk? Then press “yes” or “no” button to continue
the process.
Empty and clean the puck bin. Wash the drip tray grate. Clean drip tray
with a damp cloth. Reinstall puck bin and drip tray grate. Then press
“continue” button.
Screen will be deactivated for 15 seconds. Wipe with a clean, slightly
damp cloth.
8
9
10
11
Sure Tamp Cleaning Instructions
54801 011018
12
13
14
15
YES NO

