Jack Mount Kit, TimeCutter Riding Mower

Toro Jack Mount Kit, TimeCutter Riding Mower Installation guide

  • Hello! I am an AI chatbot trained to assist you with the Toro Jack Mount Kit, TimeCutter Riding Mower Installation guide. I’ve already reviewed the document and can help you find the information you need or explain it in simple terms. Just ask your questions, and providing more details will help me assist you more effectively!
  • Where do I find safety decals and instructions on the Toro Jack Mount Kit?
    How do I prepare my gas-powered Toro TimeCutter Riding Mower for jack mount installation?
    How do I prepare my electric-powered Toro TimeCutter Riding Mower for jack mount installation?
    How do I install the jack mount on my Toro TimeCutter Riding Mower?
    What safety precautions should I take when using the jack mount?
Form No. 3465-943 Rev A
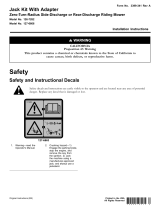
Jack Mount Kit
T imeCutter
®
Riding Mower
Model No. 147-8836
Installation Instructions
Safety
Safety and Instructional
Decals
Safety decals and instructions are
easily visible to the operator and are
located near any area of potential
danger . Replace any decal that is
damaged or missing.
decal127-6663
127-6663
1. W arning—read the
Operator's Manual .
2. Crushing hazard—engage
the parking brake, shut of f
the engine, and remove
the key; support the
machine using jackstands.
Installation
Determine the left and right sides of the machine from
the normal operating position.
Preparing the Machine
Gas Models Only
1. Park the machine on a level surface.
2. Disengage the blade-control switch.
3. Move the motion-control levers outward to the
PARK position.
4. Shut of f the machine and remove the key .
5. W ait for all moving parts to stop.
Electric Models Only
1. Park the machine on a level surface.
2. Disengage the blade-control switch.
3. Move the motion-control levers outward to the
NEUTRAL position.
4. Engage the parking brake.
5. Shut of f the machine and remove the key .
6. W ait for all moving parts to stop.
© 2023—The T oro® Company
81 1 1 L yndale A venue South
Bloomington, MN 55420
Register at www .T oro.com.
Original Instructions (EN)
Printed in the USA
All Rights Reserved
*3465-943*
Installing the Jack Mount
1. Secure the jack mount to the left axle tube on
the front of the machine using 2 U-bolts and 4
locknuts ( Figure 1 ).
g467170
Figure 1
1. U-bolt 3. Locknut
2. Jack mount
2. T orque the fasteners to 19 to 25 N∙m (175 to
225 in-lb).
Operation
Using the Jack Mount
W ARNING
The machine could fall onto someone and
cause serious injury or death.
• Read and understand the Operator ’ s
Manual before performing maintenance.
• Always shut off the engine, engage the
parking brake, and remove the key before
performing maintenance on the machine.
Do not keep the machine raised on the jack
for extended periods of time.
Always use a jack on a level surface.
• Ensure that the jack is secured properly to
the jack mount using a jack pin.
• Do not rely solely on the jack for support.
Use adequate jack stands or equivalent
support.
• Do not mount or dismount the mower while
the jack is raised.
• Before each use, ensure that the jack and
jack mount work properly and that there
are no signs of damage.
Note: Use only a manufacturer-approved jack rated
at 907 kg (2,000 lb) or higher lift capacity with the
jack mount.
1. Park the machine on a level surface, disengage
the blade-control switch, and move the
motion-control levers outward to the P ARK
position.
Note: For electric models, move the
motion-control levers outward to the NEUTRAL
position and engage the parking brake.
2. Shut of f the machine, remove the key , and wait
for all moving parts to stop before leaving the
operating position.
3. Attach the jack to the jack mount with a jack pin
(Figure 2 ).
2
g467171
Figure 2
1. Jack pin 2. Jack
4. Use the jack to raise the machine to the desired
height.
W ARNING
Raising the machine could cause a fuel
leak.
• Check for any fuel leaks before
performing maintenance.
If you see a fuel leak, immediately
lower the machine and do not attempt
to start the engine. A void creating a
source of ignition until the fuel vapors
have dissipated.
5. Support the machine with jack stands; refer to
the machine Operator ’ s Manual for jack stand
placement.
6. When nished, use the jack to lower the
machine, then remove the jack.
Note: Do not operate the machine with the jack
attached.
3
/