Page is loading ...

Installation Manual
P/N 27783 8/12
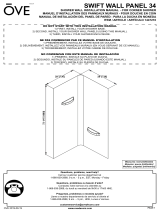
Easy-Up Bathtub Wall Sets
Please record the model number found on the front panel of the box.
Model Number:
Retain these instructions for future use.
Aspect
®
Avondale
®
Proclaim™

2
P/N 27783 10/12
PARTS INCLUDED
V
W
Z
X
Y
Back panel
Left side
panel
Right side
panel
Left side
corner panel
Right side
corner panel
Note: Wall pattern varies by model.
V W X Y Z
Proclaim™
27-1/2" (69.9 cm) 13" (33 cm) 35" (88.9 cm) 3-7/8" (9.8 cm) 58" (147.3 cm)
Aspect
®
27-1/2" (69.9 cm) 13" (33 cm) 35" (88.9 cm) 4" (10.2 cm) 58" (147.3 cm)
Avondale
®
23-1/8" (58.8 cm) 8-1/8" (20.6 cm) 45-1/4" (114.9 cm) 8-1/8" (20.6 cm) 58" (147.3 cm)
TOOLS AND MATERIALS REQUIRED
Square LevelPencilSafety glasses
Drill
Tape measure
Drop cloth
Adhesive
(4 tubes)
Sealant
(1 tube)
Hole saw
(sized to
accommodate
plumbing fixtures)
Utility knife
Masking or
painters’ tape
Scissors
Caulk gun
1/4" v-notched
trowel

3
P/N 27783 10/12
3
REQUIREMENTS FOR SUCCESSFUL INSTALLATION
◘ Read complete instructions before beginning installation.
◘ These instructions include suggestions for plumbing installation that we believe to be reliable. Local building codes
vary and could supersede those suggestions. If you are not confident in your ability to perform these tasks, contract out
those tasks you need help with or use a professional installer.
◘ Confirm that your model will fit in intended location and plumbing fixtures are located where required before beginning
installation.
◘ Walls and sub-floor must be solid, plumb, and square.
◘ Use drop cloth to protect bathtub from damage during installation.
◘ Do not install in areas where temperature may drop below 32ºF (0ºC).
◘ Allow product to reach room temperature for 30 minutes before installation.
◘ Two people recommended to install this product.
◘ Wall should be 1/2" (13 mm) moisture-resistant drywall. Surfaces must be free of dirt and other residues. Painted
surfaces must be sanded.
◘ Do not install panels over ceramic tile, plywood, or wallpaper.
◘ Dry fit all panels before applying adhesive.
◘ Apply adhesive to drywall using 1/4” v-notched trowel. Cover entire area behind panel.
◘ Follow manufacturer’s instructions for adhesive dry time and ventilation precautions.
◘ Rough plumbing and bathtub must be installed before panel installation.
WALL SET INSTALLATION
1. Symbols and Descriptions
APPLY ADHESIVE where indicated. Apply 1/4″ to 3/8″
round bead.
APPLY SEALANT where indicated.
CAUTION: A situation which, if not avoided, could
result in property damage or other undesirable conditions.
Product damage will occur and will void the warranty.
IMPORTANT! Instructions which, if not followed, could
result in property damage. Product damage may occur
and will void the warranty.
2. Mark Level Line
Pencil line
Measurement "Z"
(see page 2) up
from bathtub ledge
IMPORTANT! A level line must be established to align
top of panels.
◘
Following "Z" wall measurement (page 2), measure up from
bathtub ledge.
◘ Draw level line to height as shown.

4
P/N 27783 10/12
WALL SET INSTALLATION (Continued)
3. Dry Fit All Panels
Left side
panel
Left corner
panel
Back
panel
◘ Dry fit all panels and tape in place, aligning top to pencil
line.
IMPORTANT! If bathtub is not level, trim bottoms of
panels to follow slope of bathtub.
TIP: To trim side and back panels, score with utility
knife and straight edge and snap apart. Scissors may
be needed to trim corner panels.
4. Prepare for Plumbing Fixtures
X
Y
X
Y
Drill holes
from back.
◘ Measure and mark location for plumbing fixtures on back
of side panel.
◘ Using proper size hole saw, cut out plumbing fixture holes
from back side of panel.
5. Dry Fit Side Panels
Align edge with bathtub
◘ Position side panels with tape.
IMPORTANT! Align front edge of side panels with front
edge of bathtub. A space should remain in the corners
for corner panel installation.
◘ Trace side panels on wall.
◘ Remove panels.
IMPORTANT! The corner panels may overlap the side
panel.
6. Install Side Panels
Pencil line
APPLY ADHESIVE using trowel, staying within pencil lines.
◘ Press and tape each panel to wall.
IMPORTANT! If using solvent-based adhesive, pull
panel away from wall for 30 seconds to allow solvents to
escape. Re-press panel fi rmly against wall.

5
P/N 27783 10/12
WALL SET INSTALLATION (Continued)
7. Dry Fit Back Panel
◘ Position back panel with tape.
◘ Trace back panel on wall.
◘ Remove panel.
IMPORTANT! For Allura, Alvea™, Enhance, Venture
®
and Vesuvia™ models install corner panels fi rst, then
back panels.
8. Install Back Panels
Pencil
line
APPLY ADHESIVE to back wall using trowel.
◘ Press and tape panel against wall.
IMPORTANT! If using solvent based adhesive, pull
panel away from wall for 30 seconds to allow solvents to
escape. Re-press panel fi rmly against wall.
9. Install Corner Panels
APPLY ADHESIVE to corners using trowel, staying within
pencil lines.
APPLY SEALANT to back of corner panel as shown.
◘ Press and tape each panel to corner wall.
IMPORTANT! If using solvent-based adhesive, pull
panel away from wall for 30 seconds to allow solvents
to escape. Re-press panel fi rmly against wall.
IMPORTANT! The corner panels may overlap the side
and back panels.
10. Allow Adhesive to Dry
IMPORTANT! Follow manufacturer’s instructions for
adhesive dry time before removing tape.

6
P/N 27783 10/12
WALL SET INSTALLATION (Continued)
11. Apply Sealant
◘ Remove tape.
APPLY SEALANT to all seams.
◘ Make connections to water supply lines and check for
leaks.
IMPORTANT! Follow manufacturer’s instructions for
sealant dry time before use.

7
P/N 27783 10/12
CUSTOMER SERVICE
For product and installation questions, DO NOT return to the store. For additional help contact customer service:
Visit
www.peerlessfaucet.com, e-mail bathingsyst[email protected], or call
1-877-430-5314
CARE AND CLEANING
For regular cleaning use ONLY mild detergents or warm, soapy water. Use ONLY non-abrasive cloth or sponge. Always rinse
surfaces after cleaning.
Before cleaning this product with cleaning products, test a small, inconspicuous area.
CAUTION: The manufacturer does not recommend the use of cleaning products that contain any of the following
chemicals. Use of products containing these chemicals can cause the product to crack or discolor and will void the warranty.
◘ Naphtha
◘ Amyl Acetate
◘ Hydrogen Peroxide Solution (common household peroxide)
◘ Toluene
◘ Ethyl Acetate
◘ Lye (common in drain cleaner)
◘ Acetone
LIMITED WARRANTY
Please refer to the product label (located on the carton) to outline your model’s limited warranty period. The manufacturer
warrants to the original consumer purchaser that its products will be free of defects in materials and workmanship, subject
to the limitations, exclusions and conditions that follow, from date of original purchase as shown on purchaser’s receipt. The
manufacturer will, at its discretion, replace or repair FREE OF CHARGE except as noted below, during the warranty period,
any part that the manufacturer determines to be defective in material and/or workmanship under normal installation, use
and service. The original consumer purchaser must notify the manufacturer in writing of any defect covered by the warranty.
THIS WARRANTY IS THE ONLY EXPRESS WARRANTY MADE BY THE MANUFACTURER. ANY CLAIMS MADE UNDER THIS
WARRANTY MUST BE MADE DURING THE PERIOD REFERRED TO ABOVE. MANUFACTURER MAKES NO IMPLIED WARRANTY OF
MERCHANTABILITY OR FITNESS FOR A PARTICULAR PURPOSE. LABOR CHARGES AND/OR DAMAGE INCURRED IN INSTALLATION,
REPAIR OR REPLACEMENT AS WELL AS INCIDENTAL AND CONSEQUENTIAL DAMAGES CONNECTED THEREWITH ARE EXCLUDED
AND WILL NOT BE PAID BY THE MANUFACTURER. Some states do not allow limitations on how long an implied warranty lasts, or
the exclusion or limitation of incidental or consequential damages, so the above limitations or exclusions may not apply to you.
This warranty gives you specic legal rights, and you may also have other rights which vary from state to state. This warranty is
void for any damage to this product due to misuse, abuse, neglect, accident, improper installation, modication, unauthorized
repair, or any use violative of instructions furnished by us.
/