Page is loading ...

ITEM #0476087
MODEL #830063
CHAIN LINK PET KENNEL
1
Questions, problems, missing parts? Before returning to your retailer, call our customer
service department at 1-800-576-2367, 8 a.m. - 6 p.m., EST, Monday - Friday.
Reach us by email at [email protected]
ATTACH YOUR RECEIPT HERE
Purchase Date
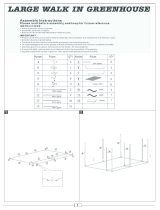
10 ft. x 10 ft. x 6 ft.
Configuration
5 ft. x 15 ft. x 6 ft.
Configuration

PACKAGE CONTENTS
2
PART DESCRIPTION QUANTITY
A Chain Link Fabric Roll 1
B Corner Post 3
C Intermediate Post 4
D Horizontal Rails 16
E Gate Panel 1
F Gate Post 1
G Tension Rods 2
H Corner Post With Gate Latch 1
F
E
C
C
C
H
B
B
B
D
D
D
D
D
D
D
D
D
D
D
D
D
D
A
G
D
C
NOTE: Gate latch is pre-installed, please do not remove.
10 ft. x 10 ft. x 6 ft.
Configuration
Fig. 1
Fig. 2
5 ft. x 15 ft. x 6 ft.
Configuration
A
B
D
B
D
D
D
D
H
D
D
B
C
C
C
C
D
D
D
D
D
D
D
E
F
G
D
D

SAFETY INFORMATION
HARDWARE CONTENTS
3
PREPARATION
Please read and understand this entire manual before attempting to assemble, operate or install
the product.
Before beginning assembly of product, make sure all parts are present. Compare parts with package
contents list and hardware contents list. If any part is missing or damaged, do not attempt to
assemble the product. This kennel can be built in two configurations: 10 ft. x 10 ft. or 5 ft. x 15 ft.
Estimated Assembly Time: 2 Hours
Two people are recommended to assemble this kennel.
Tools Required for Assembly (not included): #2 Phillips Screwdriver, 9/16 in. Wrench, Pliers
Choose the site for your kennel. The location should be flat, level and suitable for pets. Choose
location of door before you start to build kennel.
ASSEMBLY INSTRUCTIONS
1. Gather the corner and intermediate posts (B & C) and
gate post (F). Each post is labeled with a removable
sticker as the bottom of the post, for easy
identification. Loosen the pre-assembled screws in
the connectors to make insertion of horizontal rails
(D) possible. Do not remove screws, just loosen.
Note: Bottom of posts have 1 in. extension.
Pro Tip: For ease of assembly, we suggest you
lay the posts and rails out on the ground in a
manner that corresponds to the exploded view of
your chosen configuration, either Fig. 1 (10’ x 10’)
or Fig. 2 (5’ x 15’).
1
B
C
F
H
See Label on Posts
Steel
Wire Tie
Qty. 80
Gate Clips
Qty. 10
Steel Wire Clips
Qty. 22
AA BB
CC

4
ASSEMBLY INSTRUCTIONS
3. Lay the assembled gate on the ground and slide
horizontal rails (D) through the tubes on the
gate post (F).
Note: Bottom of posts have 1 in. extension.
4. Slide the top and bottom horizontal rails into corner
post (H) and then slide on an intermediate post (C)
on right.
Note: If you are building a 5 ft. x 15 ft. then you will
use a corner post (B) at the right end of the
horizontal rails (D).
2
3
E
D
D
F
F
2. Assemble gate (E) and gate post (F). Start by
removing the gate keeper screw from the top hinge
tube on the gate post (F). Insert the top of the gate
into the hinge tube and push in as far as it can go.
Then, guide the bottom of the gate onto the bottom
hinge tube. Push gate back downward to sit on the
bottom hinge tube. Re-install the gate keeper screw
to capture the gate.
Note: The gate post (F) is designed to allow the
horizontal rails (D) to slide through the tubes.
E
F
F
D
4
F
H
C
C
D
D
D
D
H

5
ASSEMBLY INSTRUCTIONS
DD
5. Working toward the right, slide another set of
horizontal rails (D) into the intermediate post (C)
and then a corner post (B) to the right.
NOTE: Adjust your use of corner posts (B) and
intermediate posts (C) depending on which
configuration you are building, following the
exploded view shown earlier.
7. Insert top and bottom horizontal rails (D) into the
corner posts to start the side of kennel, then into
an intermediate post (C). Then, another set of
horizontal rails (D) and then a corner post (B).
This will complete the right side of the kennel frame.
Note: If you are building in the 5 ft. x 15 ft.
configuration, repeat the process with two more
horizontal rails and another intermediate post.
Repeat this process to complete the left side of
the kennel.
7
D
D
D
D
D
D
D
B
D
C
C
C
C
B
5
B
D
6.
Tighten the screws on all corner (B&H), gate (F) and
intermediate posts (C). It is important to leave 2 inches
space between the swinging side of gate and the post
for proper latch function. This will complete the gate
side. Carefully stand the completed panel up.
6
E
F
C
H
2 in.
H
E

8. Complete the rear of the kennel with the addition
of four horizontal rails (D) and an intermediate post (C).
Tighten all screws in all connectors.
Note: If you are building in 5 ft. x 15 ft., only two
horizontal rails are needed to complete.
6
ASSEMBLY INSTRUCTIONS
9
10
D
D
B
B
D
D
D
D
D
B
B
C
D
D
B
D
A
AA
BB
G
8
G
9. With two people, lift the chain link fabric roll (A)
up into a standing position and drop a tension rod (G)
into the end links and connect to the gate post (F) with
five gate clips (BB) evenly spaced. Unroll the fabric
around the kennel frame.
Use wire ties (AA) to secure fabric to the top of the
kennel frame (D) to keep it in place. Ties can be
loosely applied and then tightened after the fabric is
fully unrolled.
10. To insure the tightest fit of the fabric, it
is suggested to pull the fabric as tight as possible
at each vertical member and apply three wire clips
(CC) to hold in place as one person is tensioning
the fabric.
Doing this as the fabric is unrolled, at all 7 of the
vertical members will assist in making the final
length determination and a tight fit of the chain link
fabric.
A
CC
C

7
11. Chain link fabric (A) is cut to size but may need
to be shortened for exact fit. You may need to
“cut” the fabric by removing a wire. When the
fabric is fully unrolled and the ties have secured
the fabric to the vertical members for tightness,
you should assess the remaining length and
whether the fabric will need to be shortened.
Insert the drop rod (G) into the fabric and with the
help of the Gate Clips (BB) pull the fabric toward
the final vertical and determine if there is excess
length and measure to see how much will need to
be removed for proper fit. Removing one wire will
result in a shortening of approx. 1-3/4". Using pliers,
unlock the knuckles at the top and bottom of wire
to be removed.
Then, twist the wire out from the top.
Remove the appropriate number of wires, without
removing too many. Close the knuckles with pliers.
Drop a tension rod (G) in the last diamonds of the
fabric and stretch it tight. Connect to post with five
gate clips (BB). Fasten fabric with wire ties (AA).
Place ties around bottom of kennel at 12 in. intervals.
Place ties around top at 18 in. intervals.
ASSEMBLY INSTRUCTIONS
Note:
Once the chain link fabric is stretched and secured
installer must then go back and tighten all wire ties.
It’s imperative that bottom wire ties are secured to
ensure the dog cannot break through enclosure.
Expect to use about 31 of the wire ties to secure the
top of the fabric to the frame and likewise use 49 of the
wire ties to hold the bottom of the fabric tight.
11
A
G
BB
BB
A

WARRANTY
ONE YEAR LIMITED WIRE KENNEL WARRANTY
What is Covered
The manufacturer warrants that the kennel will be free from defects in workmanship for a period of
one (1) year. This warranty is extended only to an original purchaser who installed the product at a
residence (not commercial premises) in the 50 United States. It is not transferable.
If a defect exists, the manufacturer will, at its option, either repair or replace the product or the
defective component. This warranty does not cover the costs of labor to remove a defective product
or component or install any replacement product or component.
This warranty shall not apply to defects or damages caused by mishandling, improper installation or
installation not in accordance with the instructions provided with the product, alteration, removal or
re-installation, improper or unreasonable use, maintenance or storage, use of incompatible
accessories, accident, impact by foreign objects, fire, acts of God or normal wear and tear.
No person is authorized to extend or otherwise modify this Warranty.
How to Obtain Warranty Service
To obtain warranty service, call 1-800-576-2367, 8 a.m. - 6 p.m., EST, Monday - Friday.
Limitations
THE DURATION OF ANY IMPLIED WARRANTY, INCLUDING THE WARRANTIES OF
MERCHANTABILITY AND FITNESS FOR A PARTICULAR PURPOSE, SHALL NOT EXCEED THE
WARRANTY PERIOD PROVIDED HEREIN.
Some states do not allow limitations on how long an implied warranty lasts, so the above limitation
may not apply to you.
THE MANUFACTURER SHALL NOT BE LIABLE FOR ANY INCIDENTAL OR CONSEQUENTIAL
DAMAGES RESULTING FROM THE BREACH OF ANY WRITTEN OR IMPLIED WARRANTY.
Some states do not allow the exclusion or limitation of incidental or consequential damages, so the
above limitation or exclusion may not apply to you.
This warranty gives you specific legal rights, and you may also have the other legal rights which
vary from State to State.
Printed in China
8
/