
Adjustable Mantel Assembly Instruction:
1. Hardware lists:
*Allen screw bolt (50mm), washer and nut = 4 sets
- for use in fastening the mantel shelf to the mantel legs
*Allen screws (30mm) = 18 pcs packed in a packet
- for use in securing the Plinth blocks to the bottom of each leg
*Allen key = 1 pc
- for use tightening the allen head bolts and screws
*Wrench = 1 pc.
- for use in tightening the bolts
*Adjustable 2 piece hanger board
*Adjustable 2 piece horizontal scribe
*2pcs Metal plate and 8 Phillips head screws packed in a packet
-for use in connecting the adjustable hanger board and horizontal scribe
2. Put the main shelf on the floor, upside down and attach the mantel
corresponding to the “R” and “L” markings to the shelf. Hook and snap
on to lock. Adjust the front and side to flush and bolt-in.
hook on
snap-on
to lock
bolt-in left
and right
mantels
3. Determine the correct interior height and interior width based on the
building codes and the manufacturer’s instruction for your specific
fireplace insert or stove. Consult a professional.
4. Adjust your interior height (based on #3) using the Plinth blocks.
Place one Plinth over the bottom of each leg and move the legs
up to the desired height. Secure the legs in place with the 30mm
screws (provided) by aligning the pre-drilled holes in the legs to
those in the Plinth blocks. Alignment is important so as not to
push the screws through the front of the leg. There are 18 x 30mm
screws provided and we suggest 9 on each leg.
If no interior height adjustment is needed, the Plinth blocks may
be left off or used as decorative pieces at the bottom of each leg.

Adjustable Mantel Assembly Instruction:
Adjustable “Plinth”
screw in
5. Your 2 piece hanger board is designed to be completely adjustable based
on the interior width determined from #3. Cut hanger boards on the routed
ends and in equal lengths to meet your desired total length. Connect the
pieces using the metal plate and 4 screws.
x x x x
cut on these ends
6. Before mounting the hanger board, see #10 below: “Installation for Mantels
and Shelves using the Hanger Board”
7. Hang the mantel assembly and adjust left and right shelf arm to fit your
hanger board.

Adjustable Mantel Assembly Instruction:
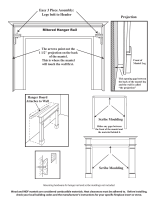
8. Scribe moldings - measure the inside width and height. The horizontal scribe
is designed to be completely adjustable based on the needed interior width.
Cut scribe boards in the routed ends and in equal lengths to meet your desired
total length. Connect the pieces using the metal plate and 4 screws. Measure
the inside height and cut the vertical scribes on the flat end so that they miter
to the top horizontal scribe. Depending on the gap between the front of the
mantel and the non-combustible surrounding firebox, the scribes may need to
be ripped down to the back. Please consult a professional.
cut on these ends
cut on these ends
left right
scribe mouldings
inside length
inside height
top scribe moulding
top scribe moulding
x x x x
9. Secure the scribe moldings with finishing nails or glue.
Scribe
Mouldings
10. Installation for Mantels and Shelves using
the Hanger Board
For hanging your shelf, we suggest that you
use the hanger board included in this box.
The type of hardware (not included) you will
use for mounting your hanger board will
depend upon the medium your shelf will be
attached to (i.e. brick, stone, drywall...)
Please consult a professional for advise on the
proper hardware.
Mounting hardware for hanger board and scribe moldings not included
Scribe Moldings
Scribe Moldings
-
 1
1
-
 2
2
-
 3
3
Pearl Mantels 201 Operating instructions
- Type
- Operating instructions
- This manual is also suitable for
Ask a question and I''ll find the answer in the document
Finding information in a document is now easier with AI
Related papers
-
Unbranded 420-72 Installation guide
-
 Pearl Mantels RPS48PD Installation guide
-
 Pearl Mantels NC-48 GRAYWASH Installation guide
-
 Pearl Mantels 412-72-09 User manual
-
 Pearl Mantels 520-48 Installation guide
-
 Pearl Mantels RPS48515D Installation guide
-
Pearl Mantels 416-60 User manual
-
 Pearl Mantels 416-72-70 Installation guide
-
Pearl Mantels RPS72614D Installation guide
-
 Pearl Mantels 430-60 Installation guide
Other documents
-
Imperial IMP 50-4009 Operating instructions
-
 Dogberry Collections m-sold-6006-agok-none Installation guide
-
Ply Gem EL40SAMPLE M4 Installation guide
-
Ply Gem VINRP1555 16 Installation guide
-
 Martin Fireplaces 400BWBIA User manual
-
 ClosetMaid MasterSuite Installer's Assembly, Installation & Reference Manual
-
Builders Choice MTTRKO54 Installation guide
-
Monessen Hearth BWBC400 User manual
-
Enviro C-11275 User manual
-
Enviro C-10078 User manual


