Page is loading ...

Operating Instructions & Specifications
Introduction
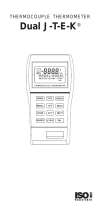
The Series 472 Digital Thermocouple Thermometer is a precision
general purpose thermometer designed for use with Type J or Type K
thermocouples. The unit incorporates a variety of features in an easy to
use format that make it useful in a wide variety of applications. The fol-
lowing summarizes the key features:
• High accuracy temperature measurement using type J and type K
thermocouples.
• Standard ANSI thermocouple connector allowing the use of a wide
variety of probe styles.
• Measurement in either degrees Fahrenheit or degrees Celsius.
• Selectable resolution for readings in degrees or in 0.1 degree incre-
ments.
• Differential or relative temperature measurement using the ΔT
mode.
• Recording and displaying minimum and maximum temperature
readings.
• Storage and recall of up to 25 temperature measurements in either
normal or ΔT mode.
• Capability for field calibration of type J and type K thermocouples.
• Display backlighting for dark or low light conditions.
• 20 minute auto power off to conserve battery with a disable function
where longer measurements are needed.
DANGER
Do not connect the thermocouple to any hazardous voltage above the
specified 50 V rms as this may result in shock or personal injury. In addi-
tion, the input circuitry is designed to accept only the low-level signals
produced by standard thermocouples. Exceeding the specified input
voltage may damage the instrument.
NOTE
Inaccurate temperature readings will result if the unit is not set to read
the thermocouple type connected to the unit. The ANSI thermocouple
connector is color coded for each thermocouple type. Type J thermo-
couples use a black connector. Type K thermocouples use a yellow con-
nector. Other colors signify other types of thermocouples not supported
by this instrument.
INSTRUCTIONS
Connecting A Thermocouple
Use either a type J or type K thermocouple with this instrument and
select the proper type using the J/K key as explained in the section
“Thermocouple Type”. Using the incorrect thermocouple or selecting the
wrong type will result in significant measurement errors. The North
American ANSI Color Code identifies thermocouples as follows:
Type J Black
Type K Yellow
Thermocouple connectors are polarized to ensure proper connection.
The connectors have a wide pin and a narrow pin. Match these with the
mating connector holes on the top end cap of the unit and carefully
insert the connector. Do not force the connector. If the temperature
readings are negative or decrease as the temperature increases, the
thermocouple may be connected in reverse. Thermocouple wire uses a
red wire to indicate the negative lead.
Specifications
Probe types: Type J and K Thermocouples
Probe Connection: ANSI female mini-connector
Input Protection: 50V rms
Temperature: Range: J: -350 to 2192°F (-210 to1200°C)
K: -418 to 2500°F (-250 to 1372°C)
Accuracy: 0.1% of reading ±0.7°F/0.4°C (> -150°C)
0.1% of reading ±2°F/1°C (< -150°C)
Resolution: 0.1° (below 1999°)
Linearization: Conforms to NIST monograph 175 revised to ITS-90.
Operating Conditions: Stated accuracy: 64 to 82°F (18 to 28°C)
Useful Range: 14 to 104°F (-10 to 40°C)
Storage Temperature: -40 to 176°F (-40 to 80°C)
Display: Dual 4-1/2 digit
Battery: 9 Volt alkaline
Battery Life: 200 Hours (typical)
Memory: 25 Samples (Normal or ΔT mode)
Battery Installation
Remove the two screws holding the bottom endcap in place and remove
it. Connect the battery to the enclosed battery clip, observing correct
polarity. Insert the battery in the case. Be careful not to trap the wires
between the case or foam pad, which retains the battery. This could
make it difficult to install the battery or remove it later for replacement.
Be sure the rubber gasket is properly seated in the gasket channel and
replace the endcap. Note that the endcap will only fit one way because
the holes are slightly off-center. Place the "Z" shaped wrist strap clip in
one of the screw recesses and replace the screws. Do not overtighten.
Attach the wrist strap to the clip.
Use only 9 Volt alkaline type batteries such as a Duracell® MN1604, or
Eveready® 522 or equivalent. Zinc-carbon types, often labeled Heavy-
Duty are not recommended because of their shorter life and an
increased potential for leakage. Alkaline batteries are a better value
because they typically last up to three times longer in this device.
On-Off Operation
The on-off control is a toggle function. Press the ON/OFF key once to
turn the unit on; again to turn it off. If the unit is left on with no activity for
approximately 20 minutes, it will turn itself off to conserve the battery.
Each time a key is pressed, the timeout will be reset to 20 minutes. The
timeout function may be disabled by holding both the ON/OFF and the
J/K key down while turning the unit on. The "ALARM 2" annunciator will
be illuminated to indicate the timeout was disabled. The unit must then
be manually turned off.
Display Backlight
The Series 472 includes a display backlight to allow use in the dark or
in poor lighting conditions. The unit must be off before this feature can
be activated. Press and hold the ON/OFF key. After about 1 second the
backlight will come on and remain lighted for approximately 2 minutes
after which it will turn itself off to conserve the battery.
Thermocouple Type
To change the thermocouple type, press the "J/K" key. The "J" and the
"K" annunciators will be alternately illuminated to indicate which ther-
mocouple type is selected. The selected type will be stored in non-
volatile memory. Remember to select the correct setting for the thermo-
couple being used. Incorrect selection will result in significant errors in
the temperature reading. Type J thermocouples are supplied with a
black connector. Type K thermocouples are supplied with a yellow con-
nector.
Selecting Temperature Units
The temperature readings may be displayed in either °F or °C. For each
units type, you may choose whether to display tenths of a degree or sup-
press it. To change the units, press the UNITS/LOC key. The sequence
will be 0.0°F, 0°F, 0.0°C, 0°C. Above 1999.9° the unit will automatically
switch to display whole degrees only. The selected units will remain in
memory even when the power is shut off. This way, your preference will
always be displayed after the initial selection.
Display Hold
Pressing then releasing the HOLD-ΔT/MEM key, will freeze the display
and illuminate the "HOLD" annunciator. Pressing the Hold-ΔT/Mem key
again will extinguish the "HOLD" annunciator and the display will again
be updated.
Series 472 Digital Thermocouple Thermometer
Specifications and Operating Instructions
Bulletin E-90-472
DWYER INSTRUMENTS, INC.
Phone: 219/879-8000 www.dwyer-inst.com
P.O. BOX 373 • MICHIGAN CITY, INDIANA 46361, U.S.A. Fax: 219/872-9057 e-mail: [email protected]
E-90-472:472 IOM 812" x 14" 7/2/09 10:16 AM Page 1

Relative Temperature Measurement Using The ΔT Function
The ΔT function displays the difference between a reference temperature
and the measured temperature. To enable the ΔT function, first measure
the reference temperature then press "HOLD", then press "MIN/ΔT". The
reference temperature will be displayed in the lower left display, the dif-
ferential temperature will be displayed on the main display, and the unit
will exit the Hold state and continue normal operation. To disable the ΔT
function, press "HOLD", then press the "MIN/ΔT" key. The unit will begin
normal operation. The ΔT function will also be canceled when the unit is
turned off.
Min/Max Function
The unit provides the ability to save the minimum and maximum temper-
ature values over a period of time. Two keys are provided for this function,
one marked MIN and one marked MAX. Pressing MIN will display the min-
imum value for temperature. Pressing MAX will display the maximum
value for temperature. Pressing both MIN and MAX simultaneously will
clear the MIN and MAX memory. Min and Max values are stored in non-
volatile memory and will be retained even when the power is off.
Memory Function
A memory function is provided that allows you to store up to 25 tempera-
ture readings. The samples are stored in nonvolatile memory so the sam-
ples are retained even when the power is off. If the unit is in the ΔT mode,
both the reference temperature and the differential temperature will be
stored.
Entering Memory Mode
To enter memory mode, press and hold the HOLD-ΔT/MEMORY key until
the MEM indicator appears in the display. The key can then be released.
The active memory location will be displayed in the lower left display,
starting initially with “01”. When recording readings in the ΔT mode, the
reference temperature is is displayed in the lower left display. In this case
the memory location will be briefly displayed in the lower left display, then
it will switch to the reference temperature.
Storing Readings
To store a reading, press the J/K/STORE key. The readings will be stored
in the previously indicated memory location and a beep will sound to indi-
cate the reading has been saved. As each reading is saved, the memory
location is advanced to the next location and displayed in the lower left
display. When 25 readings have been stored the memory location will
begin at “01” again.
Viewing Stored Readings
To view the contents of memory, the unit must be in the memory mode.
To enter the view mode, press the UNITS/LOC key. The HOLD indicator
will then be displayed with the MEM indicator to indicate that the memory
values are being displayed rather than the current readings, and the loca-
tion number will be briefly displayed. Each time the UNITS/LOC key is
pressed the memory location is advanced, and the new location will be
displayed. If the key is held down, the location will automatically increment
until the key is released. This operation may be used to select a particu-
lar memory location to store the next reading. To resume temperature
measurements, press the HOLD-ΔT/MEMORY key. The HOLD indicator
will disappear and the display will resume displaying the current mea-
surements. The last viewed memory location will remain as the location in
which the next sample will be stored.
Clearing Memory
The memory may be cleared of all previously stored values by pressing
and holding the J/K/STORE key, then simultaneously pressing the
ON/OFF key. During the clearing operation, “----” will be displayed. When
the memory is cleared, the current readings will be displayed and the
memory location will be set to “01”.
Exiting Memory Mode
To exit memory mode, press the HOLD-ΔT/MEMORY key. The memory
indicator will disappear. All values stored in memory will be retained for
later viewing.
Low Battery Indicator
A weak battery may cause improper operation or inaccurate measure-
ments. A low battery indicator is provided on the display to show when the
battery needs to be replaced. Although the unit may appear to function
and read properly, the accuracy of the readings cannot be guaranteed
when the “LOW BAT” indicator is illuminated. Replace the battery with a
fresh one. Do not leave an exhausted battery in the unit due to potential
battery leakage.
Field Calibrate Function
The calibration function allows setting a custom ice point. A separate cal-
ibration may be done for either the type J or type K thermocouple types.
The following procedure is used:
1. Prepare a mixture of crushed ice made with distilled water and dis-
tilled water and place it in a suitable container preferably an insulated
container such as a dewer flask or thermos bottle but an insulated
container such as a Styrofoam cup will suffice.
2. Place the test thermocouple into the mixture and allow it to stabilize.
3. With the unit off, press and hold the “MAX/CAL” key then the
“ON/OFF” key. Release the keys when the “CAL” indication is illumi-
nated in the lower left display.
4. When the reading is stable, press and hold the “MAX/CAL” key. The
“CAL” indicator will be removed and the “C” annunciator will be illumi-
nated. The new calibration point will be stored in nonvolatile memory
until it is manually cleared. The reference temperature must be within
±10°C of 0°C. “Err” will be displayed if you attempt to calibrate outside
this range and the calibration point will not be accepted.
To cancel the field calibration, with the unit off, press and hold the
“MAX/CAL” key then press the “ON/OFF” key to turn the unit on. This will
enter the CAL mode with the “CAL” annunciator displayed. Press and the
“MAX/CAL” key. The “C” and the “CAL” annunciators have been shut off
and the unit will now resume measurement using the factory calibration.
Maintenance
The series 472 Thermometer requires no routine maintenance. If recali-
bration or repair is required, the unit may be returned to Dwyer
Instruments by sending the packaged instrument, freight prepaid, to the
address below. Be sure to include a clear description of the problem plus
any application information available.
Dwyer Instruments, Inc.
Attn: Repair Department
102 Indiana Highway 212
Michigan City, IN 46360
Duracell® is a registered trademark of The Gillette Company.
Eveready® is a registered trademark of Eveready Battery Company, Inc.
DWYER INSTRUMENTS, INC.
Phone: 219/879-8000 www.dwyer-inst.com
P.O. BOX 373 • MICHIGAN CITY, INDIANA 46361, U.S.A. Fax: 219/872-9057 e-mail: [email protected]
©Copyright 2009 Dwyer Instruments, Inc. Printed in U.S.A. 7/09 FR# 443046-00 Rev. 1
E-90-472:472 IOM 812" x 14" 7/2/09 10:16 AM Page 2
/