Page is loading ...

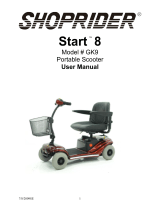
Shoprider Cadiz
Model - S889SL - User Manual
Please ensure that this user manual is read and understood before using the scooter.

Contents
Introduction and Intended Use
Technical Specications
Feature Guide
Safety Advice
Adjustments
Tiller Angle Adjustment
Seat Swivel Adjustment
Seat Slider Adjustment
Seat Height Adjustment
Backrest Angle Adjustment
6
6
6
7
7
3
3
4
5
Tiller Controls
Brake Release / Free Wheel Operation
Starting to Drive
8
9
Checklist
Moving o
Steering
Reversing
Dismounting
Ramps / Slopes
Surfaces
Transferring
10
10
11
11
11
11
12
12
Dismantling
Storage
Maintenance
12
14
Wheel & Tyres
Products Life Expectancy
General Cleaning
Check List
14
14
14
15
Batteries & Battery Charger
Batteries
Battery Charger
15
15
Troubleshooting
Circuit Breaker
Fuses
Check List
16
16
16
Further Information
Solar Energy
Health Factors
General Use
Storage & General Care
Emergency Procedures
Product Stability
Driving in Pedestrian Areas
17
17
17
17
18
18
18
Warranty Terms and Conditions 19

3
Congratulations on your purchase of the Shoprider Cadiz Scooter. This scooter incorporates comfort
and style with the latest in technology. The Cadiz Scooter is easy to use both indoors and out. Direct
drive sealed transaxles and electromagnetic brakes give a safe and ecient ride.
The Shoprider Cadiz is a Class 3 vehicle and is not legally dened as a motor vehicle, and therefore
the user is not required to have a driving licence. The scooter is not subjected to road tax or MOT
certicates. Class 3 vehicles can only be used by a person suering from a physical defect or
disability, over 14 years of age.
The scooter can be used on roads but not on motorways, cycle tracks or bus lanes. The scooter
must be switched down to 6km/h (4mph) when being used on pavements. Please ensure that you
read this manual carefully, it is important for your safety that you understand the guidelines and
instructions given.
Introduction & Intended Use
Technical specication
Classication: Class B Outdoors and suitable for indoor application. Class 3 vehicle for road use.
Overall Size
Length 1300mm
Width 640mm
Max Height 1120mm
Battery 12v x 2 36 ah
(48 ah optional)
Maximum user weight 160kg / 25st
Range Up to 32km
Battery Charger 5 amp o board
Height Seat to Floor 630mm - 705mm
Turning Radius 1500mm
Safe working slope 8º /14%
Overall Weight 100kg
Max. Speed 12 kmph (8 mph)
Seat Dimensions
Seat Width 460mm
Backrest Height 500mm - 650mm
* Passenger weight, rough ground conditions, low
temperatures and battery condition can aect maximum
range.
Note:
Persons with lower body amputations should not use this device unless evaluated with
articial limbs tted, as stability may be compromised due to an irregular centre of gravity.

4
Feature guide
‘Cadiz’
1 Shopping basket
2 Wing mirror
3 Tiller controls
4 Padded seat
5 Flip up arms rests
6 Rear lights and indicators
7 Large pneumatic tyres
8 Footmat
9 Front Bumper & LED headlight
1
2
3
4
5
7
8
9
6

5
Safety advice
• Read this manual carefully before using your scooter.
• Turn the power o when transferring to and from the scooter.
• Select a slow speed when going down gradients (max 8°) or over uneven ground.
• Keep your feet on the scooter whilst driving.
• Ensure the seat is in a xed position facing forwards before driving.
• Ensure the tiller is secure.
• Ensure the batteries are fully charged before your journey.
• Avoid rough or soft terrain and long grass wherever possible.
• Be aware of other road users and pedestrians.
• Turn the power o when not in use.
• Follow the maintenance guide to ensure safe operation of the scooter.
• Always remove the keys if leaving the scooter unattended. Unauthorised persons/
children may use the scooter resulting in injury.
Do:
• Carry passengers.
• Exceed inclines over 8°.
• Traverse inclines.
• Attempt inclines if the surface is slippery.
• Turn sharply at full speed.
• Exit or enter the scooter unless the power is switched o.
• Switch o the power whilst driving – this will cause the scooter to stop abruptly.
• Use the scooter where you cannot safely or legally walk.
• Attempt to climb or descend kerbs except drop down kerbs.
• Use the scooter if under the inuence of alcohol or any medication.
• Use a mobile phone whilst driving.
• Attempt to negotiate steps or escalators.
• Sit on the scooter if being transported in a vehicle.
• Attempt to tow any other devices.
• Exceed the stated weight limit.
• Connect any other devices to the batteries as this could cause permanent damage and
void your warranty.
• Use any other batteries/charger other than those supplied by Shoprider.
• Travel through water or over soft terrain (mud, sand etc.)
• Lift the scooter by the shroud assembly or any plastic part.
• Sharply shift your centre of gravity as this could make the scooter unstable.
• Freewheel down hills. This will damage the motor and brake and void the warranty,
• Tow the scooter with any other vehicle in the event of a breakdown.
Do not:
Every care has been taken to ensure that your scooter will give you safe, reliable service provided you
adhere to the advice given above.

6
Adjustments
Tiller Angle Adjustment
On the left hand side at the base of the tiller is a black round hand knob. Pull the lever out to release
the pin and select the required tiller angle. Ret the pin into one of the ve location holes.
Seat Swivel Adjustment
Under the right side of the seat there is a spring loaded red lever. Pulling up on the lever allows the
seat to swivel, when released the seat will lock into one of 4 positions.
Seat Slider Adjustment
Pulling up on the lever allows the seat position to be adjusted forward or backward. Release the lever
and the seat will lock in that position.

7
Seat Height Adjustment
The seat height can be adjusted by inserting the steel locking pin into the required hole.
Caution:
The higher the seat is adjusted; stability may be aected due to the higher centre
of gravity.
Backrest Angle Adjustment
Pull up on the release lever spring and set the angle required by holding the backrest in that position
and then release the lever. The backrest will stay in the position selected. The backrest can be
lowered onto the seat for storage or transport. Restrain the backrest from going forward when the
lever is released.

8
Battery Level Indicator (1)
The number of LED bars lit shows the amount of charge left in your batteries. The amount of charge
will only show at its true level when the scooter is in drive.
Horn (2)
A yellow button at the rear of the tiller operates the horn.
Maximum Speed Knob (3)
The speed control allows you to set a speed between 1 (minimum) and 10 (maximum).
Note:
This should only be used to warn others of your presence and not as a rebuke of any form.
Note:
Always start at a slow speed until accustomed with the characteristics of your scooter. Do
not put excessive pressure on the dial. Only turn as far as the stops.
When driving in pedestrian areas such as shopping precincts and busy pavement areas
always respect other pedestrians and turn the maximum speed down so that the scooter
travels at the walking pace of others around you.
Tiller Controls
Note:
Always fully charge the batteries before driving your scooter and never let the
batteries become completely drained, as this may cause permanent damage to
the batteries.
1
2
3
45
6
7
8

9
Lights (4)
A blue coloured button at the rear of the tiller head operates the lights
On / O Key
Insert the key in the right side of the tiller control. Turn the key and the LED bars will light up. There is a
delay before the thumb lever control can be operated, while the controller is checking the circuits.
Note:
Never leave the key in the switch unattended to prevent unauthorised use. Do not switch
the power o to stop the scooter unless it is an emergency. The scooter will stop very
abruptly if stopped in this way.
The release lever is located inside the right rear wheel below the chassis cover. To disengage the
motor lift up the lever (the scooter can now be pushed) to re-engage the motor push down on
the lever.
Brake Release / Free Wheel Operation
Finger Lever Controls (5)
The left nger lever controls the reverse and the right nger lever controls the forward motion. The
amount of pressure applied to each lever will determine the speed the scooter travels at. Release the
lever and the scooter will slowly come to a stop and the electShopridergnetic brake will be applied.
High & Low Speed Switch (6)
Controls speed setting from High to Low. Low setting should be used on pavements and High setting
when being used on roads.
Indicator Switch (7)
Operates indicators left or right.
Hazard Warning Switch (8)
Operates all indicator ashers.
Electromagnetic Brake
The brake is automatically operated when the control levers are released. There is a slight delay when
the scooter decelerates, this allows the scooter to come to a smooth stop.
Caution:
Never leave the scooter unattended whilst in free wheel mode as it will roll away down an
incline. ‘Free wheel’ mode should only be used in an emergency to move the scooter due
to power failure. Never move the scooter in this mode whilst it is occupied. NEVER tow the
scooter.
Note:
When in free wheel mode the scooter may be pushed on level ground at a walking pace.
The scooter will ‘auto-brake’ if this speed is exceeded.

10
Getting Started
• You must fully charge the batteries prior to rst use. (‘See Batteries and Charging’)
• Select an area of space.
• Mount the scooter by lifting the arm and sliding into the seat.
• Ensure the seat is securely locked in the forward position before driving.
• Adjust the tiller and seat if necessary. ( See ‘Adjustments’)
• Do not use the tiller to fully support you during transfer.
Check list
Please check the following before moving
The scooters speed and direction is controlled by the ‘wig-wag’ lever. The arrows shown in the image
above show the direction in which the scooter will move when the lever is operated as indicated.
Moving O
Ensure that you are seated in a comfortable position. Turn the key to the on position.
Your speed setting should be on 1 or 2. Pull your right hand nger lever, the scooter will move forward
slowly. The harder you pull the faster the scooter goes but will only reach the speed level that has
been selected. Release the lever and the scooter will slowly come to a stop and the magnetic brake
will be applied.
Starting to Drive
Caution:
Never sit on the scooter and free wheel down a hill as this can cause permanent damage
to the motor, brake and controller due to excessive regenerative braking. As above the
scooter can only be moved at a walking pace when in freewheel mode.
Reverse Forward

11
Caution:
Do not switch o the power to stop the scooter as this will cause the transmission to lock
and the scooter will come to a sharp stop, which could possibly cause injury. This
procedure should only be used in an emergency.
Steering
Steering the scooter is light and easy. Ensure when starting o you give a wide clearance when
turning so that the rear wheels clear any obstacle that you are passing. When steering through limited
spaces such as a doorway or when turning around, turn the tiller handles where you want to go and
apply power gently. The scooter will turn very tightly, but will still move with complete stability.
Caution:
Never turn sharply at high speeds as it can make the scooter unstable. The maximum
speed should be set at 50%.
Caution:
Do not reverse onto a main thoroughfare.
Reversing
Before reversing ensure that the area behind is free from any hazards or obstructions. Adjust your
speed setting to a low setting before you reverse. Pull the left nger lever, and steer wide of all corners
and obstacles.
Dismounting
Before dismounting ensure that the key is turned to the o position.
Caution:
Please ensure that care is exercised when entering or leaving the scooter and that the tiller
is not used for support.
Ramps / Slopes
The stability of your scooter is governed by several factors such as the seating position,
the angle of the slope and your height and weight. When approaching an incline, do so directly and
not at an angle and where ever possible avoid making turns. When going down a ramp or a slope
keep the speed settings to slow. This will ensure there is a safe controlled descent. When the thumb
levers are released the scooter will slowly stop.

12
Surfaces
Your scooter will perform well over many surfaces. However, avoid long grass, loose gravel, sand,
mud and ice.
Transferring
Lift up the arm-pad from the side you wish to leave or sit on the scooter. Use an aid for balance if
required. DO NOT use the tiller or armrests to support the full weight during transfers.
Caution:
Do not turn o the control key whilst the unit is in motion.
The scooters are designed to be dismantled into separate sections for transportation and storage.
The heaviest part of the scooter weighs 36kg (80lb).
Your scooter can be dismantled into the following sections;
Dismantling for Transportation & Storage
• Rear chassis cover.
• 2 x 34 A/h batteries (weight approx. 12kg each).
• Rear drive unit assembly.
• Front chassis assembly.
• Seat.
Dismantling
Pull up on the red lever under the seat and at the same time lift and twist the seat o. (see page 6)
Remove the hand-knob and clip that secures the seat adaptor. Lift the seat adaptor out of the
seat post.
Fold down the back of the seat. (see page 7)

13
Remove the rear chassis cover.
Disconnect the battery plugs and the orange multi-plug by depressing the small lip on the plugs.
Remove the Velcro retaining straps and lift out the batteries.
Remove the locking pin and separate the rear drive unit.
Lower the tiller to its lowest level on the front chassis. (see page 6)

14
Your scooter should be stored in a dry environment, preferably a garage or shed. Tarpaulins and
covers may create condensation during certain weather conditions. If your scooter is to be stored for
prolonged periods, fully charge the batteries and disconnect the battery plugs.
Please ensure your scooter is protected from heavy rain or high humidity and is stored in a dry
environment. Direct exposure to rain or dampness could cause the scooter’s electrics to malfunction.
Very cold weather can severely deplete battery condition (up to 40%). If left for any period during cold
weather it is very important that the scooter is fully charged before use.
Storage
At six monthly interval you should lubricate the following parts with a light oil or a similar lubricant;
Maintenance
• Seat pivot post.
• Seat release lever pinion.
• Wheel bearings
• Axle of scooter
Wheels and Tyres
The wheels of your scooter all have split rims. This allows any punctures to be repaired easily.
To change the wheels remove the centre bolt and slide the wheel o its axle. Ensure that when ret-
ting the wheel the retaining bolt is tted with a locking washer or the screw threads are treated with
lock-tite or a similar adhesive.
When changing a tyre the inner tube must be deated. Remove the four bolts from the wheel and split
the rim. Tyre pressure is recommended to be kept at 30 psi on the rear tyres, and 25 psi on the front.
The transaxle/gear box are sealed units and do not need lubricating. In the event of any diculties
please consult your dealer.
Product Life Expectancy
Your scooter has been designed to provide the user with a long, reliable life provided it is correctly
maintained and regularly serviced by an authorised dealer. However, due to inevitable wear and tear
and technological improvements it is recommended that the average usable life of this scooter is
ve years.
General Cleaning
The shrouds and seat of the scooter should be cleaned using a damp cloth and gentle detergent. Do
not use abrasive cleaners or solvents, as this will damage the plastic components. Do not spray water
(hose or pressure washer) onto the scooter as this may cause damage to the electronics.
We suggest that your scooter should undergo a full service at least once a year by an authorised
Shoprider dealer.

15
• Tyres are in good condition.
• Front wheels spin freely.
• Moving parts, pivots and frame xing are not damaged or worn.
• All hand knobs and levers are secure.
Check list
Please check the following;
Batteries
Charge the batteries completely (8-12 hours) prior to rst use.
The Shoprider Cadiz Scooter is supplied with 2 maintenance free, 34 A/h sealed lead acid batter-
ies. Battery performance can be aected by temperature, terrain and the weight of the user etc. The
battery level indicator is only a guide and is most eective when the scooter is moving, only then is the
true discharge level displayed.
When the scooter stops the battery level indicator may indicate full. ,An active user can use up to 30%
of battery capacity or more per day. Inactive users may only use 50% of battery capacity in a week. In
both these instances the battery should be put on charge over night.
Batteries and Battery Chargers
Note:
Batteries recommended by Shoprider MUST be used if they need to be replaced. An
authorised Shoprider dealer must carry out battery replacement.
Battery Charger
Batteries supplied with your scooter are specially designed and require an automatic battery charger.
These chargers have an electronic switch that will terminate the charge when the batteries are fully
charged.
The battery charger is a 3-amp o board. The charger is able to read the level of charge in the
batteries and will switch o when the batteries are fully charged. To charge the batteries connect the
plug lead into the battery-charging socket on the scooter and the 3-pin plug into the wall socket and
switch on.
The battery charger has two lights. The red light when constant shows the battery charger is
connected, if the red light ashes there is a break in the connection. The green light ashes when the
batteries are receiving charge. The green light is constant when the charge is complete.

16
Caution:
Do not charge the batteries for longer than 12 hours. Always charge the batteries in a
well-ventilated indoor area.
You must still maintain charging the batteries even if the scooter is not to be used for
a prolonged period of time (2 to 3 weeks). Failure to do so could result in permanent
damage and render the batteries unusable.
Wherever possible do not interrupt the charge cycle until the batteries are fully charged.
Continual interruption can permanently damage the batteries. If the charging lead should
get damaged discontinue use immediately and seek a replacement from your dealer.
Only use the charger supplied with your scooter. Do not leave the charger plugged into to
the charger port after the charge is complete. Always remove the keys from the scooter
when charging.
Disposing and recycling of used battery
Batteries must always be recycled correctly. Do not dispose of them with your
domestic refuge.
For further information regarding your nearest recycling facility please contact your
local authority.
Troubleshooting
Fuses
In-line 50amp spade fuses from the batteries protect any overload.
• The unit is switched on.
• All plugs and connections are rmly xed.
• Battery level shows full charge.
• Freewheeling device is in the drive position.
• Circuit breaker has not tripped.
Check list
If your scooter fails to operate, please check the following:
Circuit Breaker
Your scooter is tted with the latest in electronic controls that are programmed to protect the
electrical system from abnormal overloads. Fitted for extra protection is a circuit breaker, should there
be a situation that your scooter stops for no apparent reason please check that the circuit breaker has
not popped out. The circuit breaker can be found under the rear chassis cover accessible through a
port hole under the seat.

17
If the freewheel device has been operated with the scooter switched on, the scooter will not operate
until the key switch has been turned o and on again.
Should a fault occur, the fault will be identied by a beeping sequence which relates to the fault in the
table below.
Further information
Safety Information Regarding Electromagnetic Interference (EMI)
Scooters and Powerchairs are designed to operate under certain conditions.
However, radio waves or electromagnetic elds may aect the operation of the Scooter.
The source of EMI could be radio or television transmitters or portable devices such as
mobile phones, portable CB radios etc. Should any unintentional movement occur turn the
scooter o as soon as safely possible.
Solar Energy
During periods of sunny weather, it is possible that surfaces of your scooter may reach high
temperatures (as with motor vehicles). Please take precautions if leaving the scooter in direct sunlight
for any period of time. Seek shade or cover the seat and hand controls to keep any temperature
increases to a minimum.
Health Factors
Suitability for this product has been assessed on the user’s current state of health. It is essential that
the user regularly monitor their ability to use the scooter safely.
General Use
Take heed of the information given in this manual regarding safety and the maintenance of your scoot-
er. If adhered to, your scooter should give you years of reliable mobility.
Storage and General Care
We recommend that the scooter is always stored in a dry environment such as a garage or shed to
protect the chassis and other components from corrosion. Do not leave the scooter outside during
rainstorms. If the scooter is wet, wipe with a dry cloth to ensure there is no ingress of water into the
internal components of the scooter.
During everyday use, do not use in rain showers or travel through puddles. Avoid use in areas where
the scooter could become contaminated with sand or abrasive materials.
Note:
Should your scooter fail to operate after checking these possible problems, consult your
local Shoprider dealer immediately.
If the scooter is switched on and not operated for a period of time (approx 10 minutes) it
may enter ‘sleep’ mode. This is indicated by the spanner ashing on / o continuously.
Simply switch the scooter o and on to reset the controller.

18
Emergency Procedures
Should your scooter behave erratically or become unresponsive whilst driving, release the wig-wag
lever so it may return to it’s neutral position and switch o the power at the key / switch. Use the
emergency handbrake if required. These procedures will stop the scooter and activate the braking
system, preventing any further uncontrolled manoeuvres.
Product Stability
Scooters and powered wheelchairs are designed to allow the user exibility of movement in restricted
areas. Driving at maximum speed and attempting sharp turns can create a situation where the
product becomes unstable. Therefore it is essential that the user pay attention to the guidance set out
in this manual.
• Maximum speed setting
• Seat height
• User movement
• User’s manoeuvres
• Gradients or slopes
The main factors aecting stability are:
Warning:
Please keep your speed to a level where you can safely stop without having to make any
erratic turns.
Do not load bags etc. on the back of the seat as this will aect the centre of gravity and
could cause instability.
Do not lean outside of the ‘footprint’ of the product, especially whilst moving.
Avoid making turns on gradients or slopes.
Driving in Pedestrian Areas
As mentioned previously, when using the scooter in pedestrian areas always lower your maximum
speed to that of the pedestrians around you. Remember the stopping distance of your scooter and
always allow enough space to stop safely to avoid collisions with pedestrians or other objects.
Note:
Switching the power o at the key / switch can cause the scooter to stop abruptly and
should only be used to stop the scooter during an emergency as this can damage the
drive unit.

19
This is to certify that your Shoprider product is warranted for a period of 12 months from the date of
original purchase. This warranty is not transferable.
Warranty Terms and Conditions
Model:
Serial No:
Purchase Date:
Dealer Stamp
Note:
Should a defect or operating fault arise within this period the Dealer from where the
product was originally purchased should be notied immediately. Failure to register the
fault may invalidate the warranty. The Dealer from where the product was purchased is
responsible for any warranty repairs.
Shoprider warrants that if a fault occurs within this period due to faulty workmanship or materials that
the product will be repaired (or replaced at the Company’s discretion) free of charge.
Any unauthorised modications will invalidate the warranty.
Parts which are subjected to normal wear and tear, accidental damage, neglect or misuse are
excluded from this warranty. Normal wear and tear includes tyres, chassis covers, bulbs, seat
coverings etc.
Component parts replaced outside this period carry a six-month warranty. (Standard terms and
conditions apply for this period).

Invamed.co.uk
York Road
Bridgend Industrial Estate
Bridgend
CF31 3TB
United Kingdom
01656 674488
sales@invamed.co.uk
www.invamed.co.uk
Distributed by:
Phisiang Machinery MFG. CO. LTD
No. 108 Hsin-He Rd
Hsin-Feng Hsiang
Hsinchu County
Taiwan
Manufactured by:
Shoprider reserve the right to change
specications without prior notice.
EC REP
Wellkang Ltd
29 Harley St.
W1G 9QR
London, UK.
/