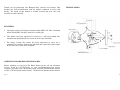
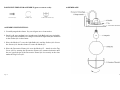
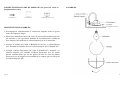
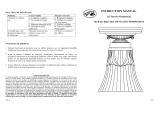
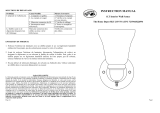
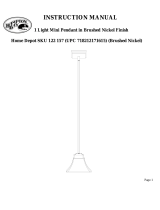
Hampton Bay BOA1691H-BN is a one-light exterior wall lantern that can be used for a variety of purposes. It features a bronze finish and clear seeded glass, giving it a classic look that will complement any home. The lantern is engineered to use a 60-watt medium base incandescent light bulb or a standard base compact fluorescent light bulb. It is also easy to install, with all the necessary hardware included.
Hampton Bay BOA1691H-BN is a one-light exterior wall lantern that can be used for a variety of purposes. It features a bronze finish and clear seeded glass, giving it a classic look that will complement any home. The lantern is engineered to use a 60-watt medium base incandescent light bulb or a standard base compact fluorescent light bulb. It is also easy to install, with all the necessary hardware included.


-
 1
1
-
 2
2
-
 3
3
-
 4
4
-
 5
5
-
 6
6
-
 7
7
-
 8
8
-
 9
9
-
 10
10
-
 11
11
-
 12
12


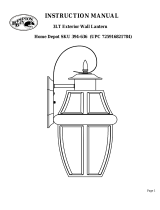
Hampton Bay BOA1691H-BN Installation guide
- Type
- Installation guide
- This manual is also suitable for
Hampton Bay BOA1691H-BN is a one-light exterior wall lantern that can be used for a variety of purposes. It features a bronze finish and clear seeded glass, giving it a classic look that will complement any home. The lantern is engineered to use a 60-watt medium base incandescent light bulb or a standard base compact fluorescent light bulb. It is also easy to install, with all the necessary hardware included.
Ask a question and I''ll find the answer in the document
Finding information in a document is now easier with AI
in other languages
Related papers
-
 Hampton Bay BOR1693 Installation guide
-
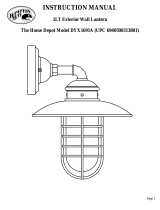 Hampton Bay DYX1691A Operating instructions
-
 Hampton Bay FXA8291A Installation guide
-
Hampton Bay WB0318 Operating instructions
-
 Hampton Bay GTP1613AL Installation guide
-
 Hampton Bay 15302 Installation guide
-
 Hampton Bay X124501 Installation guide
-
PRIVATE BRAND UNBRANDED BPL1611-WHT Installation guide
-
 Hampton Bay 17161 Installation guide
-
Hampton Bay EFG1393AL-2/BN Operating instructions


Other documents
-
Design House 517797 Installation guide
-
-
-
-
-
Maxim Dover 56094 Quick start guide
-
 Commercial Electric ESS1311 Installation guide
-
Eglo 202908A Operating instructions
-
-
Triarch 25953 User manual
