PREPARE THE COUNTER TOP
Check clearances above and below the counter. Make sure there are no obstructions such as cupboard partitions, braces or pipes to
interfere with the installation. Thickness of the counter top must not be more than 1 1/2" (38mm) thick at sink rim.
IF A TEMPLATE WAS SUPPLIED:
Position the template flat on the countertop to align with plumbing connections - do not draw around the tabs, as they are for
positioning only and do not need to be cut out. (Illustration A) Mark opening and faucet holes on countertop. If you are installing a
ledgeback sink (one with a spot for the faucet) trace the faucet holes onto the countertop.
Drill a hole to start cutout, then use a jigsaw to cut carefully along the inside edge of the cutout line, and use a hole saw to cut out
the necessary faucet holes. (Illustration 1B and 1C).
IF NO TEMPLATE WAS SUPPLIED:
Note: This step does not apply to ledgeback sinks.
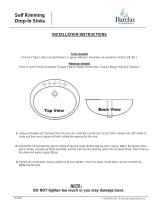
Clean the counter thoroughly to avoid scratching the polished sink rim. Place the sink face down on countertop and draw a line "A",
with pencil, around the sink, ensuring that you have left enough room for a faucet behind the sink. Remove the sink and draw a
second line "B" 3/8" inside the first. Extra allowance may be required at corners.
Drill a hole to start cut out then use a jigsaw to cut carefully along the inside edge of the cut-out line, and a hole saw to cut out the
necessary faucet holes. (Illustration 1B & 1C).
Step 1
PREPARE THE SINK
Remove the protective plastic cover from the sink and the paper tape on the rim seal. Place the supplied foam faucet gasket over
the cutout faucet holes. When installed properly, this gasket will give the faucet deck more stability. A bit of tape will hold the gasket
in place while you install the sink.
Step 2
Step 3
PREPARE THE STRAINER ASSEMBLY
Install strainer assembly as indicated. (Illustration 3). Hand tighten the tailpiece on the
strainer housing.
Step 5
Step 4
INSTALL SINK FASTENERS
Before dropping the sink into the prepared hole, and with sink right-side-up, place notched end of
bolt into the keyhole slot in sink bracket. Use one bolt per double bracket. Turn claw to rest against
side of sink. (Illustration 4).
1A 1B 1C
INSTALL THE SINK
Lower the sink carefully into the countertop so the bolts enter without interference.(Illustration 5A).
Turn the claws out 90° so they grasp the underside of the countertop. (Illustration 5B).
Tighten the clamps gradually, in a sequence similar to that shown. (Illustration 5C).
CAUTION: Tighten claws only until sink rim is flush with counter top.
Do not over tighten.
4
3
Step 6
OVERFLOW SYSTEMS
If your new sink has an overflow system, consult the directions with those parts for installation instructions.
5B5A 5C
Outside Line “A”
Inside Line “B”
A60010 0711
140037_E1_Kindred_AMSD_A60010_EN.qxd:227330_Kindred_33124.qxd 7/29/11 8:32 AM Page 2