Fagor FVH600R User manual

Category
Hobs
Type
User manual

This manual is also suitable for

english
13
220-240V 3~ Nominal switch by phases
60 cm hob 14 A
>60cm hob 16,5 A
380-415V 3N~ Nominal switch by phases
60 cm hob 11 A
>60cm hob 13 A
380-415V 2N~ Nominal switch by phases
60 cm hob 16 A
>60cm hob 19 A
This appliance is compliant with European
directives 73/23/EEC and 89/336/EEC
Recommendation: The hob must be installed
by an authorised installer, who shall follow the
manufacturer’s instructions and diagrams.
1
Instruction Manual
Very important: Read this manual thoroughly before using the hob.
This manual is designed so that the texts relate to the corresponding illustrations.
2
Installation
Use
Identify the model of your hob (“a”, “b”, “c”,
d”, “e”, “f”, “g”, “h”, “i”, “j”, “k”, “l”, “m”, “n”,
o”) by comparing the number and layout of the
elements on your appliance with that shown in
the illustrations.
1.1 Unpacking. Remove all the protective
materials.
1.2 Insertion into the unit. Always take into
account the details on the characteristics
plate (1.2.1) and the measurements of
the unit into which the hob is going to be
inserted (1.2.2, 1.2.3). If you are not going
to fi t an oven beneath the hob, you must
install a protective panel in accordance with
the measure indicated (1.2.4). Stick the foam
join along the outer edge of the hob to make
it watertight (1.2.5). Turn the hob over and
insert it into the hole (1.2.6). Secure it to the
unit with the four hooks supplied (1.2.7). Do
not use non-removable materials such as
silicone.
1.3 Connection to the power supply. The hob
is supplied with a power cable.
With 5 wires: a) dark blue, b) light blue, c)
brown, d) red, e) green yellow. (1.3.1)
• Prepared for a 230V~ hob. (1.3.2)
• Prepared for a 220-240V~ hob: see table.
(1.3.3)
• Total power: 60cm hob 6.8kW,
>60cm hob 7.8kW
220-240V~ Nominal switch by phases
60 cm hob 30 A
>60cm hob 34 A
If the type of connection is other than 220-
240V~, remove the cable and make the
connection as per diagrams (1.3.3, 1.3.4).
0
Identifi cation
Clay, copper or stainless steel receptacles can
be used with vitroceramic hobs. Aluminium
receptacles are not recommended as they can
stain the glass of the hob.
2.1 Selecting the cooking zone. You have
various elements on which to place the
receptacles. Choose the most suitable one
depending on the size of the receptacle.
2.2 Turning on the hob. Press
for 3
seconds to turn on the hob; the
0
of the
different cooking zones will be activated.
N.B.: In order to be able to select whether
the child safety function is activated,
deactivate it by pressing the
key for 3
seconds (2.13)
2.3 Activating the element. Activate the
element on which you have placed the
receptacle by pressing the corresponding
key
(2.3.1, 2.3.2). or
press
(2.4.2)
N.B.: If you take longer than 5 seconds to
select the element, the hob will automatically
turn itself off, as a safety measure.
english
14
ash (2.8.7). Select the time with
, on
the clock (2.8.8). After 5 seconds the time
will be set and the power and
will be
displayed alternately on the timed element.
Once the time has passed, you will hear
a sound and
00
will fl ash. To cancel the
timing, press
on the
icon until
00
is
displayed.
N.B.: The timer will automatically turn itself off
if you take longer than 10 seconds to select
the time.
Models e: Once an element has been
activated and the power selected, press
again the selection key of the element to
be timed, and a
will appear. (2.8.11).
Select the time with
, (2.8.12) and set
it by pressing the timed element key again
(2.8.13). The power will be displayed with a
dot indicating that the element is on a timer.
You will hear a sound and see
to indicate
that the time has passed (2.8.14). Press any
key and the sound will stop.
N.B.: The timer will automatically turn itself off
if you take longer than 10 seconds to select
the time.
Observations on timing: If the power level is 9,
the maximum time for the timer will be 60 min.
Otherwise, the maximum will be 99 min.
Once the time has passed, the alarm will sound
until you press any key.
PROGRAMMING FUNCTIONS
2.9 Rapid heating. Reaches maximum
temperature quickly to automatically go to
the constant temperature.
Models abc: Activates an element and takes
the bar to the maximum power. Press
and a
will appear on the display screen
of the selected element (2.9.1). You have 5
seconds to select the desired level, you are
advised to use levels from 3 to 6 (2.9.2). After
ve seconds the rapid heating will be set
and will appear on the display screen of the
selected element (2.9.1). You have 5 seconds
to select the desired level, you are advised
to use levels from 3 to 6 (2.9.2). After fi ve
seconds the rapid heating will be set and
and the power will be displayed alternately.
Once the maximum temperature has been
reached,
will disappear, leaving the
power constant. The element will continue
operating in the conventional way. If you want
2.4 Selecting the power. Adjust it by sliding
your fi nger along the bar (2.4.1) or by
pressing
or (2.4.2, 2.4.3).
SPECIAL ELEMENTS
2.5 Double element, Triple element. Once you
have selected the power, press
,
and this will activate the double element
(2.5.1, 2.5.3). If you press
(2.5.2) or
(2.5.4) again, this will activate the triple
element. To cancel, press (
,
,
,
).
2.6 Large hotplate. You can use this element
in a circular way
or in a joint way,
as a large hot plate
. Press
to
activate it and press again to deactivate it.
Recommendation: on the models with halogen
elements, the light is so bright that we advise
you not to look at it when it is on without the
receptacle.
TIMER FUNCTIONS
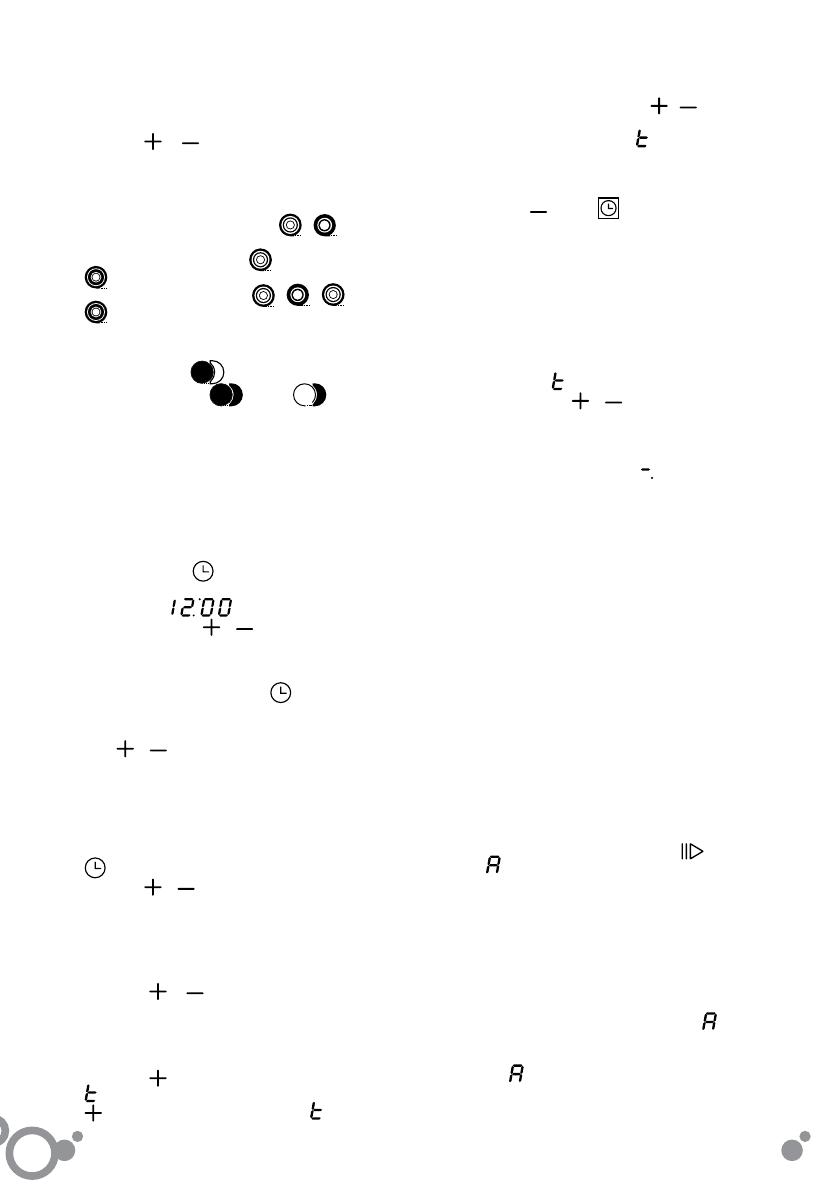
2.7 Setting the time
. When the hob is
plugged in, the digits on the clock will fl ash
and will show
(2.7.1). Adjust the
time with the keys
, (2.7.2). Follow
the same procedure whenever the appliance
is unplugged or the power supply is cut off.
To change the time, press the
key for 5
seconds (2.7.3). The time will start to fl ash
and you will hear a beep; adjust it with the
keys
, .
2.8 Selecting the time.
Models abc: Once an element has been
activated and the power selected, you have
5 seconds of fl ashing in which to press the
key (2.8.1). Select the time required by
pressing
, (2.8.2). After fi ve seconds
the timer is set and the time will be displayed
with an illuminated dot beneath the icon of
the timed element (2.8.3). To alter or see the
time remaining, press the icon of the timed
element (2.8.4). To cancel the programming,
press the
, keys simultaneously
(2.8.5).
Models dfghkmo: Once an element has
been activated and the power selected,
press the
key on the clock.
00
and a
will appear on each element (2.8.6). Press
on the element to be timed and
will
english
15
3
Maintenance and
cleaning
Do not use a steam cleaner.
Clean the surface of your hob regularly once
it has cooled down. Do not use abrasive
products or sponges. Clean with a damp cloth
and soapy water (3.1.1).
Once a week, clean thoroughly with products
specifi cally designed for vetroceramic hobs.
We recommend VITRO-CLEN for cleaning and
maintaining your vitroceramic hob.
Stubborn stains can be removed with the
glass scraper (3.1.2).
If you accidentally burn some sugar, sugary
elements or plastic on the hob, remove it as
soon as possible with a scraper while it is still
hot. If this is not done, you may be left with
permanent marks.
Use the blade of the scraper in perfect
condition; replace it if is damaged.
to cancel the rapid heating, press the icon of
the programmed element and select a new
power.
Models dfghjklmo: Select an element and
set it at the maximum power by pressing
until a 9 and a dot
are displayed (2.9.3).
Adjust the power by pressing
; levels
3 to 6 are recommended (2.9.4). After 5
seconds, fast heating is set and the power
will be displayed followed by a dot (2.9.5).
Once the maximum temperature has been
reached, the decimal point will disappear
and the element will continue operating in
the conventional way. To cancel the function,
press the key of the programmed element
and select a new power.
2.10 Vitros with controls. Make sure that the
element you are going to activate is the
element you want to use (2.10.1). Turn
the control to the desired position and the
‘on’ light will come on (2.10.2) which also
indicates the residual heat when the element
is turned off.
On the models with double elements or a
large hotplate, turning the control to the left
will adjust a part of the element and turning
the control to the right will adjust the whole
element (2.10.3).
2.11 Turning the element off. Select the power
0
of the element you want to turn off.
2.12 Residual heat. After using the hob, the
elements will stay hot for some time, which
will vary according to the power selected
and a
or a dot will be displayed on the
elements that are still hot. Do not touch
these elements, as there is a risk of
burning yourself.
Caution: If the power supply is cut off, when
it is restored, the
icon will not be displayed
even if the cooking zone is hot. It is important to
remember this fact.
2.13 Locking function. To prevent children from
handling the appliance. Press down the
key
for 3 seconds and this will activate the lock. To
unlock it, repeat the procedure.
Recommendations:
Avoid knocking receptacles against the glass.
Aluminium receptacles are not advisable as
they can stain the glass, unless they have a
stainless steel protective base.
The heat elements should not be operated
without a receptacle.
The base of the receptacle must be fl at and
dry.
Make sure that the diameters of the
receptacles are larger than or the same as
the element to be used and place them in the
centre of the heat source.
Try not to move the receptacles as this can
scratch the glass.
Only use the appliance for cooking food. Do
not use the hob as a worktop.
Do not apply cold water directly onto the hob
when it is hot.
Caution: Intermittent operation of the cooking
zones is not a fault. They operate with longer
or shorter on and off periods depending on the
desired power.
english
16
5
Environment
4
Safety
The hob has been designed with protection of
the environment in mind.
Be environmentally aware. Use the adequate
power for each cooking operation and select the
receptacles of a suitable size for the food you are
going to prepare. The heat transmission is best
when the base of the receptacle and the diameter
of the cooking zone are the same size.
When you have fi nished cooking, if you like you
can leave the receptacle where it is to make use
of the residual heat accumulated. This will save
energy.
Use a lid whenever you can in order to reduce the
heat lost through steam.
Electrical and electronic appliance waste
management.
Do not dispose of appliances by mixing them with
general domestic waste.
Take your hob to a special collection centre.
The recycling of domestic appliances avoids
negative consequences to our health, the
environment and enables us to save energy and
resources.
For further information, contact your local
authority or the establishment from where you
purchased your hob.
The power circuit supplying the hob must have
an all-pole circuit breaker with at least 3mm
space between contacts.
• The hob must be installed by an authorised
installer, who shall follow the manufacturer’s
instructions and diagrams.
• The installation must be of the appropriate
size for the maximum power indicated on the
characteristics plate and the power socket with
the regulatory earth.
• If the cable is damaged, it must be replaced
by the post-sales service or similarly qualifi ed
personnel for safety purposes.
• The element is equipped with an inner
temperature limiter which turns the element off
in the event of the hob overheating.
• After each use, switch the element off using its
control.
• If the surface of the glass is cracked or broken,
unplug the appliance immediately to avoid the
possibility of an electric shock. Do not use the
hob until the glass has been replaced (4.1.1).
• If anything spills onto the control keys, the hob
will stop and emit a sound (4.1.2).
• If you press a sensor down for too long or there
is an object activating the sensors, the hob will
stop and emit a sound (4.1.3).
• Do not place receptacles with hot bases onto
the sensors; you can burn yourself when
pressing them (4.1.3).
• Keep young children well away; the heating
surfaces can be extremely hot when in use.
Use the locking system to prevent children from
playing with the controls.
• This appliance is not designed for use by
people with disabilities.
• Always stay nearby when cooking dishes or
food with fat or oil. Excessive heat could cause
them to catch fi re.
• If the hob is installed above a drawer, no
ammable objects must be stored inside.
  • Page 1 1
  • Page 2 2
  • Page 3 3
  • Page 4 4
  • Page 5 5
  • Page 6 6
  • Page 7 7
  • Page 8 8
  • Page 9 9
  • Page 10 10
  • Page 11 11
  • Page 12 12
  • Page 13 13
  • Page 14 14
  • Page 15 15
  • Page 16 16
  • Page 17 17
  • Page 18 18
  • Page 19 19
  • Page 20 20
  • Page 21 21
  • Page 22 22
  • Page 23 23
  • Page 24 24
  • Page 25 25
  • Page 26 26
  • Page 27 27
  • Page 28 28
  • Page 29 29
  • Page 30 30
  • Page 31 31
  • Page 32 32
  • Page 33 33
  • Page 34 34
  • Page 35 35
  • Page 36 36
  • Page 37 37
  • Page 38 38
  • Page 39 39
  • Page 40 40
  • Page 41 41
  • Page 42 42
  • Page 43 43
  • Page 44 44
  • Page 45 45
  • Page 46 46
  • Page 47 47
  • Page 48 48
  • Page 49 49
  • Page 50 50
  • Page 51 51
  • Page 52 52
  • Page 53 53
  • Page 54 54
  • Page 55 55
  • Page 56 56
  • Page 57 57
  • Page 58 58

Fagor FVH600R User manual

Category
Hobs
Type
User manual
This manual is also suitable for

Ask a question and I''ll find the answer in the document

Finding information in a document is now easier with AI