Page is loading ...

Your multimeter has been engineered and manufactured to our high standard for dependability, ease of operation, and
operator safety. When properly cared for, it will give you years of rugged, trouble-free performance.
CAUTION: To reduce the risk of injury or property damage, the user must read and understand the operator’s manual before
using this product. If you do not understand the warnings and instructions in the operator’s manual, do not use this product.
Cette multimètre a été conçu et fabriqué conformément à nos strictes
normes de fiabilité, simplicité d’emploi et sécurité d’utilisation.
Correctement entretenu, cet outil vous donnera des années de
fonctionnement robuste et sans problème.
AVERTISSEMENT : Pour réduire les risques de
blessures, l’utilisateur doit lire et veiller à bien comprendre
le manuel d’utilisation avant d’employer ce produit. Si tous
les avertissements et toutes les consignes de sécurités et
instructions du manuel d’utilisation ne sont pas bien compris,
ne pas utiliser ce produit.
Su multímetro ha sido diseñado y fabricado de conformidad
con nuestras estrictas normas para brindar fiabilidad, facilidad
de uso y seguridad para el operador. Con el debido cuidado, le
brindará muchos años de sólido funcionamiento y sin problemas.
ADVERTENCIA: Para reducir el riesgo de lesiones,
el usuario debe leer y comprender el manual del operador antes
de usar este producto. Guarde este manual del operador y
estúdielo frecuentemente para lograr un funcionamiento seguro
y continuo de este producto.
CONSERVER CE MANUEL POUR
FUTURE RÉFÉRENCE
GUARDE ESTE MANUAL PARA
FUTURAS CONSULTAS
SAVE THIS MANUAL FOR FUTURE REFERENCE
OPERATOR’S MANUAL
MANUEL D’UTILISATION
MANUAL DEL OPERADOR
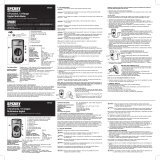
Tek4® DIGITAL MULTIMETER
MULTIMÈTRE NUMÉRIQUE
MULTÍMETRO DIGITAL
RP4020
MODE
10A
COM
V I
RANGE
REL
HOLD
AUTO POWER OFF
OFF
V
V
OFF
I
I
A
mA
A
CAT 600V 10A

2 – English
Introduction ..................................................................................................................................................................... 2
Warranty .......................................................................................................................................................................... 2
General Safety Rules .................................................................................................................................................... 3-4
Specific Safety Rules ....................................................................................................................................................4-5
Symbols ........................................................................................................................................................................... 6
Features ........................................................................................................................................................................... 7
Assembly ......................................................................................................................................................................... 8
Operation ....................................................................................................................................................................8-12
Maintenance .................................................................................................................................................................. 13
Figure numbers (illustrations) ........................................................................................................................................ 14
Parts Ordering / Service ................................................................................................................................... Back page
TABLE OF CONTENTS
INTRODUCTION
This product has many features for making its use more pleasant and enjoyable. Safety, performance, and dependability
have been given top priority in the design of this product making it easy to maintain and operate.
WARRANTY
LIMITED TWO YEAR WARRANTY AND 90 DAY EXCHANGE POLICY
90-DAY EXCHANGE POLICY: During the first 90 days after date of purchasing this product, you may either request service
under this warranty or you may exchange it by returning it with proof of purchase and all original equipment packaged with
the original product to the dealer from which it was purchased. The replacement product will be covered by the limited
warranty for the balance of the two year period from the date of the original purchase.
LIMITED TWO YEAR WARRANTY. This product is warranted against all defects in workmanship or materials for a period
of two years from the date of purchase. The warranty on any accessories for this product, excluding batteries, is limited to
90 days from the date the accessory is purchased. To obtain warranty service, call Customer Service at 1-800-525-2579
for warranty return instructions. The product must be properly packaged and returned with all equipment that was included
with the original product. When you request warranty service, you must also present proof of purchase documentation,
which includes the date of purchase (for example, a receipt or a bill of sale). Defective products returned within the war-
ranty period will be repaired or replaced, at our option, free of charge, within ninety (90) days or less. The cost of shipping
the product to us is your responsibility. This warranty only covers defects arising under normal usage and does not cover
any malfunction, failure or defects resulting from misuse, abuse, neglect, alteration, modification or unauthorized repairs.
It applies only to the original purchaser at retail, and may not be transferred. One World Technologies, Inc. makes no war-
ranties, representations or promises as to the quality or performance of this product other than those specifically stated
in this warranty. Any implied warranties granted under state law, including warranties of merchantability or fitness for a
particular purpose, are limited to two years from the date of purchase. One World Technologies, Inc. is not responsible for
direct, indirect, or incidental damages Some states do not allow limitations on how long an implied warranty lasts, or the
exclusion or limitation of incidental or consequential damages, so the above limitations and exclusions may not apply to
you. This warranty gives you specific legal rights, and you may also have other rights which vary from state to state.

3 – English
GENERAL SAFETY RULES
WARNING -
Read all instructions. Failure to follow all instructions
listed below may result in electric shock, fire and/or
serious injury. To reduce the risk of injury, user must read
instruction manual.
SAVE THESE INSTRUCTIONS
Keep work area clean and well lit. Cluttered or dark
areas invite accidents.
Avoid body contact with earthed or grounded surfaces
such as pipes, radiators, ranges and refrigerators.
There is an increased risk of electric shock if your body
is earthed or grounded.
Do not expose battery products to rain or wet
conditions. Water entering a battery product will increase
the risk of electric shock.
Do not abuse the leads. Never use the leads for car-
rying or pulling the battery product. Keep leads away
from heat, oil, sharp edges or moving parts. Damaged
or entangled leads increase the risk of electric shock.
Use battery only with charger listed.
MODEL BATTERY PACK CHARGER
RP4020 AP4001 AP4700, AP4500
Stay alert, watch what you are doing and use common
sense when operating a battery product. Do not use
a battery product while you are tired or under the
influence of drugs, alcohol or medication. A moment
of inattention while operating battery products may result
in serious personal injury.
Do not overreach. Keep proper footing and balance at
all times. Do not use on a ladder or unstable support.
Stable footing on a solid surface enables better control
of the battery product in unexpected situations.
Maintain this product. Check breakage of parts and
any other condition that may affect the product’s
operation. If damaged, have the product repaired
before use. Many accidents are caused by poorly
maintained products.
Dress properly. Do not wear loose clothing or jewelry.
Keep your hair, clothing and gloves away from leads
or moving parts. Loose clothes, jewelry or long hair can
be caught in moving parts.
Wear rubber-bottomed shoes or sneakers when
working with high-voltage equipment. Make sure
that the controls applied will prevent operation of the
equipment and that all hazardous energy, including
residual or stored energy, is blocked, discharged, or
relieved prior to starting work.
If you need to probe or otherwise touch circuits with
power off, discharge (across) large power supply filter
capacitors (at least 2 times). Monitor while discharging
and/or verify that there is no residual charge using the
multimeter.
If you must probe live, put electrical tape over all
but the last 1/16 in. of the test probes to avoid the
possibility of an accidental short, which could cause
damage to various components. Clip the reference end
of the meter or scope to the appropriate ground return
so that you need to only probe with one hand.
Never enter alone into an area containing exposed
electrical energy sources.
Use only the test instruments and insulated tools
rated for the voltage and current specified.
Store idle battery products out of the reach of children
and do not allow persons unfamiliar with the battery
product or these instructions to operate the product.
Battery products are dangerous in the hands of untrained
users.
Maintain battery products. Check for misalignment
or binding of moving parts, breakage of parts and
any other condition that may affect the product’s
operation. If damaged, have the product repaired
before use. Many accidents are caused by poorly
maintained products.
Use the product and accessories in accordance with
these instructions and in the manner intended for the
particular type of product, taking into account the
working conditions and the work to be performed.
Use of the product for operations different from those
intended could result in a hazardous situation.
BATTERY PRODUCT USE AND CARE
Ensure the switch is in the OFF position before
inserting battery pack. Inserting the battery pack into
products that have the switch on invites accidents.
Recharge only with the charger specified by the
manufacturer. A charger that is suitable for one type
of battery pack may create a risk of fire when used with
another battery pack.
Use battery products only with specifically designated
battery packs. Use of any other battery packs may create
a risk of injury and fire.
When battery pack is not in use, keep it away from
other metal objects like paper clips, coins, keys, nails,
screws, or other small metal objects that can make a
connection from one terminal to another. Shorting the
battery terminals together may cause burns or a fire.
Under abusive conditions, liquid may be ejected from
the battery, avoid contact. If contact accidentally
occurs, flush with water. If liquid contacts eyes,
additionally seek medical help. Liquid ejected from the
battery may cause irritation or burns.
When servicing a battery product, use only identical
replacement parts. Follow instructions in the
Maintenance section of this manual. Use of unauthorized
parts or failure to follow Maintenance instructions may
create a risk of shock or injury.
Know your battery product. Read operator’s manual
carefully. Learn its applications and limitations, as
well as the specific potential hazards related to this
product. Following this rule will reduce the risk of electric
shock, fire, or serious injury.

4 – English
Before you use the meter, inspect the case. Pay particular
attention to the insulation surrounding the connectors.
Inspect the test leads for damaged insulation or exposed
metal. Check the test leads for continuity. Replace
damaged test lead before you use the meter.
Do not use the meter if it operates abnormally. Protection
may be impaired. When in doubt, have the meter
serviced.
Do not operate the meter in a place where flammable or
explosive gas (or dust) is present.
Do not apply more than the rated voltage, as marked on
the meter, between terminals or between any terminal
and earth ground.
When measuring current, turn off circuit power before
connecting the meter in the circuit. Remember to place
the meter in series with the circuit.
Use caution when working above 30V AC rms, 42V peak,
or 60V DC. Such voltages pose a shock hazard.
When using the probes, keep your fingers behind the
finger guards on the probes.
When making connections, connect the common test
lead before you connect the live test lead.
When you disconnect test leads, disconnect the live test
lead first.
Remove all test leads from the meter before you open
the battery cover or portion of the case.
Do not operate the multimeter with the battery door or
portions of the case loosened or removed.The battery
door should be securely closed before operating the
multimeter.
To avoid false readings, which could lead to possible
electric shock or personal injury, replace or charge the
battery as soon as the low battery indicator (
)
appears.
Use the meter only as specified in this manual; otherwise
the safety features of the meter may be impaired.
When in Relative mode or in Data Hold mode, caution
must be used because hazardous voltage may be
present.
Do not electrically connect yourself to ground. Use
extreme caution because you may ground yourself if you
are careless.
Do not operate this meter if your hand or the meter is
wet.
Adhere to local and national safety codes.
Use Individual protective equipment to prevent shock and
arc blast injury when working in an area where hazardous
live conductors are exposed.
Remaining endangerment: When an input terminal is
connected to dangerous live potential, it is to be noted
that this potential at all other terminals can occur!
CATIII - Measurement category III is for measurements
performed in the building installation. Examples are
measurements on distribution boards, circuit breakers,
wiring, including cables, bus-bars, junction boxes,
switches, socket-outlets in the fixed installation, and
equipment for industrial use and some other equipment, for
example, stationary motors with permanent connection to
fixed installation. Do not use the meter for measurements
within Measurement Categories IV.
Use the proper terminals, function and range for your
measurements.
Before measuring current, check the meter’s fuses and
turn off power to the circuit before connecting the meter
to the circuit.
Before rotating the mode selection dial to change
functions, disconnect test leads from the circuit under
test.
Be sure the test leads and switch are in the correct
position for the desired measurement.
Never measure resistance in a circuit when power is
applied.
SPECIFIC SAFETY RULES
Battery products do not have to be plugged into
an electrical outlet; therefore, they are always in
operating condition. Be aware of possible hazards
when not using your battery product or when changing
accessories. Following this rule will reduce the risk of
electric shock, fire, or serious personal injury.
Do not place battery products or their batteries near
fire or heat. This will reduce the risk of explosion and
possibly injury.
Do not crush, drop or damage battery pack. Do not
use a battery pack or charger that has been dropped
or received a sharp blow. A damaged battery is subject
to explosion. Properly dispose of a dropped or damaged
battery immediately.
Batteries can explode in the presence of a source
of ignition, such as a pilot light. To reduce the risk of
serious personal injury, never use any cordless product
in the presence of open flame. An exploded battery can
propel debris and chemicals. If exposed, flush with water
immediately.
For best results, your battery product should be
charged in a location where the temperature is more
than 50°F but less than 94°F. To reduce the risk of serious
personal injury, do not store outside or in vehicles.
GENERAL SAFETY RULES

5 – English
CALIFORNIA PROPOSITION 65
WARNING:
This product may contain chemicals, including lead,
known to the State of California to cause cancer, birth
defects, or other reproductive harm. Wash hands after
handling.
SPECIFIC SAFETY RULES
Never touch the probes to a voltage source when the test
leads are plugged into the 10A or 400mA input.
Before use, verify the meter’s operation by measuring a
known voltage.
To avoid possible damage to the meter or to the equipment
under testing, follow these guidelines:
• Disconnect circuit power and discharge all high-voltage
capacitors before testing resistance, continuity, or
diodes.
• Before measuring current, check the meter’s fuses and
turn power OFF to the circuit before connecting the
meter to the circuit.
Save these instructions. Refer to them frequently and
use them to instruct others who may use this product.
If you loan someone this product, loan them these
instructions also.
5 – English
DECLARATION OF CONFORMITY
We declare under our sole responsibility that this product is in conformity with the following standards or
standardized documents.
2006/95/EC
EN61010-1:2001
EN61010-031:2002
15
DECLARATION OF CONFORMITY
We declare under our sole responsibility that this product is in
conformity with the following standards or standardized documents.
2006/95/EC
EN61010-1:2001
EN61010-031:2002
DECLARATION OF CONFORMITY
We declare under our sole responsibility that this product is in
conformity with the following standards or standardized documents.
2006/95/EC
EN61010-1:2001
EN61010-031:2002
DECLARATION OF CONFORMITY
We declare under our sole responsibility that this product is in
conformity with the following standards or standardized documents.
2006/95/EC
EN61010-1:2001
EN61010-031:2002
Machine: 4V Digital Multimeter Type: RP4020
Name of company: TECHTRONIC INDUSTRIES CO. LTD.
Address: 24/F, CDW BUILDING
388 CASTLE PEAK ROAD
TSUEN WAN
HONG KONG
Web: www.ttigroup.com
Name/Title: Brian Ellis
Vice President - Engineering
Signature:
Trademarks:
The use of the trademark Ryobi is pursuant to a license granted by Ryobi Limited.

6 – English
SYMBOLS
Some of the following symbols may be used on this product. Please study them and learn their meaning. Proper inter-
pretation of these symbols will allow you to operate the product better and safer.
SYMBOL NAME DESIGNATION/EXPLANATION
Safety Alert Indicates a potential personal injury hazard.
Read The
Operator’s Manual
To reduce the risk of injury, user must read and understand operator’s manual
before using this product.
Wet Conditions
Alert
Do not expose to rain or use in damp locations.
Recycle Symbol
This product uses lithium-ion (Li-ion) batteries. Local, state or federal laws may
prohibit disposal of batteries in ordinary trash. Consult your local waste authority
for information regarding available recycling and/or disposal options.
DC Volts Voltage
AC Volts Voltage
Ohms The unit of electrical resistance
Continuity Complete path for current flow
Capacitance Ability of a component to store an electrical charge
Diode A two electrode electron tube containing an anode and a cathode.
A Amperage The strength of an electric current expressed in amperes
Hz Hertz Frequency (cycles per second)
min Minutes Time
Direct Current Type or a characteristic of current
Alternating Current
Type of current
.../min Per Minute Revolutions, strokes, surface speed, orbits etc., per minute
The following signal words and meanings are intended to explain the levels of risk associated with this product.
SYMBOL SIGNAL MEANING
DANGER:
Indicates an imminently hazardous situation, which, if not avoided, will result
in death or serious injury.
WARNING:
Indicates a potentially hazardous situation, which, if not avoided, could result
in death or serious injury.
CAUTION:
Indicates a potentially hazardous situation, which, if not avoided, may result in
minor or moderate injury.
CAUTION:
(Without Safety Alert Symbol) Indicates a situation that may result in property
damage.

7 – English
FEATURES
KNOW YOUR MULTIMETER
See Figures 1 - 3, page 14.
The safe use of this product requires an understanding of
the information on the product and in this operator’s manual.
Before use of this product, familiarize yourself with all oper-
ating features and safety rules.
This digital multimeter has been designed according to
IEC-61010 concerning electronic measuring instrument
with a measurement category III ( CAT III 600V ) and Pollu-
tion degree 2.
DIGITAL LCD DISPLAY
The LCD display features easy to read digits for a variety
of functions.
MODE SELECTION DIAL
Used to select the desired function and turn the meter ON
or OFF.
BUILT IN PROBE STORAGE, KICK STAND,
AND CONVENIENCE HOOK
Keep the probes untangled, easily prop it up, and hang it
almost anywhere for one-handed operation
AUTO POWER OFF
The automatic power-off feature helps to conserve battery
power.
MODE BUTTON
Switches the meter between DC and AC current measure-
ments.
RANGE BUTTON
Switches the meter between autorange mode and manual
range mode, and also selects the desired manual range.
10A JACK
Plug-in connector for the red test lead for the current mea-
surements between 400mA and 10A.
COM JACK
Plug-in connector for the black test lead for all measure-
ments.
μA/mA JACK
Plug-in connector for the red test lead for all measurements
except the current measurements 400mA.
BACKLIGHT BUTTON
Turns the backlight on and off.
REL BUTTON
Used to enter Relative mode.
HOLD BUTTON
Used to enter Data Hold mode.
PROBE COVER STORAGE
When the black and red leads are in use, the probe covers
can be placed in the storage areas on the back of the unit.
ALLIGATOR CLIPS
Two covered alligator clips are included for securing the
probes to a circuit when you need to keep your hands
free.
PRODUCT SPECIFICATIONS
Battery Voltage ................................................................4V
Display ....................................................... 3 3/4-digit LCD
Max. LCD reading ......................................................3999
Measurement category ............................................ CAT III
Maximum Voltage ........................................................600V
Maximum Current ......................................................... 10A
Sampling Rate .............................................. 2~3 times/sec
IP Rating ........................................................................ 54*
Operating Temperature................. 32°F - 94°F (0°C ~ 35°C),
<75%RH
Temperature Coefficient .......0.2 x (specified accuracy) / °F
(<64°F or 82°F)
0.2 x (specified accuracy) / °C
(<18°C or 28°C)
Storage Temperature ....................................... 14
°F
- 140
°F
(-10°C ~ 60°C), <85%RH
Operating Altitude ................................... 0 to 2000 meters
*IP Rating: Specifies the environmental protection the product enclosure provides. An IP Rating of 54 denotes protection against harmful
deposits of dust and protection against water sprayed from all directions. The water resistance rating applies only when the battery cap
is installed.

8 – English
ASSEMBLY
UNPACKING
This product has been shipped completely assembled.
Carefully remove the product and any accessories from
the box. Make sure that all items listed in the packing list
are included.
WARNING:
Do not use this product if it is not completely assembled
or if any parts appear to be missing or damaged. Use of
a product that is not properly and completely assembled
could result in serious personal injury.
Inspect the product carefully to make sure no breakage
or damage occurred during shipping.
Do not discard the packing material until you have care-
fully inspected and satisfactorily operated the product.
If any parts are damaged or missing, please call
1-800-525-2579 for assistance.
PACKING LIST
Multimeter
Leads/Probes
Alligator Clips
Operator’s Manual
WARNING:
If any parts are damaged or missing do not operate this
product until the parts are replaced. Use of this product
with damaged or missing parts could result in serious
personal injury.
OPERATION
WARNING:
Do not allow familiarity with products to make you care-
less. Remember that a careless fraction of a second is
sufficient to inflict serious injury.
WARNING:
Follow the General and Specific Safety Rules in this
manual when making electrical measurements and work-
ing with high voltages. Failure to follow standard safety
precautions could result in electric shock and serious
personal injury.
TO INSTALL/REMOVE THE BATTERY PACK
See Figure 2, page 14.
Make sure the mode selection dial is in the OFF position
before installing or removing the battery pack.
To remove the battery cover:
Use a small phillips screwdriver to loosen the screws and
remove the battery cover.
NOTE: The screws stay attached to the cover. There is
an o-ring in the slot in the housing. Make sure the o-ring
is fully seated in the slot.
Insert the battery pack in the direction shown.
Replace the battery compartment cover and reattach with
the screws.
Do not attempt to take readings unless the battery door
is securely closed.
WARNING:
Always remove battery pack from your product when you
are assembling parts, making adjustments, cleaning, or
when not in use. Removing battery pack will prevent acci-
dental starting that could cause serious personal injury.
READING THE LCD DISPLAY
See Figure 3, page 14.
SYMBOL MEANING
AUTO
Autorange mode is selected
HOLD
Data hold is enabled
Relative mode is active
Continuity test is selected
Diode test is selected
DC
Negative sign
AC
Battery is low and should be recharged or
replaced immediately

9 – English
UNITS ON THE LCD DISPLAY
mV, V
Voltage unit
mV: Millivolt ; V: Volt;
1V=10
3
mV
μA, mA,
A
Current unit
μA: Microamp; mA: Milliamp; A: Ampere;
1A=10
3
mA=10
6
μA
Ω, k Ω,
MΩ
Resistance unit
Ω: Ohm; k Ω: Kilohm; MΩ: Megohm;
1M Ω =10
3
k Ω =10
6
Ω
nF,
μF
Capacitance unit
nF: Nanofarad; μF: Microfarad;
1F=10
6
μF=10
9
nF=10
12
pF
OPERATION
ACCURACY
Accuracy is specified for a period of one year after calibration
and at 64.4ºF to 82.4ºF (18ºC to 28ºC), with relative humid-
ity < 75%. Except the ranges which are specified specially,
accuracy is specified from 8% to 100% of range.
Accuracy specifications take the form of:
± ([% of Reading]+[number of Least Significant Digits])
DC VOLTAGE
Range Resolution Accuracy
400mV 0.1mV ±(1.0%+5)
4V 0.001V
±(0.8%+3)40V 0.01V
400V 0.1V
600V 1V ±(1.0%+3)
Input Impedance: Range 400mV: >1000MΩ
The other ranges: 10MΩ
NOTE: The 600V range is specified from 20% to 100% of
range.
AC VOLTAGE
Range Resolution Accuracy
400μA 0.1μA ±(1.2%+3)
4000μA 1μA ±(1.0%+3)
40mA 0.01mA ±(1.5%+3)
400mA 0.1mA ±(1.0%+3)
4A 0.001A ±(1.8%+3)
10A 0.01A ±(2.0%+5)
Overload Protection: Fuse 1: F 400mA, 690V
Fuse 2: F 10A, 600V/690V
Max. Input Current: 10A (For inputs > 2A : measurement
duration< 10 secs, interval >15 minutes)
Max. Measurement Voltage Drop: 200mV (for all DC cur-
rent ranges except 10A range)
NOTE: The 10A range is specified from 20% to 100% of
range.
AC CURRENT
Range Resolution Accuracy
400μA 0.1μA
±(1.5%+5)
4000μA 1μA
40mA 0.01mA
±(1.8%+5)
400mA 0.1mA
4A 0.001A ±(2.0%+5)
10A 0.01A ±(2.5%+10)
Overload Protection: Fuse 1: F 400mA, 690V
Fuse 2: F 10A, 600V/690V
Max. Input Current: 10A (For inputs > 2A : measurement
duration < 10 sec, interval >15 minutes)
Frequency Range: 40Hz 400 Hz
Response: Average, calibrated in rms of sine wave
Max. Measurement Voltage Drop: 200mV (for all AC cur-
rent ranges except 10A range)
NOTE: The 10A range is specified from 20% to 100% of
range.
RESISTANCE
Range Resolution Accuracy
400Ω 0.1Ω ±(1.0%+5)
4kΩ 0.001kΩ
±(1.0%+3)
40kΩ 0.01kΩ
400kΩ 0.1kΩ
4MΩ 0.001MΩ
40MΩ 0.01MΩ ±(1.8%+5)
Overload Protection: 600V DC/AC rms
Range Resolution Accuracy
4V 0.001V
±(1.0%+5)40V 0.01V
400V 0.1V
600V 1V ±(1.2%+5)
Input Impedance: 10MΩ
Frequency Range: 40Hz 400 Hz
Response: Average, calibrated in rms of sine wave
NOTE: The 600V range is specified from 20% to 100% of
range.
DC CURRENT

10 – English
OPERATION
Range Introduction Remark
2V
The approximate forward volt-
age drop of the diode will be
displayed.
If the voltage drop is more than
2.0V, the display shows the over-
range indicator "OL".
Open Circuit
Voltage:
about 2.4V
Short Circuit
Current:
< 0.6mA
Overload Protection: 600V DC/AC rms
CONTINUITY TEST
Range Introduction Remark
The built-in buzzer will sound if
the resistance is less than about
20Ω.
The buzzer will not sound if the
resistance is more than 150Ω.
Open Circuit
Voltage:
about 0.45V
Overload Protection: 600V DC/AC rms
Overload Protection: 600V DC/AC rms
NOTE: Accuracy does not include error caused by the
capacitance of test lead and the meter. To reduce the error,
use Relative mode.
For range 100μF, wait about 30 seconds for reading to
settle.
DIODE TEST
WARNING:
Do not take readings unless the battery door is securely
closed.
USING RELATIVE MODE
See Figure 4, page 14.
Selecting Relative Mode stores the present reading as a
reference for subsequent measurements and sets the dis-
play to zero (0).
To enter Relative Mode, press the REL▵ button. The
symbol "" will appear on the LCD display.
When you perform a new measurement, the display
shows the difference between the first (reference) and
the new measurement.
Press REL▵ again to exit Relative mode and clear the
symbol.
NOTE: For capacitance measurements, the meter
remains in Autorange mode when you select Relative
mode. The actual capacitance to be measured must not
exceed 100μF even if you use Relative mode.
For other measurements which have both Autorange mode
and Manual Range mode, the meter changes to Manual
Range mode when you select Relative mode.
The actual value of the object under test must not exceed the
full-range reading of the selected range when you use Relative
mode. Use a higher measurement range if necessary.
MANUAL RANGING AND AUTORANGING
See Figure 4, page 14.
The meter defaults to Autorange mode in measurement
functions which have both Autorange mode and Manual
range mode. When the meter is in Autorange mode, AUTO
is displayed.
Press the RANGE button to enter the manual range mode.
The AUTO symbol will disappear.
Each press of the RANGE button increases the range.
When the highest range is reached, the meter wraps to
the lowest range.
To exit the manual range mode, press and hold down the
RANGE button for about 2 seconds. The meter will return
to Autorange mode and the symbol AUTO will appear.
NOTE: The RANGE button is disabled in diode, continuity
and capacitance measurement functions.
DATA HOLD MODE
See Figure 4, page 14.
Press the HOLD button to hold the present reading on
the display. The symbol HOLD will appear on the display
as an indicator.
Press the button again to exit Data Hold mode. The sym-
bol HOLD will disappear.
BUILT-IN BUZZER
When you press a button, the built-in buzzer will sound
a beep if the press is effective.
The buzzer will beep several times about 1 minute before
the meter turns off automatically, and give 1 long beep
before the meter turns off automatically.
Range Resolution Accuracy
40nF 0.01nF ±(4%+20)
400nF 0.1nF ±(3%+5)
4μF 0.001μF
±(4%+5)
40μF 0.01μF
100μF 0.1μF ±(8%+5)
CAPACITANCE

11 – English
ALLIGATOR CLIPS
See Figure 5, page 15.
A set of alligator clips is included with the multimeter, one
for the black lead, and another for the red lead. When you
want the meter to remain connected to a circuit, but want
to keep your hands free for other operations, the alligator
clips will hold the leads in place.
To use the clips:
Make sure the multimeter is turned off.
Insert the end of the red lead probe into the metal connec-
tion inside the alligator clip cover. Make sure it is securely
connected.
Repeat the above step with the black lead and black
alligator clip.
Connect the leads to the circuit using the alligator clips.
NOTE: Do not allow the multimeter to hang by its leads
when the clips are connected to a circuit. Always use the
kick stand or convenience hook, or place the multimeter
on a stable surface.
CAUTION:
To avoid damaging the meter or blowing the fuses, always
remove the test leads from the source or load before
turning the mode selection dial.
MEASURING DC VOLTAGE
See Figure 6, page 15.
NOTE: To avoid electric shock to you or damages to the
meter, do not attempt to measure DC voltage higher than
600V although readings may be obtained.
Connect the black test lead to the COM jack and the red
test lead to the μA/mA jack.
Set the mode selection dial to range.
Select autorange mode or manual range mode with the
RANGE button.
If you use manual range mode and don’t know the magnitude
of the voltage to be measured beforehand, select the highest
range and then reduce it range by range until satisfactory
resolution is obtained.
Connect the test leads across the source or load to be
measured.
Read the display. The polarity of the red lead connection
will be indicated as well.
Remove the test leads from the source or load before
turning the mode selection dial.
MEASURING AC VOLTAGE
See Figure 7, page 15.
NOTE: To avoid electric shock to you or damages to the
meter, do not attempt to measure AC voltage higher than
600V although readings may be obtained.
Connect the black test lead to the COM jack and the red
test lead to the μA/mA jack.
OPERATION
Set the mode selection dial to range.
Select autorange mode or manual range mode with the
RANGE button.
If you use manual range mode and don’t know the magnitude
of the voltage to be measured beforehand, select the highest
range and then reduce it range by range until satisfactory
resolution is obtained.
Connect the test leads across the source or load to be
measured.
Read the display.
Remove the test leads from the source or load before
turning the mode selection dial.
MEASURING DC OR AC CURRENT
See Figure 8, page 15.
NOTE: If the magnitude of the current to be measured is not
known beforehand, select the highest range and then reduce
it range by range until satisfactory resolution is obtained.
Connect the black test lead to the COM jack. If the cur-
rent to be measured is less than 400mA, connect the red
test lead to the μA / mA jack. If the current is between
400mA and 10A, connect the red test lead to the 10A
jack instead.
Set the mode selection dial to , or position.
Press the MODE button to select DC or AC current
measurement, the display shows the corresponding
symbol.
Turn off power to the circuit you will measure. Discharge
all high voltage capacitors.
Break the circuit path to be measured, then connect the
test leads in series with the circuit.
Turn on power to the circuit, then read the display. For DC
current measurements, the polarity of the red test lead
connection will be indicated as well.
MEASURING RESISTANCE
See Figure 9, page 15.
NOTE: Before measuring in-circuit resistance, disconnect all
power to the circuit to be tested, and discharge all capaci-
tors fully.
Connect the black test lead to the COM jack and the red
test lead to the μA/mA jack.
NOTE: The polarity of the red lead is positive ( + ).
Set the mode selection dial to Ω range.
Connect the test leads across the load to be measured.
Read the display.
NOTE: For measurements > 1M Ω , the meter may take
a few seconds to stabilize reading. This is normal for high
resistance measurements.
When the input is not connected, i.e. at open circuit, OL
will be displayed as overrange indication.

12 – English
CONTINUITY TEST
See Figure 10, page 15.
NOTE: Before continuity test, disconnect all power to the
circuit to be tested, and discharge all capacitors fully.
Connect the black test lead to the COM jack and the red
test lead to the μA/mA jack.
NOTE: The polarity of the red lead is positive ( + ).
Set the mode selection dial to position.
Connect the test leads across the circuit to be tested.
If the circuit resistance is less than about 20 Ω, the built-
in buzzer will sound.
DIODE TEST
See Figure 11, page 15.
NOTE: Before diode test, disconnect all power to the circuit
to be tested, and discharge all capacitors fully.
Connect the black test lead to the COM jack and the red
test lead to the μA/mA jack.
NOTE: The polarity of the red lead is positive ( + ).
Set the mode selection dial to position.
Connect the red test lead to the anode of the diode to
be tested, and the black test lead to the cathode of the
diode .
Read the approximate forward voltage drop of the diode
on the display.
If the connection is reversed, OL will be shown on the
display.
OPERATION
MEASURING CAPACITANCE
See Figure 12, page 15.
NOTE: Before measurement, make sure that the capacitor
to be measured has been discharged fully.
Connect the black test lead to the COM jack and the red
test lead to the μA/mA jack.
Set the mode selection dial to position.
If the display shows a reading other than zero, press the
REL▵ button.
NOTE: In low capacitance range, if the reading is not
stable, wait a while to let the reading stabilize, and then
press the REL▵ button.
Connect the test leads across the capacitor to be mea-
sured.
Wait until the reading is stable, then take the reading. For
high capacitance measurements, it may take about 30
seconds for reading to be stable.
AUTOMATIC POWER OFF
The display will go blank and the meter will go into Sleep
mode if you do not turn the mode selection dial or press
any button for about 15 minutes. Pressing any button
arouses the meter from Sleep.
To disable the automatic power-off feature, press and hold
down any button while rotating the mode selection dial from
OFF position.

13 – English
MAINTENANCE
WARNING:
When servicing, use only identical replacement parts.
Use of any other parts may create a hazard or cause
product damage.
GENERAL MAINTENANCE
Avoid using solvents when cleaning plastic parts. Most
plastics are susceptible to damage from various types of
commercial solvents and may be damaged by their use. Use
clean cloths to remove dirt, dust, oil, grease, etc.
If the multimeter is not operating properly, check the battery
and the fuses. Then recheck the instructions in this manual
to verify correct operating procedures.
WARNING:
Do not at any time let brake fluids, gasoline, petroleum-
based products, penetrating oils, etc., come in contact
with plastic parts. Chemicals can damage, weaken or
destroy plastic which may result in serious personal
injury.
CLEANING THE TERMINALS
Dirt or moisture in the terminals can affect readings.
To clean the terminals:
Set the mode selection dial to OFF position and remove
the test leads from the meter.
Remove battery cover and the battery pack. Reinstall the
battery cover.
Shake out any dirt which may exist in the terminals.
Soak a new swab with alcohol.
Work the swab around in each terminal.
REPLACING THE FUSE
See Figure 13, page 15.
To prevent damage or injury, install only replacement fuses
with the specified amperage, voltage, and interrupt rat-
ings.
This meter uses two fuses:
Fuse 1:
F 400mA 690V, Fast, Min. Interrupt Rating 10000A,
ø10 x 38mm
Fuse 2:
F 10A, 600V/690V, Fast, Min. Interrupt Rating 10000A,
ø10 x 38 mm
To replace the fuses:
Disconnect the test leads.
Remove battery cover and the battery pack. Reinstall the
battery cover.
Remove the 6 Torx screws on the back cover.
NOTE: The screws are not all the same length. The
illustration shows the location of the longer and shorter
screws.
Replace the blown fuse with an identical fuse of the same
rating.
There are two posts on the circuit board and two springs
on the inside back cover of the unit. When replacing the
back cover, make sure the springs fit over the posts.
NOTE: Failure to correctly place the springs over the
posts can result in damage to the unit.
Reinstall the back cover and all the screws.
PRODUCT STORAGE
Before storing, always remove the battery pack from the
product.
BATTERY PACK PREPARATION FOR
RECYCLING
WARNING:
Upon removal, cover the battery pack’s terminals with
heavy-duty adhesive tape. Do not attempt to destroy or
disassemble battery pack or remove any of its compo-
nents. Lithium-ion batteries must be recycled or disposed
of properly. Also, never touch both terminals with metal
objects and/or body parts as short circuit may result.
Keep away from children. Failure to comply with these
warnings could result in fire and/or serious injury.
NOTE: FIGURES (ILLUSTRATIONS) START ON PAGE 14 AFTER FRENCH AND
SPANISH LANGUAGE SECTIONS.

5 - Español
CALIFORNIA - PROPUESTA DE LEY NÚM. 65
ADVERTENCIA:
Este producto puede contener sustancias químicas (por ejem-
plo, plomo) reconocidas por el estado de California como cau-
santes de cáncer, defectos congénitos y otras afecciones del
aparato reproductor. Lávese las manos después de utilazar
el aparato.
Asegúrese de que los conductores de prueba y el interruptor
estén en la posición correcta para la medición deseada.
Nunca mida la resistencia de un circuito cuando se aplica
corriente.
Nunca toque una fuente de voltaje con las sondas cuando los
conductores de prueba están enchufados en la entrada de 10
A o 400 mA.
Antes de usarlo, verifique el funcionamiento del medidor
midiendo un voltaje conocido.
Evite trabajar solo (ya tenemos una regla muy similar, pero más
detallada)
REGLAS DE SEGURIDAD ESPECÍFICAS
PRECAUCIÓN: Para evitar posibles daños en el medidor o en
el equipo que se está probando, siga estas pautas:
• Desconecte la corriente del circuito y descargue todos los
capacitores de alto voltaje antes de probar la resistencia,
la continuidad o los diodos.
• Antes de medir la corriente, revise los fusibles del medidor y
apague la corriente del circuito antes de conectar el medidor
al circuito.
Guarde estas instrucciones. Consúltelas frecuentemente y
utilícelas para instruir a otros usuarios. Si presta a alguien esta
producto, facilítele también las instrucciones.
DECLARACIÓN DE CONFORMIDAD
Declaramos bajo nuestra responsabilidad exclusiva, que este producto cumple con los siguientes están-
dares o documentos estandarizados.
2006/95/EC
EN61010-1:2001
EN61010-031:2002
5 – English
DECLARATION OF CONFORMITY
We declare under our sole responsibility that this product is in conformity with the following standards or
standardized documents.
2006/95/EC
EN61010-1:2001
EN61010-031:2002
15
DECLARATION OF CONFORMITY
We declare under our sole responsibility that this product is in
conformity with the following standards or standardized documents.
2006/95/EC
EN61010-1:2001
EN61010-031:2002
DECLARATION OF CONFORMITY
We declare under our sole responsibility that this product is in
conformity with the following standards or standardized documents.
2006/95/EC
EN61010-1:2001
EN61010-031:2002
DECLARATION OF CONFORMITY
We declare under our sole responsibility that this product is in
conformity with the following standards or standardized documents.
2006/95/EC
EN61010-1:2001
EN61010-031:2002
Machine: 4V Digital Multimeter Type: RP4020
Name of company: TECHTRONIC INDUSTRIES CO. LTD.
Address: 24/F, CDW BUILDING
388 CASTLE PEAK ROAD
TSUEN WAN
HONG KONG
Web: www.ttigroup.com
Name/Title: Brian Ellis
Vice President - Engineering
Signature:
Trademarks:
The use of the trademark Ryobi is pursuant to a license granted by Ryobi Limited.
Tipo: RP4020
Dirección:
Nombre/Cargo:
Marcas comerciales:
La marca comercial Ryobi se usa de conformidad con una licencia otorgada por Ryobi Limited.
Máquina: 4 V Multímetro digital
Firma:
Nombre de la compañía:

15
MODE
OFF
10A
!
COM
V
OFF
HOLD
REL
RANGE
AUTO POWER OFF
V A
A
mA
V
FUSED
10A MAX.
10SEC MAX.
EACH 15min
!
!
FUSED
400mA MAX
MAX600
CAT 600V
A/
mA
CAT 600V 10A
CAT 600V 10A
V
BLACK
RED
MODE
OFF
10A
!
COM
V
OFF
HOLD
REL
RANGE
AUTO POWER OFF
V A
A
mA
V
FUSED
10A MAX.
10SEC MAX.
EACH 15min
!
!
FUSED
400mA MAX
MAX600
CAT 600V
A/
mA
CAT 600V 10A
CAT 600V 10A
BLACK
RED
CAT 600V 10A
CAT 600V 10A
CAT 600V 10A
CAT 600V 10A
OL
BLACK
RED
BLACK
RED
MODE
OFF
10A
!
COM
V
OFF
HOLD
REL
RANGE
AUTO POWER OFF
V A
A
mA
V
FUSED
10A MAX.
10SEC MAX.
EACH 15min
!
!
FUSED
400mA MAX
MAX600
CAT 600V
A/
mA
CAT 600V 10A
CAT 600V 10A
R
BLACK
RED
Fig. 7
Fig. 8
Fig. 6
Fig. 9
Fig. 10
Fig. 12
Fig. 13
Fig. 11
A - Long screws (longue vis, tornillo largo)
B - Short screws (vis de court, tornillo corta)
C - Back cover (couvercle de arrière, cubierta
trasera)
D - Front cover (couvercle avant, cubierta
delantero)
E - Fuse 10A (10 A fusible, 10 A fusible)
F -
Fuse 400mA (400 mA fusible, 400 mA fusible)
G - Springs (ressorts, resortes)
H - Pins (goupilles, pasadores)
Fig. 5
DC VOLTAGE / TENSION C.C. / VOLTAJE DE
CORR. CONT.
MEASURING RESISTANCE / MESURE
DE LA RÉSISTANCE / MEDICIÓN DE LA
RESISTENCIA
CONTINUITY TEST / ESSAI DE CONTINUITÉ /
PRUEBA DE CONTINUIDAD
MEASURING CAPACITANCE / MESURE DE LA
CAPACITÉ / MEDICIÓN DE CAPACITANCIA
DIODE TEST / ESSAI DE LA DIODE / PRUEBA
DE DIODOS
DC OR AC CURRENT / COURANT C.C. OU
C.A. / CORR. CONT. O CORR. ALT.
AC VOLTAGE / TENSION C.A. / VOLTAJE DE
CORR. ALT.
MODE
OFF
10A
!
COM
V
OFF
HOLD
REL
RANGE
AUTO POWER OFF
V A
A
mA
V
FUSED
10A MAX.
10SEC MAX.
EACH 15min
!
!
FUSED
400mA MAX
MAX600
CAT 600V
A/
mA
CAT 600V 10A
CAT 600V 10A
V
BLACK
RED
A
A
B
C
B
C
E
D
F
G
H
CAT 600V 10A
MODE
OFF
10A
!
COM
V
OFF
HOLD
REL
RANGE
AUTO POWER OFF
V A
A
mA
V
FUSED
10A MAX.
10SEC MAX.
EACH 15min
!
!
FUSED
400mA MAX
MAX600
CAT 600V
A/
mA
CAT 600V 10A
CAT 600V 10A
BLACK
RED
A - Alligator clip opening (ouverture pinces
crocodile, abertura pinzas cocodrilo)
B - Alligator clip cover (pinces crocodile
couvercle, tapa de pinzas cocodrilo)
C - Probe (sondes, sondas)

16
987000-664
9-23-11 (REV:04)
ONE WORLD TECHNOLOGIES, INC.
1428 Pearman Dairy Road, Anderson, SC 29625 • Phone 1-800-525-2579
États-Unis, Téléphone 1-800-525-2579 • USA, Teléfono 1-800-525-2579
www.ryobitools.com
OPERATOR’S MANUAL
MANUEL D’UTILISATION/MANUAL DEL OPERADOR
Tek4® DIGITAL MULTIMETER
MULTIMÈTRE NUMÉRIQUE / MULTÍMETRO DIGITAL
RP4020
• REPLACEMENT PARTS
Prior to purchasing replacement parts, please obtain your model and serial number from the product data plate.
• MODEL NUMBER _______________________
• SERIAL NUMBER _______________________
• HOW TO OBTAIN REPLACEMENT PARTS:
Replacement parts can be purchased online at www.ryobitools.com or by calling 1-800-525-2579.
• HOW TO OBTAIN CUSTOMER OR TECHNICAL SUPPORT:
To obtain Customer or Technical Support please contact us at 1-800-525-2579.
RYOBI® is a registered trademark of Ryobi Limited used under license.
• PIÈCES DE REMPLACEMENT
Avant l’achat de pièces de remplacement, veuillez obtenir le numéro de série du modèle à partir de la plaque de
données du produit.
• NUMÉRO DE MODÈLE ________________________
• NUMÉRO DE SÉRIE ________________________
• COMMENT OBTENIR LES PIÈCES DE REMPLACEMENT :
Les pièces de remplacement peuvent être achetées en ligne sur le site www.ryobitools.com ou par téléphone
au 1-800-525-2579.
• COMMENT OBTENIR DE L’AIDE EN CONTACTANT LE SERVICE À LA CLIENTÈLE :
Pour contacter le service à la clientèle pour une question technique ou pour tout autre renseignement, veuillez nous
téléphoner au 1-800-525-2579.
RYOBI® est une marque déposée de Ryobi Limited utilisée sous licence.
RYOBI® es una marca comercial registrada de Ryobi Limited y es empleada mediante autorización.
• PIEZAS DE REPUESTO
Antes de solicitar servicio técnico o comprar piezas de repuesto, obtenga su modelo y número de serie de la placa
de datos del producto.
• NÚMERO DE MODELO _________________________
• NÚMERO DE SERIE _________________________
• CÓMO OBTENER PIEZAS DE REPUESTO:
Las piezas de repuesto se pueden comprar en nuestro sitio en la red mundial, en la dirección www.ryobitools.com
o llamando al 1-800-525-2579.
• CÓMO OBTENER SERVICIO O ASISTENCIA TÉCNICA AL CONSUMIDOR:
Para obtener Servicio o Asistencia Técnica al Consumidor, sírvase comunicarse con nosotros llamando
al 1-800-525-2579.
/