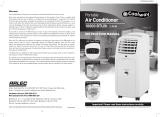
Arlec PA9000 User manual

Category
Fireplaces
Type
User manual

Arlec PA9000 is a 1HP refrigerated portable air conditioner designed to cool rooms up to 20 square meters, featuring adjustable airflow direction, a 24-hour timer, and an easy-fit adaptor kit for temporary or permanent installation. Its energy-saving design includes a maximum cooling mode and high-speed ventilation for a quick cool-down.

Arlec PA9000 is a 1HP refrigerated portable air conditioner designed to cool rooms up to 20 square meters, featuring adjustable airflow direction, a 24-hour timer, and an easy-fit adaptor kit for temporary or permanent installation. Its energy-saving design includes a maximum cooling mode and high-speed ventilation for a quick cool-down.

1 HP Refrigerated Portable
Air Conditioner
Instruction Manual PA9000
IMPORTANT: Please read these instructions carefully before use.
Due to continuous research and development the specifications herein are subject to change without notice.
CPIN_518-2 15/9/04 5:08 PM Page 1
2
SAFETY INSTRUCTIONS
DO NOT use this unit for functions other than
those described in this instruction manual
DO NOT tilt the unit. Always keep in upright
position. If unit has not been kept in upright
position, wait for at least 24 hours before
operating the unit.
DO NOT cover or obstruct the air inlet or out-
let grilles
DO NOT use the unit in a wet room, such as a
bathroom or laundry
DO NOT sit or place articles on the unit
DO NOT touch the unit with wet hands or
bare feet
DO NOT let chemical substances come into
contact with the unit
DO NOT use the unit in the presence of
inflammable substances or vapour such as
alcohol, insecticides, petrol etc.
DO NOT use the mains plug to start and stop
the unit
DO NOT pull the supply cord or
place it near a heat source. Always unwind
the cord completely to avoid overheating. If
the supply cord is damaged it must be
replaced by the service agent or a similarly
qualified person, in order to avoid a hazard
DO NOT allow children to play with this
appliance. This appliance is not intended for
use by children or infirm persons without
supervision.
DO NOT conduct repairs on this unit. It has
been built in accordance with relevant safety
and performance standards. An electrical
specialist must carry out all repairs.
DO NOT use the unit without the filter fitted
ALWAYS unplug the unit from the mains
before maintenance or
cleaning
ALWAYS use the switch on the
control panel to start and stop the unit
AL
WAYS keep a clearance of at
least 50cm from walls furniture and curtains
ALWAYS turn off the unit when not
in use
ENERGY SAVING TIPS
Use the unit in the recommended room size
of up to 20m
2
(assuming standard 2.4m ceiling
height)
Do not locate the air conditioner where fur-
niture or other objects can obstruct the air
flow.
Keep blinds/curtains closed during the sun-
niest part of the day
Close the fireplace damper, floor and/or wall
registers, so cool air does not escape
through the chimney or duct work
Keep the air filter clean
Set the unit to maximum cooling and high
speed ventilation for the initial startup, then
adjust the unit down to a more comfortable
setting as required
CPIN_518-2 15/9/04 5:08 PM Page 2
3
IDENTIFICATION
EASY FIT ADAPTOR KIT
1. Air conditioner adaptor
2. Air outlet duct
3. Foam strips – for filling the open
window space including hole for
connection to air outlet duct
4. Round connector
5. Round connector cap
6. Drain tray
7. Drain hose
AIR CONDITIONER
8. Drain cap
9. Caster
10. Control panel
11. Cooling air outlet
12. Handle
13. Air filter
14. Air inlet
15. Exhaust air outlet
16. Cord storage hook
2
1
10
12
9
11
13
14
15
16
8
3
3
4
5
6
7
CPIN_518-2 15/9/04 5:08 PM Page 3
4
Temporary Location
The air outlet duct maybe fitted directly
into the circular opening of the foam strip
supplied to provide a temporary type
installation in a window opening. The
foam strips can be cut or trimmed to fit
the desired shape.
Permanent Location
The round connector (item 4) may be fit-
ted into a circular opening cut into a wall
or glass window. This connector, when
not in use, can be left in position with the
opening covered by the cap provided.
ASSEMBLY
Fitting the air outlet duct
This air conditioner is required to have
the air outlet duct fitted to an external
opening to exhaust the hot air.
The duct can be extended from 39cm to
150cm long, however it is recommended
to use the shortest possible length.
Prevent any bow or bend in the middle of
the duct, as this will trap hot exhaust air,
which will radiate into the room and
cause the unit to shut off automatically
(due to overheating).
IMPORTANT! The duct length has
been specifically designed for this
product. Do not replace or lengthen
the duct with attachments.
If the venting of the exhaust air is
inhibited in any way the unit may
over heat and shut off.
The location may be either a temporary or
permanent type depending on your
r
equir
ements. If you wish to fr
equently
move the unit fr
om r
oom to r
oom without
creating a permanent opening in a wall or
window, you can use the foam strips as
described below under temporary location.
If you wish to have an place set aside
where you can connect and operate the
unit on a continuous basis you can use
the round connector, as described below
under permanent location
CPIN_518-2 15/9/04 5:08 PM Page 4
5
OPERATION
Control Panel
1. Power indicator
2. Fan operation indicator
3. Cooling operation indicator
4. Full water indicator
5. Thermostat
6. Function switch
(options for low fan - high fan -
low cool - high cool)
7. Timer
(1-8 hours and ON/OFF function)
Turning ON/OFF
• Set Timer to ON for continuous
operation. Power indicator will
illuminate.
To switch unit off turn Timer to OFF
position. Power indicator will dim.
Important Note: To prolong the
life of the compressor, wait for at
least 3 minutes before turning on the
unit, after it has been switched off.
Setting Timer
Set the Timer to the desired operating
time (1 to 8 hours). When the set time has
been reached the unit will shut off auto-
matically.
Setting Function
Turn the switch to the desired setting:
Low Fan - High Fan - Low Cool - High
Cool
Setting Temperature
Turn the thermostat to regulate the
desired temperature from 18 to 32
o
C.
Maximum cooling is obtained when knob
is rotated to fully clockwise position.
NOTE: The cooling system (compres-
sor) will switch off when the ambient
temperature becomes lower than the
preset temperature. The fan however
will continue to operate normally.
Regulating air flow direction
To control the air flow direction via the
vertical louvers rotate the central lever
at the bottom of the grille.
To control the air flow direction via
the horizontal louvers adjust louvers
manually (louvers interlocked).
DRAINAGE
During the cooling process some of the
water will be extracted from the air into
the unit. When the water inside the unit
reaches a preset level the compressor will
stop and only the fan will operate. The
Full Water indicator will illuminate. To
reset the unit for normal operation, drain
the water using one of the following
methods:
Drain Tray
1. T
urn off the unit when the Full Water
indicator illuminates.
2. Position the supplied water tray flat on
the floor
, beneath the drain hole.
3. Remove the drain cap and rubber plug
from the drain hole, allowing the water
to drain out.
4. When the drain tray is almost full
replace the rubber plug into the drain
hole and empty the tray.
CPIN_518-2 15/9/04 5:08 PM Page 5
6
5. Repeat steps 2,3 & 4 until the water is
completely drained.
6. Replace the rubber plug and drain cap.
The Full Water indicator should now be
off. The unit is now capable of normal
operation.
Drain Hose
1. Remove the drain cap and rubber plug
from the drain hole.
2. Connect the drain hose to the drain
hole allowing the water to drain out
and away to a desired location. The
drain hose may be extended if required.
3. After draining replace the rubber plug
and drain cap. The Full Water indicator
should now be off. The unit is now
capable of normal operation.
MAINTENANCE
Important Note: Always unplug the
unit from the mains before
maintenance or cleaning
Cleaning the housing
• Use a soft damp cloth to wipe the body
clean.
• Never use aggressive chemicals, petrol,
detergents, chemically treated cloths or
harsh cleaning solutions – these may
cause permanent damage to the
external surface.
Cleaning the filter
Use a vacuum cleaner or just tap the filter
lightly to remove loose dust and dirt.
Rinse with hot water (no hotter than 40
o
C)
then dry thoroughly before replacing.
Important Note: Never operate the
unit without the filter fitted
STORAGE
• At the end of the summer season, when
the unit is not required for an extended
period, it should be correctly stored.
• Unplug the unit. Completely drain the
condensed water. Clean the filter.
• On a warm sunny day operate the unit
in fan mode for a couple of hours to dry
it out completely.
• Storage hooks are provided on the rear
of the housing for coiling the power
cord when not in use. Always unwind
the cord completely before use.
CPIN_518-2 15/9/04 5:08 PM Page 6
7
TROUBLESHOOTING
Unit does not operate
Is the unit plugged in?
Is the power outlet switched on?
Is the Full Water indicator on?
(If so empty the condensed water)
Unit does not seem to cool effectively
Is the room too large?
Is there direct sunlight onto the unit?
(close curtains and pull down blinds)
Are windows or doors open?
Is there another heat source in the room?
Is the filter dusty or contaminated?
Is the air intake blocked?
Is the outlet duct venting the hot air
properly?
Is the room temperature below your
selected temperature?
Too Noisy
Is the unit positioned on an uneven hard
floor surface creating vibration?
Note: A soft carpeted surface may absorb
excessive vibration
The Compressor does not operate
Has the overheating protective device
operated? If so allow time for the
compressor temperature to decrease.
The device will automatically reset
Important Note: This unit is built in
accordance with relevant safety and
performance standards. An electrical
specialist must carry out repairs.
SPECIFICATIONS
Input power consumption :
1000 watt (1.3 horsepower)
Cooling capacity :
9000 BTU/hr (2600 watt)
Air volume moved at max. fan setting:
360 cubic metres/hr
CPIN_518-2 15/9/04 5:08 PM Page 7
8
GUARANTEE*
Arlec guarantees this product against defects of
materials and workmanship for a period of 24 months
from the date of purchase provided that the product is
used in accordance with Arlec’s recommendations
and within such voltage and current limits as are
specified by Arlec in relation to the product. Arlec will
at its own option make good, replace with the same or
similar product, or provide credit for any product
manufactured or supplied by it, which proves to be
defective within the limits set out above provided
always that no repairs, alterations or modifications to
the product have been undertaken or attempted, other
than by the company or its authorised agents. Should
the purchaser wish to make a claim under the
guarantee, the product should be returned pre-paid
to the place of purchase.
To obtain warranty the purchase receipt must be
returned with the product. This guarantee is in addition
to and does not take away from any rights available to
the consumer under the Trade Practices Act and the
State consumer protection legislation.
* 24 month guarantee applies for domestic use
only.
* Warranty excludes:
Damage or malfunction due to wilful abuse
or misuse.
Proof of Purchase
Please retain your receipt for all service or
warranty claims.
For all Sales enquiries:
Phone 03 9727 8860 Fax 1300 360 650
© This instr
uction leaflet is subject to copyright and must not be r
eproduced, copied or
otherwise used in any way or for any purpose without the consent in writing of the
owner, Arlec Australia limited (A.C.N. 003 118 787)
CPIN 518/2
CPIN_518-2 15/9/04 5:08 PM Page 8
  • Page 1 1
  • Page 2 2
  • Page 3 3
  • Page 4 4
  • Page 5 5
  • Page 6 6
  • Page 7 7
  • Page 8 8

Arlec PA9000 User manual

Category
Fireplaces
Type
User manual

Arlec PA9000 is a 1HP refrigerated portable air conditioner designed to cool rooms up to 20 square meters, featuring adjustable airflow direction, a 24-hour timer, and an easy-fit adaptor kit for temporary or permanent installation. Its energy-saving design includes a maximum cooling mode and high-speed ventilation for a quick cool-down.

Ask a question and I''ll find the answer in the document

Finding information in a document is now easier with AI