Page is loading ...

KeyRig
TM
25
User Guide
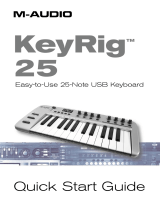
Easy-to-Use 25-Note USB Keyboard

|
3
KeyRig 25 User Guide
Introduction
Congratulations on your purchase of the KeyRig 25 USB MIDI controller. This powerful keyboard is designed for easy integration with Windows
XP and Mac OS X computers and allows you to control a variety of music creation applications including Ableton Live Lite and M-Audio Key Rig
virtual instrument software (both included in this bundle). This controller is also an ideal companion to Apple’s popular GarageBand software.
This User Guide covers the setup and features of the KeyRig 25 USB MIDI controller. Even if you are experienced with MIDI and computer audio,
we recommend reading this User Guide to help you get the most out of your new purchase. Since this keyboard can be used with many third-party
music programs, you may also wish to review your software’s documentation to learn how KeyRig 25 can be used with your software as well.
What’s in the Box?
Your M-Audio KeyRig 25 bundle should contain the following items:
• M-Audio KeyRig 25 USB keyboard
• USB cable
• Printed Quick Start Guide
• KeyRig 25 CD-ROM including Key Rig software, driver, and User Guide
• Ableton Live Lite CD-ROM
KeyRig 25 Keyboard Features
• 25 full-sized, half-action, velocity sensitive keys
• Pitch Bend control
• Modulation control
• Octave up/down buttons
• 8 assignable knobs
• 8 assignable buttons
• 1 assignable slider
• Sustain pedal input
• USB Bus-powered operation
• Compatible with M-Audio’s Enigma software editor
• Thin, compact design
• Class-compliant operation—no driver installation required

|
4
KeyRig 25 User Guide
Minimum System Requirements
KeyRig 25 Keyboard
Windows
• Pentium 3 - 800 MHz or higher
(CPU may be higher for laptops)
• 256 MB RAM
• DirectX 9.0b or higher
• Windows XP (SP2) or higher*
(Windows 98, Me, NT, or 2000 not supported)
Mac OS
• Macintosh G3 800/G4 733 MHz or higher**
(CPU may be higher for laptops)
• OS X 10.3.9 with 256 MB RAM
• OS X 10.4.2 or greater with 512 MB RAM
* Home and Professional Edition only. Windows Media Center Edition is not currently supported.
** G3/G4 accelerator cards are not supported.
NOTE: M-Audio suggests checking the minimum system requirements for any third-party software you plan to use with your
KeyRig 25 keyboard, as they may be greater than the above specifications.
Check www.m-audio.com for Windows Vista driver availability.
Key Rig Virtual Instrument Software (PC only)
• Pentium III 933MHz or higher (CPU may be higher for laptops)
• 512 MB RAM, 350 MB free hard disk space
• DirextX 9.0b or higher
• Windows XP (SP2)†
• MIDI interface or USB-compatible MIDI keyboard
• CD-ROM drive for installation
• Internet connection (on any computer) for software certification
• VST 2.0- or RTAS-compatible host software (for use as a plug-in)
• ASIO-compatible sound card (for stand-alone operation)
†
Home and Professional Edition only. Windows Media Center Edition and Windows Vista are not currently supported.
Windows 98, Me, NT or 2000 not supported.

|
5
KeyRig 25 User Guide
Installing the KeyRig 25 keyboard
Your KeyRig 25 controller is class-compliant and requires no additional drivers when used under Windows XP or Mac OS X. To install the
keyboard:
1. Turn on your computer.
2. Use the provided USB cable to connect KeyRig 25 to an available USB port on your computer.
3. Make sure that the power switch on the back of the controller is in the “on” position.
Your KeyRig 25 keyboard is now ready to be used.
NOTE: Advanced Windows XP users who plan to 1.) use the keyboard with more than one audio application at the same time, or 2.)
send long SysEx (system exclusive) commands, must install special multi-client driver. The installation process is described in the
following section of this User Guide.
IMPORTANT: The KeyRig 25 keyboard is “bus-powered” by your computer through the USB connection. Only use a power adapter if
your computer cannot provide adequate power to the controller or if you are using KeyRig 25 without a computer.
Advanced Installation Instructions for Windows XP
(optional)
1. If you have already connected KeyRig 25 to your computer, disconnect it before beginning the installation.
2. We recommend that you download the most recent KeyRig 25 drivers by going to the Support > Drivers page at www.m-audio.com.
This ensures that you have the newest drivers available. If you do not have Internet access, insert the KeyRig 25 CD-ROM into your
computer to install the drivers that came with KeyRig 25.
a. If you are installing drivers from the KeyRig 25 CD-ROM, the computer will automatically display the interactive install screen
when the CD-ROM is inserted. If your computer fails to launch this application, you can manually start it by clicking on Start >
My Computer > KeyRig 25 CD-ROM. Next, select your product from the menu and click “Install.”
b. If you are installing drivers from www.m-audio.com, double-click the file once it has finished downloading.
3. Follow the driver installer’s on-screen instructions.
4. At various points in this installation process, you may be notified that the driver being installed has not passed Windows Logo
Testing. Click “Continue Anyway” to proceed with the installation.
5. Once the installer has completed, click “Finish.”
6. Attach KeyRig 25 to an available USB port.
7. Windows will identify the controller and will ask if you want to search the Internet for a driver. Select “No, not this time” and press
“Next.”
8. Windows will display a “Found New Hardware” Wizard.
9. Choose “Install software automatically” and click “Next.”
10. Once the Wizard has completed, click “Finish.”
11. Once the installation is complete, you will see a message pop up stating, “Your new hardware is installed and ready to use.”

|
6
KeyRig 25 User Guide
Controls and Connectors
Top Panel
1. Keyboard – KeyRig 25 has a two-octave, velocity sensitive keyboard. This controller features special “half-action” keys which allow
KeyRig 25 to be thinner and more portable than traditional controller keyboards.
2. Pitch Bend – This control lets you create expressive changes in your performances by raising and lowering pitch. Pressing the
right side of the Pitch Bend control will raise an instrument’s pitch whereas pressing the left side will lower the pitch. Once the Pitch
Bend control is released, your instrument’s pitch will return to normal.
Note that the upper and lower pitch bend limit is determined by settings on your hardware or software synthesizer, not by the Pitch
Bend control on the KeyRig 25 keyboard. Typically, this can be either a half note or an octave up/down.
3. Modulation – This control is used to add expressivity to your performance by changing the intensity of certain effects. By default,
most synthesizers assign this control to manipulate vibrato (change in intonation) or tremolo (change in volume) although it is usually
possible to reassign the function of modulation through the instrument’s control panel.
The MIDI data range of the Modulation control is 0 to 127, with 0 being the note-unchanged position. Like the Pitch Bend wheel,
the amount of actual modulation that takes place depends on your instrument’s settings.
4. Octave Up/Down – The Octave Up/Down control “shifts” the keyboard’s octave range in order to let you play higher or lower
notes. Press the “Octave +” button to shift the keyboard up one octave; press the “Octave -” button to shift the keyboard down one
octave. Note that it is possible to shift several octaves in each direction by pressing the “Octave +” or “Octave -” buttons more than
once.
5. Assignable Slider – This slider sends out MIDI Continuous Controller (CC) data, giving you real-time control over your MIDI
hardware or software instruments.
6. Function Buttons – These buttons are used to access all of the various functions and features of the keyboard. They are
described in the “Using KeyRig 25” section of this guide
7. LED Display – The LED screen displays MIDI functions and data selections.
8. MIDI Controller Knobs (C1
– C8) – These eight MIDI Controller knobs give you real-time control over your MIDI hardware and
software through MIDI Continuous Controller (CC) messages.
9. MIDI Controller Buttons (B1 – B8) – Like the MIDI Controller knobs described above, these eight MIDI Controller buttons give
you real-time control over your MIDI hardware and software through MIDI Continuous Controller (CC) messages.

|
7
KeyRig 25 User Guide
Rear Panel
10. Power Switch – This switch powers the unit on and off.
11. Sustain Pedal Input – Connect your sustain pedal’s 1⁄4” connector to this jack. There is no need to worry about the polarity of the
pedal—the keyboard detects the sustain pedal polarity by auto-sensing the pedal’s orientation during startup.
12. MIDI Output – Connect this output to the input of a MIDI device using a standard 5-pin MIDI cable. By default, all MIDI data
generated by KeyRig 25 is sent out through this MIDI output as well as through the USB connection (if available). However, if
KeyRig 25 is connected to your computer via USB, it is possible to reconfigure this port so that it appears as a completely separate
MIDI output port to your music software.
Refer to the “Using KeyRig 25” section of this manual to learn how to engage “MIDI Out from USB” mode.
13. USB Connector – Connect a USB cable from this output to the host computer’s USB port. When using the USB connection,
KeyRig 25 is powered by the host computer and a power adapter is not required.
14. Power Jack (9V DC, 500 mA) – Connect an optional 9V DC, 500mA external power supply to this jack. A power supply is only
necessary if KeyRig 25 is being used without a computer or if the computer is not able to provide adequate bus power to the
controller.
The optional power adapter can be ordered from www.m-audio.com
IMPORTANT: The KeyRig 25 keyboard is “bus-powered” by your computer through the USB connection. Only use a power
adapter if your computer cannot provide adequate power to the controller or if you are using KeyRig 25 without a computer.

|
8
KeyRig 25 User Guide
Using KeyRig 25
In many cases, once KeyRig 25 has been installed, you can simply launch your music program and begin making music right away. Many
programs (including Ableton Live Lite, M-Audio Key Rig Virtual Instrument, or Apple GarageBand) are ready “out of the box” and require no further
configuration. Certain other programs may require you to select KeyRig 25 as a MIDI input source or to map KeyRig’s assignable MIDI controls
(buttons, knobs, sliders, etc.) to whatever on-screen functions you would like to control. These steps are described further below.
Configuring Your Software:
Once the KeyRig 25 keyboard is installed on your computer, all MIDI capable applications on your system should recognize the controller
as a new MIDI input device. However, some applications may require you to configure the software to accept MIDI data being sent from
the KeyRig 25 keyboard. This is usually done through a “Control Panel” or “Device Setup” menu in your application, but the specific
process varies from program to program. Please consult your application’s documentation to learn how to select MIDI input devices.
NOTE: In Windows XP, KeyRig 25 will appear as “USB Audio Device” to your music software if the optional M-Audio drivers have not
been installed. This is normal. If the M-Audio drivers have been installed, KeyRig 25 will appear like “USB O
2
In.”
Assigning KeyRig 25’s Buttons, Knobs, or Sliders to Control Your Software:
The KeyRig 25 keyboard has a number of assignable MIDI controls (knobs, buttons, sliders, etc.) that can be used to control your music
software. Each assignable control has its own unique MIDI Continuous Controller (CC) number. When you turn a knob, push a button,
or move a fader, KeyRig 25 sends out MIDI CC data that is received and interpreted by your music software.
Use your program’s “MIDI Learn” function to assign each of KeyRig 25’s knobs, buttons, and sliders to the specific parameters you’d like
to control. Most audio applications now have a MIDI Learn function, and you’ll need to refer to the software’s documentation to find out
how to use this feature. Once you have assigned an on-screen parameter to one of the controls on KeyRig 25, you should be able to
manipulate the on-screen parameter using your hardware controller.
For example, if you are using M-Audio Key Rig virtual instrument software, right click any MIDI mapable on-screen control. If the control
can be mapped, the following window will appear:
Select “Learn” and turn a knob on the controller keyboard that you would like to assign to the on-screen knob. The assignment has now
be made and you should see the on-screen knob move when you turn your KeyRig keyboard’s knob.
NOTE: If your program does not feature a “MIDI Learn” function, you may still be able to control your music software by changing the
mapping of KeyRig 25’s assignable controls to match the MIDI CC numbers required by your music software. To find out how to do
this, refer to the section entitled “KeyRig 25 Advanced Features” found later in this guide.

|
9
KeyRig 25 User Guide
Sending Program Changes
If your software or MIDI device supports “program change” messages, you can recall different presets (sounds) straight from the KeyRig
25 keyboard without having to reach for the MIDI device (or computer). To send a program change message:
1. Press the ADVANCED FUNCTION button.
2. Press the PROG CHG key on the keyboard.
3. Enter the program number you wish to send, using the
numerical data entry keys, or the DEC/INC buttons.
4. Press the ENTER key to confirm.
Note that program change messages are sent on the “global” MIDI
channel. The global channel can be changed using the procedure
described further below.
Sending Bank Changes
If your software or MIDI device contains more than 128 presets (sounds), then the presets will be organized into separate “banks” of
sounds. KeyRig 25 allows you to switch between banks straight from the keyboard without having to reach for the MIDI device (or
computer). To send a bank change message:
1. Press the ADVANCED FUNCTION button.
2. Press the BANK LSB or BANK MSB key on the keyboard.
3. Enter the bank number you wish to send using the numerical data entry keys, or the DEC/INC buttons.
4. Press the ENTER key to confirm.
5. Press the ADVANCED FUNCTION button.
6. Press the PROG CHG key on the keyboard.
7. Enter the program number you wish to recall in your new bank, using the numerical data entry keys, or the DEC/INC buttons.
8. Press the ENTER key to confirm.
To learn more about LSB and MSB, please refer to the “MIDI Messages In-Depth” section of this manual.
NOTE: Bank change messages must be followed by a Program Change message for the bank change to take effect. Simply
sending a bank change message by itself will not result in any changes in your MIDI hardware or software.
Setting the Global MIDI Channel
The M-Audio KeyRig 25 can transmit on any of the standard 16 MIDI channels. If you are using a computer-based system, the software
usually controls the routing of MIDI signals, and this parameter can be left in its default setting.
However, if you are using KeyRig 25 without a computer to control a MIDI device (such as a sound module), you will need to make sure
that both your M-Audio KeyRig 25 keyboard and the MIDI device are set to the same MIDI channel. KeyRig 25 has a “Global” MIDI
channel setting that affects the keyboard, program/bank change messages, and any controllers (buttons, knobs, sliders, footswitch) that
have been set to respond to the global channel.
To set the Global MIDI Channel:
1. Press the GLOBAL CHAN button. The keyboard enters Program Mode. The LED will display the currently selected Global
Channel, preceded by a “c.”
2. Enter the MIDI channel number using the numeric keys or use the DEC/INC keys.
3. Press the ENTER key to accept the new channel.
Tip: The assignable buttons can be programmed
to send out specific program change messages on
individual MIDI channels. This can be useful as it
allows you to quickly jump to specific presets by
pressing one button. For further information regarding
this method, please refer to the “MIDI Messages In-
Depth” section of this manual.

|
10
KeyRig 25 User Guide
MIDI Out from USB Mode
When KeyRig 25 is connected to your computer via USB, all MIDI data generated by the keyboard is sent to your computer through the
USB connection. By default, this same data is also “mirrored” and sent out through KeyRig 25’s MIDI Output port. However, KeyRig
25’s “MIDI Out from USB Mode” makes it possible to reconfigure the MIDI Output port so that it appears as a completely independent
MIDI output to your music software. You can then use this port to control a separate MIDI device (such as a sound module or sampler)
through your software (you will still be able to use KeyRig 25 as a controller).
To activate MIDI Out from USB mode:
1. Press the ADVANCED FUNCTION button.
2. Press the MIDI OUT key.
The LED display will show “USB,” indicating that the MIDI Out port is now independent of the local KeyRig 25 keys and MIDI
controls and will output data sent to the device from your music software.
To deactivate MIDI Out from USB mode and return to normal operation, repeat the steps listed above. The LED display will show
‘Int’ indicating that the M-Audio KeyRig 25 keyboard is once again sending mirrored data out of the USB and MIDI Output ports.
KeyRig 25 Advanced Features
This section deals with the more advanced features found within the KeyRig 25 keyboard. We have included this information for “power users”
who want to explore and use the keyboard’s in-depth features and additional capabilities to their full extent. This information is not required reading
for most users and readers who are not interested in more advanced MIDI programming concepts can feel free to skip this section.
Recalling Presets
KeyRig 25 is capable of storing five “presets” containing all control assignments and keyboard configuration settings. Use the “DEC”
and “INC“ buttons to step through the five available presets. The LED will display the preset number preceded by a “p” to indicate which
preset is currently loaded.
The following is a list of the five “factory default presets” that have been pre-programmed into KeyRig 25:
• 01 GM Preset
• 02 Reason Native
• 03 Reason Mixer
• 04 Yamaha XG/Roland JV Preset
• 05 Undefined CC’s for MIDI learn*
Note that these default settings can be modified to suit your particular needs (this is described below, beginning with the “Program
Mode Overview” section.)
* Some applications do not have any default settings and require you to set the MIDI controllers for the application’s parameters
yourself. This normally involves placing the application into a “MIDI Learn” mode, selecting an on-screen control and moving
the hardware controller you wish to assign to it. When working with such an application, it is recommended that the controller
numbers used by MIDI controls on the keyboard do not already have another function associated with them – this is how preset #5
is configured.

|
11
KeyRig 25 User Guide
Storing Presets
KeyRig 25 uses “non-volatile” memory allowing presets to be stored even after the keyboard has been switched off. All controller and
channel assignments are automatically stored under the current preset number as soon as you confirm a change—there is no need to
“save” the preset. Additional settings are also stored including: the program number, bank LSB and bank MSB data, global channel
setting, MIDI Out from USB configuration, and last used memory preset.
Duplicating and Organizing Presets
You may want to duplicate or reorganize the order of the presets on your KeyRig 25 controller. For example, let’s say you wanted to copy
preset #2 (“Reason Native”) to location #4. This can be done through the following procedure:
1. Recall preset #2 by using the DEC/INC buttons.
2. Press the ADVANCED FUNCTION button.
3. Press the MEM STORE key on the keyboard.
4. Enter “4” using the numerical data entry keys or the DEC/INC buttons.
5. Press the ENTER key to confirm.
This will save or store the current setup to preset location #4. Note that this operation will overwrite the contents of the existing preset.
Enigma Software
Enigma is a powerful program that allows you to change the settings of any assignable slider, knob, or button on the KeyRig 25 through
an easy-to-use graphical user interface. The program also allows you to store a virtually unlimited amount of presets on your computer’s
hard drive—a handy tool for users who have created custom presets for each of their MIDI devices. The program is available for free
download at www.m-audio.com
Refer to the Enigma User Guide to learn more about how to use the software with KeyRig 25
Sending a Snap Shot
Snap Shot is a useful function that can be used to synchronize the
receiving MIDI device with the controls on your keyboard. When you
send a Snap Shot, the current value of each individual MIDI control
(button, knob, slider, etc.) will be sent on the channel that the MIDI
control is assigned to.. This updates all of the parameters on your MIDI
device with the current knob positions on KeyRig 25. The function can
also be used as a creative tool, often with interesting and surprising
results.
Press the GLOBAL CHAN and MUTE buttons together to send a
“Snap Shot.”
Muting All Controllers
To temporarily mute KeyRig 25’s fader and knobs, press the function button labeled MUTE. The LED displays “OFF” when this function
is engaged.
Mute allows you to alter the position of the slider and the knobs without affecting the settings of your software. Note that this function
does not affect buttons, the foot switch, pitch bend and modulation controls, or the keyboard. When one of the aforementioned controls
is used, mute is disengaged and all controllers are turned back on.
Use this feature if you are switching between presets with the controllers out of position. You will be able to move the controller to a
position relative to the software’s controller value, without causing the software’s controller value to jump.
TIP: This function can also be used to set up the
control parameters at the start of a song. If you set all
the controller values to obtain the desired effect levels
in your song, you can then record the Snap Shot to
ensure the song will always play back with the correct
effect levels. To do this, put your sequencer into
record mode and press the Snap Shot buttons.

|
12
KeyRig 25 User Guide
Program Mode Overview
KeyRig 25 has two modes of operation: Program mode and Performance mode. Most of the time, the controller stays in Performance
mode so you can play regularly—Program mode is only used when you need to configure various parameters like knob assignments. Use
the ADVANCED FUNCTION button to enter and exit Program mode (a small dot appears on the lower-right hand side of the display
whenever you are in Program mode).
• Once you have entered Program mode, you can select different parameters to edit by pressing one of the keys on the left half of
the keyboard. The function of each key is written directly above the key:
• Each of the assignable controllers on KeyRig 25 can send MIDI CC, RPN/NRPN, GM 1&2, and SysEx messages on its own
individual MIDI channel.
• Certain parameters will require you to enter additional information such as MIDI channel or CC number. Use the 0-9 keys (on
the right hand of the keyboard) or the DEC/INC buttons to set these values. The LED display will indicate the current value.
• If you’ve entered a number, use the Enter key to confirm the entry. If you’ve changed your mind, press the ADVANCED
FUNCTION button to exit Program mode without changing any settings.
Assigning MIDI CCs
To edit a MIDI CC mapping for a button, knob, or slider:
1. Press the ADVANCED FUNCTION button and move or push the controller that you wish to assign.
2. Press the CTRL ASGN key. The LED display will show the MIDI CC number of your selected controller.
3. Enter a new MIDI CC value using the numerical data entry keys, or the DEC/INC buttons. The LED will display your new CC
number.
4. Press the ENTER key to confirm the entry and exit Program mode.
Assigning MIDI Channels
The following procedure describes how to set any of the assignable controls on KeyRig 25 to transmit on a unique MIDI channel:
1. Press the ADVANCED FUNCTION button and move or push the controller that you wish to assign.
2. Press the CHAN ASGN key. The LED display will show the current channel assignment of the selected controller.
3. Enter the new MIDI channel number using the numerical data entry keys or the DEC/INC buttons. The LED will display the new
channel number.
4. Press the ENTER key to confirm the entry and exit Program mode.
Note: If a button, knob, or slider is assigned to channel 0, it will transmit on the controller’s Global Channel.

|
13
KeyRig 25 User Guide
Limiting the Range of the Controls
Normally, the range of a MIDI controller is 0 to 127. In some cases, you may wish to restrict the minimum or maximum limits of this range.
A minimum restriction can be placed on knobs, faders, Pitch bend, or Modulation controls by doing the following:
1. Press the ADVANCED FUNCTION button and move or push the controller that you wish to limit.
2. Press the DATA 2 (MIN) key. The LED will display the current Minimum limit of the controller.
3. Enter the desired minimum value using the numerical data entry keys or the DEC/INC buttons.
4. Press the ENTER key to confirm the entry and exit Program mode.
If you would like to place a maximum limit:
1. Press the ADVANCED FUNCTION button and move or push the controller that you wish to limit.
2. Press the DATA 3 (MAX) key. The LED will display the current maximum limit of the controller.
3. Enter the desired maximum value using the numerical data entry keys or the DEC/INC buttons.
4. Press the ENTER key to confirm the entry and exit Program mode.
Using Controls to Increment or Decrement Values
Buttons and the pedal can be set to decrement or increment MIDI data values within a defined range and one by one. This is useful if
you need precise control over MIDI CC or you would like to use buttons to step forward or backward through programs (using a Program
Change message). To do this:
1. Press the ADVANCED FUNCTION button and push the footswitch or button you wish to modify.
2. Press the CTRL ASGN key.
3. Enter ‘153’ if you’d like to use the control to decrease a value (enter ‘154’ if you’d like to use the control to increase a value).
4. Press the ENTER key to confirm.
5. Press the ADVANCED FUNCTION button again, followed by the DATA 1 key.
6. Enter the number of the MIDI CC you want the button to send out.
7. Press the ENTER key to confirm.
8. To define the range minimum, press the ADVANCED FUNCTION button, followed by the DATA 2 (MIN) key.
9. Enter the desired minimum value using the numerical data entry keys or the DEC/INC buttons (e.g. 0).
10. Press the ENTER key to confirm.
11. To define the range maximum, press the ADVANCED FUNCTION button, followed by the DATA 3 (MAX) key.
12. Enter the desired maximum value using the numerical data entry keys or the DEC/INC buttons ((e.g. 127).
13. Press the ENTER key to confirm.

|
14
KeyRig 25 User Guide
Setting Toggle Values for the Buttons
The 8 assignable buttons and the pedal can each be assigned to toggle between two values by doing the following:
1. Press the ADVANCED FUNCTION button and push the footswitch or button you wish to modify.
2. Press the DATA 2 (MIN) key. The LED will display the current “low” value of the controller.
3. Enter your new low value using the numerical data entry keys or the DEC/INC buttons.
4. Press the ENTER key to confirm.
5. Press the ADVANCED FUNCTION button again, followed by the DATA 3 (MAX) key.
6. Enter the new “high” value using the numerical data entry keys or the DEC/INC buttons.
7. Press the ENTER key to confirm.
The procedure described above will toggle the button or footswitch each time you press it. It is also possible to configure the control so
that it sends one value when it is pressed, and another value when released. To do this:
1. Press the ADVANCED FUNCTION button and push the footswitch or button you wish to modify.
2. Press the CTRL ASGN key.
3. Enter 146 using the numerical data entry keys or DEC/INC buttons. This sets the control for MIDI CC (On/Off) mode.
4. Press ENTER to confirm.
5. Press the ADVANCED FUNCTION button again, followed by the DATA 1 key.
6. Enter the number of the MIDI CC you want the button to send out.
7. Press the ENTER key to confirm.
8. Assign the two toggle values for “control press” (DATA 3) and “control release” (DATA 2) using the procedure described above.
Assigning MIDI Machine Control (MMC) Commands to a Button
1. Press the ADVANCED FUNCTION button and push the button you wish to modify.
2. Press the CTRL ASGN key.
3. Enter “149” using the numerical data entry keys to indicate that you would like to assign an MMC command to your selected button
(see Appendix B for a complete list of MIDI CC numbers and their corresponding commands).
4. Press the ADVANCED FUNCTION button, then the CHAN ASGN key.
5. Enter “127” using the numerical keypad. This ensures that the message is sent to all device ID numbers.
6. Press the ADVANCED FUNCTION button, then the DATA 2 key.
7. Enter a number from the chart below to assign the corresponding MMC message to your selected button.
Number MMC Command
01 STOP
02 PLAY
03 DEFERRED PLAY
04 FAST FORWARD
05 REWIND
06 RECORD STROBE
07 RECORD EXIT
08 RECORD PAUSE
09 PAUSE
10 EJECT
11 CHASE
12 COMMAND ERROR RESET
13 MMC RESET

|
15
KeyRig 25 User Guide
Assigning a Note to a Button
The following shows the procedure for setting a button to transmit a MIDI Note On message when pressed, and a MIDI Note Off
message when released.
1. Press the ADVANCED FUNCTION button and push the button you wish to modify.
2. Press the CTRL ASGN key.
3. Enter “147” using the numerical data entry keys or the DEC/INC buttons. This is the MIDI CC number that corresponds to Note
On/Off mode (see Appendix B for all MIDI CC numbers).
4. Press the ENTER key to confirm.
5. Press the ADVANCED FUNCTION button followed by the DATA 3 key.
6. Enter “100” using the numerical data entry keys or the DEC/INC buttons. This will result in a “Note On” message with a velocity of
100 when your selected button is pressed. If you would like a different velocity, enter that velocity instead of “100.”
7. Press the ENTER key to confirm.
8. Press the ADVANCED FUNCTION button followed by the DATA 2 key.
9. Enter “0” using the numerical data entry keys or the DEC/INC buttons. This will result in a “Note Off” command being sent out
when your selected button is released.
10. Press the ENTER key to confirm.
11. Press the ADVANCED FUNCTION button followed by the DATA 1 key.
12. Enter “64” using the numerical data entry keys or the DEC/INC buttons. This results in MIDI Note 64 or E4 each time the button is
pressed. To play a different note, enter a different value here (MIDI Note numbers are listed in Appendix D).
13. Press the ENTER key to confirm.
Assigning RPN/NRPN to a Fader or Knob
Non-registered parameter numbers (NRPN’s) are device-specific messages that enable you to control synthesizers and sound modules
via MIDI. The MIDI specification defines open parameter numbers to allow manufacturers to specify their own controllers. Some of the
more common messages are now registered by the MIDI Manufacturer’s Association and are part of the MIDI specification (hence the
term Registered Parameter Numbers – RPN’s).
Each NRPN/RPN has an associated 2-byte number. The two bytes allow for 128 values each. (An RPN or NRPN message is made up
of two parts: the MSB and the LSB message. Both of these messages together constitute an RPN or NRPN command.) This allows for
16,384 values in total.
MIDI controllers 98 and 99 represent the NRPN LSB and MSB respectively, while 100 and 101 represent the RPN LSB and MSB
messages (see the MIDI controllers list in Appendix E). To transmit an NRPN/RPN message, these LSB and MSB controller messages
are sent along with their user-specified values. A further controller message and value needs to be sent to specify the (coarse or fine)
value adjustment. This is specified by controller number 6 (data entry) for coarse adjustments or number 38 for fine adjustments.
A list of NRPN’s is usually given in the user’s manual of any device that receives NRPN messages. It is always necessary that the NRPN
MSB and LSB be sent together. Both will be specified in the device’s manual.
To assign an RPN/NRPN message to a fader or knob:
1. Press the ADVANCED FUNCTION button and move the fader or knob you wish to assign.
2. Press the CTRL ASGN key and enter “132” for RPN Coarse, “133” for RPN Fine, “134” for NRPN Coarse, or “135” for NRPN
Fine using the numerical data entry keys or DEC/INC buttons.
3. Press ENTER key to confirm your selection.
4. Press the ADVANCED FUNCTION button, then the DATA 3 key.
5. Enter your RPN/NRPN MSB value and press the ENTER key to confirm.
6. Press the ADVANCED FUNCTION button, then the DATA 2 key. This assigns the number for the RPN/NRPN LSB.
7. Enter your RPN/NRPN LSB value and press the ENTER key to confirm.

|
16
KeyRig 25 User Guide
8. Finally, press the ADVANCED FUNCTION button, then the CHAN ASGN key.
9. Enter the channel that the message should be sent on.
10. Press the ENTER key to confirm your selection.
Note: Many specification sheets for synthesizers and other MIDI devices make use of NRPN messages and will give the MSB and
LSB values that should be entered for DATA 3 and DATA 2 (See Appendix F). Some sheets may only list the values in hexadecimal
format, but the M-Audio KeyRig 25 requires each value to be entered as a decimal. Use Appendix C at the end of this User Guide to
convert hexadecimal values into decimal.
About SysEx Messages and Device ID
MIDI SysEx messages (memory dump, all notes off, master tune, etc.) are global MIDI messages that are not MIDI channel-specific. This
means SysEx messages are not transmitted on specific MIDI channels. Instead, SysEx transmits a Device ID number along with any
SysEx message. This ID is used to uniquely address a particular destination device within your MIDI setup. Device IDs range between
00–127. To send a SysEx message to a particular device in your MIDI setup, find out which Device ID it responds to, then assign the
same Device ID to KeyRig 25 before starting the transmission.
For most devices, the Device ID is pre-configured at 127 at the factory. Device ID 127 plays a special role, as it can be read by all
connected devices, regardless of their individual Device ID setting.
As an example, a device with device ID 50 will not only accept messages that are using Device ID 50, but also messages with Device ID
127. SysEx messages with any other Device ID are ignored.
The Device ID for a SysEx message assigned to a controller can be changed using the DEV ID key. This key is used for varying the
global Device ID of the M-Audio KeyRig 25.
Assigning the Device ID
Press the ADVANCED FUNCTION button, then the DEV ID key to assign a Device ID to the M-Audio KeyRig 25. When the DEV ID key is
pressed, the LED display indicates the assigned Device ID. It is possible to enter a new device ID using the numerical data entry keys, or
the +/- buttons. Press the ENTER key to confirm.
If a SysEx message is sent from a device with a Device ID of 127, that message can be read by all attached MIDI receiving hardware
regardless of their Device ID settings. If a SysEx message is created by a device with a Device ID other than 127, the SysEx message
will only be processed by devices with an identical Device ID. The sent SysEx message will be ignored by devices with a Device ID that
doesn’t match that of the sending device.
Memory Dump
Press the ADVANCED FUNCTION button followed by the MEM DUMP key to send out a number of SysEx data packets that represent
the 5 user-defined or factory-set presets of the M-Audio KeyRig 25. This can be used for storing or backing up the contents of the
memory presets externally.
It is possible to record a Memory Dump to a standard MIDI sequencer track, much like how you would record notes on a MIDI sequencer
track. You can recall the Memory Dump you recorded by playing back the MIDI track containing the recorded Memory Dump, making
sure that the M-Audio KeyRig 25 is selected as the MIDI output for that particular track.
The current controller assignments are not immediately affected by a Memory Dump, or a memory location that is sent to the keyboard.
You first need to recall a preset to access the uploaded new settings after a memory dump has been sent to the keyboard.

|
17
KeyRig 25 User Guide
MIDI Messages In-Depth
Program & Bank Changes
When the MIDI standard was first established, it enabled the user to access only 128 different sounds using program change messages
(0-127). As MIDI devices grew to be more sophisticated and contain more sounds, bank change messages were included in an updated
MIDI specification to allow for more than 128 sounds to be accessed.
The language MIDI uses to communicate between
musical instruments only allows for program change
commands 0-127, for a total of 128 possible
programs (127 programs + program “0” = 128
programs total). Because of inherent limitations
of the MIDI communication protocol, the number
of directly accessible programs (using program
change messages) cannot easily be expanded
beyond 128. Thus, a system of banks, with 128
sounds in each, has been created that enables
manufacturers to overcome the 128-sound MIDI
limit.
128 Banks with 128 sounds in each bank is the
basic principle used to expand the number of
accessible sounds. However, to avoid reaching the
new limit of the resulting 16,384 possible sounds
(128 banks x 128 programs) accessible using a
bank change combined with a program change,
another layer of banks was added. The result is a
system of 128 banks that can contain 128 sub-
banks in each of them, which, in turn, can contain
128 sounds (programs) within them.
Bank change messages are useful when calling
up sounds from a large library that may exist in a
particular sound module or software synth. For
example devices that are built with Roland’s GS
specification or Yamaha’s XG specification require
you to specify a bank change in order to access the
extra voices and effects that these devices provide.
MIDI CC 0 is the bank select MSB (Most Significant
Byte) message. This MIDI message is 7-bit in size
and can be used to select any of 128 banks. This
message can be used in conjunction with MIDI CC
32 which is bank select LSB (Least Significant
Byte): a separate 7-bit message allowing additional
selection of any of another 128 sub-banks. The
combination of Bank MSB and LSB messages
gives a 14-bit message that can select any of a
possible 16,384 banks. Each bank can in turn
contain 128 possible sounds selected via a separate
program change MIDI message. This enables a user to theoretically recall over two million programs directly, using only MIDI commands.
However, most devices only use a few different banks, and allow you to access them with either a Bank LSB message or a Bank MSB
message. Please consult your synthesizer’s or software’s documentation for more information on which type of bank change messages
they can process.”

|
18
KeyRig 25 User Guide
You will find many MIDI devices respond to program change commands and many are organized according to the GM listing. In General
MIDI devices, different sounds are organized in the same way from device to device. Piano sounds are in their particular place, string
sounds are in their place, drum sounds are in their place, and so on. All GM devices (both hardware and software sound modules) are
clearly labeled as such, so you know that their sounds are organized in the General MIDI structure. When a GM device receives a MIDI
program change, it calls up a type of sound that you expect from the GM sound set. All non-GM MIDI sound modules call up unique
sounds from their memory upon receiving MIDI program changes. Since the sounds in a non-GM device are not arranged in a particular
order, you need to take a look at the device itself to see which sound you want and at which location in the memory it resides. Many VST
instruments such as Native Instruments’ FM7 or the synth modules in Propellerhead Reason are non-GM devices.
You can send program change, bank LSB and bank MSB messages directly from the KeyRig keyboard. Please consult the “Advanced
KeyRig 25 Features in Edit Mode“ section of this User Guide for further details.
Troubleshooting
The KeyRig 25 keyboard has been tested under a wide variety of conditions. Despite our thorough testing, the controller can be used in
virtually limitless situations and certain scenarios may result in unexpected performance. This section will highlight some of the most common
difficulties users may experience and provide tips to remedy these problems. If you have read this section and still cannot resolve an issue you are
experiencing, please feel free to contact M-Audio technical support for further assistance.
Problem 1: My KeyRig 25 suddenly stopped working after having performed fine since installation.
Close any music applications you are using, switch the KeyRig 25 off, and restart your computer. Once your computer has restarted,
switch the KeyRig 25 back on and try again.
Problem 2: I have connected a sustain pedal to my M-Audio keyboard, but its operation is reversed.
The KeyRig 25 keyboard determines the polarity of a sustain pedal when the controller is switched on. The sustain pedal is assumed
to be in the OFF position (i.e., not pressed) when the keyboard is turned on. To ensure proper operation, make sure the pedal is not
pressed during start up.
Problem 3: The keyboard does not trigger sounds in my music software.
See if your music software features a “MIDI input” or “MIDI activity” indicator. Most programs have a MIDI activity indicator that can
be used to confirm whether MIDI data from the keyboard is reaching the software. If the software is not receiving any MIDI data,
be sure the controller is properly installed and is selected as a MIDI input device within your software. Refer to your software’s
documentation to learn how to configure and select MIDI input devices.
If the MIDI activity display indicates that MIDI data is reaching your software, then you may not be hearing sounds because the MIDI
data is not being routed correctly through the software itself. Refer your software’s documentation to learn how to route MIDI data
properly.
Problem 4: The controller is connected to my computer through USB but it does not seem to turn on.
Make sure the power switch is in the “On” position. If this does not remedy the problem, the keyboard may not be receiving
adequate power from your computer. Try plugging the controller into a different USB port or powered USB hub. Alternatively, you
may try connecting a 9-12V DC, 1000mA external power supply to the Power jack on the rear of the keyboard.
Problem 5: My music software (or hardware) always recalls the preset next to the program number that I have sent to it from the
KeyRig 25. For example, if I send a program change with the number 40 (Violin), my software loads sound number 41 (Viola).
Some General MIDI modules count their sound patches from 1 – 128 instead of 0-127. Both methods are common. As a result,
there may be an offset of +/-1 between the sent program change number and the recalled sound patch.
Problem 6: I have modified my KeyRig 25 settings but would like to go back to its “factory default” settings.
To reset KeyRig 25 to its “factory default” settings, first switch the keyboard off. Next (while the controller is still off), press and hold
both Preset +/- buttons and turn the unit on. Note that restoring the factory presets will erase all setups you have stored to memory.

|
19
KeyRig 25 User Guide
Appendices
Appendix A: MIDI Implementation Chart
Function Transmitted Received Remarks
Basic Default 1-16
X
Channel Changed 1-16
Mode Default ---------
Messages X X
Altered *********
Note 0-127
X
Number True Voice *********
Velocity Note ON 0
X
Note OFF X
After Keys X
X
Touch Ch’s 0
Pitch Bend 0 X
Control 0-119 0 X
Change 120-127 0 X
Program 0-127
X
Change True Number *********
System
Exclusive
GM, GM2, MMC Memory Dump
System Song Position
X
X
Common Song Select X
System Clock X
X
Exclusive Commands X
Aux
Messages
Local ON/
OFF
0
X
All Notes OFF 0
Active Sense 0
Reset 0
Notes 0 = YES X=NO

|
20
KeyRig 25 User Guide
Appendix B: Assignable MIDI CC’s on KeyRig 25
Table B1: Knobs and fader assignments
MIDI CC Description Data LSB Data MSB
0-119 Standard MIDI CC’s - -
120-127 Channel Mode Messages - -
128 Pitch Bend Sensitivity - -
129 Channel Fine Tune - -
130 Channel Coarse Tune - -
131 Channel Pressure - -
132 RPN Coarse RPN LSB RPN MSB
133 RPN Fine RPN LSB RPN MSB
134 NRPN Coarse NRPN LSB NRPN MSB
135 NRPN Fine NRPN LSB NRPN MSB
136 Master Volume GM* Volume LSB Volume MSB
137 Master Pan GM* Pan LSB Pan MSB
138 Master Coarse Tune GM* Tuning LSB Tuning MSB
139 Master Fine Tune GM* Tuning LSB Tuning MSB
140 Chorus Mod Rate GM2* Mod rate -
141 Chorus Mod Depth GM2* Mod depth -
142 Feedback GM2* Feedback level -
143 Send to Reverb GM2* Reverb send level -
144 Pitch Bend Pitch shift LSB Pitch shift MSB
255 Controller Off - -
* Sys Ex messages

|
21
KeyRig 25 User Guide
Table B2: Buttons and Sustain Pedal Assignments
MIDI CC Description Program Data LSB Data MSB
0-119 Standard MIDI CC’s - Toggle value 2 Toggle value 1
120-127 Channel Mode
Messages
- Toggle value 2 Toggle value 1
128 Pitch Bend Range - Sensitivity value -
129 Channel Fine Tune - Tuning amount -
130 Channel Coarse Tune - Tuning amount -
131 Channel Pressure - Pressure amount -
132 RPN Coarse Value RPN LSB RPN MSB
133 RPN Fine Value RPN LSB RPN MSB
134 NRPN Coarse Value NRPN LSB NRPN MSB
135 NRPN Fine Value NRPN LSB NRPN MSB
136 Master Volume GM* - Volume LSB Volume MSB
137 Master Pan GM* - Pan LSB Pan MSB
138 Master Coarse Tune
GM*
- Tuning LSB Tuning MSB
139 Master Fine Tune GM* - Tuning LSB Tuning MSB
140 Chorus Mod Rate
GM2*
- Mod rate -
141 Chorus Mod Depth
GM2*
- Mod depth -
142 Feedback GM2* - Feedback level -
143 Send to Reverb GM2* - Reverb send level -
144 Pitch Bend - Pitch shift LSB Pitch shift MSB
145 Program/Bank Preset Program Bank LSB Bank MSB
146 MIDI CC (on/off) MIDI CC Button press value Button release value
147 Note (on/off) Note Velocity off Velocity on
148 Note (on/off toggle) Note Velocity off Velocity on
149 MMC Command** - Command select. -
150 Reverb Type GM2 * - Type -
151 Reverb Time GM2 * - Time -
152 Chorus Type GM2* - Type -
153 MIDI CC Decrement MIDI CC Start value End value
154 MIDI CC Increment MIDI CC Start value End value
255 Controller Off - - -
* Sys Ex messages
** MMC Sys Ex messages
Table B3: MMC Command Numbers
Number MMC Command Number MMC Command
01 STOP 08 RECORD PAUSE
02 PLAY 09 PAUSE
03 DEFERRED PLAY 10 EJECT
04 FAST FORWARD 11 CHASE
05 REWIND 12 COMMAND ERROR RESET
06 RECORD STROBE 13 MMC RESET
07 RECORD EXIT
/