Page is loading ...

LP GAS CYLINDER SOLD SEPARATELY
BOUTEILLE DE GPL VENDUE SÉPARÉMENT
EL TUBO DE GAS PL SE VENDE POR SEPARADO
FOR OUTDOOR USE ONLY
UTILISER À L’EXTÉRIEUR SEULEMENT
PARA USO EN EL EXTERIOR ÚNICAMENTE
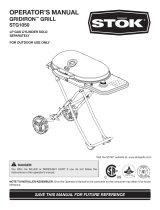
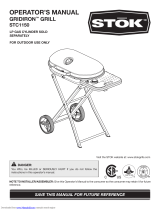
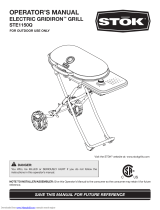
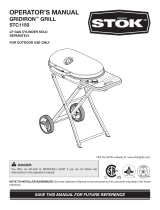
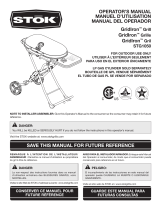
OPERATOR’S MANUAL
MANUEL D’UTILISATION
MANUAL DEL OPERADOR
GridIron
™
Grill
GridIron
™
Grille
GridIron
™
Gril
STG1150HD
CONSERVER CE MANUEL POUR
FUTURE RÉFÉRENCE
GUARDE ESTE MANUAL PARA
FUTURAS CONSULTAS
SAVE THIS MANUAL FOR FUTURE REFERENCE
NOTE TO INSTALLER/ASSEMBLER: Give this Operator’s Manual to the consumer so the consumer may retain it for future
reference.
DANGER:
You WILL be KILLED or SERIOUSLY HURT if you do not follow the instructions in this operator’s manual.
Visit the STOK website at: www.stokgrills.com
REMARQUE À L’INTENTION DE L’INSTALLATEUR/
ASSEMBLEUR : Remettre ce manuel d’utilisation au propriétaire
du gril à titre de référence.
DANGER :
Le non-respect des instructions fournies dans ce manuel
d’utilisation entraînera des BLESSURES GRAVES, voire
MORTELLES.
Visitez le site Web de STOK à l’adresse suivante : www.stokgrills.com
AVISO PARA EL INSTALADOR/ARMADOR: Entregue este Manual
del Operador al consumidor, de modo que el consumidor pueda
conservarlo para referencia en el futuro.
PELIGRO:
El incumplimiento de las instrucciones en este manual del
operador puede CAUSARLE LA MUERTE O LESIONARLE
GRAVEMENTE.
Visite el sitio web de STOK en: www.stokgrills.com
Downloaded from www.Manualslib.com manuals search engine

2 — English
Introduction ......................................................................................................................................................................2
General Safety Rules .................................................................................................................................................... 3-4
Specific Safety Rules ........................................................................................................................................................4
Symbols ............................................................................................................................................................................5
Features ............................................................................................................................................................................6
Loose Parts ......................................................................................................................................................................7
Tools Needed ....................................................................................................................................................................7
Assembly .................................................................................................................................................................... 8-12
Operation .................................................................................................................................................................. 13-15
Maintenance ............................................................................................................................................................. 16-17
Troubleshooting ..............................................................................................................................................................18
Warranty .........................................................................................................................................................................19
Parts Ordering/Service ..................................................................................................................................... Back Page
This grill has many features for making its use more pleasant and enjoyable. Safety, performance, and dependability have
been given top priority in the design of this product making it easy to maintain and operate.
TABLE OF CONTENTS
INTRODUCTION
DANGER:
If you smell gas:
1. Shut off gas to the appliance
2. Extinguish any open flame.
3. Open firebox hood.
4. If odor continues, keep away from the appliance
and immediately call your gas supplier or your fire
department.
Failure to follow these instructions could result in fire or
explosion which could cause property damage, personal
injury or death.
WARNING:
Improper assembly, adjustment, alteration, service, or
maintenance can cause property damage, injury, or
death. Read the Assembly, Operation, and Maintenance
instructions thoroughly before use, assembly, or servicing
of this product.
DANGER:
Always use outdoors. Using the grill indoors or within an
enclosed area can lead to carbon monoxide poisoning,
resulting in serious injury or death.
WARNING:
Do not store or use gasoline or other flammable liquids
or vapors in the vicinity of this or any other appliance.
An LP cylinder not connected for use shall not be
stored in the vicinity of this or any other appliance.
To register your STŌK
®
product, please
visit: http://register.stokgrills.com
Downloaded from www.Manualslib.com manuals search engine

3 — English
GENERAL SAFETY RULES
WARNING:
Read and understand all instructions. Failure to follow
all instructions listed below, may result in electric shock,
fire and/or serious personal injury.
READ ALL INSTRUCTIONS
This appliance must be installed in accordance with the
latest local codes. In the absence of local codes, use the:
• United States:
- National Fuel Gas Code, ANSI Z223.1/NFPA 54
- LP gas Code, NFPA 58
• Canada:
- Natural Gas and Propane Installation Code, CSA
B149.1
- Propane Storage and Handling Code, CSA B149.2
If an accessory is used on the grill that requires an external
electrical power source, the accessory when installed
must be electrically grounded in accordance with local
codes. In the absence of local codes, use the:
• United States: National Electrical Code, ANSI/NFPA 70
• Canada: Canadian Electrical Code, CSA C22.1
This appliance is for outdoor use only, and shall not be
used in a building, garage, shed, balcony, or any other
enclosed area.
Do not use or install this appliance in or on boats or
recreational vehicles.
This grill must be located away from combustible surfaces
by no less than 36 in. (914 mm) from back of grill and
36 in. (914 mm) from sides of this grill.
The grill shall not be used under overhead combustible
construction.
Keep area around this appliance free of combustible
materials, gasoline, and all other flammable vapors and
liquids.
Do not restrict the flow of combustion and ventilation air.
Keep ventilation openings of the cylinder enclosure free
and clear from debris.
This grill is not intended for commercial use.
Never move grill when using or still hot.
Never use the grill indoors. Toxic fumes can accumulate.
Always remove the LP gas cylinder (liquid propane also
called liquid petroleum gas) when the appliance is not in
use or before storing or lowering the unit.
Do not alter the grill in any manner.
Do not use this appliance unless it is fully and properly
assembled and all parts are securely fastened.
Never attempt to light burner with the firebox hood
closed. A build up of non-ignited gas inside a closed grill
is hazardous.
When in use, keep children and pets away at all times.
Do not leave the grill unattended.
Do not use charcoal, ceramic briquettes, or lava rock in
a gas grill.
In the event of a grease fire, turn off the burner. Do not
attempt to extinguish with water. Use type BC dry chemical
fire extinguisher or smother with dirt, sand, or baking
soda.
Keep any electrical cord and fuel supply hose away from
any heated surfaces.
Do not store a spare LP gas cylinder under or near the
grill. If not followed exactly, a fire causing death or serious
injury may occur.
Never fill the LP gas cylinder beyond 80 percent full. An
overfilled or improperly stored cylinder is a hazard due
to possible gas release from the safety release valve. If
not followed exactly, a fire causing death or serious injury
may occur.
36 in.
36 in.
36 in.
Fig. 1
Downloaded from www.Manualslib.com manuals search engine

4 — English
SPECIFIC SAFETY RULES
Use grill only with LP gas and the regulator/valve assembly
supplied.
Check for leaks prior to grilling operations. Do this even
if this grill was assembled at the store.
Do not operate the grill if there is a gas leak present.
Never use a flame to check for gas leaks.
Should the burner go out while grilling, turn off the gas
valve. Open the firebox hood and wait five minutes before
attempting to relight.
Never lean over an open grill or place hands or fingers
on hot surfaces.
Thoroughly clean the grill regularly.
Do not block the ventilation holes in the sides or back of
the grill.
Never attempt to use the appliance or any components
that have been damaged or exposed to an accidental
fire.
Propane gas is not natural gas. Do not try to convert
this grill to natural gas as it will void the warranty and is
extremely dangerous.
Place dust cap on cylinder valve outlet whenever the
cylinder is not in use. Only install the type of dust cap on
the cylinder valve outlet that is provided with the cylinder
valve. Other types of caps or plugs may result in leakage
of propane.
Do not store or use gasoline or other flammable liquids
or vapors in the vicinity of the grill.
Use heat-resistant mitts or gloves, and long-handled
utensils when operating this grill.
Apartment Dwellers: Check with management to learn
requirements and fire codes of using a LP gas grill in your
apartment complex.
Save these instructions. Refer to them frequently and use
them to instruct others who may use this grill. If you loan
someone this grill, loan them these instructions also.
GENERAL SAFETY RULES
If a leak is detected at any time, get away from the LP
gas cylinder and call the fire department.
This grill is not intended to be used on a boat, in an RV,
camper trailer, or motor home.
Do not use the grill until leak-tested.
Periodically check and/or clean the burner/venturi tubes
for insects and insect nests. A clogged tube can lead to
a fire beneath the grill.
LP gas cylinders must be stored outdoors out of
reach of children and must not be stored in a building,
garage, or any other closed in area.
Do not operate the grill while under the influence of drugs,
alcohol, or any medication.
Stay alert and exercise control. Watch what you are doing
and use common sense. Do not operate a grill when you
are tired.
Propane cylinder use (1 lb. disposable):
• Use only cylinder marked “Propane Fuel”.
• Cylinder must be constructed and marked in accordance
with the specifications for LP gas cylinders of the U.S.
Department of Transportation (DOT) or the National
Standard of Canada, CAN/CSA-B339, Cylinders,
Spheres and Tubes for the Transportation of Dangerous
Goods.
• Size should be 4 in. diameter, 8 in. height, or 3 in.
diameter, 10 in. height.
• Save cylinder cap and reinstall when not in use.
• Cylinder supply system must be arranged for vapor
withdrawal. Gas cylinder must be upright in use.
Downloaded from www.Manualslib.com manuals search engine

5 — English
SYMBOLS
The following signal words and meanings are intended to explain the levels of risk associated with this product.
SYMBOL SIGNAL MEANING
DANGER:
Indicates an imminently hazardous situation, which, if not avoided, will result
in death or serious injury.
WARNING:
Indicates a potentially hazardous situation, which, if not avoided, could result
in death or serious injury.
CAUTION:
Indicates a potentially hazardous situation, which, if not avoided, may result in
minor or moderate injury.
NOTICE:
(Without Safety Alert Symbol) Indicates important information not related to an
injury hazard, such as a situation that may result in property damage.
Some of the following symbols may be used on this product. Please study them and learn their meaning. Proper
interpretation of these symbols will allow you to operate the product better and safer.
SYMBOL NAME DESIGNATION/EXPLANATION
Safety Alert Indicates a potential personal injury hazard.
Read Operator’s
Manual
To reduce the risk of injury, user must read and understand operator’s
manual before using this product.
Hot Surface
To reduce the risk of injury or damage, avoid contact with any hot
surface.
CALIFORNIA PROPOSITION 65
WARNING:
1. Combustion by-products produced when using this product may contain chemicals known to the State of California
to cause cancer, birth defects, or other reproductive harm. To reduce the risk of exposure to these substances, always
use the grill in a well-ventilated area.
2. This product contains chemicals, including lead, lead compounds, and benzene (depending on the fuel type used),
known to the State of California to cause cancer, birth defects, or other reproductive harm. Wash hands after handling.
To minimize exposure to these substances, always operate this unit according to the Operator’s Manual, ensuring you
provide adequate ventilation when cooking with gas.
In Massachusetts: All gas products must be installed using a Massachusetts-licensed plumber or gasfitter. A “T” handle
type manual gas valve must be installed in the gas supply line to this appliance. This applies to permanently installed
natural gas and propane installation. This does not apply to propane portable installations using a 20 lb. tank.
Downloaded from www.Manualslib.com manuals search engine

6 — English
PIZZA STONE - Make brick oven quality pizza using the grill
and the porous ceramic pizza stone. The pizza stone absorbs
heat to promote even cooking. The stone will discolor with
use but this will not affect performance.
REMOVABLE GRATE INSERT - Remove the round
porcelain-coated, cast-iron grate insert when using the
pizza stone or other available inserts (sold separately). When
transporting be sure the cast-iron grate is installed.
RUGGED WHEELS - The durable plastic wheels allow you
to move the grill across smooth and rough surfaces.
TEMPERATURE GAUGE - The temperature gauge
measures temperatures up to 700°F.
PRODUCT SPECIFICATIONS
BTU rating ............................................................... 15,000
Total grill surface ............................................... 338 sq. in.
Grilling surface height ................................................ 31 in.
FEATURES
Fig. 2
Fuel source .....................................Propane (not included)
Natural gas convertible ................................................. No
KNOW YOUR GRILL
See Figure 2.
The safe use of this grill requires an understanding of the
information on the grill and in this operator’s manual. Before
use of this grill, familiarize yourself with all operating features
and safety rules.
COLLAPSIBLE STAND - The stand can be collapsed for
storing or transporting the grill.
ELECTRIC IGNITOR - The electric ignitor uses a AAA
battery that lights the gas burner when pushed.
FIREBOX HOOD - The firebox hood can be locked for easy
transport.
MATCH HOLDER STORAGE - Slots in the back of the grill
provide convenient storage for the match holder.
REMOVABLE
GRATE
INSERT
ELECTRIC
IGNITOR
RUGGED
WHEELS
FIREBOX
TEMPERATURE
GAUGE
COLLAPSIBLE
STAND
FIREBOX
HOOD
MATCH
HOLDER
STORAGE
CONTROL
KNOB
FIREBOX
HANDLE
GRATE
STAND
FRONT
HANDLE
Downloaded from www.Manualslib.com manuals search engine

7 — English
Fig. 3
The following tools (not included or drawn to scale) are needed for assembly and making adjustments:
PHILLIPS
SCREWDRIVER
TOOLS NEEDED
Fig. 4
LOOSE PARTS
A - Firebox handle .......................................................... 1
B - Grease cup ............................................................... 1
C - Grate insert ............................................................... 1
D - Grate ......................................................................... 1
E - Wheel ........................................................................ 2
F - Stand front handle .................................................... 1
G - Pizza Stone ............................................................... 1
H - Axle ........................................................................... 1
HARDWARE BLISTER PACK
AA - Wing nut ................................................................2
BB - Screw (wheel) ........................................................2
CC - AAA Battery ...........................................................1
DD - Washer ..................................................................4
EE - Screw (stand front handle) ....................................4
FF - Hitch Pin ................................................................1
A
AA
E
B
F
H
BB
FF
DD
DD
EE
G
CC
D
C
Downloaded from www.Manualslib.com manuals search engine

8 — English
ASSEMBLY
UNPACKING
This product requires assembly.
Carefully lift grill from the carton and place it on a level
work surface.
WARNING:
Do not use this product if any parts on the Loose Parts List
are already assembled to your product when you unpack
it. Parts on this list are not assembled to the product by
the manufacturer and require customer installation. Use
of a product that may have been improperly assembled
could result in serious personal injury.
Inspect the grill carefully to make sure no breakage or
damage occurred during shipping.
Do not discard the packing material until you have
carefully inspected the grill, identified all loose parts, and
satisfactorily operated the grill.
NOTE: Some loose parts are located inside the grill
assembly beneath the firebox hood.
If any parts are damaged or missing, please call
1-800-847-5993 for assistance.
WARNING:
If any parts are damaged or missing, do not operate
this grill until the parts are replaced. Use of this product
with damaged or missing parts could result in serious
personal injury.
CAUTION:
Some parts may contain sharp edges that may cause
personal injury. Wear protective gloves if necessary.
STEP 1: ATTACHING THE WHEELS
See Figure 5 - 6.
With the grill out of the box and packaging removed,
place the grill right side up on flat surface.
Locate the holes in the stand legs.
Slide the axle (H) through the square hole in the left stand
leg and then through the round hole in the right stand leg.
Install the hitch pin (FF) into the hole in the axle to secure
it in place.
Lift the grill, slide one washer (DD) and wheel (E) onto the
axle.
Using a second washer (DD) and screw (BB), secure the
wheel to the stand. Securely tighten screw.
Repeat this process to secure the other wheel.
Fig. 5
Fig. 6
Fig. 7
SQUARE
HOLE
ROUND
HOLE
AXLE
HOLE
STEP 2: ATTACHING THE STAND FRONT
HANDLE
See Figure 7.
Locate the handle mounts on the firebox.
Align holes in stand front handle (F) with holes in mounts.
Install front handle using phillips screws (EE). Securely
tighten screws.
SCREW
MOUNT
HITCH
PIN
STAND
FRONT
HANDLE
WASHER
WASHER
AXLE
SCREW
Downloaded from www.Manualslib.com manuals search engine

9 — English
ASSEMBLY
RELEASE
LEVER
Fig. 9
Fig. 8
CENTER
BRACE
STEP 3: OPENING THE STAND
See Figure 8 - 10.
Grasp the stand front handle and raise the stand until it
rests on the wheels and frame support.
WARNING:
Use the stand front handle to raise the stand. Do not
raise by any part of the grill that is attached to the stand.
Failure to heed this warning can result in possible injury
and damage the grill.
Step on the release lever and pull the stand front handle
toward you at the same time.
Apply slight downward pressure on the stand until the
release lever closes over the center brace, locking the
unit in place.
WARNING:
Failure to remove the LP gas cylinder or attempting
to move the grill while it is hot could result in serious
personal injury.
Fig. 10
RELEASE
LEVER
STAND
FRONT
HANDLE
FOOT
BRACE
STAND
FRONT
HANDLE
RELEASE
LEVER
FRAME
SUPPORT
Downloaded from www.Manualslib.com manuals search engine

10 — English
ASSEMBLY
STEP 4: ATTACHING FIREBOX HANDLE
See Figures 11 - 12.
Raise and open the stand.
Lift the hood latch then raise firebox hood.
Insert studs in firebox handle (A) through holes in firebox
hood.
Install wing nuts (AA) and tighten securely.
STEP 5: INSTALLING THE GREASE CUP
See Figure 13.
Slide the grease cup (B) into the cup holders on the bottom
of the grill.
NOTE: Clean the grease cup after each use. Do not remove
the grease cup until after the grill has cooled completely.
Do not transport the grill with a dirty grease cup.
Fig. 11
HOOD
LATCH
FIREBOX
HOOD
FIREBOX
Fig. 12
WING
NUT
FIREBOX
HANDLE
FIREBOX
HOOD
Fig. 13
GREASE
CUP
STUD
Downloaded from www.Manualslib.com manuals search engine

11 — English
ASSEMBLY
STEP 6: INSTALLING BATTERY IN IGNITOR
See Figure 14.
Turn the ignitor cap counterclockwise and lift cap from
the control panel.
Slide a AAA battery (CC), negative (—) end first, into the
ignitor. Be sure spring is still in place inside the ignitor cap.
Replace ignitor cap.
STEP 7: CONNECTING THE LP GAS CYLINDER
TO THE REGULATOR
See Figure 15.
Remove cap from LP gas cylinder.
Hold the LP gas cylinder firmly and insert into the
regulator.
Turn the cylinder clockwise taking care not to cross thread
the connection. Do not use tools.
NOTE: The regulator will seal in the cylinder valve resulting
in some resistance. An additional one-half to three-
quarters turn is required to complete the connection.
If you cannot complete the connection, disconnect and
repeat the above two steps. If you still cannot complete
the connection, DO NOT use this regulator!
Inspect valve connections. Look for any damage or debris.
Remove any debris. Never attempt to use damaged or
plugged equipment. See your local LP Gas Dealer for
repairs.
STEP 8: TESTING VALVES AND REGULATOR
FOR LEAKS
See Figure 16.
Connections on the valve were tested at the factory to ensure
no gas leaks were present. However, shipping and handling
could loosen connections. As a safety precaution:
Turn the control knob off.
NOTE: To lock the control knob in the off position, turn
the control knob to LOCK ( ).
Make sure the LP cylinder is properly connected to the
LP gas cylinder valve.
If you hear a rushing sound, immediately remove the LP
gas cylinder. This sound means there is a major leak at
the connection. Correct the problem before proceeding.
Using a clean paint brush and a 50/50 mixture of mild soap
and water, brush soapy solution over all the connections
and fittings on the grill.
“Growing” bubbles indicate a leak. Remove the LP gas
cylinder and recap the bottle.
NOTE: If leaks cannot be stopped, do not try to repair.
Call for replacement parts.
IGNITOR CAP
AAA
BATTERY
Fig. 14
Fig. 15
LP GAS
CYLINDER
REGULATOR
Downloaded from www.Manualslib.com manuals search engine

12 — English
ASSEMBLY
STEP 9: CLOSING STAND AND TRANSPORTING
THE GRILL
See Figures 17 - 18.
Never close the stand or attempt to move the grill unless the
grill is completely cool, the grease cup is empty, and the LP
gas cylinder is removed.
NOTE: Make sure the grate and removable insert are in
place and hood latch secured prior to closing the stand or
transporting the grill. This will help to keep all grates in place.
To close the stand:
Grasp the stand front handle and step on the release
lever.
Lift the stand front handle up and away from you.
Apply slight forward pressure until the release lever clicks
into place and the unit rests on the wheels and frame
support.
From this position, the GridIron
™
grill can be moved easily
from place to place.
To lower a closed stand :
Stand at the wheel side of the collapsible stand and grasp
the stand front handle.
Tilt the unit toward you and then slowly lower it to the
ground.
Fig. 16
REGULATOR
Fig. 18
Fig. 17
RELEASE
LEVER
STAND
FRONT
HANDLE
Downloaded from www.Manualslib.com manuals search engine

13 — English
OPERATION
WARNING:
Do not allow familiarity with grill to make you careless.
Remember that a careless fraction of a second is
sufficient to inflict severe injury.
WARNING:
Do not use any attachments or accessories not
recommended by the manufacturer of this grill. The use
of attachments or accessories not recommended can
result in serious personal injury.
SAFETY TIPS FOR USING THE GRILL
Before turning the control knob on, check the LP gas
cylinder for tightness and perform a leak test.
Trim excess fat from meat to reduce flare ups from drip-
pings.
When grill is not in use, turn the control knob to LOCK
( ), and remove the LP gas cylinder.
Do not move grill while cooking.
To avoid burns and splatters, use long-handled utensils
and oven mitts.
Do not use the grill if the grease cup is not clean and
properly installed.
Once the grill has cooled, clean promptly.
Do not let grease or hot material drip from the grill onto
the valve, hose, or regulator. Correct the problem before
use.
If the regulator frosts, immediately turn off the grill and
cylinder valve. This indicates a problem with the LP gas
cylinder and it should not be used. Return the cylinder
to the supplier.
Do not leave the grill unattended while preheating
or burning off food residue. If the grill has not been
regularly cleaned as instructed, a grease fire can occur.
Never use water on a grease fire.
Perform a burner flame check before each use (see the
Maintenance section).
GRILLING GUIDE
High — for preheating the grill, searing steaks and other cuts
of meat, burning off food residue from grate.
Medium — for most grilling, baking, and roasting.
Low — for cooking fish and other lean foods.
COOKING/GRILLING TIPS
The best oils to use when grilling meats are high-temper-
ature oils (i.e., peanut, canola, safflower, and cottonseed
oils).
Dry off meat prior to grilling. Dry meat browns; wet meat
steams.
Grill with the firebox hood down.
Keep grates clean. A clean grate is less likely to be sticky
and will last longer.
Clean the firebox hood and inside the firebox often. A
grease build-up is a fire hazard and adds unwanted flavors
to your fresh food.
Before lighting the burner, spray grates with non-stick
spray to prevent food from sticking.
Always preheat the grill 10 - 15 minutes prior to use.
Before you start grilling, organize the food by cooking tech-
nique, required cooking time, and grilling area required.
Sauces containing sugars and fats can cause flare-ups
and burn your food. Apply these sauces only in the last
10 minutes of cooking.
Marinades and rubs enhance the flavor of food. A dry rub
or liquid marinade can be used prior to cooking.
FOOD SAFETY
Wash hands, utensils, and surfaces with hot soapy water
before and after handling raw meat.
Keep raw meat separate from ready-to-eat foods.
Use a clean platter and utensils when removing cooked
food from the grill.
Cook meat and poultry thoroughly to kill bacteria.
Use a meat thermometer to ensure proper internal tem-
perature of meat.
USDA Recommended Safe Minimum Internal Tempera-
tures of Food:
• 145°F for beef, veal, lamb, steaks, and roast
• 145°F for fish
• 160°F for ground pork, beef, veal, and lamb
• 160°F for pork
• 160°F for egg dishes
• 165°F for turkey, chicken, and duck (whole, pieces,
and ground)
Refrigerate prepared and leftover foods promptly.
WARNING:
If ignition does NOT occur within 5 seconds, turn the
control knob to OFF ( O ) and wait 5 minutes. Repeat lighting
procedures. If burner does NOT ignite with the cylinder
valve open, gas will continue to flow out of the burner and
could accidently ignite and result in serious personal injury.
Downloaded from www.Manualslib.com manuals search engine

14 — English
OPERATION
To ignite burner using match lighting:
Open the firebox hood.
Turn control knob to OFF ( O ).
NOTE: To lock the control knob in the off position, turn
the control knob to LOCK ( ).
Make sure the LP gas cylinder is tightly connected to the
regulator and a leak test has been performed.
Using the match holder included with this grill, place a
match between the circular wires.
Light the match and place into lighting hole on the
bottom of the firebox.
Push in the control knob and turn to .
When burner is lit, turn the control knob to the desired
setting.
If burner fails to light, extinguish the match, turn the control
knob off, and wait five (5) minutes then repeat the step.
NOTE: Place burner on high and observe flame height
which should be approximately 1/2 in. If flame is too
high or too low, burner adjustment is required. See the
Maintenance section later in this manual.
IGNITING THE BURNER
See Figures 19 - 20.
NOTE: Never lean over the grill while lighting burner.
The first time you use your newly purchased grill, it is
recommended the grill run on the highest setting for
15 - 20 minutes.
To ignite burner using the electric ignitor:
Open the firebox hood.
Turn the control knob on the side shelf to OFF ( O ).
NOTE: To lock the control knob in the off position, turn
the control knob to LOCK ( ).
Make sure the LP gas cylinder is tightly connected to the
regulator and a leak test has been performed.
To light the burner, push in the control knob and turn
to .
Press and hold the electric ignitor until the burner lights.
When burner is lit, turn the control knob to the desired
setting.
If burner fails to light within five (5) seconds, release the
electric ignitor. Turn the control knob off and wait five (5)
minutes then repeat the step.
NOTE: Place burner on high and observe flame height
which should be approximately 1/2 in. If the flame is
too high or too low, burner adjustment is required. See
Maintenance section later in this manual.
Fig. 19
CONTROL
KNOB
ELECTRIC
IGNITOR
LIGHTING
HOLE
Fig. 20
MATCH
HOLDER
Downloaded from www.Manualslib.com manuals search engine

15 — English
OPERATION
USING THE GRILL AND ACCESSORIES
WARNING:
Never use an accessory if the porcelain coating is dam-
aged or chipped. Use with a damaged coating could
result in serious personal injury if ingested.
To use the grate:
Turn on the grill and close the firebox hood. Preheat the
grill for 10 - 15 minutes.
Open the firebox hood and place the food on clean grates
then close the firebox hood. Cooking time will vary de-
pending on personal preference.
NOTE: When grilling fish, the meat is typically done when
it flakes easily with a fork. If any part of the meat is glossy
in appearance, it is not done.
When finished cooking, turn the control knob off.
NOTE: To lock the control knob in the off position, turn
the control knob to LOCK ( ).
After the grill has cooled, clean grates and grease cup.
WARNING:
Only place the pizza stone in cold grill. Placing the pizza
stone in a hot grill can result in possible serious injury.
WARNING:
Remove grate insert from cold grill or use heat- resistant
mitts if removing a hot insert. Place insert on a heat re-
sistant surface and keep away from children. Removing
a hot insert may result in possible serious injury.
To use the pizza stone:
Lift and remove the grate insert then place the pizza stone
in the hole where the grate insert was removed.
Turn on the grill and close the hood. It will take 15 minutes
to heat the stone to cooking temperature.
Open the hood and place pizza on the pizza stone.
Cook the pizza.
When finished cooking, turn the control knob off.
NOTE: To lock the control knob in the off position, turn
the control knob to LOCK ( ).
Carefully remove the pizza. Wear heat-resistant mitts and
use a pizza peel or other long-handled utensil to remove
the pizza.
Allow the pizza stone and grill to completely cool.
Clean grates, grease cup, and pizza stone.
NOTE: When cleaning the pizza stone, use a plastic
utensil or scraper to remove excess food. Rinse with
water when needed, but do not soak. The pizza stone is
not dishwasher safe.
Downloaded from www.Manualslib.com manuals search engine

16 — English
MAINTENANCE
Fig. 21
Fig. 22
BURNER
TUBE
Clean burner tubes using one of the following three ways:
1. Bend a stiff wire into a small hook. Run the hook
through the burner tube several times.
2. Use a narrow bottle brush with flexible handle and
run through burner tubes several times. DO NOT
use a wire brush.
3. Wear eye protection then use an air hose to force
air into the burner tube and out through the burner
port. Clean any clogged port with an opened paper
clip.
WARNING:
When servicing, use only identical replacement parts.
Use of any other parts could create a hazard or cause
product damage.
GENERAL MAINTENANCE
When cleaning the inside of the firebox hood and grill bottom,
use a strong solution of detergent and water with a scrub
brush to clean. Rinse thoroughly and allow to air dry. NEVER
use a caustic grill cleaner on painted or cooking surfaces.
All plastic parts, stainless-steel and painted surfaces, should
be cleaned with warm soapy water and wiped dry. Cooking
surfaces should be cleaned with a bristle brush only. Check
that no loose bristles remain on the cooking grates prior to
using.
Cooking grates:
Clean before and after each use with a stiff wire brush.
Port shields:
Scrape any build-up off the port shields using a wire
brush.
Grease:
After use, allow the grease in the cup to cool then empty
into the garbage.
Empty after each use to avoid spillage and flare ups.
CLEANING BURNER ASSEMBLY AND
CHECKING VENTURI FOR INSECTS
See Figures 21 - 22.
DANGER:
Failure to clean the burner assembly and check the
venturi as described can result in a fire or explosion
resulting in serious injury or death.
Burner should be cleaned when the grill has been idle
for some time. In some parts of the country, spiders and
other insects can spin webs, build nests, and lay eggs in
the venturi blocking gas flow and causing fire in the tubes
known as “flashback”. Flashback can damage the grill and
even cause injury.
Tur n control knob to OFF ( O ). Allow grill to cool completely.
NOTE: To lock the control knob in the off position, turn
the control knob to LOCK ( ).
Remove the LP gas cylinder.
Pull electrode wire from the electronic ignitor.
Remove the wing nuts securing the burner to the firebox.
Using work gloves, lift burner up and away from the gas
valve openings.
ELECTRODE
GAS VALVE
ORIFICE
WING
NUT
BURNER
FIREBOX
PORT SHIELD
Downloaded from www.Manualslib.com manuals search engine

17 — English
0
MAINTENANCE
Once burner tube is clear of debris, use a wire brush to
remove food and dirt from the outer surface of the tubes.
Check burner for damage. Normal wear and corrosion
may cause some holes to enlarge. Replace burner if this
happens.
NOTE: Burner tube must reengage valve opening.
Verify that the gas valve orifice is correctly positioned
inside burner inlet.
Attach the electrode to the burner and carefully replace
the burner.
Slide burner into the grill and secure burner using wing
nuts.
Reattach electrode wires to the electric ignitor.
BURNER FLAME CHECK
See Figure 23.
Open the firebox hood and allow grill to cool completely.
Turn control knob to OFF ( O ).
NOTE: To lock the control knob in the off position, turn
the control knob to LOCK ( ).
Remove grates.
Light burner and turn the control knob from high to low.
A smaller flame should been seen on low while the high
positions flame should be approximately 1/2 in. in height.
If only a low flame is seen, you may need to replace the
LP gas cylinder.
Fig. 23
LOW
HIGH
Fig. 24
IGNITOR CHECK
Remove LP gas cylinder completely. Press and hold the
ignitor. “Click” should be heard and a spark seen between
the burner and electrode. If no spark, see the Troublesh ooti ng
section later in this manual.
VALVE CHECK
Remove LP gas cylinder completely. Control knob locks in
place when turned off. To check valves: push in knobs and
release. If knobs don’t spring back, replace the valve
assembly before using grill.
STORING THE GRILL
See Figure 24.
Turn the control knob to OFF ( O ).
NOTE: To lock the control knob in the off position, turn
the control knob to LOCK ( ).
Remove LP gas cylinder.
Place dust cap on cylinder valve outlet whenever the
cylinder is not in use. Only install the type of dust cap on
the cylinder valve outlet that is provided with the cylinder
valve. Other types of caps or plugs may result in leakage
of propane.
Once cooled, clean grill thoroughly, including grease cup.
Store in dry location. If storing outside, cover grill with
one of the variety of grill covers offered by STOK or other
grill cover manufacturers.
Downloaded from www.Manualslib.com manuals search engine

18 — English
TROUBLESHOOTING
PROBLEM POSSIBLE CAUSE SOLUTION
Smell of gas Regulator, or valve leaking. Remove LP cylinder immediately
and check for damaged regulator or
valve. Perform leak test, see Testing
Valves and Regulator for Leaks in the
Assembly section.
Flame flashback beneath control panel Fire in burner tube due to blockage. See Cleaning Burner Assembly and
Checking Venturi for Insects in the
Maintenance section.
Gas leak detected from cylinder,
regulator, or other connection
Improper installation and loose
connections.
Mechanical failure due to rusting or
mishandling.
Tighten fittings and see Testing Valves
and Regulator for Leaks in the
Assembly section.
Replace LP gas cylinder.
Grease fire or continuous excessive
flames above cooking surface
Grease build up in burner area. Turn off control knob. Leave firebox
hood open allowing flames to extinguish.
Once cool, clean grill thoroughly.
Burner will not light LP gas cylinder is empty.
Burner not connected to control knob.
Venturi blocked.
Ignitor wire is loose, dirty, or not
connected.
Dead battery in ignitor.
Replace LP gas cylinder.
Make sure valves are inside the burner
tubes.
See Testing Valves and Regulator for
Leaks in the Assembly section.
Reconnect burner electrode wires or
replace the ignitor wire assembly. Clean
wires and/or electrode with rubbing
alcohol and a clean swab. Tighten all
connections.
Replace the battery in the ignitor.
Decreasing heat or popping sound LP gas cylinder is empty.
Venturi blocked.
Replace LP gas cylinder.
See Cleaning Burner Assembly and
Checking Venturi for Insects in the
Maintenance section
Hot spots on cooking surface Venturi blocked. See Cleaning Burner Assembly and
Checking Venturi for Insects in the
Maintenance section
Yellow flame Venturi or burner may be blocked. See Cleaning Burner Assembly and
Checking Venturi for Insects in the
Maintenance section
Inside of firebox hood appears to be
peeling
This is a build up of grease. Clean with a soft bristle brush or
scraper.
Downloaded from www.Manualslib.com manuals search engine

19 — English
WARRANTY
STŌŌK
®
GAS GRILL LIMITED WARRANTY
Thank you for purchasing a STŌŌŌK
®
brand grill. Below is our limited gas grill product warranty. Before submitting a warranty
claim, we suggest you read the Operator’s Manual that came with your grill. You may discover an easy and simple solution
to your problem. If you cannot find the manual, a replacement can be obtained by calling the number below, or by down-
loading one from our web site at the address below.
What the Warranty Covers:
• Stainless Steel Burner: 10 years against manufacturing and material defects
• All other Grill Parts and Components: 2 years against manufacturing and material defects
The warranty period begins on the date of purchase. The warranty applies only to grills purchased from an authorized retailer
in the U.S. or Canada and extends only to the original purchaser and is not transferable.
Although we encourage you to register your gas grill, you do not need to do so in order to submit a warranty claim. Registering
your grill, however, will NOT serve as a substitute for a sales receipt. We cannot honor any warranty claims without a valid
sales receipt which shows date and place of purchase. If STŌŌŌK approves the claim, you may be required to return any
defective part, which STŌŌK will repair or replace without charge. If a part is not repairable and no longer available, the part
may be replaced with a similar part of equal function. Repair or replacement of parts does not extend the warranty period.
Repair or replacement of parts is your exclusive remedy under this limited warranty.
What the Warranty Doesn’t Cover:
The limited warranty does not cover damage caused by any of the following:
• Failure to assemble, use, or maintain the grill in accordance with the assembly instructions and Operator’s Manual or
any other misuse or abuse or failure to follow local codes
• Commercial, institutional, apartment complex, or other community use
• Gas cylinders or tanks
• Unauthorized modification or repair of the grill or use of unauthorized parts
• Acts of God such as fire, flood, hurricanes, lightning, wind, and hail
• Flare-up fires or accidents
• Cleaners other than those recommended in the Operator’s Manual or exposure to other chemicals either directly or in
the atmosphere (do not store your grill near a pool)
• Food loss or incidental, consequential, or special damages
• Scratches, dents, discoloration, surface rust, or other cosmetic issues or damages caused by tools during assembly
• Normal wear and tear
• Any consumable accessories provided with your grill such as grilling tools, brushes, or cleaners
• Postage, pickup, delivery or other transportation costs
• The cost to remove or install any parts or components or other labor charges
THIS LIMITED WARRANTY IS THE SOLE EXPRESS WARRANTY PROVIDED BY STŌŌŌK. EXCEPT TO THE EXTENT PRO-
HIBITED BY LAW, ANY IMPLIED WARRANTY OF MERCHANTABILITY OR FITNESS FOR A PARTICULAR PURPOSE IS
LIMITED TO THE DURATION OF THE ABOVE WARRANTY. NO RETAILER OR OTHER PARTY HAS ANY AUTHORITY TO
CREATE ANY OTHER WARRANTY OR ADD TO OR VARY THIS LIMITED WARRANTY. ONE WORLD TECHNOLOGIES,
INC.’S MAXIMUM LIABILITY IN ANY EVENT UNDER THIS WARRANTY WILL NOT EXCEED THE PURCHASE PRICE PAID
BY THE ORIGINAL PURCHASER.
Note that some states, provinces, or other jurisdictions do not allow exclusion or limitation of incidental or consequential
damages or limits on how long an implied warranty lasts. Some of the above limitations therefore may not apply to you.
This limited warranty gives you specific legal rights. You also may have other rights that vary from jurisdiction to jurisdiction.
How to Obtain Warranty Service:
Before returning any parts or components, please contact Customer Service at the number shown below. Please have
available the grill’s serial number (located on leg stand) and a copy of your sales receipt showing your date and place of
purchase. The call must be made within the warranty period.
Returns will not be accepted without a valid return authorization number (RAN) from Customer Service. You will be
responsible for paying shipping charges, and you must return the defective part to STŌŌŌK freight/postage prepaid with the
RAN shown on the outside of the package. Returns that do not meet these requirements will be refused. We will return a
replacement part to you freight/postage prepaid.
STŌŌŌK Customer Service (toll free, U.S. and Canada): 1-800-847-5993
STŌŌK web site address: www.stokgrills.com
Downloaded from www.Manualslib.com manuals search engine

991000745
9-21-15 (REV:01)
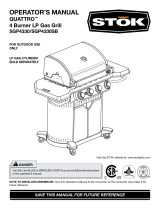
OPERATOR’S MANUAL
MANUEL D’UTILISATION
MANUAL DEL OPERADOR
GridIron
™
Grill
GridIron
™
Grille
GridIron
™
Gril
STG1150HD
ONE WORLD TECHNOLOGIES, INC.
1428 Pearman Dairy Road, Anderson, SC 29625
Phone 1-800-847-5993
www.stokgrills.com
Customer Service Information:
For parts or service, do not return this product to the store. Please call 1-800-847-5993
or visit us online at www.stokgrills.com.
The model number and serial number of this grill is found on a label located on the leg
stand. Please record the serial number in the space provided below. When ordering
repair parts, always give the following information:
Model No.
Serial No.
Service après-vente :
Pour acheter des pièces ou pour un dépannage, ne pas retourner ce produit au magasin.
Téléphoner au 1-800-847-5993 ou visiter notre site www.stokgrills.com.
Le numéro de modèle et le numéro de série du barbecue se trouvent sur l’étiquette
située sur le stand. Noter ci-dessous le numéro de série. Lors de toute commande de
pièces détachées, fournir les informations suivantes :
No. de modèle
No. de série
Información sobre servicio al consumidor:
Para piezas de repuesto o servicio no devuelva este producto a la tienda. Le suplicamos
llamar al 1-800-847-5993 o visitar nuestro sitio en la red mundial, en la dirección
www.stokgrills.com.
El número de modelo y el número de serie se encuentra en una etiqueta ubicada en
base de las patas. Le suplicamos anotar el número de serie en el espacio suministrado
abajo. Al pedir piezas de repuesto siempre proporcione la siguiente información:
Núm. de modelo
Núm. de serie
Downloaded from www.Manualslib.com manuals search engine
/