Page is loading ...

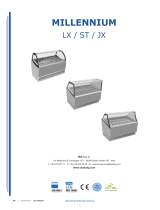
REFRIGERATED COUNTERS
MANUAL OF INSTRUCTIONS FOR USE AND
INSTALLATION

INDEX
1. Introduction
2. Manufacturers Retained Rights and Responsibilities
3. Transportation & Storage
4. Commissioning
4.1 Positioning
4.2 Initial Hygiene
4.3 Connection to Electrical Supply
4.4 Connection to Drains
5. Technical Characteristics
5.1 Electrical Consumption
5.2 Noise and Vibration
5.3 Possible Applications
6. Usage
6.1.1 Switching On/Off
6.1.2 Temperature Readout
6.1.3 Setting Temperature
6.1.4 Alarm Codes
6.2 Storage of Foodstuffs
6.3 Defrosting
6.3.1 Defrost Timer
6.3.2 Manual Defrosting
7. Maintenance
7.1 Periodic Cleaning
7.2 Cleaning of Condenser
7.3 Cabinet Not in Use
8. Troubleshooting
8.1 If the cabinet is not operating
8.2 If temperature is not being achieved
8.3 If the cabinet leaks water
8.4 Excessive Noise
9. Spares/Repairs
10. Disposal

1. Introduction
This equipment has been produced to match the internal and external
specifications required by our clients. It has been thoroughly tested and
checked before despatch to ensure it meets the highest European
standards of quality and safety.
To ensure optimum performance from your equipment, please ensure to
follow the instructions in this manual with regards to operation and
maintenance, failure to do so may result in invalidating the warranty. By
following the enclosed instructions, you will ensure a long and productive
life from your machine.
2. Manufacturers Retained Rights and Responsibilities
It is forbidden reproduce in whole or in part, any of these instructions
without the express permission of the manufacturer.
The manufacturer does not accept liability to third parties as the result of:
• Failure to observe the warnings and instructions in this text
• Use of equipment for any purpose other than specified
• Misuse by untrained personnel
• Usage not conforming to local regulations
• Unauthorised modifications and/or repairs carried out by
unsuitable persons.
• Use of non-original or recommended parts or accessories
• The manufacturer reserves the right to introduce any
modification deemed necessary without notice.

3. Transportation
The equipment is wrapped in absorbent material and contained and fixed
within a fixed pallet and stiff cardboard crate. Weights and volume are
listed as follows:
MODEL
NET Wt.
(Kg)
Packing Wt and Volume
BCC2 72 100kg/0.85m³
BCC3 107 125kg/0.94m³
HBC2 98 113Kg/0.92m³
HBC3 134 152Kg/1.21m³
HBC4 153 173Kg/1.50m³
LBC2 103 118Kg/0.92m³
LBC3 137 154Kg/1.21m³
LBC4 155 175Kg/1.50m³
PIZ1500
258 275Kg/1.34m³
PIZ2000
320 340Kg/1.79m³
HBC2EN 125 145Kg/1.16m³
HBC3EN 155 180Kg/1.53m³

4. Putting Into Operation
4.1. Positioning
Ensure before installation that the space reserved for the unit is adequate
to allow normal operation and maintenance. After carefully unpacking the
unit, remove the PVC protective film and all other packaging materials
used to protect the equipment in transit.
Place the cabinet on a flat and even surface and use the adjustable legs to
level the unit ready for operation. The cabinet MUST only be lifted from
the exterior of the base to avoid the possibility of damage, particularly
when using mechanical means to site.
Do not move the cabinet by pushing the work surface. If the unit has
been transported or stored in any position other than upright, wait at least
2 hours before switching on.
The equipment must be installed in a suitable environment and not
exposed to open air or exposed to rain. The correct position to site the
unit is away from direct heat sources (radiators/cookers etc) and out of
direct sunlight and draughts. Ensure there is suitable ventilation around
the unit, failure to adhere to these guidelines will result in adverse
performance or failure of your equipment.
4.2 Initial Cleaning
Before putting into operation, all parts of the cabinet must be cleaned.
For the interior of the cabinets, a solution of mild detergent and warm
water is recommended using a moistened cloth. Dry both the interior and
exterior of the cabinet with a soft dry cloth. Do NOT use harsh abrasive
detergents or cleaning materials such as scourers, wire wool etc. Use
extra caution when cleaning moving parts with sharp edges such as
evaporator, condenser etc and always use protective gloves.

4.3 Electrical Connection
Check that the supply conforms with the requirements listed on the
factory label and that it is provided with a circuit breaker with sufficient
earth connection. Should there be none present, ensure one is supplied
and installed by a suitably qualified engineer by means of an omnipolar
switch as indicated in the safety regulations with a minimum clearance of
the contacts of 3mm.
Where the cabinet has to be stored at distance from the power supply,
ensure that the ensuing connection conforms to all local safety
regulations. Cabinets supplied with integral condensing units are supplied
with an appropriate plug fitted with Neutral and Earth.
The supply cable must be well stretched to avoid coiling and
superimposition and it must not be exposed to the possibility of damage
by third parties. It should be kept clear of liquids, water or heat sources
and in the event of damage, must be replaced by a suitably qualified
person.
4.4 Connection to Drains
The evaporation of the defrost water is automatic in all models with an
integral condensing unit. Models with a remote condensing unit can be
supplied with a heater.

5. Technical Characteristics
5.1 Electrical Consumption
The power loads for these units are listed in the following table:
MODEL POWER LOAD
(w)
HBC2 340
HBC3 340
HBC4 456
LBC2 1000
LBC3 1000
LBC4 1000
PIZ1500
340
PIZ2000
456
HBC2EN
350
HBC3EN
350
5.2 Noise & Vibration
The sound level of the equipment fitted with an integral hermetic
condensing unit does not exceed 70dB, it is therefore unnecessary to
provide sound insulation. Under normal conditions, the unit does not
generate vibrations enough to affect the surroundings
5.3 Suitable Usage
Do not use this equipment to maintain and store medical supplies. The
equipment will operate in unfavourable conditions as registered in Class 4
of the ISO 1992 regulations (Amb. Temp. +30˚c ±1˚c relative Humidity
55%).
The optimal ambient temperatures for operation are +10˚c/+30˚c with
relative humidity of 30/55%. The potential usage for the various models
are as follows:
- Refrigerated Counters (-2˚c/+15˚c):
Storage for short
periods of fresh foodstuffs or prepared cooked food (-2˚c/+8˚c)
and beverage refrigeration (+15˚c)
- Freezer Counters (-10˚c / -20˚c):
Storage for long periods
of frozen foods and freezing of small quantities of fresh foodstuffs
of smaller portions.

6. Putting Into Operation
6.1.1 Switching On/Off
Switch on operation switch and the control panel should illuminate and
display the current temperature within the cabinet. Simultaneously the
compressor pilot light should activate. In the event of a power failure or
interruption, the compressor will normally restart after a slight delay when
power is restored. A full illustration of the controller can be found on the
last page of this manual
6.1.2 Temperature Display
During normal functioning, the cabinet temperature will be displayed on
the controller as soon as the unit is switched on.
6.1.3 Setting The Cabinet temperature
By pressing the SET button for 1 second, it is possible to read the set
temperature. To change the temperature press SET and press the switch
Λ (Up) or V (Down) to respectively increase or decrease the temperature
from the preset. After selecting the desired temperature confirm this by
again pressing SET
6.1.4 Alarm Codes
The electronic control panel will detect certain malfunctions and display
the as follows:
ALARM
CAUSE OUTPUTS
P1 Room Probe Failure Compressor output according to Cy - Cn
P2 Evaporator Probe Failure Defrost end is timed
HA Maximum Temperature alarm Outputs unchanged
LA Minimum temperature alarm Outputs unchanged
EA External alarm Outputs unchanged
CA Serious external alarm All outputs OFF
dA Door open Compressor and fan restarts
Action On:
If the display is showing one or more of the above alarm
codes, take note and switch off the electronic control panel and switch on
again after a few seconds. If the alarm codes continue to display, please
contact technical assistance quoting the code displayed.

6.2 Storage of Foodstuffs
In order to obtain the optimum performance from your machine, it is
necessary to observe the following instructions:
• Place the merchandise into the unit only after it has reached the
desired operating temperature on the digital display
• Do not place uncovered hot foods or liquids inside the unit
• Package or protect foods where possible
• Do not overload the cabinet as this will affect the airflow inside
the cabinet
• Avoid excessive opening of doors/drawers
• Avoid prolonged periods of opening doors
• After closing a door, wait a few moments before reopening.
Whilst stocking, only open and fill one door/drawer at a time to
eliminate the risk of over-balancing
6.3 Defrosting
6.3.1 Defrost Timer
The electronic control panel automatically defrosts 4 times in 24 hours.
Its timer will reset to the time of the initial startup. To modify the start
time for defrost to the required time, press the Defrost button (Dripping
Snowflake) for more than 5 seconds, a defrost cycle starts immediately
and the following one will start after 6 hours. During defrosting an LED
will be switched on.
6.3.2 Manual Defrosting
All tables defrost automatically (see 6.3.1). To start a manual defrost
follow the instructions above and modify the start time accordingly. For
evaporation of condensate, see section 4.4.

7. Maintenance
7.1 Periodic Cleaning
For hygienic reasons and improved performance clean the cabinet at least
once a week using warm water and a weak detergent diluted solution.
Before cleaning, perform a manual defrost cycle (section 6.3). When
complete, disconnect from the power supply and follow the cleaning
instructions given in (section 4.2).
7.2 Cleaning of Condenser
For improved performance, clean the condenser at least once a week.
Before beginning, ensure the unit is disconnected from the power supply
then proceed as follows:
• Unscrew and remove protective grill
• Remove the dust deposited on the front surface of the
condenser using a soft brush and vacuum cleaner. When
complete, replace grill and screw securely
7.3 Cabinet Not in Use
During periods of inactivity, remove the products from the cabinet and
follow these instructions:
• Disconnect the unit from the power supply, ensuring all switches
are set to OFF
• Carefully clean the unit as described in (section 4.2)
• Cover the cabinet with a cloth or cover that allows air circulation
around the cabinet.

8. Troubleshooting
Often, a malfunction in the unit can be put down to a simple solution that
can be resolved without the need for a technician, therefore, eliminate the
faults by following these instructions:
8.1 If the cabinet doesn’t operate, check the following:
• The plug is not connected to the power supply
• The supply cord is not damaged
8.2 If the required temperature is not achieved, check the
following:
• The command switch is turned on
• The controller has been correctly set
• The cabinet is not defrosting/frosting
• The evaporator is not covered with frost
• The condenser is not blocked with dust
• The cabinet is not located close to a heat source
• The airflow to the condenser is not obstructed
• The products in the cabinet are not impeding the door
• The cabinet is not overloaded, or loaded in a way that obstructs
air circulation
8.3 If the cabinet leaks water, ensure that:
• The evaporator tray is not damaged
• The drains are not blocked or obstructed
• The cabinet has been properly levelled
• The door seal is not gathering condensation as a result of door
heater failure.

8.4 If the cabinet is excessively noisy, ensure that:
• The frame or cabinet does not have any loose nuts, screws or
bolts
• The cabinet has been sited in a stable position and correctly
levelled
9. Spares/Repairs
Before commencing any service or maintenance work, isolate the cabinet
from the electrical supply. Always fit original spares which may be
obtained from an authorised supplier. If electrical supply cable needs to
be renewed it must conform to the original specification to that supplied
with the cabinet. The engineer must ensure that there is no possibility of
water ingress or damp.
For replacement or spare parts, scan the QR code below with your
smartphone or reader. Alternatively, visit www.pentlandparts.co.uk
10. Disposal
The scrapping of the cabinet should be undertaken by a suitable
authorised company working to local legislation and observing local
statutes. The composition of the cabinet is a follows:
The cabinet consists of:
• Structure in steel plate
• Electrical components and cables
• Electrical compressor
• Plastic materials
• Refrigerant gas which must be discharged by a suitably qualified
person

Controller Illustration
All the manual controls are on the right hand
side of the unit. The controls are shown in the
illustration below:
1. Defrost Light
2. Compressor Operation Light
3. Temperature Adjustment Keys
4. Digital Thermostat
5. Set Key
6. Defrost Button
1
2
3
4
5
6


/