Morphy Richards IB42700 User manual
- Category
- Irons
- Type
- User manual
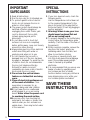
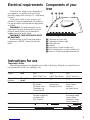
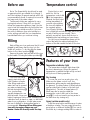
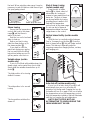
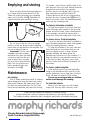
Morphy Richards IB42700 is an iron that can be used for dry ironing and steam ironing. It has a large capacity tank which can hold 2 beakers of water. The iron has a temperature indicator light which shows that the iron is warming up. When the required temperature is reached, the light will go out and will cycle on-off during operation. The iron has a steam on-off button and a variable steam button. The steam on-off button is used to turn the steam on or off. The variable steam button is used to adjust the amount of steam that is produced.
Morphy Richards IB42700 is an iron that can be used for dry ironing and steam ironing. It has a large capacity tank which can hold 2 beakers of water. The iron has a temperature indicator light which shows that the iron is warming up. When the required temperature is reached, the light will go out and will cycle on-off during operation. The iron has a steam on-off button and a variable steam button. The steam on-off button is used to turn the steam on or off. The variable steam button is used to adjust the amount of steam that is produced.


-
 1
1
-
 2
2
-
 3
3
-
 4
4
-
 5
5
-
 6
6


Morphy Richards IB42700 User manual
- Category
- Irons
- Type
- User manual
Morphy Richards IB42700 is an iron that can be used for dry ironing and steam ironing. It has a large capacity tank which can hold 2 beakers of water. The iron has a temperature indicator light which shows that the iron is warming up. When the required temperature is reached, the light will go out and will cycle on-off during operation. The iron has a steam on-off button and a variable steam button. The steam on-off button is used to turn the steam on or off. The variable steam button is used to adjust the amount of steam that is produced.
Ask a question and I''ll find the answer in the document
Finding information in a document is now easier with AI
Related papers
-
Morphy Richards RN40514 MUK REV 1 User manual
-
-
-
-
-
-
Morphy Richards 40684 User manual
-
-
-
