Page is loading ...

© Copyright 2019 Pi Tape Texas LLC. All rights reserved. https://pitape.com
PI TAPE and the logo are trademarks of Pi Tape Texas, LLC, and they are registered in the USA and in 45 other countries.
Please visit https://www.pitape.com/trademarks.htm for a list of countries in which our trademarks are registered.
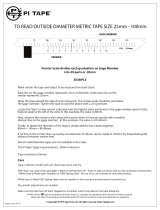
Vernier Scale divides each graduation on Gage Member
into 50 parts or .01mm
EXAMPLE
VERNIER
TO READ INSIDE DIAMETER METRIC TAPE
GAGE MEMBER
Make certain the tape and object to be measured are both clean.
Each line on the gage member represents .5mm of diameter, while each line on the vernier
represents .01mm.
Place the tape inside the object to be measured. The vernier scale should be just below the gage member. Make
certain the tape is aligned on the inside diameter flat and snug to the part, straight and parallel so the gage
member is flat against the vernier scale.
Locate the “zero” on the vernier scale and note the highest value achieved on the gage member above it (the
highest value to the left of the zero). In this example, the value is 660.0mm.
Next, observe the vernier scale’s value at the point where it lines up exactly with a marked division line on the
gage member. In this example, the value is 23 (0.23mm).
Finally, to obtain the diameter of the object, simply add the two values together:
660.0mm + 0.23mm = 660.23mm
Inside diameter tapes are manufactured at 68ºF under no tension. All inside diameter tapes are marked I.D. and
are calibrated for direct inside diameter readings.
As a suggestion for checking very large diameters – pieces of masking tape can be used to hold the tape in the
proper parallel position.
Tape resolution 0.01mm
Care
Tape is delicate, handle with care. Keep tape clean and dry.
After each use, wipe clean and apply a light rust preventive oil*. Store in tape container and in a low moisture environment. *
White Easy to Read tapes Stainless or 1095 Spring Steel - Do not oil or use solvents to clean this product.
White Easy to Read 1095 Spring Steel must be stored in a low moisture environment to prevent rust.
No periodic adjustments are needed.
Make sure the tape has not been stepped on or kinked, which may destroy the tape tolerance.
February 2021 Rev B
/


