Page is loading ...

Instruction Manual
WALL MOUNT
MULTI-MATERIAL
CUTTER
Model F700-1
G1089 1/22
www.logangraphic.com
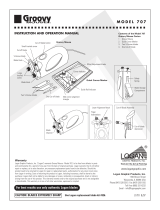
Description
The Model 700-1 has been designed as
a full featured Multi-Material Wall
Mounted Cutter. Features include
interchangeable cutting tools for glass,
matboard / foamboard, and plastic.
Large capacity 60” cutting length, 48”
material bed, smooth bearing guided and
counter-balanced cutting head, solid all
metal construction makes this an ideal
machine for your framing requirements.

WALL MOUNT
MULTI-MATERIAL CUTTER
1. Cutting Bar / Cutting Head Assembly
2. Left Cutting Bed
3. Right Cutting Bed
4. Steel Gusset
5. Support Arm
6. Top Mounting Bracket
7. Bottom Mounting Bracket
8. Side Mounting Bracket
9. Material Clamp Assembly
10. Production Stop
11. Glass Cutting Tool
12. Plastic Cutting Tool
13. Mat Board Cutting Tool
14. Counter-Weight & Cable
15. Wall Screws (9)
16. Wall Washers (9)
17. Wall Mollies (9)
18. Mounting Nuts (8)
19. Support Arm Screws (4)
20. Support Arm Wrench
21. Gusset Screws (7)
22. Gusset Wrench
23. Debris Brush
24. Mat Blade 5-Pack
25. Glass Cutting Oil
26. Parts Tray
27. Adjustment Wrench
28. Pulley
1
2 3
4 5
69
10
11 12 13
14
23
24
25
26
28
27
7
88
Instruction Manual Model F700-1
Identification of
Carton Contents:
G1089 1/22
Logan Graphic Products Inc., 1100 Brown Street, Wauconda, IL 60084 847-526-5515 www.logangraphic.com
2
15
16
17
18
19
21
20
22
BLADES

WALL MOUNT
MULTI-MATERIAL CUTTER
G1089 1/22
Cutting Bar
Counterweight
Material Clamp
Gusset
Left Cutting Bed
Glass Cutting Oil
Adjustment
Wrench
Debris Brush
Mat Blades Board Cutter Glass Cutter Plastic Cutter
Right Cutting BedProduction Stop
Cutting Head
Support Arm
Instruction Manual Model F700-1
Logan Graphic Products Inc., 1100 Brown Street, Wauconda, IL 60084 847-526-5515 www.logangraphic.com
3
Machine Components

WALL MOUNT
MULTI-MATERIAL CUTTER
G1089 1/22
Instruction Manual Model F700-1
Logan Graphic Products Inc., 1100 Brown Street, Wauconda, IL 60084 847-526-5515 www.logangraphic.com
4
Installation
Mounting Top and Bottom Brackets
1. For drywall / wood wall, use a stud finder to locate vertical stud at
preferred machine location.
2. Using a level, draw a vertical line at stud location and mark five drill
hole locations on vertical line per chart (Fig. 1)
66”
27”
15”
15”
32”
Vertical Line
Stud Location
Floor
Drill Hole
Locations
4”
Tools needed for installation
• Step Ladder
• Level (24”-36”)
• Drill
• 1/8” drill bit
• 1/4” drill bit
• 1/4” masonry bit (for masonry wall)
• Hammer
• Phillips head screwdriver
• Tape measure
• Stud finder
• Carpenters square 16” x 24”
• Pencil
• Adjustable wrench or 7/16” wrench
Fig. 1

WALL MOUNT
MULTI-MATERIAL CUTTER
G1089 1/22
Instruction Manual Model F700-1
Logan Graphic Products Inc., 1100 Brown Street, Wauconda, IL 60084 847-526-5515 www.logangraphic.com
5
Mounting Top and Bottom Brackets
4. Drill holes using 1/8” drill bit for wood or 1/4” masonry bit for masonry
wall (insert wall mollies using hammer).
5. Mount Top Bracket aligning top three holes on wall with holes in bracket
and secure using washers and screw (Fig. 2).
6. Mount Bottom Bracket aligning bottom two holes on wall with holes in
bracket and secure using washers and screws (Fig. 3).
Mount Cutter Bar
1. Carefully fit top pin in Cutting Bar (Fig. 4) into slot in Top Bracket
(Fig. 5) and align bracket edges along bar assembly edge (Fig. 6).
2. Align Bottom Bracket edge along Cutting Bar side (Fig. 7).
3. Tighten five (5) Mount Screws (Fig. 8).
Fig. 2
Fig. 6
Fig. 4Fig. 3 Fig. 5
Fig. 7 Fig. 8

WALL MOUNT
MULTI-MATERIAL CUTTER
G1089 1/22
Instruction Manual Model F700-1
Logan Graphic Products Inc., 1100 Brown Street, Wauconda, IL 60084 847-526-5515 www.logangraphic.com
6
Mounting Cutting Beds
1. Attach Left Cutting Bed (long 48”) (Fig. 9) onto mount bar studs and
secure with two (2) mount nuts (Fig. 10).
2. Align Gusset with left cutting bed and cutting bar assembly (Fig. 11).
3. Attach Gusset with seven (7) flat head screws.
*Note* Attach screws in the order shown (Fig. 12).
4. Attach Right Cutting Bed (shorter 24”) onto mount bar studs and secure
with two (2) mount nuts (Fig. 13).
5. Attach Support Bar by aligning pins in support bar with holes in Right
Cutting Bed and Cutting Bar (Fig. 14 & 15).
6. Secure Support Bar with four (4) screws (Figs. 16A & 16B).
7. Attach Side Brackets onto cutting bed studs with four (4) mount nuts
(Fig. 17).
8. Align Side Brackets to wall, and mark holes with a pencil.
Fig. 9
Fig. 10
Fig. 11 Fig. 12
1
254
7
6
3
Fig. 13
Fig. 14 Fig. 15 Fig. 16A
Fig. 16B Fig. 17

WALL MOUNT
MULTI-MATERIAL CUTTER
G1089 1/22
Instruction Manual Model F700-1
Logan Graphic Products Inc., 1100 Brown Street, Wauconda, IL 60084 847-526-5515 www.logangraphic.com
7
Mounting Cutting Beds
9. Drill marked hole centers.
10. Insert four (4) Wall Mollies into wall holes and hammer flush (Fig. 18).
11. Secure Side Brackets to wall with screws and washers.
Install Material Clamp
1. Holding clamp vertically, slide Material Clamp bracket lock nut into Left
Cutting Bed (Fig. 19).
2. Slide Material Clamp until top mounting screw aligns with top mount
block.
3. Attach top mounting screw (Fig. 20).
4. Adjust clamp to be parallel with guide bars (Fig. 21).
5. Extremely tighten clamp bracket knob.
Attach Counter-Balance Weight Bag
1. Attach Pulley to top mount block (Fig. 22).
2. Hook Counter-Balance Weight Bag onto cable post located on right side
of cutting head (Fig. 23).
Fig. 18
Fig. 19
Fig. 21
Fig. 23
Fig. 20
Fig. 22

WALL MOUNT
MULTI-MATERIAL CUTTER
G1089 1/22
Instruction Manual Model F700-1
Logan Graphic Products Inc., 1100 Brown Street, Wauconda, IL 60084 847-526-5515 www.logangraphic.com
8
Attach Counter-Balance Weight Bag
3. Holding the Bag in your right hand and keeping tension on the cable
with your left hand, step up on ladder and loop cable over Pulley with
left hand (Fig. 24).
4. Slowly lower Bag until cable is taut (Fig. 25).
Install Production Stop
1. Slide Production Stop lockplate into right or left Cutting Bed and slide to
desired location (Fig. 26).
2. Tighten stop knob to secure.
Install Parts Tray
1. Remove adhesive backing from bottom of Parts Tray.
2. Stick onto right side bracket (Fig. 27).
Use Trash Can
It is recommended that you place a small trash can under bottom of
cutting bar to catch debris (Fig. 28).
Fig. 24
Fig. 25
Fig. 28Fig. 27Fig. 26

WALL MOUNT
MULTI-MATERIAL CUTTER
G1089 1/22
Instruction Manual Model F700-1
Logan Graphic Products Inc., 1100 Brown Street, Wauconda, IL 60084 847-526-5515 www.logangraphic.com
9
Cutting Tool Details
The machine includes three separate interchangeable cutting tools:
• Glass Cutting Tool
• Board Cutting Tool
• Plastic Cutting Tool
Glass Cutting Tool (Red Tip)
• Cuts glass up to 1/4” thick.
• Features a turret design which carries six (6) carbide wheels. Wheels are
numbered 1-6 (Replacement part F57).
• Includes cutting oil for best results.
• Glass wheels “score” glass which is then cracked to separate pieces.
Glass Cutting Tool Wheel Change
1. Loosen turret nut and turret rotation screw (Fig. 29).
2. Rotate turret until next number appears (Fig. 30).
3. Re-tighten both nut and screw.
Glass Cutting Tool Turret Change
1. Loosen turret rotation screw one full turn.
2. Remove turret nut.
3. Push turret screw to remove turret (Fig. 31).
4. Replace new turret (Fig. 32).
5. Rotate turret to setting “1” or “I”.
6. Tighten turret rotation screw.
7. Replace and tighten turret nut.
Fig. 32Fig. 31Fig. 30
Fig. 29
Nut
Rotation
Screw

WALL MOUNT
MULTI-MATERIAL CUTTER
G1089 1/22
Instruction Manual Model F700-1
Logan Graphic Products Inc., 1100 Brown Street, Wauconda, IL 60084 847-526-5515 www.logangraphic.com
10
Board Cutting Tool (Yellow Tip)
• Cuts up to 1/2” foam board, mat board, gator board, and cardboard.
• Uses standard utility blade (Replacement Number F58).
• Uses both ends of blade.
• Features blade depth adjustment screw.
Board Cutting Tool Blade Change
1. Remove blade screw (Fig. 33).
2. Rotate or replace blade.
3. Replace blade screw but do not tighten.
4. Push back of blade to reposition blade against depth screw.
5. Tighten blade screw.
Board Cutting Depth Adjustment
1. To adjust, loosen blade screw (Fig. 34).
2. Push back of blade to reposition it against depth screw (Fig. 35).
3. Tighten blade screw.
Fig. 33
Blade Screw
Depth Screw
Fig. 34 Fig. 35

WALL MOUNT
MULTI-MATERIAL CUTTER
G1089 1/22
Instruction Manual Model F700-1
Logan Graphic Products Inc., 1100 Brown Street, Wauconda, IL 60084 847-526-5515 www.logangraphic.com
11
Plastic Cutting Tool (Blue Tip)
• Cuts acrylic, polycarbonate, and plexiglas up to 1/4” thick.
• Tool “scores” or “gouges” a channel into the plastic.
• Uses carbide double tip blade (Replacement No. F59).
Plastic Cutting Tool Blade Change
1. Remove Blade Screw (Fig. 36).
2. Remove blade.
3. Either rotate or replace blade.
4. Insert blade in slot with tip pointing to the left.
5. Replace Blade Screw and tighten.
Fig. 36
Blade Screw
Tip pointing left

WALL MOUNT
MULTI-MATERIAL CUTTER
G1089 1/22
Instruction Manual Model F700-1
Logan Graphic Products Inc., 1100 Brown Street, Wauconda, IL 60084 847-526-5515 www.logangraphic.com
12
Operation
Using Handle
1. The handle has two settings: retracted (raised) (Fig. 37) or engaged
(lowered) (Fig. 38).
2. To retract handle, pull handle up until it stops. Trigger will lock handle
(Fig. 39).
3. To engage handle, press trigger with thumb but be careful as handle is
spring loaded and will pull down (Fig. 40).
Cutting Head Operation
The cutting head slides vertically with cutting capacity of 60”. A count-
er-balance weight is attached which allows head to be positioned
anywhere on guides without moving. The handle of the cutting head is
spring loaded and pivots down for cutting. The cutting head also allows
three cutting tools to interlock into the tool holder on the handle.
Using Cutting Head
To move cutting head, simply grip handle and pull up or down as needed.
*Note - As a precaution, always make sure handle is retracted when
adjusting head as engaged cutting tools can interfere with material.
Fig. 37
Fig. 38
Fig. 39 Fig. 40

WALL MOUNT
MULTI-MATERIAL CUTTER
G1089 1/22
Instruction Manual Model F700-1
Logan Graphic Products Inc., 1100 Brown Street, Wauconda, IL 60084 847-526-5515 www.logangraphic.com
13
Changing Cutting Tools
1. Raise Cutting Head Handle to retracted position.
2. Slide back of cutting tool into pivot bar slot until pin drops over end and
into slot (Fig. 41).
3. Pull back and push down on cutting tool handle into seat(Fig. 42).
4. Tool will lock in place.
Using Material Clamp
Use clamp for all materials EXCEPT GLASS. DO NOT USE ON GLASS.
1. Lift Clamp Handle up (Fig. 43).
2. Move handle forward and down onto material.
3. When clamp is set, there is a rubber pad which holds material secure.
4. To release, pull up and back.
Fig. 41
Fig. 43
Fig. 42
Seat
Using Production Stop
When making several cuts of the same dimension, the production stop
can be used. The stop can be used on left or right cutting beds.
1. Lower stop arm to horizontal.
2. Loosen stop knob.
3. Slide stop to desired dimension.
4. Tighten stop knob to lock.
Using Vertical Scale
The vertical cutting bar scale is a reference scale used to help determine
material size (Fig. 44).
Fig. 44

WALL MOUNT
MULTI-MATERIAL CUTTER
G1089 1/22
Instruction Manual Model F700-1
Logan Graphic Products Inc., 1100 Brown Street, Wauconda, IL 60084 847-526-5515 www.logangraphic.com
14
Cutting Glass
• Always wear eye protection, gloves, and protective clothing when
handling glass.
• DO NOT USE MATERIAL CLAMP ON GLASS.
• Always load glass from left side support.
• Only score glass on downstroke.
1. Put a drop of oil on wheel.
2. Raise handle into retracted position and install glass cutting
tool (yellow tip).
3. Raise cutting handle above glass.
4. Place glass on left cutting bed (Fig. 45).
5. Slide glass under cutting bars to desired cutting dimension.
6. Lower cutting head handle by pressing trigger. Be careful as handle is
spring loaded and will pull down.
7. Lower cutting head until glass wheel touches top edge of glass (Fig. 46).
8. With left hand holding glass against gusset, move cutting handle to top
edge of glass.
Fig. 45
Fig. 46
Cutting Glass
9. With right hand, gently and smoothly pull cutting head handle down
(NOT FORWARD).
*Caution - Do not put forward pressure on cutter as the spring supplies
needed pressure.
10. Pull back cutting head handle to retracted position.
11. Only score glass one time.
To Separate Glass
1. Do not move glass after scoring.
2. Keep left hand on glass holding it in position.
3. With right thumb, apply increasing pressure on the bottom right edge of
glass near score line until the glass separates (Fig. 47).
* Do not apply pressure at the center of the glass *
4 Clean cutting beds using cleaning brush.
Fig. 47
Score Line
Pressure

WALL MOUNT
MULTI-MATERIAL CUTTER
G1089 1/22
Instruction Manual Model F700-1
Logan Graphic Products Inc., 1100 Brown Street, Wauconda, IL 60084 847-526-5515 www.logangraphic.com
15
Cutting Board Material
• Use caution razor blades are sharp.
• Cut mat board, foam board, gator board, and cardboard
• Use material clamp.
• Use slip sheet or scrap mat board under material you are cutting for an
extra sharp clean cut.
1. Raise cutting head handle to retracted position and install board
cutting tool.
2. Position cutting head toward top of machine.
3. Place board on left cutting bed.
4. Slide material under cutting bars and set to desired cut dimension.
5. Clamp board using material clamp (Fig. 48).
6. Lower cutting head carefully.
7. Lower cutting head until blade just touches board.
8. With two hands, pull cutting head through material keeping even down-
ward pressure on handle.
9. Cut with one smooth, continuous motion.
10. Retract cutting head handle and raise cutting head above top of board.
11. Check cut - recut if necessary.
12. Release material clamp.
Fig. 48
Cutting Plastic
To Cut
• Cuts acrylic, polycarbonate, and plexiglas up to 3/16” thick.
• Plastic cutter “scores” material several times and fractures to separate.
• Use material clamp.
• It is not necessary to remove protective film from plastic prior to cutting.
1. Raise cutting head handle to retracted position and install plastic
cutting tool (blue tip).
2. Position cutting head toward top of machine.
3. Place sheet onto left cutting bed.
4. Slide material under cutting bars and set to desired cut dimension.
5. Clamp plastic using material clamp.
6. Lower cutting head carefully.
7. Lower cutting head until blade just touches plastic (Fig. 49).
8. Raise cutting head handle and position tip of blade as close as possible
onto top of plastic. With two hands, pull handle down through material
applying forward and downward pressure.
*Note: Scoring will produce a screechy sound and plastic debris.
10. Retract cutting handle.
11. Repeat 2 times if material less than 1/8” and 3-4 times for material
thicker than 1/8”.
Fig. 49

WALL MOUNT
MULTI-MATERIAL CUTTER
G1089 1/22
Instruction Manual Model F700-1
Logan Graphic Products Inc., 1100 Brown Street, Wauconda, IL 60084 847-526-5515 www.logangraphic.com
16
To Fracture or Separate the Plastic
1. Retract cutting handle.
2. Raise cutting head above top of plastic.
3. Align crack roller at top of material by pressing the crack bar (Fig. 50).
4. Keeping even downward pressure, push on crack bar and pull down
through length of plastic. You should hear cracking sound. If you do not
hear cracking sound, repeat.
*Note - Sometimes you may not hear a cracking sound but material will
be separated.
5. Release clamp.
6. Remove plastic and bend plastic at cut line to separate.
*Note - If material is still not separated, rescore plastic by aligning blade
tip into scoring channel and then clamping material. Rescore several
times to ensure break.
7. Clean cutting bed using cleaning brush.
Fig. 50

WALL MOUNT
MULTI-MATERIAL CUTTER
G1089 1/22
Instruction Manual Model F700-1
Logan Graphic Products Inc., 1100 Brown Street, Wauconda, IL 60084 847-526-5515 www.logangraphic.com
17
Adjustments
1. Loosen outer cutting bed adjustment lock nut (Fig. 51).
2. Using carpenters square, lay short edge of square on cutting
bed (Fig. 52).
3. Insert Board Cutting tool (yellow tip) into cutting head.
4. Engage Board Cutting tool so it is down position.
5. Position blade against top of carpenters square (Fig. 53).
6. Pull cutting head down to bottom of carpenters square and
inspect (Fig. 54).
7. If there is a gap, loosen (turn left) adjustment knob and retest
until no gap.
9. If there is no gap, slide cutting head up to top of carpenters square. If
there is a gap, tighten (turn right) adjustment knob and retest until
there is no gap.
10. Cutting bed is square when there is no gap at top or bottom of
carpenters square.
11. Tighten lock nut to secure setting.
12. Test both left and right cutting beds.
Squaring Machine
Fig. 53 Fig. 54
Fig. 52
Fig. 51

WALL MOUNT
MULTI-MATERIAL CUTTER
G1089 1/22
Instruction Manual Model F700-1
Logan Graphic Products Inc., 1100 Brown Street, Wauconda, IL 60084 847-526-5515 www.logangraphic.com
18
1. Retract handle.
2. Locate pressure adjustment screw (Fig. 57).
3. To adjust, tighten (turn right) screw to increase pressure or loosen
(turn left) screw to decrease pressure.
4. Adjust 1/2 turn at a time and retest.
Glass Cutter Pressure Adjustment
1. When handle is retracted, glass wheel should touch top of glass in
middle of wheel (Fig. 55).
2. To adjust, tighten (turn right) to reduce depth, loosen (turn left) to
increase depth (Fig. 56).
3. Adjust 1/2 turn at a time and recheck.
Glass Cutter Depth Adjustment
Fig. 57
Fig. 55
Fig. 56
All three scales can be adjusted if they are not accurate. They are not
glued but held in place by screws (Fig. 58).
1. To adjust, use gusset wrench and loosen screw one full turn.
2. Adjust scale.
3. Retighten screw.
Adjusting Scales
If the cutting head is moving up or down when not in use then the
counter-weight is out of balance.
1. If cutting head is moving down then more weight needs to be added.
If cutting head moves up then weight will have to be removed.
2. Remove counter-weight bag by lowering cutting head to bottom of
machine.
3. Using step ladder, lift bag to loosen tension and unhook cable from
pulley and cable post on cutting head.
4. Open bag by unclipping and unrolling bag (Fig. 59).
5. Pour out sand to decrease weight or add sand or metal scrap like
nails, screws or washers to increase weight.
6. Close bag, replace cable and retest.
Adjusting Counter-Weight
Fig. 58 Fig. 59

WALL MOUNT
MULTI-MATERIAL CUTTER
G1089 1/22
Instruction Manual Model F700-1
Logan Graphic Products Inc., 1100 Brown Street, Wauconda, IL 60084 847-526-5515 www.logangraphic.com
19
Troubleshooting
Problem: When cutting glass, the glass cutter jumps or skips.
Cause 1: Dirty Glass.
Solution: Clean glass.
Cause 2: Worn glass wheel.
Solution: Rotate to new wheel.
Cause 3: Too little pressure.
Solution: Adjust by applying slight pressure with hand.
Solution: Oil the active wheel.
Cause 4: Shards of glass impairing proper rotation of glass wheel.
Solution: Oil the active wheel.
Problem: When cutting glass, chipping or flaking occurs.
Cause: Too much pressure
Solution: You may be applying too much pressure on the handle. Pull back on the handle during cut.
Too much pressure will shorten wheel life. Never score twice.
Solution: Oil the active wheel
Glass Cutting Problems
Problem: When cutting plastic, it skips and/or chatters.
Cause 1: Scoring too fast
Solution: Slow down the stroke speed
Cause 2: Scoring tool broken
Solution: Rotate cutter if you have not done so previously
Cause 3: Too much pressure
Solution: Reduce pressure slightly on handle
Cause 4: Not using media clamp
Solution: Use media clamp
Plastic Cutting Problems

WALL MOUNT
MULTI-MATERIAL CUTTER
G1089 1/22
Instruction Manual Model F700-1
Logan Graphic Products Inc., 1100 Brown Street, Wauconda, IL 60084 847-526-5515 www.logangraphic.com
20
Problem: When cutting mat board, the mat board buckles.
Cause 1: Mat board not clamped
Solution: Use media clamp
Cause 2: Blade too dull
Solution: Change to new blade
Problem: The cut edge of mat board is frayed.
Cause 1: Dull mat cutting blade
Solution: Change to new blade
Cause 2: No slip sheet under media being cut
Solution: Use slip sheet
Board Cutting Problems
Problem: When I make cuts, the dimensions are incorrect.
Cause: The measuring scale is off
Solution: Recalibrate the measuring scale
Problem: The cut edge is not square - not a 90 degree cut.
Cause 1: Debris between the media and cutting bed.
Solution: Remove debris
Cause 2: Cutting bed is not perpendicular to vertical extrusion.
Solution: Square the cutting bed (highly unlikely)
Machine Problems
WARRANTY: Logan Graphic Products, Inc. (“Logan”) warrants the F700-1 WALL MOUNTED MULTI-MATERIAL CUTTER to be free from defects in parts and workmanship
for a period of two years from the date of original purchase. Logan warrants that it will either repair or replace, in its sole discretion, any necessary replacement parts found
to be defective. Should the product need to be returned to Logan for repair or replacement parts, authorization for any return must come from Logan in writing. Costs of
returning the product to Logan, including insurances, shall be borne by the purchaser. Logan shall not be liable for any damages or losses, incidental or consequential,
direct or indirect, arising from the use of this product. This warranty extends only to the original purchaser and is not assignable or transferable. This warranty is in lieu of
all other warranties, expressed or implied. Be advised that any Logan products purchased as “new” from an unauthorized dealer, such as an online auction site or similar,
may be void of their warranty.
Logan Graphic Products, Inc.
1100 Brown Street
Wauconda, IL 60084
800-331-6232 847-526-5515
/