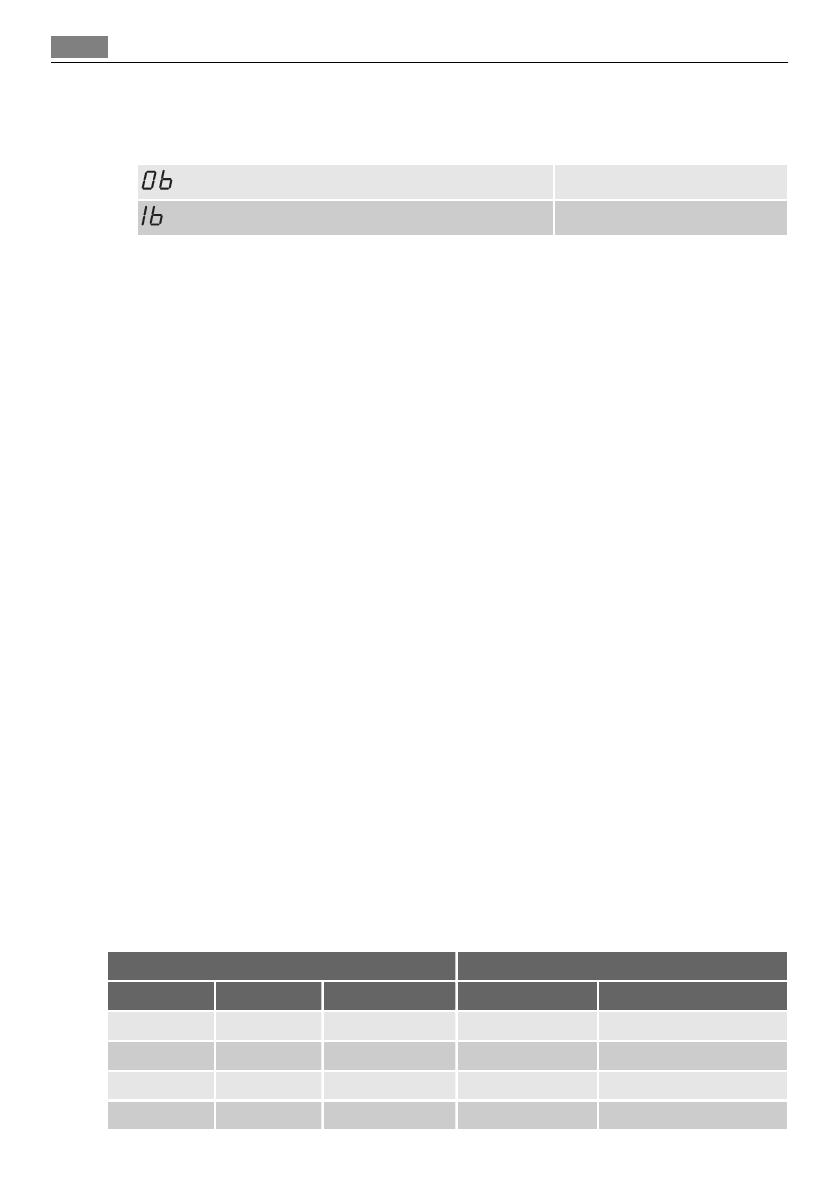
Aeg-Electrolux 65411 VI User manual

Category
Dishwashers
Type
User manual

This manual is also suitable for

Favorit 65411 VI
User manual Dishwasher
Thank you for choosing one of our high-quality products.
To ensure optimal and regular performance of your appliance please read this
instruction manual carefully. It will enable you to navigate all processes perfectly
and most efficiently. To refer to this manual any time you need to, we recommend
you to keep it in a safe place. And please pass it to any future owner of the
appliance.
We wish you much joy with your new appliance.
CONTENTS
OPERATING INSTRUCTIONS 3
SAFETY INFORMATION 3
Correct use 3
General safety 3
Child safety 3
Installation 4
PRODUCT DESCRIPTION 6
CONTROL PANEL 8
Digital display 8
Delay start button 9
Function buttons 9
Setting mode 9
Audible signals 9
USE OF THE APPLIANCE 10
SETTING THE WATER SOFTENER 10
Manual adjustment 11
Electronic adjustment 11
USE OF DISHWASHER SALT 12
USE OF RINSE AID 12
Adjusting the rinse aid dosage 13
LOADING CUTLERY AND DISHES 14
Helpful hints and tips 14
Lower basket 14
Cutlery basket 15
Upper basket 16
Adjustment of the height of the upper
basket 16
USE OF DETERGENT 17
MULTITAB FUNCTION 18
To activate the multitab function: 19
To activate/deactivate the rinse aid
dispenser: 19
SELECT AND START A WASHING PROGRAM 19
Select and start a washing program with
delay start 20
Cancelling a delay start 20
Interrupting a washing program 20
Cancelling a washing program 20
End of the washing program 21
Removing the load 21
Standby mode 21
WASHING PROGRAMS 23
CARE AND CLEANING 26
Cleaning the filters 26
External cleaning 27
Internal cleaning 27
Long periods of non-operation 27
Frost precautions 27
Moving the machine 27
WHAT TO DO IF… 28
TECHNICAL DATA 29
INSTALLATION INSTRUCTIONS 30
INSTALLATION 30
Adjust the level of the appliance 31
Adhesive steam protection foil 31
Fixing to the adjacent units 31
Custom made kick-panel 32
WATER CONNECTION 32
Water inlet hose 32
Water drain hose 33
ELECTRICAL CONNECTION 34
ENVIRONMENT CONCERNS 35
Old appliance 35
WARRANTY 35
Subject to change without notice
2 Contents
OPERATING INSTRUCTIONS
SAFETY INFORMATION
For your safety and correct operation of the appliance, read this manual carefully before
installation and use. Always keep these instructions with the appliance even if you move or
sell it. Users must fully know the operation and safety features of the appliance.
Correct use
Only use the appliance to clean household utensils that are suitable for dishwashers.
Do not put solvents in the appliance. Risk of explosion.
Put the knives and all items with sharp points in the cutlery basket with their points
down. If not, put them in a horizontal position in the upper basket.
Use only products specified for dishwashers (detergent, salt, rinse aid).
If you open the door while the appliance is in operation, hot steam can escape. Risk of
skin burns.
Do not remove dishes from the appliance before the end of the washing program.
When the washing program is completed, disconnect the mains plug from the mains
socket and close the water tap.
Only an authorised service engineer can repair this appliance. Use only original spare
parts.
Do not do repairs yourself to prevent injury and damage to the appliance. Always con-
tact the Customer Care Centre.
General safety
Some dishwasher detergents are strongly alkaline. They can be extremely dangerous if
swallowed. Avoid contact with skin and eyes. Keep the children away from the appliance
when the door is open. Check that the detergent dispenser is empty after completion of
the washing programme.
Obey the safety instructions from the manufacturer of the dishwasher detergent to pre-
vent burns to eyes, mouth and throat.
Only put detergent in the dispenser before you start a washing program.
Do not drink the water from the appliance. Detergent residues can stay in your appli-
ance.
Always close the door when you do not use the appliance to prevent injury and not to
stumble over the open door.
Do not sit or stand on the open door.
Child safety
This appliance is not intended for use by young children or infirm persons unless they
have been adequately supervised by a responsible person to ensure that they can use the
appliance safely. Young children should be supervised to ensure that they do not play
with the appliance.
Keep all the packaging away from children. There is a risk of suffocation.
Keep all detergents in a safe area. Do not let children touch the detergents.
Keep children and pets away from the appliance when the door is open.
Safety information
3
Installation
Make sure that the appliance is not damaged because of transport. Do not connect a
damaged appliance. If necessary, contact the supplier.
Remove all packaging before first use.
A qualified and competent person must do the electrical installation.
A qualified and competent person must do the plumbing installation.
Do not change the specifications or modify this product. Risk of injury and damage to
the appliance.
Do not use the appliance:
if the mains cable or the water hoses are damaged,
if the control panel, worktop or plinth area are damaged so that you can get access to
the inner side of the appliance.
Contact your local Customer Care Centre.
Do not drill into the sides of the appliance otherwise damage to hydraulic and electrical
components may occur.
WARNING!
Carefully obey the instructions for electrical and water connections.
4 Safety information
Safety information 5
PRODUCT DESCRIPTION
1 Upper basket
2 Water hardness dial
3 Salt container
4 Detergent dispenser
5 Rinse aid dispenser
6 Rating plate
7 Filters
8 Lower spray arm
9 Upper spray arm
Light beam
After the start of the washing program, a light beam shows on the floor below the appli-
ance door.
If the appliance is installed higher with a flush kitchen furniture door, the light beam will
not be visible.
Light beam
The red light is on. Indication of the start of a washing program. The red light stays on dur-
ing the washing program.
The red light flashes. Indication of a malfunction.
The red light goes off. Indication of the end of a washing program.
6 Product description
Product description 7
CONTROL PANEL
7
1 On/off button
2 Digital display
3 Delay start button
4 Program selection buttons
5 Indicator lights
6 Program indicator lights
7 Function buttons
Indicator lights
MULTITAB The indicator light shows the activation/deacti-
vation of the multitab function. Refer to 'Multi-
tab function'.
1)
The indicator light comes on when it is necessa-
ry to fill the salt container. Refer to 'Use of dish-
washer salt'.
The salt indicator light can stay on for some
hours, but it does not have an unwanted effect
on the operation of the appliance.
1)
The indicator light comes on when it is necessa-
ry to fill the rinse aid container. Refer to 'Use of
rinse aid'.
1) The indicator light is off while a washing programme operates.
Digital display
The display shows:
adjusted level of the water softener,
activation/deactivation of the rinse aid dispenser (only with multitab function on),
8 Control panel
program duration,
remaining time to the end of the program,
end of a washing program,
number of hours in delay start,
fault codes,
deactivation/activation of the audible signals.
Delay start button
Use the delay start button to delay the start of the washing program with an interval be-
tween 1 and 19 hours. Refer to 'Select and start a washing program'.
Function buttons
Use the function buttons for these operations:
to set the water softener. Refer to 'Setting the water softener'.
to deactivate/activate the audible signals. Refer to 'Deactivation/activation of the audible
signals'.
to activate/deactivate the multitab function. Refer to 'Multitab function'.
to deactivate/activate the rinse aid dispenser when multitab function is active. Refer to
'Multitab function'.
to cancel the washing program in progress or a delay start in progress. Refer to 'Select
and start a washing program'.
Setting mode
The appliance must be in setting mode for these operations:
To set a washing program.
To set the water softener level.
To deactivate/activate the audible signals.
To deactivate/activate the rinse aid dispenser.
Press the on/off button. The appliance is in setting mode when:
All the program indicator lights are on.
Press the on/off button. The appliance is not in setting mode when:
Only one program indicator light is on.
A washing program is set. It is necessary to cancel the program to go back to the setting
mode. Refer to "Select and start a washing program".
Audible signals
You can hear an audible signal:
at the end of the washing program,
during the setting of the level of the water softener,
when the appliance has a malfunction.
The activation of the audible signals is set at the factory.
Do these steps to deactivate the audible signals:
1. Switch on the appliance.
2. Make sure that the appliance is in setting mode.
3. Press and hold function buttons B and C until the indicator lights of function buttons
A, B and C start to flash.
4. Press the function button C.
Control panel
9
Indicator lights for function buttons A and B go off.
Indicator light for function button C flashes.
The digital display shows the setting.
Audible signals deactivated
Audible signals activated
The audible signals are activated.
5. Press the function button C again.
The digital display shows the new setting.
The audible signals are deactivated.
6. Switch off the appliance to save the operation.
Do these steps to activate the audible signals:
1. Do the above procedure until the digital display shows necessary setting.
USE OF THE APPLIANCE
Refer to specified instructions for each step of the procedure.
1. Check if the water softener level is correct for the water hardness in your area. If neces-
sary set the water softener.
2. Fill the salt container with dishwasher salt.
3. Fill the rinse aid dispenser with rinse aid.
4. Load cutlery and dishes into the dishwasher.
5. Set the correct washing program for the type of load and soil.
6. Fill the detergent dispenser with the correct quantity of detergent.
7. Start the washing program.
SETTING THE WATER SOFTENER
The water softener removes minerals and salts from the water supply. Minerals and salts
can have bad effect on the operation of the appliance.
Water hardness is measured in equivalent scales:
mg/I (millimol per litre)
ppm (parts per million),
mmol/l (millimol per litre - international unit for the hardness of water).
Adjust the water softener in to the water hardness in your area. If necessary, contact your
local water authority.
Water hardness Water hardness setting
mg/l ppm mmol/l manually electronically
910 - 1250 910 - 1250 9,1 - 12,5 2 10
760 - 909 760 - 909 7,6 - 9,0 2 9
650 - 759 650 - 759 6,5 - 7,5 2 8
510 - 649 510 - 649 5,1 - 6,4 2 7
10 Use of the appliance
Water hardness Water hardness setting
mg/l ppm mmol/l manually electronically
400 - 509 400 - 509 4,0 - 5,0 2 6
330 - 399 330 - 399 3,3 - 3,9 2 5
260 - 329 260 - 329 2,6 - 3,2 1 4
190 - 259 190 - 259 1,9 - 2,5 1 3
70 - 189 70 - 189 0,7 - 1,8 1 2
< 70 < 70 < 0,7 1
1
1)
1) No use of salt required.
You must set the water softener manually and electronically.
Manual adjustment
The appliance is set at the factory at position 2.
1. Open the door.
2. Remove the lower basket.
3. Turn the water hardness dial to position 1
or 2 (refer to the chart).
4. Install the lower basket.
5. Close the door.
Electronic adjustment
The dishwasher is factory set at level 5.
1. Switch on the appliance.
2. Make sure that the appliance is in setting mode.
3. Press and hold function buttons B and C until the indicator lights of function buttons
A, B and C start to flash.
4. Release function buttons B and C.
5. Press function button A.
The indicator lights for function buttons B and C go off.
The indicator light for function button A continues to flash.
The digital display shows the current level.
You can hear an audible signal.
Example: digital display shows
/ 5 intermittent audible signals = level 5.
6. Press the function button A one time to increase the water softener level by one step.
7. Continue pressing function button A until the desired water softener level is achieved.
8. Press the on/off button to save the operation.
Setting the water softener 11
USE OF DISHWASHER SALT
CAUTION!
Only use dishwasher salt. Types of salt that are not suitable for dishwashers cause damage
to the water softener.
CAUTION!
Grains of salt and salty water on the bottom of the appliance can cause corrosion. Fill the
appliance with salt before you start a washing program to prevent corrosion.
Do these steps to fill the salt container:
1. Turn the cap anticlockwise to open the salt container.
2. Fill the salt container with 1 litre of water (only the first operation).
3. Use the funnel to fill the salt container
with salt.
4. Remove the salt around the opening of the salt container.
5. Turn the cap clockwise to close the salt container.
It is normal that water overflows from the salt container when you fill it with salt.
USE OF RINSE AID
CAUTION!
Only use rinse aid specified for dishwashers.
Do not fill the rinse aid dispenser with other products (e.g. dishwasher cleaning agent, liq-
uid detergent). This can cause damage to the appliance.
Rinse aid makes it possible to dry the dishes without streaks and stains.
Rinse aid is automatically added during the last rinsing phase.
Follow these steps to fill the rinse aid dispenser:
12 Use of dishwasher salt
1. Press the release button (A) to open the
rinse aid dispenser.
2. Fill the rinse aid dispenser with rinse aid.
The mark 'max.' shows the maximum level.
3. Remove the spilled rinse aid with an ab-
sorbent cloth to prevent too much foam
during the subsequent washing program.
4. Close the rinse aid dispenser.
Adjusting the rinse aid dosage
The rinse aid is set at the factory at position 4.
You can set the rinse aid dosage between position 1 (lowest dosage) and position 6 (highest
dosage).
Turn the rinse aid dial to increase or decrease the
dosage.
Increase the dosage if there are water droplets
or limescale on the dishes.
Decrease the dosage if there are streaks, whitish
stains or bluish layers on the dishes.
Wash hands to remove any residue of rinse aid
from skin.
Use of rinse aid 13
LOADING CUTLERY AND DISHES
Helpful hints and tips
Only use the appliance for household utensils that are suitable for dishwashers.
Do not use the appliance to clean objects that can absorb water (e.g. sponges, household
cloths).
Before you load cutlery and dishes, follow these steps:
Remove all food remainings and debris.
Make burnt, remaining food in pans soft.
While you load cutlery and dishes, follow these steps:
Load hollow items (e.g. cups, glasses and pans) with the opening down.
Make sure that water does not collect in the container or in a deep base.
Make sure that cutlery and dishes do not lie inside one another.
Make sure that cutlery and dishes do not cover other cutlery and dishes.
Make sure that glasses do not touch other glasses.
Put small objects in the cutlery basket.
Plastic items and pans with non-stick coatings can retain water droplets. Plastic items do
not dry as well as porcelain and steel items.
Put light items in the upper basket. Make sure that the items do not move.
CAUTION!
Make sure that the spray arms can move freely before you start a washing program.
WARNING!
Always close the door after you load or unload the appliance. An open door can be danger-
ous.
Lower basket
Put saucepans, lids, plates, salad bowls and cutlery
in the lower basket.
Arrange service dishes and large lids around the
edge of the basket.
14 Loading cutlery and dishes
The rows of prongs in the lower basket can be ad-
justed flat to load pots, pans and bowls.
Cutlery basket
WARNING!
Do not put long-bladed knives in a vertical position. Arrange long and sharp cutlery hori-
zontally in the upper basket. Be careful with sharp items.
Put forks and spoons with the handles down.
Put knives with the handles up.
Mix spoons with other cutlery to prevent them nesting together.
Use the cutlery grids for best washing results.
If the dimensions of the cutlery prevent use of the
cutlery grids, you can fold them out.
You can open the cutlery basket to remove the
cutlery more easily. Follow these steps to remove
the cutlery.
1. Put the cutlery basket on a table or work
surface.
2. Open the handle.
3. Remove the cutlery.
Hold the two parts of the handle tightly when
you move the cutlery basket.
Loading cutlery and dishes 15
Upper basket
The upper basket is for plates (maximum 24 cm in
diameter), saucers, salad bowls, cups, glasses and
lids.
Arrange the items to let water touch all surfaces.
For longer items fold the cup racks up.
Adjustment of the height of the upper basket
If you put large plates in the lower basket, first move the upper basket to a upper position.
Maximum height of the dishes in:
the upper basket the lower basket
Upper position 20 cm 31 cm
Lower position 24 cm 27 cm
Follow these steps to move the upper basket to the upper position:
16 Loading cutlery and dishes
1. Pull the basket out until it stops.
2. Carefully lift the two sides until the
mechanism is engaged and the basket is
stable.
Follow these steps to move the upper basket
to the lower position:
1. Pull the basket out until it stops.
2. Carefully lift the two sides upwards.
3. Hold the mechanism and guide it back
down slowly.
CAUTION!
Do not lift or lower the basket on one side
only.
If the basket is in the upper position, do not put cups on the cup racks.
USE OF DETERGENT
Only use detergents (powder, liquid or tablet) that are suitable for dishwashers.
Follow the data on the packaging:
dosage recommended by the manufacturer,
storage recommendations.
Do not use more than the correct quantity of detergent to decrease pollution.
Follow these steps to fill the detergent dispenser:
1. Open the lid of the detergent dispenser.
2. Fill the detergent dispenser (A) with deter-
gent. The marking shows the dosage:
20 = approximately 20 g of detergent
30 = approximately 30 g of detergent.
Use of detergent 17
3. If you use a washing program with pre-
wash, put more detergent in the prewash
detergent compartment (B).
4. If you use detergent tablets, put the deter-
gent tablet in the detergent dispenser (A) .
5. Close the lid of the detergent dispenser.
Press the lid until it locks into position.
Different brands of detergent dissolve in different times. Some detergent tablets do not
have the best cleaning results during short washing programs. Use long washing programs
when you use detergent tablets to fully remove the detergent.
MULTITAB FUNCTION
The multitab function is for combi detergent tablets.
These tablets contain agents such as detergent, rinse aid and dishwasher salt. Some types of
tablets can contain other agents.
Do a check if these tablets are suitable for the local water hardness. Refer to the instruc-
tions from the manufacturer.
The multitab function can be set with any program.
When you set the multitab function, it stays on until you deactivate it.
The multitab function automatically stops the rinse aid and water softener operation. The
rinse aid indicator light and salt indicator light are deactivated.
The program duration can increase if you use the multitab function.
A
B
18 Multitab function
Activate or deactivate the multitab function before the start of a washing program.
You cannot activate or deactivate the multitab function when the program operates. Can-
cel the washing program, then set the program again.
To activate the multitab function:
Press and hold the two multitab buttons (function buttons D and E). The multitab indica-
tor light comes on.
To deactivate the multitab function:
Press and hold the two multitab buttons (function buttons D and E). The multitab indica-
tor light goes off.
Follow these steps if the drying results are not satisfactory:
1. Fill the rinse aid dispenser with rinse aid.
2. Activate the rinse aid dispenser.
3. Set the rinse aid dosage to position 2.
You can only activate or deactivate the rinse aid dispenser when the multitab function is
activated.
To activate/deactivate the rinse aid dispenser:
1. Switch on the appliance.
2. Make sure that the appliance is in setting mode.
3. Press and hold function buttons B and C.
The indicator lights for function buttons A, B, and C start to flash.
4. Press function button B.
The indicator lights for function buttons A and C go off.
The indicator light for function button B continues to flash.
The digital display shows the setting.
Rinse aid dispenser deactivated
Rinse aid dispenser activated
5. Press function button B again.
The digital display shows the new setting.
6. Switch off the appliance to save the operation.
To use normal detergent again:
1. Deactivate the multitab function.
2. Fill the salt container and rinse aid dispenser.
3. Adjust the water hardness setting to the highest level.
4. Do a washing program without dishes.
5. Adjust the water softener to the water hardness in your area.
6. Adjust the rinse aid dosage.
SELECT AND START A WASHING PROGRAM
Set the washing program with the door ajar. The washing program only starts after you
close the door. Until then it is possible to modify the settings.
Select and start a washing program
19
Follow these steps to set and start a washing program:
1. Switch on the appliance.
2. Make sure that the appliance is in setting mode.
3. Press one of the program buttons. Refer to the 'Washing programs' chart for program
details.
The indicator light of the selected program stays on. All other program indicator
lights go off.
The digital display shows the program duration.
4. Close the door.
The washing program starts.
When the washing program operates, you cannot change the program. Cancel the washing
program. Refer to 'Cancelling a washing program'.
Select and start a washing program with delay start
1. Press the on/off button.
2. Set a washing program.
The program indicator light comes on.
3. Press the delay start button until the display shows the necessary delay start of the
washing program.
The delay start indicator light comes on.
4. Close the door.
The countdown of the delay start starts.
When the countdown is completed, the washing program starts automatically.
If you open the door during the countdown, it will interrupt the countdown. When you
close the door again, the countdown continues from the point of interruption.
Cancelling a delay start
1. Press and hold function buttons B and C until all the program lights come on.
When you cancel a delay start, you also cancel the washing program.
2. Set a new washing program.
WARNING!
Only interrupt or cancel a washing program if necessary. Open the door carefully. Hot
steam and water can escape.
Interrupting a washing program
1. Open the appliance door. The washing program stops.
2. Close the appliance door. The washing program continues from the point of interrup-
tion.
Cancelling a washing program
1. Press and hold function buttons B and C until all the program lights come on.
2. Release function buttons B and C to cancel the washing program.
At this point, you can follow these steps:
1. Switch off the appliance.
20 Select and start a washing program
  • Page 1 1
  • Page 2 2
  • Page 3 3
  • Page 4 4
  • Page 5 5
  • Page 6 6
  • Page 7 7
  • Page 8 8
  • Page 9 9
  • Page 10 10
  • Page 11 11
  • Page 12 12
  • Page 13 13
  • Page 14 14
  • Page 15 15
  • Page 16 16
  • Page 17 17
  • Page 18 18
  • Page 19 19
  • Page 20 20
  • Page 21 21
  • Page 22 22
  • Page 23 23
  • Page 24 24
  • Page 25 25
  • Page 26 26
  • Page 27 27
  • Page 28 28
  • Page 29 29
  • Page 30 30
  • Page 31 31
  • Page 32 32
  • Page 33 33
  • Page 34 34
  • Page 35 35
  • Page 36 36
  • Page 37 37
  • Page 38 38
  • Page 39 39
  • Page 40 40

Aeg-Electrolux 65411 VI User manual

Category
Dishwashers
Type
User manual
This manual is also suitable for

Ask a question and I''ll find the answer in the document

Finding information in a document is now easier with AI