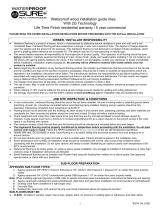
Page is loading ...

Wind Gust 510-06
Made in Belgium
MATERIALS NEEDED
The following items will be needed for your installation.
• Package of DumaWall wall panels
• Hand saw/circular saw
• 1-inch wood screws
• Adhesive, nish nails or staples
• Utility knife
• Tape measure
PREPARATION
A sturdy support frame must be attached to uneven or damaged
walls to ensure an even surface on which to attach the tiles.
(illustration 1).
• 2"x2" furring strips or lattice is recommended.
• These supports must be installed in the opposite
direction of the tiles (e.g., if the tiles are installed
horizontally, then the supports must be placed
vertically).
• The distance between the supports should be a
maximum of 12 inches.
With a smooth, even wall surface, Loctite® Power Grab® Ultimate
adhesive can be used to attach the tiles and no framework is
required. The DumaWall tiles may be glued directly onto existing
tiles, drywall, OSB or plywood.
• This method is only suitable for dry surfaces free from
dust and grease. For damp and uneven walls, we
recommend the use of furring strips or lattice.
• Apply the adhesive in a zigzag pattern onto the tile
or the approved substrate. Keep adhesive 1 inch from
tile edges and wipe o excess from tile face before
adhesive dries.
Note: For tile installation in showers or other wet environment, be
sure to use Kwick Seal Plus® sealer or similar silicone sealant between
all joints and edges.
INSTALLATION
The DumaWall tiles may be cut using a handsaw, table saw, or
portable circular saw.
Place the rst tile with side (A) facing to the right (illustration 2).
www.dumawall-us.com
Then attach the tile using one of the following methods:
(illustration 3):
• (A) on framing with nails or staples through the tab at
the top. For a perfect t for the next row, make sure
that the nail is completely ush with the tab.
• (B) on a smooth surface like drywall, OSB or
plywood using adhesive (see Preparation).
Connect the next tile along the cross-cut side (B) by fully
inserting the tab into the groove (illustration 4).
Make sure that the tiles always t each other properly along the
length so that the next row ts perfectly parallel. Create a full
row this way by tting the tiles via the end tab with nails or
adhesive. Cut the tile to size at the end of the row.
Attach the rst row of tiles with 1-inch wood screws at the
bottom if using a baseboard or cove base (illustration 5). If not
covering with base, use adhesive to attach bottom of tiles.
Take the remaining piece (at least 12 inches long - enabling it to
be xed to the rst support beam of the framework) of the cut
tile and use this for the next row if needed (illustration 6).
You can install the tile in a “staggered” layout (A) or “stack bond”
layout (B) (illustration 7). The tiles can be placed vertically as well as
horizontally. Complete the installation row upon row.
FINISHING AND MAINTENANCE
Edge trims and corner trims can be used if desired. Many trim
varieties will work for this tile application. A 5/16-inch aluminum
edge trim often used for ooring is a good choice. For inside corners
where panels abut at 90-degrees, a bead of matching caulk or clear
silicone sealant is also a good option.
Do not attach accessories like coat hooks, light ttings, mirrors, etc.
directly to the tiles. Drill holes through the tiles and use suitable
anchors to attach the accessories securely into the framing behind
(illustration 8).
For installation in a shower area, around a bath or other very
damp places, a bead of silicone sealant must be provided in the
connection between the tiles themselves and between the tiles
and support trims to ensure a completely waterproof joint. Also
apply a silicone bead between the tile and the edge of the shower
or the bath.
4”
max 11.8”
8-8-17
/


