Sony CDX-R3300 Operating instructions

Category
Car media receivers
Type
Operating instructions
01US+00COV-U.fm masterpage:Right
3-261-845-11 (1)
CDX-R3300
3-261-845-11 (1)
Operating Instructions
Mode d’emploi
Owner’s Record
The model and serial numbers are located on the bottom of the unit.
Record these numbers in the space provided below.
Refer to these numbers whenever you call upon your Sony dealer regarding this product.
Model No. CDX-R3300 Serial No.
CDX-R3300
For installation and connections, see the supplied installation/connections manual.
En ce qui concerne l’installation et les connexions, consulter le manuel
d’installation/raccordement fourni.
© 2004 Sony Corporation
FR
US
FM
/
AM
Compact Disc
Player
2
CDX-R3300
3-261-845-11 (1)
01US01INT-U.fm masterpage:Left
Welcome !
Thank you for purchasing this Sony Compact
Disc Player. You can enjoy its various features
even more with:
MP3 file playback.
CD-R/CD-RW which can have a session added
can be played (page 7).
Discs recorded in Multi Session can be played,
depending on the recording method (page 7).
CD TEXT information
(displayed when a CD TEXT disc*
1
is played).
•ID3 tag*
2
version 1.0, 1.1, 2.2, 2.3 or 2.4
information (displayed when an MP3 file is
played).
Optional controller accessory
Card remote commander RM-X114
*1 A CD TEXT disc is an audio CD that includes
information such as the disc name, artist name,
and track names. This information is recorded on
the disc.
*2 ID3 tag is an MP3 file that contains information
about album name, artist name, track name, etc.
Warning
This equipment has been tested and found to
comply with the limits for a Class B digital
device, pursuant to Part 15 of the FCC Rules.
These limits are designed to provide reasonable
protection against harmful interference in a
residential installation. This equipment
generates, uses, and can radiate radio frequency
energy and, if not installed and used in
accordance with the instructions, may cause
harmful interference to radio communications.
However, there is no guarantee that interference
will not occur in a particular installation. If this
equipment does cause harmful interference to
radio or television reception, which can be
determined by turning the equipment off and on,
the user is encouraged to try to correct the
interference by one or more of the following
measures:
Reorient or relocate the receiving antenna.
Increase the separation between the equipment
and receiver.
Connect the equipment into an outlet on a
circuit different from that to which the receiver
is connected.
Consult the dealer or an experienced radio/TV
technician for help.
You are cautioned that any changes or
modifications not expressly approved in this
manual could void your authority to operate this
equipment.
The use of optical instruments with this produc
t
will increase e
y
e hazard.
CAUTION
3
01US+00COV-UTOC.fm masterpage:Right
CDX-R3300
3-261-845-11 (1)
Table of Contents
Location of controls . . . . . . . . . . . . . . . . . . . 4
Precautions . . . . . . . . . . . . . . . . . . . . . . . . . . 6
Notes on discs . . . . . . . . . . . . . . . . . . . . . . . . 6
About MP3 files . . . . . . . . . . . . . . . . . . . . . . 7
Getting Started
Resetting the unit. . . . . . . . . . . . . . . . . . . . . . 9
Detaching the front panel . . . . . . . . . . . . . . . 9
Setting the clock . . . . . . . . . . . . . . . . . . . . . 10
CD Player
Playing a disc. . . . . . . . . . . . . . . . . . . . . . . . 11
Display items. . . . . . . . . . . . . . . . . . . . . . . . 12
Playing tracks repeatedly
— Repeat Play . . . . . . . . . . . . . . . . . . . . 12
Playing tracks in random order
— Shuffle Play . . . . . . . . . . . . . . . . . . . . 12
Radio
Storing stations automatically
— Best Tuning Memory (BTM). . . . . . . 13
Receiving the stored stations. . . . . . . . . . . . 13
Storing only the desired stations . . . . . . . . . 14
Other Functions
Adjusting the sound characteristics . . . . . . 14
Quickly attenuating the sound . . . . . . . . . . 14
Changing the sound and display settings
— Menu . . . . . . . . . . . . . . . . . . . . . . . . . 15
Setting the equalizer (EQ3). . . . . . . . . . . . . 16
Additional Information
Maintenance . . . . . . . . . . . . . . . . . . . . . . . . 17
Removing the unit. . . . . . . . . . . . . . . . . . . . 18
Specifications . . . . . . . . . . . . . . . . . . . . . . . 19
Troubleshooting . . . . . . . . . . . . . . . . . . . . . 20
Error displays/Messages . . . . . . . . . . . . . . . 21
4
01US02CD-U.fm masterpage:Left
CDX-R3300
3-261-845-11 (1)
Location of controls
Refer to the pages listed for details.
a Volume +/– button
b ATT (attenuate) button 14
c DSPL (display mode change) button
10, 12
d OPEN/EJECT shutter 11
e Display window
f EQ3 button 16
g OFF (Stop/Power off) button* 9, 11
h SEEK +/– button
Radio:
To tune in stations automatically/find a
station manually.
CD (MP3 files):
To skip tracks/fast-forward, reverse a track.
i (front panel release) button 9
j SOURCE (Power on/Radio/CD) button
To select the source.
k MODE button
To change the operation.
l SEL (select) button
To select items.
m RESET button (located on the front side of
the unit, behind the front panel) 9
n Number buttons 15
Radio:
To store the desired station on each number
button.
MP3 files:
(1): ALBUM – 11
(2): ALBUM + 11
CD:
(3): REP 12
(4): SHUF 12
o SENS button 13
p SCRL (scroll) button 12
q BTM button 13
r Receptor for the card remote
commander
* Warning when installing in a car without
an ACC (accessory) position on the
ignition switch
After turning off the ignition, be sure to press
and hold (OFF) on the unit until the display
disappears.
Otherwise, the display does not turn off and this
causes battery drain.
ATT OFF
SOURCE MODE
SEL
SEEK
123456
SENS
REP
ALBUM
+
SHUF
CDX-R3300
BTMSCRL
DSPL
EQ3
5
01US02CD-U.fm masterpage:Right
CDX-R3300
3-261-845-11 (1)
The corresponding buttons of the card
remote commander control the same
functions as those on this unit.
a DSPL button
b MENU button*
1
c SOURCE button
d SEEK (–/+) buttons
e SOUND button
f OFF button
g VOL (+/–) buttons
h MODE button
i LIST button*
1
j DISC*
1
(ALBUM)/PRESET (+/–)
buttons
k ENTER button*
1
l ATT button
*1 Not available for this unit
Note
If the display disappears by pressing (OFF), it cannot
be operated with the card remote commander unless
(SOURCE) on the unit is pressed, or a disc is inserted
to activate the unit first.
Tip
For details on how to replace the battery, see
“Replacing the lithium battery” on page 17.
Selecting an album with the card
remote commander
Album can be skipped using the DISC
(ALBUM) (+/–) buttons on the card remote
commander.
*2 Available only when an MP3 file is played.
Skipping tracks continuously
Press once (SEEK) (+) or (SEEK) (–) on the
card remote commander, then press again within
2 seconds and hold.
Card remote commander RM-X114
(optional)
DISC
ATTOFF
DSPL MODE
SOURCE
DISC
+
VOL
+
PRESET
+
SEEK
+
SEEK
PRESET –
SOUND
ENTER
MENU
LIST
To Press
Skip albums*
2
Album selection
+ or – [once for each album]
To continuously skip
albums, press and hold
either button.
6
01US02CD-U.fm masterpage:Left
CDX-R3300
3-261-845-11 (1)
Precautions
If your car has been parked in direct sunlight,
allow the unit to cool off before operating it.
Power antenna will extend automatically while
the unit is operating.
If you have any questions or problems
concerning your unit that are not covered in this
manual, please consult your nearest Sony dealer.
Moisture condensation
On a rainy day or in a very damp area, moisture
condensation may occur inside the lenses and
display of the unit. Should this occur, the unit
will not operate properly. In such a case, remove
the disc and wait for about an hour until the
moisture has evaporated.
To maintain high sound quality
Be careful not to splash juice or other soft drinks
onto the unit or discs.
Notes on discs
To keep a disc clean, do not touch its surface.
Handle the disc by its edge.
Keep your discs in their cases or disc
magazines when not in use.
Do not subject discs to heat/high temperature.
Avoid leaving them in a parked car or on a
dashboard/rear tray.
Do not attach labels, or use discs with sticky
ink/residue. Such discs may stop spinning
when used, causing a malfunction, or may ruin
the disc.
Do not use any discs with labels or stickers
attached.
The following malfunctions may result from
using such discs:
– Inability to eject a disc (due to a label or
sticker peeling off and jamming the eject
mechanism).
– Inability to read audio data correctly (e.g.,
playback skipping, or no playback) due to
heat shrinking of a sticker or label causing a
disc to warp.
Discs with non-standard shapes (e.g., heart,
square, star) cannot be played on this unit.
Attempting to do so may damage the unit. Do
not use such discs.
You cannot play 8 cm (3 in) CDs.
7
01US02CD-U.fm masterpage:Right
CDX-R3300
3-261-845-11 (1)
Before playing, clean the discs with a
commercially available cleaning cloth. Wipe
each disc from the center out. Do not use
solvents such as benzine, thinner, commercially
available cleaners, or antistatic spray intended
for analog discs.
Music discs encoded with copyright
protection
This product is designed to play back discs that
conform to the Compact Disc (CD) standard.
Recently, various music discs encoded with
copyright protection are marketed by some
record companies. Please be aware that among
those discs, there are some that do not conform to
the CD standard and may not be playable by this
product.
Notes on CD-Rs (recordable CDs)/CD-
RWs (rewritable CDs)
This unit can play the following discs:
Some CD-Rs/CD-RWs (depending on the
equipment used for its recording or the
condition of the disc) may not play on this unit.
You cannot play a CD-R/CD-RW that is not
finalized*.
You can play MP3 files recorded on CD-
ROMs, CD-Rs, and CD-RWs.
A CD-R/CD-RW to which a session can be
added can be played.
* A process necessary for a recorded CD-R/CD-RW
disc to be played on the audio CD player.
About MP3 files
MP3 (MPEG 1 Audio Layer-3) is a standard
technology and format for compressing a sound
sequence. The file is compressed to about 1/10 of
its original size. Sounds outside the range of
human hearing are compressed while the sounds
we can hear are not compressed.
Notes on discs
You can play MP3 files recorded on CD-ROMs,
CD-Rs, and CD-RWs.
The disc must be in the ISO 9660*
1
level 1 or
level 2 format, or Joliet or Romeo in the
expansion format.
You can use a disc recorded in Multi Session*
2
.
*
1
ISO 9660 Format
The most common international standard for
the logical format of files and folders on a
CD-ROM.
There are several specification levels. In
Level 1, file names must be in the 8.3 format
(no more than 8 characters in the name, no
more than 3 characters in the extension
“.MP3”) and in capital letters. Folder names
can be no longer than 8 characters. There can
be no more than 8 nested folder levels. Level
2 specifications allow file names up to 31
characters long.
Each folder can have up to 8 trees.
For Joliet or Romeo in the expansion format,
make sure of the contents of the writing
software, etc.
*
2
Multi Session
This is a recording method that enables
adding of data using the Track-At-Once
method. Conventional CDs begin at a CD
control area called the Lead-in and end at an
area called Lead-out. A Multi Session CD is a
CD having multiple sessions, with each
segment from Lead-in to Lead-out regarded
as a single session.
CD-Extra: The format which records audio
(audio CD data) as tracks on session 1, and
records data as tracks on session 2.
Mixed CD: In this format, data is recorded as
track 1, and audio (audio CD data) is recorded
as track 2.
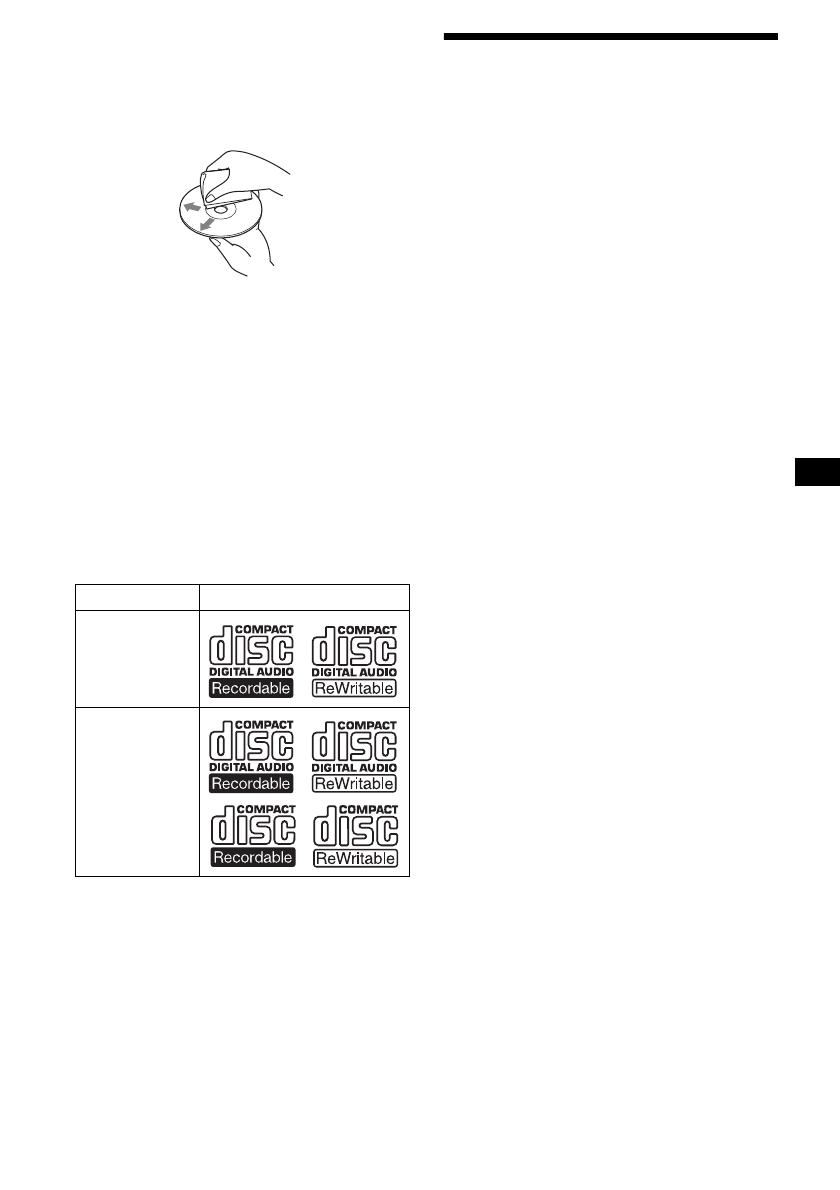
Type of discs Label on the disc
Audio CD
MP3 files
continue to next page t
8
01US02CD-U.fm masterpage:Left
CDX-R3300
3-261-845-11 (1)
Notes
With formats other than ISO 9660 level 1 and level 2,
folder names or file names may not be displayed
correctly.
When naming, be sure to add the file extension
“.MP3” to the file name.
If you put the extension “.MP3” to a file other than
MP3, the unit cannot recognize the file properly and
will generate random noise that could damage your
speakers.
The following discs take a longer time to start
playback.
– a disc recorded with complicated tree structure.
– a disc recorded in Multi Session.
– a disc to which data can be added.
Cautions when playing a disc that is recorded in
Multi Session
When the first track of the first session is audio CD
data:
Only audio CD data of the first session is played
back.
Any data in subsequent sessions is skipped.
When the first track of the first session is not audio
CD data:
– If an MP3 file is in the disc, only MP3 file(s) is
played back and other data is skipped. (Audio CD
data is not recognized.)
– If no MP3 file is in the disc, “NO MUSIC” is
displayed and nothing is played back. (Audio CD
data is not recognized.)
The playback order of the MP3 files
The playback order of the folders and files is as
follows:
Notes
A folder that does not include an MP3 file is skipped.
When you insert a disc with many trees, it takes a
longer time to start playback. We recommend that
you make only one or two trees for each disc.
Maximum folder number: 150 (including root folder
and empty folders)
The maximum number of MP3 files and folders that
can be contained in a disc: 300
When a file/folder name contains many characters,
this number may become less than 300.
Tip
To specify a desired playback order, before the folder
or file name, input the order by number (e.g., “01,
“02”), then record contents onto a disc. (The order
differs depending on the writing software.)
1
2
6
3
5
7
1
2
6
7
4
8
3
5
8
4
9
Folder (album)
MP3 file (track)
Tree 1
(root)
Tree 2
Tree 4
Tree 5
Tree 3
9
01US02CD-U.fm masterpage:Right
CDX-R3300
3-261-845-11 (1)
Getting Started
Resetting the unit
Before operating the unit for the first time, or
after replacing the car battery or changing the
connections, you must reset the unit.
Remove the front panel and press the RESET
button with a pointed object, such as a ball-point
pen.
Note
Pressing the RESET button will erase the clock setting
and some stored contents.
Detaching the front panel
You can detach the front panel of this unit to
protect the unit from being stolen.
Caution alarm
If you turn the ignition switch to the OFF
position without removing the front panel, the
caution alarm will beep for a few seconds.
If you connect an optional amplifier and do not
use the built-in amplifier, the beep sound will be
deactivated.
1 Press (OFF)*.
CD playback or radio reception stops (the key
illumination and display remain on).
* If your car has no ACC (accessory) position on
the ignition switch, be sure to turn the unit off by
pressing (OFF) until the display disappears to
avoid car battery drain.
2 Press , then pull it off towards you.
Notes
If you detach the panel while the unit is still turned
on, the power will turn off automatically to prevent
the speakers from being damaged.
Do not drop or put excessive pressure on the front
panel and its display window.
Do not subject the front panel to heat/high
temperature or moisture. Avoid leaving it in a parked
car or on a dashboard/rear tray.
Tip
When carrying the front panel with you, use the
supplied front panel case.
RESET button
continue to next page t
O
P
E
N
/
E
J
E
C
T
(OFF)
10
01US02CD-U.fm masterpage:Left
CDX-R3300
3-261-845-11 (1)
Attaching the front panel
Attach part A of the front panel to part B of the
unit as illustrated and push the left side into
position until it clicks.
Note
Do not put anything on the inner surface of the front
panel.
Setting the clock
The clock uses a 12-hour digital indication.
Example: To set the clock to 10:08
1 Press (DSPL) for 2 seconds.
The hour indication flashes.
1Press the volume +/– button to set
the hour.
2Press (SEL).
The minute indication flashes.
3Press the volume +/– button to set
the minute.
2 Press (DSPL).
The clock starts. After the clock setting is
completed, the display returns to normal play
mode.
O
P
E
N
/
E
J
E
C
T
11
01US02CD-U.fm masterpage:Right
CDX-R3300
3-261-845-11 (1)
CD Player
Playing a disc
1 Open the shutter.
2 Insert the disc labeled side up.
Playback starts automatically.
3 Close the shutter.
If a disc is already inserted, press (SOURCE)
repeatedly until “CD” appears to start playback.
* Available only when an MP3 file is played.
To skip tracks continuously, press (SEEK) (+) or
(SEEK) (–), then press again within 2 seconds
and hold.
To eject the disc
1 Open the shutter.
2 Push down the shutter.
The disc is ejected.
Notes
While ejecting or inserting a disc, do not close the
shutter. The disc may be caught and damaged.
A disc may be ejected if you open the shutter
forcefully.
Before playing a track, this unit reads all track and
album information on the disc. Depending on the
track structure, it may take more than a minute
before playback begins. During this time, “READ” is
displayed. Please wait for play to start automatically
when the reading is complete.
Depending on the condition of the disc, it may not
play back (page 6, 7).
While the first/last track on the disc is playing, if
(SEEK) (–) or (SEEK) (+) is pressed, playback skips
to the last/first track of the disc.
When the last track on the disc is over, playback
restarts from the first track of the disc.
If you play a high-bit rate MP3 file such as 320 kbps,
sound may be intermittent.
Tip
A disc can be played with the shutter opened or
closed.
To Press
Stop playback (OFF)
Skip tracks
Automatic
Music Sensor
(SEEK) (–/+)
(./>)
[once for each track]
Fast-forward/
reverse
Manual Search
(SEEK) (–/+)
(m/M)
[hold to desired point]
Skip albums*
Albums selection
(1)(ALBUM–) or
(2)(ALBUM+)
12
01US02CD-U.fm masterpage:Left
CDX-R3300
3-261-845-11 (1)
Display items
When the disc/album/track changes, any
prerecorded title*
1
of the new disc/album/track is
automatically displayed (if A.SCRL (Auto
Scroll) is set to “ON,” names exceeding 8
characters will be scrolled (page 15)).
*1 When pressing (DSPL), “NO NAME” indicates that
there is no prerecorded name to display.
*2 Only for CD TEXT discs with the artist name.
*3 Only for MP3 files.
Only track name/artist name/album name in ID3
tag is displayed.
When pressing (DSPL), “NO ID3” indicates that
there is no ID3 tag to display.
Notes
Some characters cannot be displayed.
For some CD TEXT discs with very many
characters, information may not scroll.
This unit cannot display the artist name for each
track of a CD TEXT disc.
Notes on MP3
ID3 tag applies to version 1.0, 1.1, 2.2, 2.3 and 2.4.
Some characters and signs cannot be displayed
(appear as “*”). The maximum number of
displayable characters for an album (folder) name/
track (file) is 64 (Romeo) or 32 (Joliet); ID3 tag 30
characters (1.0, 1.1, 2.2 and 2.3) or 126 characters
(2.4).
In the following cases, elapsed playing time may not
be displayed accurately.
– when an MP3 file of VBR (variable bit rate) is
played.
– during fast-forward/reverse.
Tips
When A.SCRL (Auto Scroll) is set to “OFF” and the
disc/album/track is changed, the disc/album/track
name does not scroll.
When an MP3 file is played and the album is
changed, the new album number is displayed.
Playing tracks repeatedly
— Repeat Play
You can select:
REP-TRACK — to repeat the current track.
REP-ALBM* — to repeat the tracks in the
current album.
* Available only when an MP3 file is played.
During playback, press (3) (REP)
repeatedly until the desired setting
appears in the display.
Repeat Play starts.
To return to normal play mode, select
“REP-OFF.
Playing tracks in random
order
— Shuffle Play
You can select:
SHUF-ALBM* — to play the tracks in the
current album in random order.
SHUF-DISC — to play the tracks in the disc in
random order.
* Available only when an MP3 file is played.
During playback, press (4) (SHUF)
repeatedly until the desired setting
appears in the display.
Shuffle Play starts.
To return to normal play mode, select
“SHUF-OFF.
To Press
Switch display item (DSPL )
Scroll display item (SCRL)
Source
Displayable items
Track number/Elapsed playing time
Disc name*
1
/Artist name*
2
Album (folder) name*
3
Track (file) name*
1
*
3
•ID3 tag*
3
•Clock
13
01US02CD-U.fm masterpage:Right
CDX-R3300
3-261-845-11 (1)
Radio
The unit can store up to 6 stations per band
(FM1, FM2, FM3, AM1 and AM2).
Caution
When tuning in stations while driving, use Best
Tuning Memory to prevent accidents.
Storing stations
automatically
— Best Tuning Memory (BTM)
The unit selects the stations with the strongest
signals within the selected band, and stores them
in the order of their frequency.
1 Press (SOURCE) repeatedly to select
the radio.
2 Press (MODE) repeatedly to select the
band.
3 Press (BTM) for 2 seconds.
The unit stores stations in the order of their
frequencies on the number buttons.
A beep sounds when the setting is stored.
Notes
If only a few stations can be received due to weak
signals, some number buttons will retain their former
settings.
When a number is indicated in the display, the unit
starts storing stations from the one currently
displayed.
Receiving the stored stations
1 Press (SOURCE) repeatedly to select
the radio.
2 Press (MODE) repeatedly to select the
band.
3 Press the number button ((1) to (6))
on which the desired station is stored.
If preset tuning does not work
— Automatic tuning/Local Seek Mode
Automatic tuning:
Press ( SEEK) (+) or (SEEK) (–) to
search for the station.
Scanning stops when the unit receives a
station. Repeat the operation until the desired
station is received.
Local Seek Mode:
If the automatic tuning stops too
frequently, press (SENS) repeatedly
until “LOCAL-ON” appears in the
display.
Only the stations with relatively strong
signals will be tuned in.
To cancel the local seek mode, press ( SENS)
twice when receiving FM.
Note
When receiving AM, to cancel the local seek mode,
press (SENS) (“LOCAL-OFF” appears).
Tip
If you know the frequency of the station you want to
listen to, press and hold (SEEK) (+) or (SEEK) (–) to
locate the approximate frequency, then press
(SEEK) (+) or (SEEK) (–) repeatedly to fine adjust to
the desired frequency (manual tuning).
If FM stereo reception is poor
— Monaural Mode
During radio reception, press (SENS)
repeatedly until “MONO-ON” appears
in the display.
The sound improves, but becomes monaural
(“ST” disappears).
To return to normal radio reception mode, press
(SENS) (“MONO-OFF” appears).
14
01US02CD-U.fm masterpage:Left
CDX-R3300
3-261-845-11 (1)
Storing only the desired
stations
You can manually preset the desired stations on
any chosen number button.
1 Press (SOURCE) repeatedly to select
the radio.
2 Press (MODE) repeatedly to select the
band.
3 Press (SEEK) (+) or ( SEEK) (–) to tune
in the station that you want to store.
4 Press the desired number button ((1)
to (6)) for 2 seconds until “MEM”
appears.
The number button indication appears in the
display.
Note
If you try to store another station on the same number
button, the previously stored station will be erased.
Other Functions
Adjusting the sound
characteristics
You can adjust the balance, fader, low pass filter
and subwoofer volume.
1 Press (SEL) repeatedly until “BAL,
“FAD,” “LPF” or “SUB” appears.
Each time you press (SEL), the item changes
as follows:
LOW*
1
t MID*
1
t HI*
1
t
BAL (left-right) t FAD (front-rear) t
LPF (low pass filter)*
2
*
3
t
SUB (subwoofer volume)*
2
*
4
*1 When EQ3 is activated (page 16).
*2 When “SUB” is selected (page 15).
*3 The cut off frequency is adjustable to 78 Hz,
125 Hz or OFF.
*4 The volume level is adjustable between –10
and +10 steps. (Below –10, “ATT” is displayed.)
2 Press the volume +/– button to adjust
the selected item.
Note
Adjust within 3 seconds after selecting the item.
Quickly attenuating the
sound
Press (ATT).
After “ATT-ON” momentarily appears,
ATT” appears in the display.
To restore the previous volume level, press
(ATT) again.
15
01US02CD-U.fm masterpage:Right
CDX-R3300
3-261-845-11 (1)
Changing the sound and
display settings
— Menu
The following items can be set:
Set up
REAR/SUB*
1
— to switch the audio output
REAR or SUB.
– Select “REAR” to output to a power
amplifier.
– Select “SUB” to output to a subwoofer.
A.SCRL (Auto Scroll)*
2
(page 12)
•DEMO*
1
— to turn the demonstration display
on or off.
– Select “ON” to activate the demonstration
display (The demonstration starts about 10
seconds after the unit is turned off).
– Select “OFF” to deactivate the
demonstration display.
BEEP — to turn the beeps on or off.
DIM — to change the brightness of the display.
– Select “ON” to dim the display.
– Select “OFF” to deactivate the Dimmer.
Switching the REAR/SUB*
1
Press ( SEL ) and then press the
volume + (REAR) or – (SUB) button.
After 3 seconds, the display returns to normal
play mode.
Selecting the desired item
Press ( SEL ) and the desired button
simultaneously.
(SEL) + (3): A.SCRL*
2
(SEL) + (4): DEMO*
1
(SEL) + (6): BEEP
(SEL) + (DSPL): DIM
After the mode setting is completed, the display
returns to normal play mode.
To cancel the item, press (SEL) and the desired
button simultaneously again.
*1 When the unit is turned off.
*2 When no CD is playing, this item will not appear.
16
01US02CD-U.fm masterpage:Left
CDX-R3300
3-261-845-11 (1)
Setting the equalizer (EQ3)
You can select an equalizer curve for 7 music
types (XPLOD, VOCAL, CLUB, JAZZ, NEW
AGE, ROCK, CUSTOM and OFF (equalizer
OFF)).
You can store a different equalizer setting for
each source.
Selecting the equalizer curve
1 Press (SOURCE) to select a source
(Radio or CD).
2 Press (EQ3) repeatedly until the
desired equalizer curve.
Each time you press (EQ3), the item
changes.
To cancel the equalizing effect, select “OFF.
Adjusting the equalizer curve
You can store and adjust the equalizer settings
for different tone ranges.
1 Press (SOURCE) to select a source
(Radio or CD).
2 Press (EQ3) repeatedly to select the
desired equalizer curve.
3 Adjusting the equalizer curve.
1Press (SEL) repeatedly to select the
desired tone range.
Each time you press ( SEL), the tone range
changes.
LOW t MID t HI (t BAL t FAD t
LPF t SUB)
2Press the volume +/– button
repeatedly to adjust to the desired
volume level.
The volume level is adjustable by 1 dB
steps from –10 dB to +10 dB.
3Repeat step 1 and 2 to adjust the
equalizer curve.
To restore the factory-set equalizer curve,
press (SEL) for 2 seconds.
Note
When EQ3 is set to “OFF,” you cannot adjust the
equalizer curve settings.
17
01US02CD-U.fm masterpage:Right
CDX-R3300
3-261-845-11 (1)
Additional Information
Maintenance
Fuse replacement
When replacing the fuse, be sure to use one
matching the amperage rating stated on the
original fuse. If the fuse blows, check the power
connection and replace the fuse. If the fuse blows
again after replacement, there may be an internal
malfunction. In such a case, consult your nearest
Sony dealer.
Warning
Never use a fuse with an amperage rating
exceeding the one supplied with the unit as this
could damage the unit.
Cleaning the connectors
The unit may not function properly if the
connectors between the unit and the front panel
are not clean. In order to prevent this, detach the
front panel (page 9) and clean the connectors
with a cotton swab dipped in alcohol. Do not
apply too much force. Otherwise, the connectors
may be damaged.
Notes
For safety, turn off the ignition before cleaning the
connectors, and remove the key from the ignition
switch.
Never touch the connectors directly with your fingers
or with any metal device.
Replacing the lithium battery
Under normal conditions, battery will last
approximately 1 year. (The service life may be
shorter, depending on the conditions of use.)
When the battery becomes weak, the range of the
card remote commander becomes shorter.
Replace the battery with a new CR2025 lithium
battery. Use of any other battery may present a
risk of fire or explosion.
Notes on lithium battery
Keep the lithium battery out of the reach of
children. Should the battery be swallowed,
immediately consult a doctor.
Wipe the battery with a dry cloth to assure a
good contact.
Be sure to observe the correct polarity when
installing the battery.
Do not hold the battery with metallic tweezers,
otherwise a short-circuit may occur.
Fuse (10 A)
Main unit
Back of the front panel
x
+ side up
WARNING
Battery may explode if mistreated.
Do not recharge, disassemble, or dispose of
in fire.
18
01US02CD-U.fm masterpage:Left
CDX-R3300
3-261-845-11 (1)
Removing the unit
1 Remove the protection collar.
1 Detach the front panel (page 9).
2 Engage the release keys together
with the protection collar.
3 Pull out the release keys to remove
the protection collar.
2 Remove the unit.
1Insert both release keys together
until they click.
2Pull the release keys to unseat the
unit.
3Slide the unit out of the mounting.
Orient the release
key correctly.
Face the hook
inwards.
19
01US02CD-U.fm masterpage:Right
CDX-R3300
3-261-845-11 (1)
Specifications
CD Player section
Signal-to-noise ratio 120 dB
Frequency response 10 – 20,000 Hz
Wow and flutter Below measurable limit
Tuner section
FM
Tuning range 87.5 – 107.9 MHz
Antenna terminal External antenna connector
Intermediate frequency 10.7 MHz /450 kHz
Usable sensitivity 9 dBf
Selectivity 75 dB at 400 kHz
Signal-to-noise ratio 67 dB (stereo),
69 dB (mono)
Harmonic distortion at 1 kHz
0.5 % (stereo),
0.3 % (mono)
Separation 35 dB at 1 kHz
Frequency response 30 – 15,000 Hz
AM
Tuning range 530 – 1,710 kHz
Antenna terminal External antenna connector
Intermediate frequency 10.7 MHz/450 kHz
Sensitivity 30 µV
Power amplifier section
Outputs Speaker outputs
(sure seal connectors)
Speaker impedance 4 – 8 ohms
Maximum power output 52 W × 4 (at 4 ohms)
General
Outputs Audio outputs terminal
(rear/sub switchable)
Power antenna relay control
terminal
Power amplifier control
terminal
Input Antenna input terminal
Tone controls Low:
±10 dB at 60 Hz (XPLOD)
Mid:
±10 dB at 1 kHz (XPLOD)
High:
±10 dB at 10 kHz (XPLOD)
Power requirements 12 V DC car battery
(negative ground)
Dimensions Approx. 178 × 50 × 179 mm
(7
1
/8 × 2 × 7
1
/8 in) (w/h/d)
Mounting dimensions Approx. 182 × 53 × 161 mm
(7
1
/4 × 2
1
/8 × 6
3
/8 in)
(w/h/d)
Mass Approx. 1.2 kg
(2 lb 10 oz)
Supplied accessories Parts for installation and
connections (1 set)
Front panel case (1)
Optional accessory Card remote commander
RM-X114
Design and specifications are subject to change
without notice.
POWER OUTPUT AND TOTAL HARMONIC DISTORTION
23.2 watts per channel minimum continuous average power into 4 ohms,
4 channels driven from 20 Hz to 20 kHz with no more than 5% total
harmonic distortion.
AUDIO POWER SPECIFICATIONS
20
01US02CD-U.fm masterpage:Left
CDX-R3300
3-261-845-11 (1)
Troubleshooting
The following checklist will help you remedy
problems you may encounter with your unit.
Before going through the checklist below, check
the connection and operating procedures.
General
No sound.
Press the volume + button to adjust the
volume.
Cancel the ATT function.
Set the fader control to the center position for
a 2-speaker system.
The contents of the memory have been
erased.
The RESET button has been pressed.
t Store again into the memory.
The power lead or battery has been
disconnected.
The power connecting lead is not connected
properly.
No beep sound.
The beep sound is canceled (page 15).
An optional power amplifier is connected
and you are not using the built-in amplifier.
The display disappears from/does not
appear in the display window.
The display disappears if you press and hold
(OFF).
t Press and hold (OFF) again until the
display appears.
Remove the front panel and clean the
connectors. For details, see “Cleaning the
connectors” on page 17.
Stored stations and correct time are erased.
The fuse has blown.
Makes noise when the ignition key is in the
ON, ACC, or OFF position.
The leads are not matched correctly with the
car’s accessory power connector.
No power is being supplied to the unit.
Check the connection. If everything is in
order, check the fuse.
The car does not have an ACC position.
t Press (SOURCE) (or insert a disc) to turn
on the unit.
The power is continuously supplied to the
unit.
The car does not have an ACC position.
The power antenna does not extend.
The power antenna does not have a relay box.
CD playback
A disc cannot be loaded.
Another CD is already loaded.
The CD has been forcibly inserted upside
down or in the wrong way.
Playback does not begin.
Defective or dirty CD.
CD-R/CD-RW that is not finalized.
You tried to play back a CD-R/CD-RW not
designed for audio use.
Some CD-Rs/CD-RWs may not play due to
its recording equipment or the disc
condition.
MP3 files cannot be played back.
Recording was not performed according to
the ISO 9660 level 1 or level 2 format, or the
Joliet or Romeo in the expansion format.
The file extension “.MP3” is not added to the
file name.
Files are not stored in MP3 format.
MP3 files take longer to play back than
others.
The following discs take a longer time to start
playback.
a disc recorded with complicated tree
structure.
a disc recorded in Multi Session.
a disc to which data can be added.
A disc is automatically ejected.
The ambient temperature exceeds 50°C
(122°F).
The operation buttons do not function.
CD will not be ejected.
Press the RESET button.
The sound skips from vibration.
The unit is installed at an angle of more than
45°.
The unit is not installed in a sturdy part of
the car.
The sound skips.
Dirty or defective disc.
  • Page 1 1
  • Page 2 2
  • Page 3 3
  • Page 4 4
  • Page 5 5
  • Page 6 6
  • Page 7 7
  • Page 8 8
  • Page 9 9
  • Page 10 10
  • Page 11 11
  • Page 12 12
  • Page 13 13
  • Page 14 14
  • Page 15 15
  • Page 16 16
  • Page 17 17
  • Page 18 18
  • Page 19 19
  • Page 20 20
  • Page 21 21
  • Page 22 22
  • Page 23 23
  • Page 24 24
  • Page 25 25
  • Page 26 26
  • Page 27 27
  • Page 28 28
  • Page 29 29
  • Page 30 30
  • Page 31 31
  • Page 32 32
  • Page 33 33
  • Page 34 34
  • Page 35 35
  • Page 36 36
  • Page 37 37
  • Page 38 38
  • Page 39 39
  • Page 40 40
  • Page 41 41
  • Page 42 42
  • Page 43 43
  • Page 44 44

Sony CDX-R3300 Operating instructions

Category
Car media receivers
Type
Operating instructions

Ask a question and I''ll find the answer in the document

Finding information in a document is now easier with AI

in other languages