Samsung 460ex 550ex User manual

Category
Public displays
Type
User manual
SyncMaster 400EX(n), 460EX(n), 550EX(n)
LCD Display
User Manual
The color and the appearance may differ depending on the
product, and the specifications are subject to change
without prior notice to improve the performance.
Safety Instructions
Notational
Note
These
safety instructions must be followed to ensure your safety and prevent property dam-
age.
Make sure to read the instructions carefully and use the product in the correct manner.
Warning / Caution
Failure to follow directions noted by this symbol could result in bodily
harm or damage to the equipment.
Note
Prohibited
Important to read and under-
stand at all times
Do not disassemble
Disconnect the plug from the
outlet
Do not touch
Ground to prevent an electric
shock
Power
When not used for extended period of time, set your computer to DPM.
If using a screen saver, set it to active screen mode.
The
images here are for reference only, and are not applicable in all cases
(or countries).
Shortcut to Anti-Afterimage Instructions
Do not use a damaged power cord or plug or a damaged or
loose power outlet.
Otherwise, this may result in electric shock or fire.
Do not touch the power plug with wet hands when removing or
plugging the plug into the outlet.
Otherwise, this may result in electric shock.
Make sure to connect the power cord to a grounded power out-
let.
Otherwise, it may result in electric shock or personal injury.
1
Ensure that the power plug is plugged into the power outlet
firmly and correctly.
Otherwise, this may result in fire.
Do not forcefully bend or pull the power plug and do not place
any heavy material on it.
Otherwise, this may result in fire.
Do not connect multiple appliances to the same power outlet.
Otherwise, this may cause fire due to overheating.
Do not disconnect the power cord while using the product.
Otherwise,
this may result in damage to the product due to
electric shock.
To disconnect the apparatus from the mains, the plug must be
pulled
out from the mains socket, therefore the mains plug shall
be readily operable.
Otherwise, this may cause electric shock or fire.
Use only the power cord provided by our company. Do not use
the provided power cord of another product.
Otherwise, this may result in fire or electric shock.
Installation
Be sure to contact an authorized Service Center when installing your
monitor
in a location with heavy dust, high or low temperatures, high hu-
midity, and exposed to chemical substances and where it operates for 24
hours such as at airports, train stations etc.
Failure to do so may cause serious damage to your monitor.
Ensure that at least two persons lift and move the product.
Otherwise,
it may be dropped and cause personal injury, and/
or damage the product.
When installing the product in a cabinet or rack, make sure that
the front end of the bottom of the product does not project out.
Otherwise, it may fall or cause personal injury.
Use a cabinet or rack of a size appropriate to the product.
DO NOT PLACE CANDLES, MOSQUITO REPELLANT, CIG-
ARETTES AND ANY HEATING APPLIANCES NEAR THE
PRODUCT.
Otherwise, this may result in fire.
Safety Instructions
2
Keep heating appliances as far away from the power cord or the
product as possible.
Otherwise, this may result in electric shock or fire.
Do not install it in a badly ventilated location such as a bookcase
or closet.
Otherwise,
this may result in fire due to an increase in the in-
ternal temperature.
When putting the product down, make sure to put it down softly.
Otherwise, this may result in damage to the screen display.
Do not place the front of the product on the floor.
Otherwise, this may result in damage to the screen display.
Ensure that an authorized installation company installs the wall
mount.
Otherwise, it may fall and cause personal injury.
Make sure to install the specified wall mount.
Install your product in a well ventilated location. Ensure that
there is a clearance of more than 4 inches (10 cm) from the wall.
Otherwise,
it may result in fire due to an increase in the internal
temperature.
Ensure that the packaging vinyl is kept away from children.
Otherwise,
it may result in serious harm (suffocation) if children
play with it.
If the height of your monitor is adjustable, do not place any ob-
ject or part of your body on the stand when lowering it.
This
may cause damage to the product or the person carrying
it.
Clean
When cleaning the monitor case or the surface of the TFT-LCD screen,
wipe with a slightly moistened, soft cloth.
Do not spray cleaner directly onto the surface of the product.
Otherwise,
this may result in the discoloration and distortion of
the structure and the screen surface may peel off.
When cleaning the power plug pins or dusting the power outlet,
clean it with a dry cloth.
Otherwise, it may result in fire.
Safety Instructions
3
When cleaning the product, make sure to disconnect the power
cord.
Otherwise, it may result in electric shock or fire.
When cleaning the product, disconnect the power cord and
clean it with a soft, dry cloth.
(Do not use chemicals such as wax, benzene, alcohol, thinner,
mosquito repellant, lubricant, or cleaner.) These may change
the appearance of the product surface and peel off the indica-
tion labels on the product.
Since the product housing is easily scratched, make sure to use
the specified cloth only.
When cleaning the product, do not spray water directly onto the
main body of the product.
Ensure that water does not enter the product and that it is not
wet.
Otherwise, this may result in electric shock, fire or a malfunc-
tion.
Others
The product is a high voltage product. Do not disassemble, re-
pair or modify the product yourself.
Otherwise, this may result in electric shock or fire. If the product
needs to be repaired, contact a Service Center.
If there is a strange smell or a strange sound or smoke is coming
from the product, disconnect the power plug immediately and con-
tact a Service Center.
Otherwise, this may result in electric shock or fire.
Do not place this product in a location exposed to moisture, dust,
smoke, water, or in a car.
Otherwise, this may result in electric shock or fire.
When you drop the product or the case is broken, turn the power
off and disconnect the power cord. Contact a
Service Center.
Otherwise, this may result in electric shock or fire.
If thunder or lightning is occurring, do not touch the power cord
or antenna cable.
Otherwise, this may result in electric shock or fire.
Safety Instructions
4
Do not try to move the monitor by pulling only the wire or the
signal cable.
Otherwise,
it may fall and result in electric shock, damage to
the product or fire due to damage to the cable.
Do not lift or move the product back and forwards or right and
left while only holding the power cord or signal cables.
Otherwise,
it may fall and result in electric shock, damage to
the product or fire due to damage to the cable.
Make sure that the ventilating opening is not blocked by a table
or curtain.
Otherwise,
it may result in fire due to an increase in the internal
temperature.
Do not place any containers containing water, vases, flower-
pots, medicines as well as any metal on the product.
If
water or a foreign material enters the product, disconnect the
power cord and contact a Service Center.
This may result in a product malfunction, electric shock, or fire.
Do not use or keep combustible spray or flammable material
near the product.
Otherwise, this may result in an explosion or fire.
Do not insert any metal, such as chopsticks, coins, pins and
steel,
or flammable objects, such as matches or paper, inside the
product (through the ventilating openings, input and output termi-
nals, etc).
If water or foreign material enters the product, disconnect the
power cord and contact a Service Center.
Otherwise, this may result in electric shock or fire.
When using a fixed screen for a long time, an afterimage or stain
may occur.
If
you are not using your product for a long period of time, put
it into sleep mode or use a moving screen saver.
Set a resolution and frequency appropriate to the product.
Otherwise, your eyesight may be damaged.
When using headphones or earphones, do not turn the volume
too high.
Having the sound too loud may damage your hearing.
To avoid eyestrain, do not sit too close to the product.
Safety Instructions
5
Take a rest for at least five (5) minutes after using the monitor
for one (1) hour.
This reduces eye fatigue.
Do not install it in an unstable location such as an unstable rack
or uneven surface or a location exposed to vibrations.
Otherwise,
it may fall and cause personal injury and/or damage
the product.
If you use the product in a location exposed to vibrations, it may
damage the product and result in fire.
When moving the product, turn the power off and disconnect
the
power plug, antenna cable, and all the cables connected to the
product.
Otherwise, it may result in electric shock or fire.
Ensure that children do not hang onto the product or climb up
onto the product.
The product may fall and cause personal injury or death.
If you do not use the product for a long period of time, disconnect
the power cord from the power outlet.
Otherwise, this may result in overheating or fire due to dust,
and may result in fire due to electric shock or leakage.
Do not place any heavy items or toys or confectionery, such as
cookies etc. that may attract the attention of children and to the
product.
Your children may hang onto the product causing it to fall and
this may result in personal injury or death.
Be careful that children do not place the battery in their mouths
when removed from the remote control. Place the battery in a lo-
cation that children or infants cannot reach.
If children have had the battery in their mouths, consult your
doctor immediately.
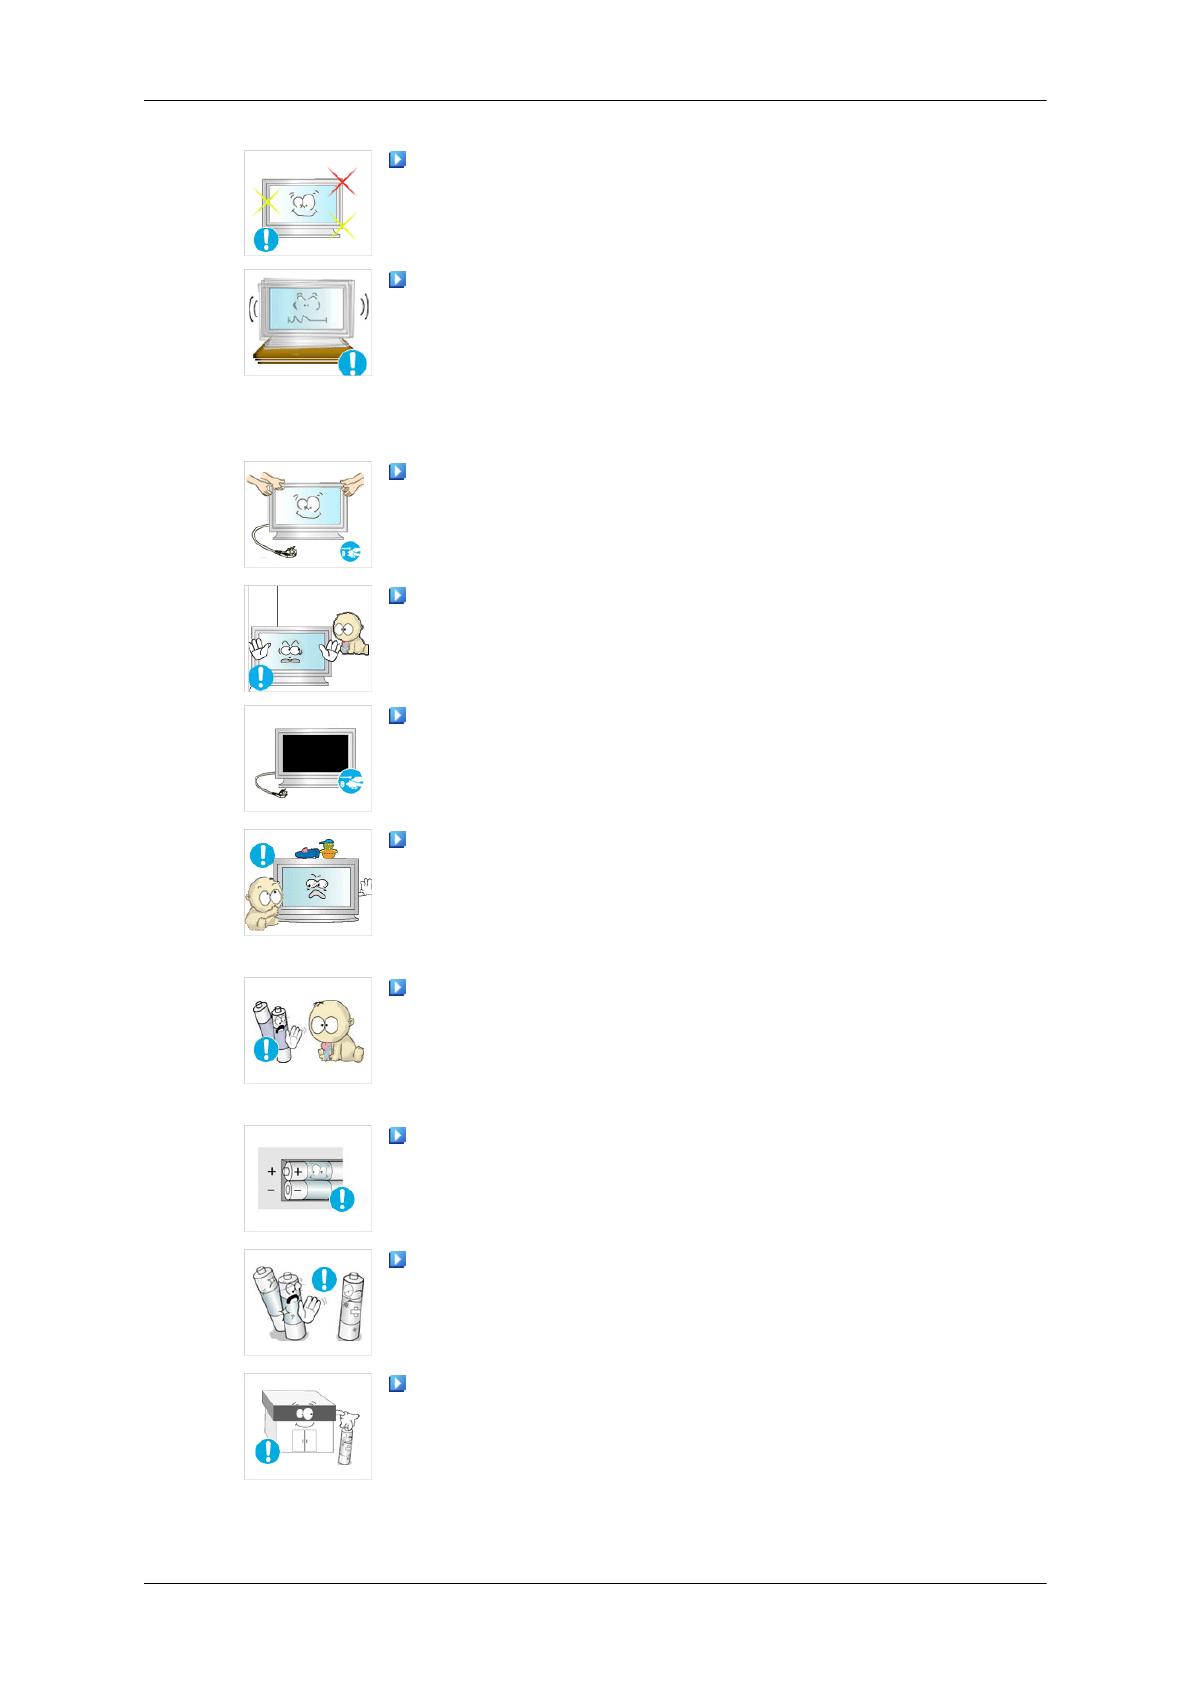
When replacing the battery, insert it with the right polarity (+, -).
Otherwise, the battery may become damaged or it may cause
fire, personal injury or damage due to leakage of the internal
liquid.
Use only the specified standardized batteries, and do not use a
new battery and a used battery at the same time.
Otherwise,
the batteries may be damaged or cause fire, per-
sonal injury or damage due to a leakage of the internal liquid.
The batteries (and rechargeable batteries) are not ordinary re-
fuse
and must be returned for recycling purposes. The customer
is responsible for returning the used or rechargeable batteries for
recycling.
Safety Instructions
6
The
customer can return used or rechargeable batteries to a
nearby public recycling center or to a store selling the same
type of the battery or rechargeable battery.
Do not place the product in a location exposed to direct sunlight
or near any heat such as a fire or heater.
This
may reduce the lifetime of the product, and may result in
fire.
Do not drop any objects onto the product or cause any impact
to the product.
Otherwise, this may result in electric shock or fire.
Do not use a humidifier near the product.
Otherwise, this may result in electric shock or fire.
When there is a gas leak, do not touch the product or the power
plug; ventilate immediately.
If a spark occurs, it may cause an explosion or fire.
If the product has been turned on for a long time, the display
panel becomes hot. Do not touch it.
Keep the small accessories in a location out of the reach of
children.
Be careful when adjusting the angle of the product or the height
of the stand.
This
may result in personal injury as your hand or fingers may
become caught.
Also, if you tilt the product too far, it may fall and cause personal
injury.
Do not install the product in a location low enough for children
to reach.
Otherwise, it may fall and result in personal injury.
Since the front part of the product is heavy, install the product
on a level and stable surface.
Do not put any heavy objects on the product.
This
may result in personal injury and/or damage to the prod-
uct.
Safety Instructions
7
Introduction
Package Contents
Note
Please make sure the following items are included with your LCD Display.
If any items are missing, contact your dealer.
Contact a local dealer
to buy optional items.
Note
This stand is not for the Floor Standing Type.
Checking the Contents of the Package
Remove the lock from the package box, as shown in the figure above.
Lift up the package box by
holding the grooves on
both sides of the package
box.
Check the contents of the
package.
Remove the Styrofoam
and vinyl cover.
Note
After unpacking the package, make sure to check the contents of the package.
Make sure to keep the package box for transporting the product in the future.
After unpacking, you may use the lower part of the package box as a temporary stand for
product test or operation check.
8
Unpacking
LCD Display
Manuals
Quick Setup Guide Warranty Card
(Not available in all loca-
tions)
User's Guide
MagicInfo Software CD,
MagicInfo Manual CD
(Applicable to the EXn
model only)
Cables
Power Cord D-Sub Cable
Others
Remote Control
(BP59-00138A)
Batteries (AAA X 2)
(Not available in all loca-
tions)
HOLDER-WIRE 2EA
(BN61-05373A)
Introduction
9
Sold separately
LAN Cable USB Cable
(Applicable to the EXn
model only)
RGB to BNC Cable
RGB to Component Cable
RGB to AV Cable
Network Box
(Applicable
to the EX mod-
el only)
Wall Mount KIT
Your LCD Display
Front
SOURCE button
Switches
from PC mode to Video mode. Selects the input source that an
external device is connected to.
[PC] [AV] [Component] [HDMI] [MagicInfo]
Note
For an EX model,
MagicInfo can only be enabled when a network box is connected.
The HDMI port
and network box cannot be connected at the same time.
Introduction
10
(Power) button
Use this button for turning the LCD Display on and off.
Brightness Sensor
Automatically detects the surrounding brightness.
Power indicator
Shows PowerSaver mode by blinking green
Note
See PowerSaver described in the manual for further information regarding
power saving functions. For energy conservation, turn your LCD Display
OFF when it is not needed or when leaving it unattended for long periods.
Remote Control Sensor
Aim the remote control towards this spot on the LCD Display.
Rear
Note
For
detailed information concerning cable connections, refer to Connecting Cables under
Setup. The LCD Display's configuration at the back may vary slightly depending on the model.
Introduction
11
POWER S/W ON [
] / OFF
Switches the LCD Display On/Off.
POWER
The power cord plugs into the LCD Display
and the wall outlet.
Note
Applicable to the EXn
model only.
CMOS CLEAR
Resets MagicInfo.
USB 1 / 2 / 3 (USB Connection Terminal )
Keyboard / Mouse, Mass Storage Device
Compatible.
LAN (LAN Connection Terminal)
Connects to a LAN cable to allow Internet or
network access in MagicInfo mode.
RGB OUT
MagicInfo video output port
RS232C OUT / IN (RS232C Serial
PORT)
MDC(Multiple Display Control) Program Port
RJ 45 MDC (MDC PORT)
MDC(Multiple Display Control) Program Port
Introduction
12
HDMI IN
Connect the HDMI terminal at the back of
your LCD Display to the HDMI terminal of
your digital output device using a HDMI
cable.
Up to HDMI 1.0 can be supported.
DVI OUT(LOOPOUT)
Connect a monitor to another monitor
through a DVI, DVI to HDMI cable.
Connect the [DVI OUT(LOOPOUT)] port
on the monitor to the [HDMI IN] port on
the other monitor using the DVI to HDMI
cable.
HDMI and network signals sent via the
[DVI OUT(LOOPOUT)] port are dis-
played on the second display which has
the DVI IN port.
Note
A maximum of 6 monitors can be connected
to DVI-Loopout. However, up to 10 monitors
can be connected in Full HD mode
depending on the type of cable or signal
equipment connected.
RGB / COMPONENT / AV IN
Connect the [RGB/COMPONENT/AV IN]
port of the product to the RGB port of the
PC using the D-SUB cable.
Connect the [RGB / COMPONENT / AV
IN] port on the monitor to the Component
port on the external device using the RGB
to Component cable.
Connect the [RGB / COMPONENT / AV
IN] port on the monitor to the BNC port on
the PC using the RGB to BNC cable.
Connect the [RGB / COMPONENT / AV
IN] port on the monitor to the AV port on
the external device using the RGB to AV
cable.
Introduction
13
AUDIO IN
Connect the [AUDIO IN] port on the monitor
to the audio output port on the PC or on the
external device using an audio cable.
AUDIO OUT
Connect a headphone or an External speak-
er.
Note
The
[AUDIO OUT] port is only supported for
460EX(n) and 550EX(n) models.
Kensington Lock
A Kensington Lock is an anti-theft device that
enables users to lock the product so that they
can safely use it in public locations. Since the
shape and usage of the locking device may
differ depending on the model and the man-
ufacturer, refer to the User Manual supplied
with the locking device for more information.
Note
You
must purchase the Kensington Lock
separately.
To lock the product, follow these
steps:
1. Wrap the Kensington lock cable around
a large, stationary object such as a desk
or chair.
2. Slide the end of the cable with the lock
attached through the looped end of the
Kensington lock cable.
3. Insert the locking device into the Ken-
sington slot on the Monitor (
).
4.
Lock the lock ( ).
Note
These
are general instructions. For exact
instructions, see the User Manual sup-
plied with the locking device.
Introduction
14
You
can purchase the locking device
from an electronics store, an online shop,
or our service center.
Note
See Connecting Cables
for further information regarding cable connections.
Remote Control
Note
The
performance of the remote control may be affected by a TV or other electronic device
operating near the LCD Display , causing a malfunction due to interference with the frequen-
cy.
POWER
OFF
Number Buttons
DEL / GUIDE button
+ VOL -
SOURCE
D.MENU
TOOLS
Up-Down Left-Right buttons
INFO
COLOR BUTTONS
TTX/MIX
MTS/DUAL
ENTER/PRE-CH
MUTE
CH/P
TV
MENU
RETURN
EXIT
MagicInfo
1. POWER
Turns the product On.
2.
OFF
Turns the product Off.
3. Number Buttons Used
to enter the password during the OSD adjustment or
to use MagicInfo.
Press to change the channel.
Introduction
15
4. DEL / GUIDE but-
ton
The "-" button is used to select Digital channels.
Electronic Program Guide (EPG) display.
- This function does not work for this LCD Display.
5. + VOL -
Adjusts the audio volume.
6.
SOURCE
Selects a connected external input source or MagicInfo
mode.
Press the button to change the input signal SOURCE.
Changing the SOURCE is only allowed for external devices
that are connected to the LCD Display at the time.
7.
D.MENU DTV menu display
- This function does not work for this LCD Display.
8. TOOLS
Use to quickly select frequently used functions.
- This function does not work for this LCD Display.
9. Up-Down Left-Right but-
tons
Moves from one menu item to another horizontally, vertically
or adjusts selected menu values.
10.
INFO
Current
picture information is displayed on the upper left
corner of the screen.
11. COLOR BUTTONS Press to add or delete channels and to store channels to the
favorite channel list in the “Channel List” menu.
- This function does not work for this LCD Display.
12.
TTX/MIX
TV
channels provide written information services via tele-
text.
- Teletext Buttons
- This function does not work for this LCD Display.
13. MTS/DUAL
MTS-
You can select MTS (Multichannel Television Stereo) mode.
Audio Type MTS/S_Mode Default
FM Stereo Mono Mono Manual
Change
Stereo Mono Stereo
SAP Mono SAP Mono
DUAL-
STEREO/MONO, DUAL l / DUAL ll and MONO/NICAM
MONO/NICAM STEREO can be operated depending on the
broadcasting type by using the DUAL button on the remote
control while watching TV.
Introduction
16
- This function does not work for this LCD Display.
14. ENTER/PRE-CH
This
button is used to return to the immediately previous
channel.
- This function does not work for this LCD Display.
15.
MUTE
Pauses
(mutes) the audio output temporarily. This is dis-
played on the lower left corner of the screen. The audio
comes back on if MUTE or - VOL + is pressed in the Mute
mode.
16.
CH/P In TV mode, selects TV channels.
- This function does not work for this LCD Display.
17. TV
Selects the TV mode directly.
- This function does not work for this LCD Display.
18. MENU Opens the on-screen menu and exits from the menu or
closes the adjustment menu.
19.
RETURN
Returns to the previous menu.
20.
EXIT
Exits from the menu screen.
21. MagicInfo MagicInfo Quick Launch Button.
Note
This
button is disabled for products that do not support
MagicInfo.
Mechanical Layout(400EX(n))
Mechanical Layout
Introduction
17
LCD Display Head
Installation VESA Bracket
When installing VESA, make sure to comply with the international VESA standards.
Purchasing VESA Bracket and Installation Information : Please contact your nearest
SAMSUNG Distributor to place an order. After your order is placed, installation profes-
sionals will visit you and install the bracket.
At least 2 persons are needed in order to move the LCD Display.
SAMSUNG is not responsible for any product damage or any injury caused by installation
at customer's discretion.
Dimensions
Notice
For
securing the bracket on a wall, use only machine screws of 6 mm diameter and 8 to 12
mm length.
Wall Bracket Installation
Contact a technician for installing the wall bracket.
Introduction
18
SAMSUNG
Electronics is not responsible for any damages to the product or harm to
customers when the installation is done by the customer.
This product is for installing on cement walls. The product may not stay in place when
installed on plaster or wood.
Components
Only use the components and accessories shipped with the product.
Wall Bracket(1) Hinge(Left 1, Right
1)
Plastic
Hanger
(4)
Screw
(A)(11)
Screw
(B)(4)
Anchor
(11)
Wall Bracket Assembly
Note
There are two hinges(left and right). Use the correct one.
1.
Insert and tighten the Captive Screw in the direction of the arrow.
When done, mount the wall bracket on the wall.
A - Captive Screw
B - Wall Bracket
C - Hinge (Left)
D - Hinge (Right)
2. Before
drilling into the wall, check if the length between the two locking holes at the back
of the product is correct.
Introduction
19
  • Page 1 1
  • Page 2 2
  • Page 3 3
  • Page 4 4
  • Page 5 5
  • Page 6 6
  • Page 7 7
  • Page 8 8
  • Page 9 9
  • Page 10 10
  • Page 11 11
  • Page 12 12
  • Page 13 13
  • Page 14 14
  • Page 15 15
  • Page 16 16
  • Page 17 17
  • Page 18 18
  • Page 19 19
  • Page 20 20
  • Page 21 21
  • Page 22 22
  • Page 23 23
  • Page 24 24
  • Page 25 25
  • Page 26 26
  • Page 27 27
  • Page 28 28
  • Page 29 29
  • Page 30 30
  • Page 31 31
  • Page 32 32
  • Page 33 33
  • Page 34 34
  • Page 35 35
  • Page 36 36
  • Page 37 37
  • Page 38 38
  • Page 39 39
  • Page 40 40
  • Page 41 41
  • Page 42 42
  • Page 43 43
  • Page 44 44
  • Page 45 45
  • Page 46 46
  • Page 47 47
  • Page 48 48
  • Page 49 49
  • Page 50 50
  • Page 51 51
  • Page 52 52
  • Page 53 53
  • Page 54 54
  • Page 55 55
  • Page 56 56
  • Page 57 57
  • Page 58 58
  • Page 59 59
  • Page 60 60
  • Page 61 61
  • Page 62 62
  • Page 63 63
  • Page 64 64
  • Page 65 65
  • Page 66 66
  • Page 67 67
  • Page 68 68
  • Page 69 69
  • Page 70 70
  • Page 71 71
  • Page 72 72
  • Page 73 73
  • Page 74 74
  • Page 75 75
  • Page 76 76
  • Page 77 77
  • Page 78 78
  • Page 79 79
  • Page 80 80
  • Page 81 81
  • Page 82 82
  • Page 83 83
  • Page 84 84
  • Page 85 85
  • Page 86 86
  • Page 87 87
  • Page 88 88
  • Page 89 89
  • Page 90 90
  • Page 91 91
  • Page 92 92
  • Page 93 93
  • Page 94 94
  • Page 95 95
  • Page 96 96
  • Page 97 97
  • Page 98 98
  • Page 99 99
  • Page 100 100
  • Page 101 101
  • Page 102 102
  • Page 103 103
  • Page 104 104
  • Page 105 105
  • Page 106 106
  • Page 107 107
  • Page 108 108
  • Page 109 109
  • Page 110 110
  • Page 111 111
  • Page 112 112
  • Page 113 113
  • Page 114 114
  • Page 115 115
  • Page 116 116
  • Page 117 117
  • Page 118 118
  • Page 119 119
  • Page 120 120
  • Page 121 121
  • Page 122 122
  • Page 123 123
  • Page 124 124
  • Page 125 125
  • Page 126 126
  • Page 127 127
  • Page 128 128
  • Page 129 129
  • Page 130 130
  • Page 131 131
  • Page 132 132
  • Page 133 133
  • Page 134 134
  • Page 135 135
  • Page 136 136
  • Page 137 137
  • Page 138 138
  • Page 139 139
  • Page 140 140
  • Page 141 141
  • Page 142 142
  • Page 143 143
  • Page 144 144
  • Page 145 145
  • Page 146 146
  • Page 147 147
  • Page 148 148
  • Page 149 149
  • Page 150 150
  • Page 151 151
  • Page 152 152
  • Page 153 153
  • Page 154 154
  • Page 155 155
  • Page 156 156
  • Page 157 157
  • Page 158 158
  • Page 159 159

Samsung 460ex 550ex User manual

Category
Public displays
Type
User manual

Ask a question and I''ll find the answer in the document

Finding information in a document is now easier with AI