ASSEMBLY & INSTALLATION (CONT.)
Curtain & Weather Insulation Board Installa-
tion
NOTE: The Weather Installation Board adds an extra layer of
insulation to keep air from passing through the sides of the win-
dow air conditioner.
1. Using a sharp blade or scissors, slowly cut the
Weather Insulation Board to a size that will fit inside of
the side curtain rails and completely cover the curtain.
2. Once properly sized, remove the backing to expose
the adhesive tape.
3. Place the Weather Insulation Board over the left curta-
in and firmly press and hold for 5 seconds.
4. Place the Weather Insulation Board over the right curt-
ain and firmly press and hold for 5 seconds.(FIG. 1)
5. Insert the side curtains into the upper and lower rails of
the air conditioner. Fasten the curtains to the unit with-
short screws as shown below:
6. Slide the free end of the curtain into the side panel of
the air conditioner. Do this for each side. The flange
for securing the curtain into the window sill will be fac-
ing the room side when installed.
Placing the Unit Inside a Normal Window
2. Once the air conditioner is placed, extend the left and
right curtains to the width of the window.
3. Place the curtain lock between the curtain extensions
and the window sill, drive long screws through the lock
and into the sill as shown below:
4. Secure the left and right flanges on end bottom side of
the curtain with long screws.
5. Drive long screws through upper frame holes into win-
dow sash.
6. Attach the sash lock to the place between the upper
and lower sashes and secure it with long screws. Each
side uses 2 long screws.
7. Cut the foam seal to the window width and insert the
sash seal between the glass and the window to pre-
vent air and insect from getting into the room.
8. For added insulation, the insert strip can be inserted
between the air conditioner and window sill. This is
optional.
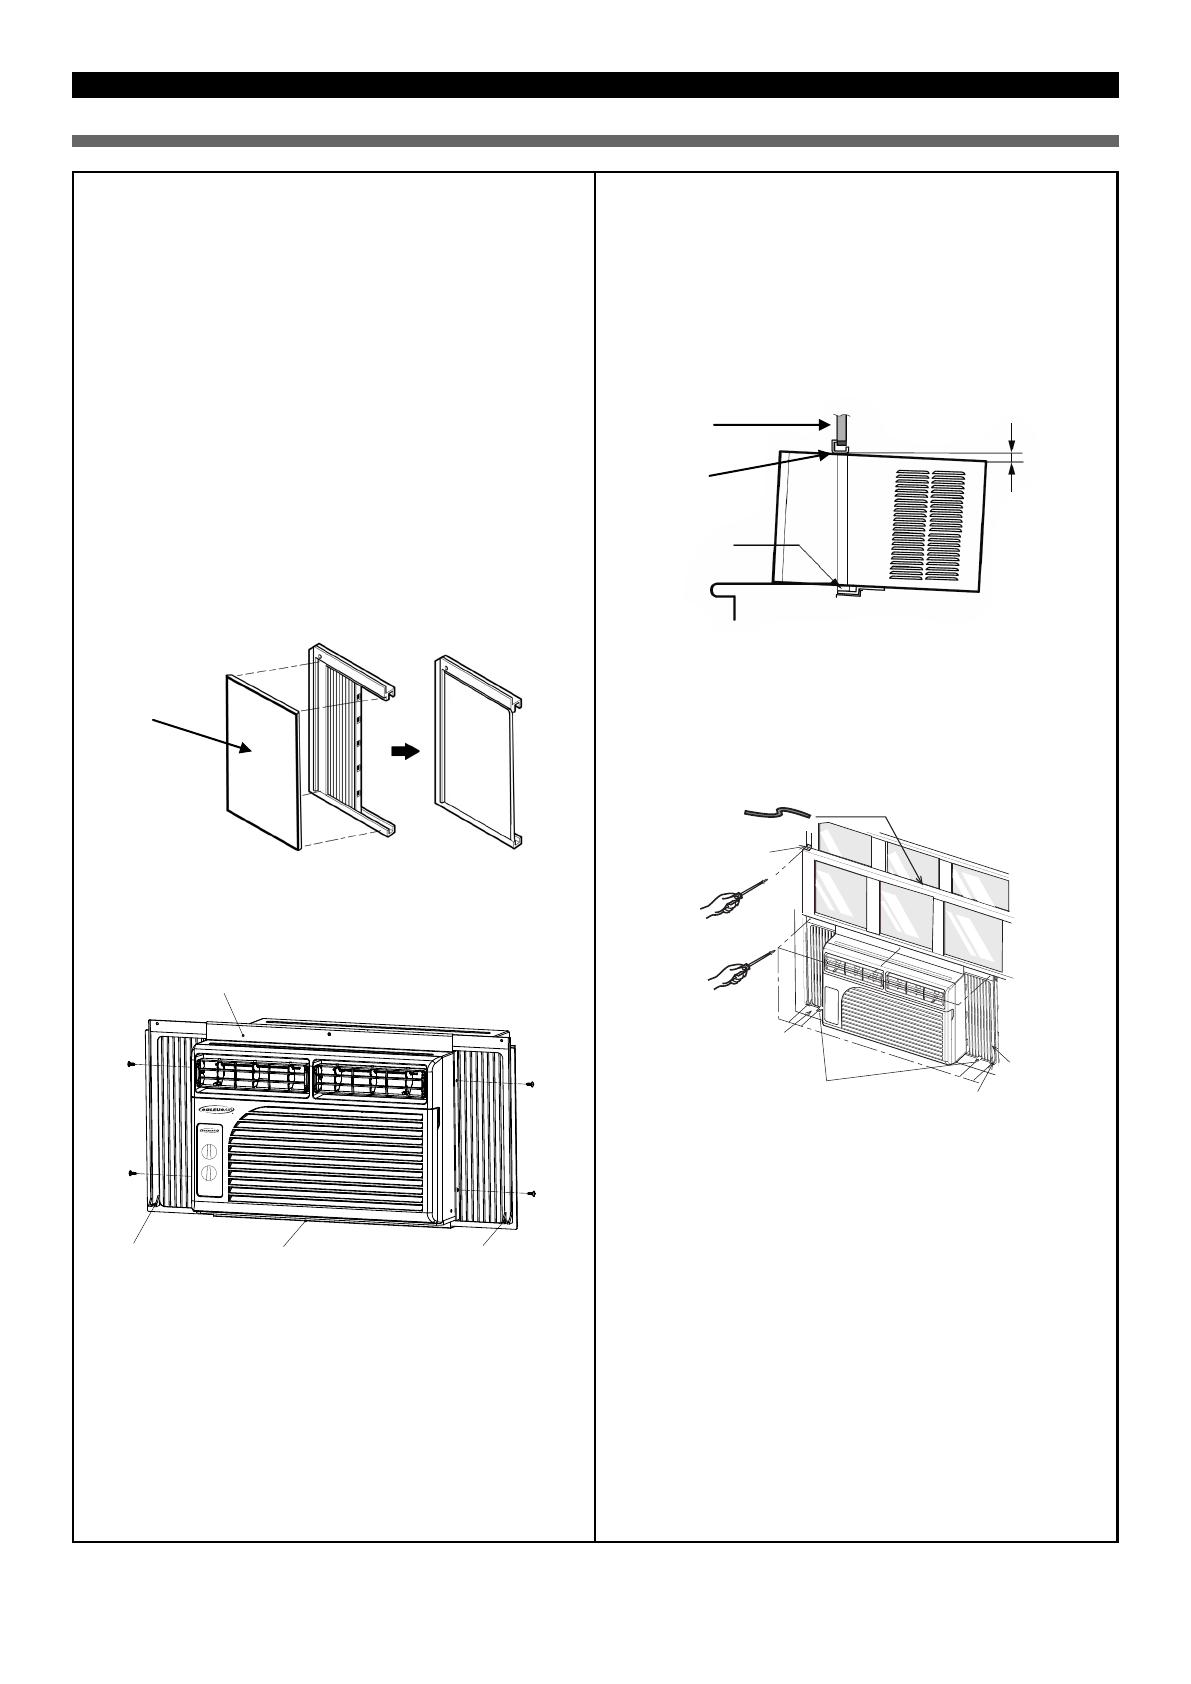
FIG.1
Weather Insulation
Board
1. Set the unit in the window so that is centered. Place
the unit so that from edge of the bottom rail is against
the back edge of the sill.
2. Bring the window down so that the front edge of the
top rail is in front of the window. Be sure the unit is
tilting slightly to the outside.
1/4”
Bottom Rail
Top Rail
Window
Frame


