Installation Guide
3/4″ High-Flow Deck/Rim Mount Bath Valve
M product numbers are for Mexico (i.e. K-12345M)
Los números de productos seguidos de
M corresponden a México (Ej.
K-12345M)
Français, page “Français-1”
Español, página “Español-1”
K-301
113969-2-AC

Tools and Materials
Thank You For Choosing Kohler Company
Thank you for choosing Kohler Company. Your Kohler Company
product reflects the true passion for design, craftsmanship, artistry, and
innovation Kohler Company stands for. We are confident its
dependability and beauty will surpass your highest expectations,
satisfying you for years to come.
All the information in this guide is based upon the latest product
information available at the time of publication. At Kohler Company,
we strive to fulfill our mission of improving the level of gracious living
for each person who is touched by our products and services. We
reserve the right to make changes in product characteristics, packaging,
or availability at any time without notice.
Please take a few minutes to review this guide. If you encounter any
installation or performance problems, please call 1-800-4KOHLER
(1-800-456-4537) from within the USA and Canada, or 001-877-680-1310
from within Mexico.
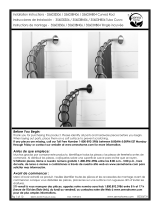
Before You Begin
Observe all local plumbing and building codes.
Shut off the water supply.
Assorted
Screwdrivers
Adjustable
Wrench
Pipe
Wrench
Strap
Wrench
Hacksaw or
Tubing Cutter
Propane
Torch
Solder
Thread
Sealant
Plumbers
Putty
Plus:
• Wood Screws
• Rags
113969-2-AC 2 Kohler Co.

Before You Begin (cont.)
Instructions are given for installations with 8″ (20.3 cm) centers.
For wider installations, adjust all roughing-in dimensions and
copper tube lengths accordingly. If the spout is to be installed
more than 24″ (61 cm) from the valves, Kohler recommends
installing a Sioux Chief 652-AD water hammer arrestor designed
for this type of installation. Install the water hammer arrestor
close to the outlet ports of the valves. For more information
contact Sioux Chief at www.siouxchief.com.
Products purchased separately may change valve placement and
alignment.
These instructions cover two methods of installation: installation
on finished deck or rim, and installation on rough (unfinished)
deck. Follow the sections and directions that pertain to your
installation.
Provide an access panel to the valves for servicing.
Installer-supplied copper tubing is to be: 5/8″ OD (1/2″ Nom.);
and 7/8″ OD (3/4″ Nom.) for inlets.
Plaster guard diameters are approximately 1-5/8″ (4.1 cm) for the
valve, and 7/8″ (2.2 cm) for the spout.
The finished deck material must fit closely to the diameters of the
plastic guards.
The spout plaster guard diameter is 7/8″ (2.2 cm) for the spout.
Leave the protective sleeve on the spout supply tube until spout
installation. This is an O-ring sealing surface which may be
damaged when unprotected.
Kohler Co. reserves the right to make revisions in the design of
faucets without notice, as specified in the Price Book.
Kohler Co. 3 113969-2-AC

1. Prepare the Site
X=the distance from the centerline of the spout inlet base to the
front of the spout base plus 1/2″ (2.5 cm).
Y=the distance between the valve centerlines varies. Check the
handle and spout installation instructions for exact dimensions.
Install or relocate the water supplies as needed.
Protect the surfaces of the bath/deck during installation.
Ensure that holes drilled into the deck are not oversized. The
spout and valves require adequate base material strength and
maximum contact area with the deck.
NOTE: Reinforcing material may be required if the deck or rim is
thin. Install 1/2″ exterior grade plywood before proceeding.
NOTE: For installations to be covered with tile, the tile thickness
must not exceed 1-1/4″ (3.2 cm).
For installations with 8″ (20.3 cm) centers using copper tubing
(1/2″ nominal, 5/8″ OD), cut two 2-7/8″ (7.3 cm) pieces and one
2-3/8″ (6 cm) piece of tubing.
1-1/4" (3.2 cm) Max.
Tile Thickness
X
Y
X
7/8" D.
5/8" O.D. Tubing (1/2" Nom.)
1-5/16" D.
Y
X
7/8" D.
1-5/16" D.
Finished Deck And Rim Mount Roughing-In
Rough Deck Plus Finished Deck (Tile) Roughing-In
1/8" (3 mm) Min.
2-1/8" (5.4 cm) Max.
Rim Thickness
7/8" I.D.
(3/4" Nom.)
1/2" (1.3 cm) Min.
2-1/8" (5.4 cm) Max.
Deck Thickness
1-13/16"
(4.6 cm)
4-5/8"
(11.7 cm)
5-5/8"
(14.3 cm)
2-1/16"
(5.2 cm)
1/2" (1.3cm) Min.
2-1/8" (5.4 cm) Max.
Rough Deck
Thickness
5/8" O.D. Tubing
(1/2" Nom.)
7/8" I.D.
(3/4" Nom.)
113969-2-AC 4 Kohler Co.

Prepare the Site (cont.)
The diameter of the spout hole should be 1-1/8″ (2.9 cm)
maximum.
The diameter of the valve holes should be 1-1/2″ (3.8 cm)
maximum.
Kohler Co. 5 113969-2-AC

2. Install the Spout Supply Tube
NOTE: Leave the protective sleeve on the spout supply tube until
the spout installation.
Slide the brass washer from the bottom of the spout supply tube
over the threads until it reaches the spout supply shoulder.
Insert the spout supply tube through the mounting hole from the
top of the deck/bath rim.
The flat portion of the brass washer should face forward, and the
countersunk holes should face up. The spout supply tube will be
suspended by the brass washer.
Slide the plate (oriented with the tabs toward the deck) and
washer onto the spout supply tube from the bottom and thread
on the nut.
Tighten the nut.
Secure the plate to the rough deck with two wood screws.
Brass
Washer
Plate
Washer
Wood
Screw
Wood
Screw
Nut
Spout Supply Tube
Spout
Supply
Shoulder
113969-2-AC 6 Kohler Co.

3. Install the Valves
IMPORTANT! Do not solder the connections during this step.
Thread one mounting nut, flange side up, followed by one fiber
washer and one rubber washers onto each valve body.
Insert the 2-7/8″ (7.3 cm) long copper tubes between the valve
bodies and 1/2″ tee.
For a finished deck or bath rim installation only, insert the 2-3/8″
(6 cm) long copper tube into the top of the tee.
NOTE: Orient the valve body marked “COLD” so it is on the right
when facing the front of the faucet.
Insert the valve bodies through the mounting holes from the
bottom of the deck/rim.
Hold the tube in place.
Place a collar, flange side up, on each valve body and thread
them down to at least 1-13/16″ (4.6 cm) from the top of the valve
stem.
2-7/8" (7.3 cm)
Copper Tubes
1/2"
Tee
2-3/8" (6 cm) Copper
Tube (Finished Deck
or Bath Rim
Installation Only)
Rubber
Washer
Fiber
Washer
Mounting
Nut
Valve Body
1-13/16"
(4.6 cm)
Collar
Valve Stem
Kohler Co. 7 113969-2-AC

4. Installation on Finished Deck or Rim
NOTE: For installation on a rough (unfinished) deck, proceed to the
″Installation on Rough (Unfinished) Deck″ section.
Tighten the mounting nuts on each valve body from underneath
the deck/rim.
Solder the copper tubes to the valve bodies, tee and spout supply
tube.
Solder the hot and cold water tubes to the valve body inlets (not
shown). Make sure that the cold supply is on the right side.
Go to the ″Check Operation of Valves″ section.
Hot
Supply
Solder
Cold
Supply
Collar
Mounting
Nut
113969-2-AC 8 Kohler Co.

5. Installation on Rough Deck
When the tile or deck material is less than 1” (2.5 cm) thick:
Add the thickness of the tile/deck material to 2-1/16″ (5.2 cm) to
get the installation height for the valve bodies.
Deck Material+ 2-1/16″ (5.2 cm) =Installation Height
Note this dimension. You will need to use it again after
connecting the supply tube.
Adjust the threaded collar until the dimension from the top of the
valve stem to the top of the rough deck surface equals the
determined clearance.
When the tile or deck material is between 1” (2.5 cm) to 1–1/4” (3.2
cm) thick:
Thread the collar down onto each of the valve bodies until the
top of the valve stem is 3-1/16″ (7.8 cm) above the surface of the
rough deck.
3–1/6" (7.8 cm)
Valve Body
Clearance
Deck thickness
between 1" (2.5 cm)
and 1–1/4" (3.2 cm)
Threaded
Collar
Top of Valve Stem
Calculated
Valve Body
Clearance
Deck thickness less
than 1" (2.5 cm)
Rough Unfinished
Deck 2-1/8" (5.4 cm)
Max.
2-1/16"
(5.2 cm)
Kohler Co. 9 113969-2-AC

6. Install the Tubing - Rough Deck Installations
Measure the distance from the bottom of the spout supply tube to
the top of the tee.
Add 1″ (2.5 cm) to this measurement, and cut a piece of 1/2″
Nom. (5/8″ O.D.) copper tubing to fit into the supply tube and
tee port.
Back off the threaded collars as far as possible without removing
them.
Pivot the valve bodies enough to remove the tee and two pieces
of tubing.
NOTE: If the valve body holes are smaller than recommended, it
may be necessary to remove the entire valve body assembly.
Install the tubing into the tee.
Mate the copper tube from the tee with the spout supply tube.
Pivot the valve bodies onto the two pieces of copper tubing.
DO NOT solder at this time.
Tee
Measure
Distance
A
Spout Supply
Tube
Tee
Copper
Tube
Mounting
Nut
Rough
Deck
Sleeve
Spout Supply
Tube
Threaded
Collar
113969-2-AC 10 Kohler Co.

7. Complete Installation on Rough Deck
Reset the Valve Body Height
Adjust the threaded collars until the dimension from the top of
the sleeve to the top of the rough deck equals the clearance
requirement calculated earlier.
Solder the Connections
Tighten the mounting nuts on each valve body under the deck.
Solder the copper tubes to the valve bodies, tee and spout supply
tube.
Make sure that the cold supply is on the right side.
Solder the hot and cold water supply tubes to the valve body
inlets.
Top of
Sleeve
Tile
Thickness
Threaded
Collar
Rough
Deck
Pre-Determined
Clearance
Requirement
Hot
Supply
Cold
Supply
Solder
Spout
Supply
Tube
Copper
Tube
Rough
Deck
Valve
Body
Mounting
Nut
Kohler Co. 11 113969-2-AC

8. Check Operation of Valves
WARNING: Risk of personal injury. Wrap a cloth towel
around the pipe plug to prevent water spray. Water will
purge from the supply tube when you remove the plug.
Thread a 3/8″ pipe plug into the top of the spout supply tube.
Ensure that the valves are in the closed position. Turn the cold
valve fully counterclockwise. Turn the hot valve fully clockwise.
Turn on the main water supply.
Check the complete installation for leaks with the valves closed
and open.
Repair leaks as needed.
Close both valves and turn off the main water supply.
Carefully loosen the pipe plug to remove pressure.
Thread the pipe plug back into the spout supply tube.
Install the cardboard plaster guards over both valves and the
spout supply tube.
3/8" Pipe Plug
Close Hot
Close Cold
113969-2-AC 12 Kohler Co.

9. Install Tile (If Applicable)
Verify that there will be a 3/4″ (1.9 cm) to 1-1/4″ (3.2 cm)
distance from the top of the valve shoulder to the top of the tile.
If there is not, correct the valve clearance as described earlier.
Install the tile up to the plaster guards on the valves and the
spout supply tube.
Tile
3/4" (1.9 cm) Min.
1-1/4" (3.2 cm) Max.
Valve
Shoulder
Kohler Co. 13 113969-2-AC
Page is loading ...
Page is loading ...
Page is loading ...
Page is loading ...
Page is loading ...
Page is loading ...
Page is loading ...
Page is loading ...
Page is loading ...
Page is loading ...
Page is loading ...
Page is loading ...
Page is loading ...
Page is loading ...
Page is loading ...
Page is loading ...
Page is loading ...
Page is loading ...
Page is loading ...
Page is loading ...
Page is loading ...
Page is loading ...
Page is loading ...
Page is loading ...
Page is loading ...
Page is loading ...
Page is loading ...
/