Page is loading ...

®
NOTE: Read instructions thoroughly before installing. For weight loads/capacities, use trailer guidelines. Tongue weight 30 pounds.
1. Remove the tail light assembly according to service manual instructions.
2. Follow instructions 1 through 12 for Part 45-1806 included.
Note: Step 5. For the 2012 models the amplifier box must be dropped down to allow the clamp to be installed around the crossbar.
133 Gold Street, Worcester, MA 01608 Ph: 508-791-7552 Toll Free: 800-821-9861 Fax: 508-793-2919
INSTALLATION INSTRUCTION
FOR 45-1806A
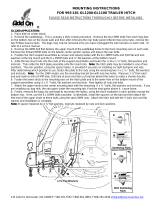
2012 GL1800 RECEIVER TRAILER HITCH
Not for Air Bag Models
Step 4
Step 4

®
NOTE: Read instructions thoroughly before installing. For weight loads/capacities, use trailer guidelines. Tongue weight 30 pounds.
1. Place bike on center stand.
2. Remove both side covers, step covers, rear passenger floorboards and rear case guards. Save hardware to replace these parts later. On the 2006 model, the
case guard bolts and case guards were removed to gain access to the saddle trunk forward support bolt, thus, the original case guard bolts were replaced.
3. Loosen clamp that holds the muffler to header pipe and support bolt then let muffler gently drop down. Repeat on the other side. Figure 3.
4. Remove rear license panel.
5. Remove “V” shaped amp box support. This will not be reinstalled.
6. Remove the forward saddlebag support bolt located behind the rear case guard. Slide the trailer hitch side arms between the gray motorcycle frame and the
black saddlebag support. Attach arm using the M8x 35 mm bolt, flat and lock washers provided. Finger tighten bolt. Repeat on the other side.
7. Attach the top of the side arms to the cross bar with the cast clamps using 8mm bolts. Note: on the 2006 model, when reinstalling the molded plastic wheel
well housing into the upper wheel well, be sure the assembly slot fit correctly in the upper wheel well.
8.. Attach the side tabs to the bike frame using 6mm bolts. Figure 4
9. Attach the “H” shaped hitch mount to the side bars with the four 12mm bolts. Figure 5
10. Tighten all bolts.
11. Install the chrome receiver and ball and attach to the frame with the hitch pin. Gently tighten front bolt on the receiver to prevent the receiver from moving
while the bike is in motion. Figure 6
12. Reinstall side covers, step covers, rear passenger floorboards, mufflers and rear case guards. Reinstall rear license filler plate.
NOTE: If the bike has the navigation system there will be a black box behind the saddlebag filler. Loosen the box first, install the hitch, and then tighten the box back up.
IMPORTANT: MAXIMUM TORQUE IS 9 NEWTON METERS FOR 6MM AND 26 FOR 8MM BOLTS. (Revised Inst 3-11)
Photos on next page.
133 Gold Street, Worcester, MA 01608 Ph: 508-791-7552 Toll Free: 800-821-9861 Fax: 508-793-2919
email: info@addonaccessories.net web: www.addonaccessories.net
1
INSTALLATION INSTRUCTION
FOR 45-1806
RECEIVER TRAILER HITCH
Revised 4-12
Not for Air Ba
g
Models

Figure 1 Figure 2 Figure 2A
Figure 3 Figure 4
Figure 5 Figure 6 Arms, H bracket, receiver
2
133 Gold Street, Worcester, MA 01608
Ph: 508-791-7552
Toll Free: 800-821-9861
Fax: 508-793-2919
email: info@addonaccessories.net
web: www.addonaccessories.net
Part 45-1806
GL1800 Receiver
Trailer Hitch
Not for air bag models.
/


