Page is loading ...

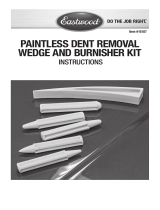
PAINTLESS
DENT REMOVAL KIT
INSTRUCTIONS
Item #16145

2 Eastwood Technical Assistance: 800.343.9353 >> techelp@eastwood.com
The EASTWOOD PAINTLESS DENT REMOVAL KIT includes all professional-use components which
allows shallow dents and dings to be removed quickly and easily without expensive paintwork.
Perfect for pulling hail damage and most common parking lot and shopping cart mishaps.
CONTENTS
(1) Lever Type Dent Puller
(1) Slide Hammer Dent Puller
(9) Plastic Pull Buttons
(1) Electric Hot Glue Gun
(8) Glue Sticks
(1) Nylon Scraper
(1) Aluminum Spray Bottle
(1) Blow Molded Case
DANGER indicates a hazardous situation which, if not avoided, will result in death or serious injury.
WARNING indicates a hazardous situation which, if not avoided, could result in death or serious injury.
CAUTION used with the safety alert symbol, indicates a hazardous situation which, if not avoided,
could result in minor or moderate injury.
NOTICE is used to address practices not related to personal injury.
SAFETY INFORMATION
The following explanations are displayed in this manual, on the labeling, and on all other information
provided with this product:

To order parts and supplies: 800.343.9353 >> eastwood.com 3
READ INSTRUCTIONS
• Thoroughly read and understand this manual before using.
• Save for future reference.
BURN HAZARD!
• The Electric Hot Glue Gun and hot Glue can cause serious burns.
Wear protective heat-resistant gloves when using this Kit.
EYE INJURY HAZARD!
• Hot Glue may be ejected from Glue Gun. Eye protection should be worn at
all times when operating this tool. Use ANSI approved safety glasses.
Everyday eyeglasses are NOT safety glasses.
FALL HAZARD!
• Glue may suddenly release while being pulled. Failure to ensure proper foot-
ing can quickly result in a fall which could inflict serious personal injury or
property damage.
INJURY HAZARD!
• DO NOT use the Eastwood Dent Pulling Kit to support the weight of a person
or valuable property as serious injury or property damage may occur.
• DO NOT exceed 80 lbs. of lifting or pulling capacity as serious injury or
property damage may occur.
• The Eastwood Paintless Dent Pulling Kit may damage or pull paint from
a surface during use. This is less likely to happen when used on factory
painted surfaces than refinished surfaces.
• Only use Eastwood #16146 Replacement Glue Sticks as they are formulated
for use with this tool.

4 Eastwood Technical Assistance: 800.343.9353 >> techelp@eastwood.com
PREPARATION
• Prepare the area to be pulled by removing all traces of wax, polish or dirt.
DENT REMOVAL PROCEDURE
• Select the Plastic Pull Button that best
matches the size and shape of the
dent to be pulled. Generally, the very
center of a dent is the best placement
however larger dents may benefit from
multiple pulls from different locations.
• Using a non-permanent type marker or
masking tape, trace a circle around the
outside of the planned location of the
Pull Button (FIG A).
• Insert a Glue Stick into the portal at the
rear of the Glue Gun and slide it inward
approx. 2” (FIG B).
• Plug in the Glue Gun & allow to heat
up for 10 to 15 minutes. At this time,
the glue should be sufficiently heated
to use.
• Using extreme care and wearing heat
resistant gloves, apply heated glue to
the face of the selected Pull Button
to a uniform depth of approx. 1/16”
(FIG C).
This step is vital to allow full adhesion of glue when pulling. Use Eastwood PRE
#10041Z PRE Painting Prep (Not Included) or equivalent product with a clean,
lint-free cloth to clean the area several times to remove all traces of wax or polish.
If none is available, denatured alcohol may be used (not Included) with the empty
Aluminum Spray Bottle.
FIG. A
FIG. B
FIG. C
✓
Glue
Stick

To order parts and supplies: 800.343.9353 >> eastwood.com 5
• Immediately apply the face of the Pull
Button to the previously outlined area
and hold firmly in place for 10 to 15
seconds.
• Wait several minutes for the heated
glue to solidify then hook the slotted
feature of either the Levered Puller or
Slide Hammer shaft over the “T” fea-
ture of the Pull Button (FIGS D & E).
• Operate the chosen pulling device to
remove damage.
DO NOT apply excessive pressure
to the Pull Button.
The Levered Puller works best
on smaller dents and dings while
the Slide Hammer is best for
larger, deeper and more complex
damage.
Dents with creased edges may
be improved upon, however the
creases will require metal work-
ing and cannot be removed with
this kit.
✓
Levered
Puller
Pull Button
✓
Slide
Hammer
Pull Button
✓
✓
FIG. E
FIG. F

6 Eastwood Technical Assistance: 800.343.9353 >> techelp@eastwood.com
PULL BUTTON REMOVAL
• Fill the Aluminum Spray Bottle 3/4 full of denatured alcohol (not included).
• Apply the denatured alcohol liberally to the glue area while using the Nylon Scraper to gently
wedge between the Pull Button and paint surface.
Use extreme care not to scratch the paint surface while using the Nylon Scraper.
The full dent pulling procedure may need to be repeated several times to adequately
remove damage and in some situations, dents with irregular or creased damage may
not be able to be removed completely.

To order parts and supplies: 800.343.9353 >> eastwood.com 7
NOTES

© Copyright 2017 Easthill Group, Inc. 5/17 Instruction item #16145Q Rev 1
If you have any questions about the use of this product, please contact
The Eastwood Technical Assistance Service Department: 800.343.9353 >> email: techelp@eastwood.com
PDF version of this manual is available online >> eastwood.com/16145manual
The Eastwood Company 263 Shoemaker Road, Pottstown, PA 19464, USA
US and Canada: 800.343.9353 Outside US: 610.718.8335
Fax: 610.323.6268 eastwood.com
ADDITIONAL ITEMS
#10041Z Eastwood PRE Painting Prep 11 oz. Aerosol
#10194ZP Eastwood PRE Painting Prep 30 oz. Bottle
#16146 Replacement Glue Sticks
#16147 Replacement Pull Buttons
/
