C
D
E
ZETHUS SERIES
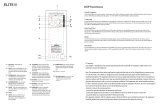
Rear Panel Instruction
A1. CH1 INPUT: LINE/MIC audio source input using balanced XLR or 1/4" cables.
: LINE/MIC audio source input using balanced XLR or 1/4" cables.A2. CH2 INPUT
Rotate to adjust the gain level for INPUT1 or AUX IN. The knob should generally beB1. CH1/AUX Volume:
set above the midway point for microphone signals or turned down for line level signals. *Note: For line level
signals, adjust the knob over midway point might cause distortion, you can still raise the volume by adjust the
‘MASTER’ knob instead.
Rotate to adjust the gain level for INPUT2. The knob should generally be set above theB2. CH2 Volume:
midway point for microphone signals or turned down for line level signals.
Outputs combined signals from CH1 and CH2 INPUTS to another device via XLR maleC. Line Output:
connector.
One 1/8" TRS connector is provided for signal input from mp3, smart phone, iPad etc. StereoD. AUX IN:
signals are summed to mono. Gain level will be controlled by CH1 VOLUME knob.
Short press to turn on and off Bluetooth function. Long press to set up TWSE. TWS Bluetooth Control:
bluetooth connection or disconnect TWS bluetooth. Gain level will be controlled by MASTER knob.
This indicator flashes when bluetooth is on and searching for connection. WhenF. Bluetooth Indicator:
bluetooth are paired successfully, the LED will light solid.
The DSP display.G. LCD:
* Operating the ‘MASTER’ knob ( ) to set the DSPby turning to scroll and by pressing to confirm setting
and the LCD display provides the status for the DSP setting.
Press the MASTER knob twice to enter the speaker’s MODE menu. ‘MUSIC’1. MODE (Sound Programs):
will appear in the display.(Default setting.) Press MASTER knob to select this program, or turn the MASTER
knob to scroll through the other options ‘DJ’, ‘LIVE’, ‘SPEECH’. Press the MASTER knob to confirm selection.
Press the MASTER knob and turn the knob until ‘LOCATION’ appears. Press the knob again2. LOCATION:
to edit this function. Select ‘NORMAL’ when the speaker is used as main speaker or select ‘MONITOR’ when
the speaker is used as a floor monitor.
3. 3-BAND EQ: Press the MASTER knob once and turn to scroll through the 3-Band EQ menu: ‘HIGH EQ’
(treble), ‘MID EQ’ (mid range), ‘LOW EQ’ (bass). Press the MASTER knob again to enter the frequency menu
and turn the MASTER knob clockwise to boost the frequency up to 12dB, or turn counterclockwise to reduce
by up to 12 dB. Press the MASTER knob to confirm your settings.
Press the MASTER knob once and turn the knob until ‘SUB’ appears in the display.4. SUB (Bass Boost):
Press the MASTER knob again to enter the speaker’s Bass Boost menu. Turn the knob to select between
OFF, 80, 100, 120 or 150 Hz, and press the MASTER knob again to confirm. Audio signal will be activated
a boost (around 3dB raise) at the selected frequency.
Press the MASTER knob once and turn the knob until ‘DELAY’ appears, then press the knob5. Delay:
again to access the edit menu. This function causes the signal to be delayed a small amount of time to
allow the music to be played in time with speakers located in a distance.
Edit these menus to adjust the LCD display when needed.6. LCD DIM / BRIGHT / CONTRAST:
DSP Setting Guide
H. MASTER:
1. Turn the MASTER knob to adjust the overall volume level.
2. DSP setting knob: by pressing or turning this knob to access the DSP setting. * Please refer to the ‘DSP
Setting Guide’ for detail operation.
I. AC I :nput Neutrik powerCON (A) receptacle for power input. It is important to supply the proper AC
line voltage to the unit. Do not connect to intermittent or faulty power.
Neutrik powerCON (B) connector for power output.J. AC Output: It is important to supply the proper
otherAC line voltage to the unit.
K. :Voltage selection This switch is supplied for moving the unit from 115 voltage (US Standard) to
230 voltage (European Standard). The switch needs to be set on the proper voltage for your area.
To turn/off the speaker.L. Power Switch:


