www.ledisons.com
Rendementstraat 5
8094 RA Hattemerbroek
The Netherlands
MANUAL / HANDLEIDING / ANLEITUNG / INSTRUCTIONS
LED DOWNLIGHT PROVETTA
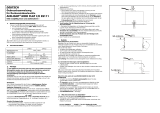
DIMENSIONS / AFMETINGEN / ABMESSUNGEN / DIMENSIONS
INSTALLATION / INSTALLATIE
LDD25
EN:
1. Turn off the power.
2. Cut a hole in the ceiling.
3. Connect the driver to the mains.
4. Complete the installation.
DE:
1. Schalten Sie den Strom aus.
2. Sägen Sie ein Loch in der Decke.
3. Schließen Sie den Treiber an die Stromversorgung an.
4. Das Downlight in der Decke platzieren.
NL:
1. Schakel de stroom uit.
2. Zaag een gat in het plafond.
3. Sluit de driver aan op het lichtnet.
4. Voltooi de installatie.
FR:
1. Éteignez l’alimentation.
2. Découpez un trou dans le plafond.
3. Connectez le pilote au secteur.
4. Compléter l’installation.
Tension / Spannung /
Spanning / Tension
3W
6W
9W
12W
18W
24W
Cut-out Ø / Einbaumaß Ø /
Zaagmaat Ø / Ø de découpe
72 mm
100 mm
135 mm
155 mm
200 mm
285 mm
Cut-out / Zaagmaat /
Einbaumaß / Diamètre de découpe
Downlight diameter / Durchmesser Downlight
/ Diamètre du spot
L
N
H
1. 2.
3. 4.
WARNINGS / WAARSCHUWINGEN / WARNUNGEN / AVERTISSEMENTS
EN:
1. Turn off the power before installing the downlight.
2. Please do not connect the downlight directly to the mains without the driver.
3. If the external flexible cable or cord of this luminaire is damaged, it shall be exclusively replaced by the
manufacturer or his service agent or a similar qualified person in order to avoid a hazard.
4. The light source contained in this luminaire shall only be replaced by the manufacturer of his service
agent or a similar qualified person.
5. It is preferred that this fixture will be installed by an experienced/trained electrician.
6. This downlight works on a voltage range of 100-265 Volt.
7. Please connect the driver to the mains before turning on the power of the mains.
8. The downlight should not touch the second ceiling, there should be some space around and above the
downlight for heat dissipation and ventilation.
9. The guarantee does not apply to any damage caused due to ‘Wrong’ or ‘Bad’ installation or any
abnormal conditions that this fixture may have been subjected.
DE:
1. Schalten Sie die Hauptstromversorgung aus, bevor Sie dem Downlight installieren.
2. Schließen Sie das Downlight nie ohne den Treiber direkt an das Stromnetz an.
3. Wenn das externe flexible Kabel oder die Leitung dieser Leuchte beschädigt ist, darf es ausschließlich
vom Hersteller oder seinem Servicevertreter oder einer ähnlich qualifizierten
Person ersetzt werden, um Gefahren zu vermeiden.
4. Die in dieser Leuchte enthaltene Lichtquelle darf nur vom Hersteller, seinem Kundendienst oder einer
ähnlich qualifizierten Person ausgetauscht werden.
5. Es wird bevorzugt, dass dieses Downlight von einem erfahrenen/geschulten Elektriker installiert wird.
6. Dieses LED Downlight funktioniert über einen Spannungsbereich zwischen 100 und 265 Volt.
7. Schließen Sie den Treiber an, bevor Sie die Stromversorgung einschalten.
8. Das Downlight sollte nicht vollständig umschlossen sein, es sollte etwas Platz um das Downlight
herum und über das Downlight sein für die Wärmeableitung und die Ventilation.
9. Die Garantie gilt nicht für Schäden, die durch falsche/schlechte Installation oder abnormale
Bedingungen verursacht wurden, denen diese Leuchte ausgesetzt war.
NL:
1. Schakel de stroom uit voordat u de downlight installeert.
2. Sluit de downlight niet rechtsreeks op het lichtnet aan zonder gebruik van de driver.
3. Als de externe flexibele kabel of het snoer van deze armatuur beschadigd is, mag deze uitsluitend worden
vervangen door de fabrikant of zijn servicevertegenwoordiger of een gelijkaardig gekwalificeerd persoon om
gevaar te voorkomen.
4. De lichtbron in deze armatuur mag alleen worden vervangen door de fabrikant van zijn serviceagent of
een vergelijkbare gekwalificeerde persoon.
5. Het heeft de voorkeur dat deze downlight wordt geïnstalleerd door een opgeleide elektricien.
6. De downlight werkt op een spanningsbereik tussen de 100 en 265 Volt.
7. Sluit de driver aan op het lichtnet voordat u de stroom inschakelt.
8. De downlight mag niet volledig ingesloten zijn en er moet wat ruimte rond en boven de downlight zijn
voor de warmteafvoer en ventilatie.
9. De garantie is niet van toepassing op schade veroorzaakt door een verkeerde/slechte installatie of
abnormale omstandigheden waaraan deze downlight is blootgesteld.
FR:
1. Coupez l’alimentation avant d’installer le downlight.
2. Veuillez ne pas connecter le downlight directement au secteur sans le conducteur.
3. Si le câble flexible externe ou le cordon de ce luminaire est endommagé, il doit être remplacé
exclusivement par le fabricant ou son agent de service ou une personne qualifiée similaire afin d’éviter un
danger.
4. La source lumineuse contenue dans ce luminaire ne doit être remplacée que par le fabricant de son agent
de service ou une personne qualifiée similaire.
5. Il est préférable que ce luminaire soit installé par un professionnel expérimenté / électricien de formation.
6. Ce downlight fonctionne sur une gamme de tension de 100-265 Volt.
7. Veuillez connecter le pilote au secteur avant d’allumer la puissance du secteur.
8. Le downlight ne doit pas toucher le deuxième plafond, il doit y avoir un espace autour et au-dessus du
downlight pour la dissipation de la chaleur et la ventilation.
9. La garantie ne s’applique pas aux dommages causés par une installation mauvaise ou toute condition
anormale à laquelle le luminaire peut avoir été soumis.


