Page is loading ...

DESCRIPTION
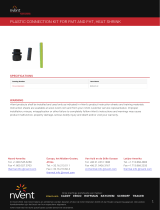
The nVent RAYCHEM CRH-SC-S1 kit used to splice two lengths
of nVent RAYCHEM CRH-1C-40 heating cable.
For technical support call nVent at (800)545-6258.
TOOLS REQUIRED
• Utility knife • Diagonal cutters
• Wire strippers • Heat gun
• Burndy
®
crimp tools Y10D, MR8-9Q or equivalent
This component is an electrical device that must
be installed correctly to ensure proper operation
and to prevent shock or fire. Read these important
warnings and carefully follow all of the installation
instructions.
• Do not use substitute parts or vinyl electrical
tape.
• Damaged conductors can overheat or short.
Do not break conductor wire strands when
removing insulation.
• To minimize the danger of fire from sustained
electrical arcing if the heating cable is damaged
or improperly installed, and to comply with the
requirements of nVent, agency certifications,
and national electrical codes, ground-fault
equipment protection must be used on each
heating cable branch circuit. Arcing may not be
stopped by conventional circuit breakers.
• Keep components and heating cable ends dry
before and during installation.
• Heat guns or torches can cause fire or explosion
in hazardous areas. Be sure there are no
flammable materials or vapors in the area
before using these tools.
• Wrap exposed conductors with supplied tape
strips to prevent shorts.
WARNING:
KIT CONTENTS
Item Qty Description
A 1 Heat shrink tubing (3-inch)
B 1 Teflon tape (1/2 x 6 inch strip)
C 1 Burndy YSV14 uninsulated parallel
splice
A
B C
CRH-SC-S1
In-Line Splice Kit for CRH-1C-40 Heating Cables
Installation Instructions

2 | nVent.com
Plated copper conductor
Fiberglass braid
Conductor insulation
Fiberglass
braid
Do not cut
conductor wires
2
4 5
1/4 in
(6 mm)
Do not cut
conductor wires
1/4 in
(6 mm)
Fiberglass
braid
Do not cut
conductor wires
1
3
• Remove exposed fiberglass braid.
• Slide heat shrinkable tube onto one of the heating cables.
• Remove 1/4 inch (6 mm) of insulation from heating cable.
Do not cut conductor strands.
• Remove 1/4 inch (6 mm) of insulation from second cable.
Do not cut conductor strands.
• Remove exposed fiberglass braid.
• Insert the exposed conductor of each heating cable into
opposite ends of the uninsulated butt splice.
HEATING CABLE CONSTRUCTION

nVent.com | 3
8
10
Release liner
(remove and discard)
1/4 in
(6 mm)
min.
76
9
• Center the heat shrinkable tube over the taped splice
connection.
• Leave these instructions with the end user for future
reference.
• Use release liner to guide tape while wrapping and
overlapping the tape. Cover the butt splice and 1/4-inch
(6 mm) of both sets of heating cable insulation.
• Using a Y10D, MR8-9Q or equivalent crimp tool, crimp
each side of the butt splice, as shown.
• Starting from the center of the heat-shrinkable tubing,
using a heat gun in a back and forth movement, shrink
tubing onto the splice.

nVent.com
©2018 nVent. All nVent marks and logos are owned or licensed by nVent Services GmbH or its aliates. All other trademarks are the property of their respective owners.
nVent reserves the right to change specications without notice.
Raychem-IM-H58461-CRHSCS1-EN-1805 PN P000001079
North America
Tel +1.800.545.6258
Fax +1.800.527.5703
Europe, Middle East, Africa
Tel +32.16.213.511
Fax +32.16.213.604
Asia Pacific
Tel +86.21.2412.1688
Fax +86.21.5426.3167
Latin America
Tel +1.713.868.4800
Fax +1.713.868.2333
/


