Page is loading ...

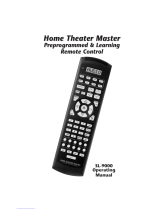
3-245-898-11 (1)
Integrated Remote
Commander
Operating Instructions
© 2002 Sony Corporation
RM-VL1000T

2

3
Features
The RM-VL1000T Remote
Commander provides centralized
control of all your AV components
from a single remote commander
and saves the trouble of operating
different AV components with
different remote control devices.
The following are its main
features.
Customizing 180 labels of
control keys in the dot matrix
LCD with dot matrix makes label
customizing possible. A total of
180 labels on the LCD, such as
component labels, macro labels,
etc., can be customized. A label of
up to 8 letters with digits,
characters or symbols can be
selected and displayed.
Control of 12 components
Control of a maximum of 12
components (TV, SAT, VCR, DVD,
CD, AMP, etc.) is possible.
Components are selectable with 12
keys on the LCD display by
pressing the Label Select buttons.
This Commander has an LCD
display that changes the label
display according to the selected
component.
Setting a maximum of 36
macro commands of a
maximum of 32 successive
steps
A maximum of 36 macro
commands which provide a
maximum of 32 successive steps
by pressing a single button can be
set (12 system control macros, 12
component macros and 12 timer
macros). Macro execution speed is
changeable.
All power off macro commands
for Sony components are preset at
the factory to the SONY OFF label.
Clock display and timer
function
A maximum of 12 timer macros,
timer control of automatic on/off
and other controls (such as
recording, stopping, etc.) of each
component is possible.
Centralized control of Sony AV
components with this one
remote commander
This Commander is preset at the
factory to operate Sony brand
components, so you can use it out
of the box as a control centre for
your Sony AV components.
Remote control signals for non-
Sony components are also
preset
This Commander is preset for
most major brands components
other than Sony. You can control
your components remotely by
setting their code numbers (page
13).
Learning function for
programming other remote
control signals you need
This Commander has a learning
function to learn remote control
signals to operate non-preset
components or functions (page
23).
In addition, the Commander can
learn remote control signals
(infrared signals only) of non
Audio Visual components such as
air-conditioners, lights, etc.
(Certain appliances or functions
may not be available) (page 28).
Channel macro function allows
you to select a programme
with a single button
Up to 4 key steps can be
programmed on macro labels. If
you set the key operations for
entering a programme number on
a macro label, you can select the
programme by selecting that
macro label (page 48).
LCD display with backlight
The display backlight allows
operation even in the dark.

4
Table of Contents
Getting Started
Location and Function of Controls .............................................................. 6
Installing the Batteries ................................................................................7
When to replace the batteries ........................................................................... 7
Setting the Clock ......................................................................................... 8
Setting the clock for the first time after installing batteries ......................... 8
Adjusting the clock after setting the clock ....................................................11
Basic Operations
Setting the Code for Preset Audio and Visual Components ...................... 13
Setting a component code ............................................................................... 13
Checking if the code number works ............................................................. 16
Finding a component code with the Search function ................................. 17
To clear the contents programmed for a specific component label .......... 19
Operating Your Components with the Remote Commander .....................21
To control the volume...................................................................................... 23
Using Non-Preset Remote Control Operations — Learning Function ....... 23
Notes on learning the signals of an air-conditioner .................................... 28
For accurate learning ....................................................................................... 29
Changing or erasing the function of a taught label or button ................... 29
Advanced Features
Controlling the Volume of Visual Components Connected to an Audio
System..................................................................................................... 30
Executing a Series of Commands — System Control Functions................34
Programming a series of commands for the System Macro labels ........... 34
Notes on System Control Operations ........................................................... 38
To clear programmed commands for a specific System Macro number
label ................................................................................................................. 39
Programming a series of commands for the component labels ................ 40
Changing the interval between operation steps.......................................... 42
Changing the component macro executing time ........................................ 43
Adding an Extra Function to the Component Labels.................................44
Programming the Power-On command of a selected component
(for Sony components only) ........................................................................ 44
Assigning Other Components to the Component Labels...........................46
Copying the settings of a component label to another label ..................... 46
Selecting a Programme with a Single Label — Channel Macro Function . 48
Setting the Timer ....................................................................................... 51
Setting the new timer programme................................................................. 51
Changing the programme already set or changing another programme
that you select ................................................................................................ 56
To clear timer settings programmed for a specific programme number
label ................................................................................................................. 60

5
Using Other Functions
Locking the Controls — Hold Function......................................................62
Adjusting the Automatic-Off Time of the Backlight of the
Display Window.......................................................................................63
Setting the Key-Touch Beep .......................................................................64
Adjusting the Contrast of the Display Window ......................................... 65
Changing the Names of the Labels on the Display.................................... 65
Erasing All the Settings..............................................................................68
Additional Information
Precautions ................................................................................................ 70
Maintenance .............................................................................................. 70
Specifications............................................................................................. 70
Troubleshooting .........................................................................................71
Appendices
Table of Preset Functions........................................................................... 74
TV ....................................................................................................................... 74
SAT1, SAT2 (Satellite) ...................................................................................... 74
DVD ................................................................................................................... 75
VCR1, VCR2, VCR3 ......................................................................................... 76
CD ...................................................................................................................... 77
AMP ................................................................................................................... 77
MD...................................................................................................................... 78
DAT .................................................................................................................... 79
TAPE A, TAPE B ............................................................................................... 79
Index ............................................................................................ Back cover

6
Location and
Function of Controls
1 LCD display window
2 COMPO (component) button
3 SYSTEM button
4 TIMER button
5 SCROLL button
6 SET button
7 Player Control buttons
8 1-/
-/-- button
9 button
0 button
qa MENU button
qs 2 (volume) +/– buttons
qd % button
qf Label Select button
qg 1 button
qh Number buttons
qj 2-/ENT (enter) button
qk button
ql GUIDE button
w; Joystick and Cursors
wa PROGR (programme) +/–
buttons
ws button
*Note on the 2 and %
buttons
The Commander controls or mutes the
TV’s volume when you select a visual
component. The Commander controls
or mutes the amplifier’s volume when
you select an audio component.
You can also change this setting (page
30).
Getting Started
COMPO
SYSTEM
TIMER
SCROLL
SET
REC
VIDEO1 VIDEO2 AUX
TUNER CD TAPE
MD
TV
DVD
MENU
PROGR
GUIDE
PHONO
1-
2-

7
Installing the
Batteries
Slide open the battery
compartment lid and insert two
size AA (R6) alkaline batteries (not
supplied). Be sure to line up the +
and – on the batteries with the +
and – on the battery compartment.
When to replace the
batteries
Batteries for remote control
operation and backlight (two
size AA (R6) batteries)
Under normal conditions, alkaline
batteries will last up to 5 months.
The battery life varies depending
on frequency of use.
If the Commander does not
operate properly, the alkaline
batteries might be worn out and
“BATT” appears on the LCD
display when you try to operate
the Commander.
When the display dims, replace
the alkaline batteries with new
ones.
Notes on batteries
• Do not mix old battery with new one
or mix different types of batteries
together.
• If the electrolyte inside the battery
leaks, wipe the contaminated area of
the battery compartment with a cloth
and replace the old batteries with
new ones. To prevent electrolyte from
leaking, remove the batteries when
you plan not to use the Commander
for a long period of time.
• After replacing batteries, set the clock
(page 8).

8
Setting the Clock
Setting the clock for the
first time after installing
batteries
SET
CLOCK
SUN
12:00 AM
STD TIME
DS TIME
--:--
COMPO
SYSTEM
TIMER
SCROLL
SET
REC
VIDEO1 VIDEO2 AUX
TUNER CD TAPE
MD
TV
DVD
MENU
PROGR
GUIDE
PHONO
1-
2-
1,7
3
4-6
2
For the first time after installing
batteries, the display for
component operation appears.
TV
PIP SWAP
PIP MOVE
PIP CH+
PIP CH-
--:--
1 Keep the SET button
pressed for more than a
second.
“SET” appears on the LCD
display.
2 Select “CLOCK” by
pressing the Label Select
button.
The Commander enters clock
setting mode.
SET
PRESET
LEARN
LABEL
CLOCK

9
4 Select the day of the week
by pressing the Joystick
toward
or .
The selected day of the week
flashes.
SUN : Sunday
MON : Monday
TUE : Tuesday
WED : Wednesday
THU : Thursday
FRI : Friday
SAT : Saturday
Then press the Joystick toward
. The day of the week is set.
“12” and “AM” flash.
Note
If you press the Joystick toward , the
day of the week is set and setting
mode skips to Step 6.
3 Select “STD TIME”
(standard time) or “DS
TIME” (daylight saving
time) by pressing the Label
Select button.
If the summer time (daylight
saving time) is used in your
area, select “DS TIME” when it
is in the summer time.
If the summer time is not used
in your area, select “STD
TIME.”
The selected “STD TIME” or
“DS TIME” stays lit.
For example, when “STD
TIME” is selected
SET
CLOCK
SUN
12:00 AM
STD TIME
DS TIME
--:--
SET
CLOCK
SUN
12:00 AM
STD TIME
DS TIME
--:--
SET
CLOCK
SUN
12:00 AM
STD TIME
--:--
Continued
SUN
MON
TUE
WED
THU
FRI
SAT
SET
CLOCK
MON
12:00 AM
STD TIME
--:--

10
5 Set the hour (AM or PM) by
pressing the Joystick
toward
or .
Each time the Joystick is
pressed toward or , the
hour changes by one.
The selected hour (AM or PM)
flashes.
Then press the Joystick toward
. The hour is set. “00”
(minute) flashes.
Note
If you press the Joystick toward , the
hour and AM (or PM) are set and the
setting mode returns to Step 4.
6 Set the minute by pressing
the Joystick toward
or .
Each time the Joystick is
pressed toward or , the
minute changes by one.
The selected minute flashes.
Notes
• If you press the Joystick toward
, the minute is set and the
setting mode returns to Step 4.
• If you press the Joystick toward
, the minute is set and the
setting mode returns to Step 5.
• If you want to finish the clock
setting, go to Step 7.
SET
CLOCK
MON
9:00 PM
STD TIME
--:--
Setting the Clock (continued)
PM
PM
PM
AM
AM
AM

11
7 Press the SET button.
With a beep sound, the day of
the week, the hour, and the
minute are set, and the clock
starts from 0 seconds.
The Commander enters the
setting mode.
If you press the SET button
again
The display for component operation
appears.
Note
If you press the SET button in steps 4-6,
the clock setting is confirmed and starts
form 0 seconds.
Continued
Adjusting the clock after
setting the clock
1 Keep the SET button
pressed for more than a
second.
“SET” appears on the LCD
display.
COMPO
SYSTEM
TIMER
SCROLL
SET
REC
VIDEO1 VIDEO2 AUX
TUNER CD TAPE
MD
TV
DVD
MENU
PROGR
GUIDE
PHONO
1-
2-
4
1,5
2
3
SET
CLOCK
MON
STD TIME
9:30 PM
SET
PRESET
LEARN
LABEL
CLOCK

12
2 Select “CLOCK” by
pressing the Label Select
button.
The Commander enters clock
setting mode.
“CLOCK” and the current time
setting is displayed on the LCD
display.
The time mode (STD TIME or
DS TIME) currently set stays
lit, and the other flashes.
3 To change the time mode,
select the time mode which
flashes (STD TIME or DS
TIME) by pressing the
Label Select button.
If it is not necessary to change
the time mode, press the
Joystick toward or , and go
to Step 4.
SET
PRESET
LEARN
LABEL
CLOCK
Setting the Clock (continued)
4 Set the clock by pressing
the Joystick toward
, ,
or . Follow Steps 4 - 6 on
pages 9-10.
5 Press the SET button.
SET
CLOCK
WED
10:00 AM
STD TIME
DS TIME
10:00 AM

13
Example: To set up a Philips’ TV
1 See the tables in the
supplied “Component
Code Numbers,” and find
the four-digit code number
for the desired component.
If more than one code number
is listed, use the number that is
listed first.
For example, to set up a Philips
TV, you would use the code
number 8056.
The first digit of the
component code number
means the component category
(TV, VCR, etc.). For further
details, see the tables in the
supplied “Component Code
Numbers.”
Basic Operations
Setting the Code for
Preset Audio and
Visual Components
The Commander is preset at the
factory to operate Sony brand AV
components (see the table below).
If you are using the Commander
with a factory-set Sony
components, skip the following
procedures.
You can use the Commander with
other preset AV components also.
To use with other AV components,
you need to follow the following
procedures to set the correct codes
for each component.
Setting a component code
COMPO
SYSTEM
TIMER
SCROLL
SET
REC
VIDEO1 VIDEO2 AUX
TUNER CD TAPE
MD
TV
DVD
MENU
PROGR
GUIDE
PHONO
1-
2-
2
3
5
4
Component
name on the
display
TV
SAT1
SAT2
DVD
VCR1
VCR2
VCR3
CD
AMP
MD/DAT
TAPE A
TAPE B
Factory setting
Sony TV
Sony digital
satellite box
Sony analogue
satellite box
Sony DVD
player
Sony VHS VCR
(VTR3)
Sony 8mm VCR
(VTR2)
Sony Betamax
VCR
Sony CD player
Sony amplifier
Sony MD deck
Sony cassette
deck
Sony cassette
deck
Preset
component
TV
Digital
satellite
Analogue
satellite
DVD player
VCR
VCR
VCR
CD player
Amplifier
MD deck/
DAT deck
Cassette
deck*
Cassette
deck*
* Analogue audio compact cassette
deck
See “Table of Preset Functions”
(page 74) for the functions of keys
and buttons as for each
component.
Continued

14
Setting the Code for Preset
Audio and Visual Components
(continued)
2 Keep the SET button
pressed for more than a
second.
“SET” appears on the LCD
display.
3 Select “PRESET” by
pressing the Label Select
button.
“PRESET” appears on the LCD
display, and component names
are displayed on the labels.
SET
PRESET
LEARN
LABEL
CLOCK
SET
PRESET
TV
SAT1
VCR1
DVD
4 Select the desired
component by pressing the
Label Select button.
To change the labels, press the
SCROLL button repeatedly.
Each time the SCROLL button
is pressed, the labels change as
follows.
SET
PRESET
TV
SAT1
VCR1
DVD
TV
SAT1
VCR1
DVD
SAT2
VCR2
CD
AMP
MD/DAT
VCR3
TAPE A
TAPE B

15
When the desired component
is selected, the component
name (in this case, TV), and the
four-digit component code
number previously set for the
component are displayed.
5 Press the four-digit
component code number by
pressing the number
buttons followed by the
ENT button.
Example: To enter “8086”
Input “8,” “0,” “8,” “6,” and
press the ENT button.
If the setting of the code is
successful
With a beep sound, “OK” and
input digits are displayed.
The digits are decided and the
display returns to the
presetting mode.
If you press the SET button
The display returns to the setting
mode.
If you press the SET button
again
The display for component
operation appears.
Continued
COMPO
SET
PRESET
8001
TV
6 If you want to set a code for
another component, repeat
Steps 4 and 5.
If you press the SET button
The display returns to the previous
one.
Notes
• If you press a component code
number that is not on the table in the
supplied “Component Code
Numbers,” the Commander beeps
five times and “NG” flashes after you
press the ENT button. The setting
returns to the previous one. If this
happens, check the component code
number, and try setting again.
• If you don't input anything into the
Commander for over two minutes
between each step, the setup
procedure will be cancelled. In this
case, preset again.
• The first digit of the component code
number means the component
category (TV, VCR, etc.). The
component corresponding to the
four-digit component code number is
preset in Step 5. If you preset the
component of which the category is
different from that preset previously,
you can, if necessary, change the
component names (see page 65).
• If you preset a component code after
you input character contents to the
labels on the LCD display (page 65),
they are cleared and the original
display is shown. Edit the characters
after you decide the component to be
used by presetting a code.

16
Checking if the code
number works
1 When the display for
component operation
appears (if not, press the
SET button repeatedly),
press the COMPO button.
“COMPO” appears on the LCD
display, and component names
are displayed on the labels.
To change the labels, press the
SCROLL button repeatedly.
Each time the SCROLL button
is pressed, the labels change as
follows.
COMPO
TV
SAT1
VCR1
DVD
10:00 AM
TV
SAT1
VCR1
DVD
SAT2
VCR2
CD
AMP
MD/DAT
VCR3
TAPE A
TAPE B
2 Select the component you
have set up by pressing the
Label Select button.
3 Turn on the component by
its power switch.
4 Aim the Commander at the
component and press the 1
button.
COMPO
TV
SAT1
VCR1
DVD
10:00 AM
Setting the Code for Preset
Audio and Visual Components
(continued)

17
Finding a component code
with the Search function
You can find a code number
available for a component that
doesn’t have one in the supplied
“Component Code Numbers.”
Before starting the Search
function
Set each component to the
following status to enable the
Search function.
TV, AMP: Power-on
CD, MD, TAPE, DAT: Power-on
with a playback source (disc,
cassette tape, etc.)
Other components: Power-off
COMPO
SYSTEM
TIMER
SCROLL
SET
REC
VIDEO1 VIDEO2 AUX
TUNER CD TAPE
MD
TV
DVD
MENU
PROGR
GUIDE
PHONO
1-
2-
1
2
3
5
6
4
When the remote control signal
is sent, is shown on the
display.
The component should turn
off.
5 If you have succeeded,
check that the Commander
is operating the other
functions of your
component, such as
programme and volume
control.
See page 23 for details.
If the Commander does not
seem to be working
Try repeating these setup procedures
using the other codes listed for your
components (see page 13).
Notes on labels on the LCD
display which have “learned” a
remote control signal already
If another signal has already been
programmed on that label by the
learning function (page 23), you
cannot preset the component code
number. To use it as a preset
component label, first erase its
learned signal (page 29).
Continued
TV

18
1 Keep the SET button
pressed for more than a
second.
“SET” appears on the LCD
display.
2 Select “PRESET” by
pressing the Label Select
button.
“PRESET” appears on the LCD
display, and component names
are displayed on the labels.
3 Select the desired
component by pressing the
Label Select button.
To change the labels, press the
SCROLL button repeatedly.
Each time the SCROLL button
is pressed, the labels change as
in Step 4 on page 14.
When the desired component
is selected, the component
name (in this case, TV) and the
four-digit component code
number previously set to the
component is displayed.
4 Press the PROGR + or
PROGR – button to search for
component code numbers in
the same category (in this
case, code numbers which
begin with “8”).
Press PROGR + to go to the next
code number.
Press PROGR – to go back to
the previous code number.
SET
PRESET
LEARN
LABEL
CLOCK
SET
PRESET
TV
SAT1
VCR1
DVD
SET
PRESET
TV
SAT1
VCR1
DVD
Setting the Code for Preset
Audio and Visual Components
(continued)
COMPO
SET
PRESET
8001
TV

19
To clear the contents
programmed for a specific
component label
You can clear all data you have set
(preset data, learned contents, channel
macro, character contents of the labels,
programmed data of system macro for
the component label).
1 Keep the SET button
pressed for more than a
second.
“SET” appears on the LCD
display.
2 Press the SCROLL button
twice to display “CLEAR”
on one of the labels.
Each time the SCROLL button is
pressed, the label changes as
follows.
Note
To search for component code
numbers in another category, return
to Step 3, or input a four-digit
component code number of another
category (for example, a code
number which begins with “3”, “4”,
etc.) before Step 4.
5 Aim the Commander at the
component and press the 1
button.
When the remote control signal
is sent, is shown on the
display.
If it works (power-off for TV,
AMP, playback for CD, MD,
DAT, TAPE, and power-on for
other components), go to Step
6.
If it does not, repeat Steps 4 to
5.
6 Press the ENT button.
With a beep sound, “OK” and
input digits are displayed.
The component code number is
decided and the display returns
to the presetting mode.
If you press the SET button
The display returns to the setting
mode.
If you press the SET button
again
The display for component
operation appears.
Note
It is recommended to write down
the code number.
Continued
COMPO
SET
PRESET
PRESET
LEARN
LABEL
CLOCK
SYSTEM
TIMER
CH MACRO
VOLUME
POWER ON
COPY
CLEAR
SYSDELAY

20
5 Select the component of
which the settings you
want to erase by pressing
the Label Select button.
While erasing
When erasing finishes,
“COMPLETE” is displayed with a
beep sound.
If you want to erase the
settings of other
Components
Repeat Step 5.
If you press the SET button
The display returns to the previous
one.
3 Select “CLEAR” by
pressing the Label Select
button.
4 Select “COMPO” by
pressing the Label Select
button.
Component names are
displayed on the labels.
To change the labels, press the
SCROLL button repeatedly.
Each time the SCROLL button
is pressed, the labels change as
in Step 4 on page 14.
SET
POWER ON
COPY
CLEAR
SYSDELAY
SET
CLEAR
COMPO
SYSTEM
TIMER
ALL
COMPO
SET
CLEAR
TV
SAT1
VCR1
DVD
Setting the Code for Preset
Audio and Visual Components
(continued)
COMPO
SET
CLEAR
COMPLETE
R
R
R
R
R
R
R
R
R
TV
/