Page is loading ...

SHOWER BASE TRAYS
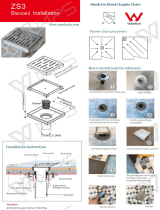
INSTALLATION INSTRUCTIONS
ASSEMBLED WITH ALUMINUM FLANGES:
MODELS AND SIZES:
ASSEMBLED WITH ALUMINUM FLANGES:
www.lesscare.com Version 1.0
STYLE
C
STYLE
RL
Centered drain opening
Right/Left reversible drain opening
LSB3232C-W
LSB3636C-W
LSB4834C-W
LSB4836C-W
LSB6030C-W
LSB6032C-W
LSB6034C-W
LSB6036C-W
32" x 32"
36" x 36"
48" x 34"
48" x 36"
60" x 30"
60" x 32"
60" x 34"
60" x 36"
MODELS AND SIZES:
LSB4834RL-W
LSB4836RL-W
LSB6030RL-W
LSB6032RL-W
LSB6034RL-W
LSB6036RL-W
48" x 34"
48" x 36"
60" x 30"
60" x 32"
60" x 34"
60" x 36"
ALCOVE
SHOWER DOOR
WALL CORNER
SHOWER ENCLOSURE
WALL CORNER
SHOWER ENCLOSURE
ALCOVE
SHOWER DOOR
WALL CORNER
SHOWER ENCLOSURE
WALL CORNER
SHOWER ENCLOSURE

www.lesscare.com
SHOWER BASE TRAYS
PREPARATION FOR INSTALLATION
2
PREPARATION FOR INSTALLATION
TOOLS & MATERIALS REQUIRED:
READ ALL INSTRUCTIONS BEFORE UNPACKING THE PRODUCT
INSTRUCTIONS THAT, IF IGNORED COULD RESULT IN SERIOUS INJURY OR DEATH
CAUSED BY INCORRECT HANDLING OR INSTALLATION OF THE PRODUCT.
THESE INSTRUCTIONS MUST BE OBSERVED FOR SAFE INSTALLATION!
LICENSED AND INSURED PLUMBER CONTRACTOR IS REQUIRED TO INSTALL
THIS PRODUCT INCLUDING ASSISTANCE OF A SECOND PERSON DURING INSTALLATION
2 PEOPLE ARE REQUIRED TO LIFT AND CARRY
THIS PRODUCT DURING INSTALLATION
LessCare reserves the right to change, update, modify, alter, redesign this manual/product or its policies without prior notice!
It is your responsibility to visit website to download or contact customer service for the most updated version of the installation instructions.
No modifications to the product are allowed. Modifications of any types to the product will result in serious injuries or may cause death.
LessCare shall not be liable for any injuries or property damages in connection with this product during installation or use of this product!
IMPORTANT UNPACKING INSTRUCTIONS:
When you have open top carton box lid, do not take out the product before you read this and have the product in place. Have a soft cloth blanket
min ¼" thick and make sure cloth blanket is bigger then the size of the product in your working area place. Set this soft cloth blanket on the floor of
working area. Take out the product from the carton box and set it on the soft cloth blanket. Do not lean it on the wall or floor without the soft cloth
blanket.
ATTENTION! Never set the product on floor, tile, solid floor, or wall surface without a soft cloth blanket. If you set it without soft cloth blanket it
will cause scratches to the surface. Improper handling may cause scratches as well. NEVER set the product on its corners. Make sure the your
floor is leveled with the soft cloth blanket when preparing the product for installation.
After opening the package, read this introduction carefully. Check that all of the needed parts are included in the package by checking all the
components on the diagram of components. Examine boxes and packages for shipping damage. If the unit has been damaged or missing parts,
please contact our customer support department immediately. Please note that LessCare will not replace any damaged products or missing parts
after 2 business days of the order receipt.
VERY IMPORTANT! You should consult your local building codes with questions on installation compliance standards. Building and plumbing
codes may vary from state to state and location. LessCare is not responsible for code compliance standards for your project and will not accept
any returns. Prior to installation, ensure that the installation surface is leveled and solid, and will be able to support the total weight of the unit.
READ CAREFULLY THIS GUIDE BEFORE PROCEEDING WITH THE INSTALLATION.
The shower base feet are not trimmed to be level, and are intended to be set in mortar. Construct a leveled subfloor that will adequately support
the shower base. Do not support the shower base by the rim. Shower base tray model with centered drain is shown for illustrative purpose, The
same installation steps apply for right and left drain models.
• Make sure you have all the tools and materials needed for installation. Always wear safety glasses at all times during the installation
• The shower base must be installed perfectly leveled on a floor and walls that are also perfectly leveled
• The weight of the shower base must rest on the floor. No weight should be supported by the tiling flange or the base skirt
OTHER TOOLS & MATERIALS MAY BE REQUIRED
Drill
Soft Cloth
or Blanket
Waterproof
Silicone
Tape
Measure
Pencil/Marker Safety Glass Mortar
Screws
LevelKnife Caulk Gun
Soft Wood
Shim
IMPORTANT: All required drainage and plumbing must be installed prior the shower base tray installation. All provided in the
installation manual are for reference only. The actual shower base tray including overall dimensions and drain location must be
measured before installation. Dimensions to the center of drain location may have a tolerance +/- 1/2".

www.lesscare.com
SHOWER BASE TRAYS
COMPONENTS & DIMENSIONS
DIMENSIONS
3
3 x Aluminum Tile Flanges
1 x Magnetic Drain Cover
1 x Shower Base Tray
A
l
u
m
i
n
u
m
T
i
l
e
F
l
a
n
g
e
S
i
d
e
V
i
e
w
L
L1
L2
5"
3"
3 1/4"
DRAIN OPENING
LEFT DRAINCENTER DRAIN OR RIGHT DRAIN
L1
L2
L
W
2 3/4"
PROFILE HEIGHT
L1
L2
5"
3"
3 1/4"
DRAIN OPENING
W
32"
36"
48"
48"
60"
60"
60"
60"
32"
36"
34"
36"
30"
32"
34"
36"
LSB3232C-W
LSB3636C-W
LSB4834C-W
LSB4836C-W
LSB6030C-W
LSB6032C-W
LSB6034C-W
LSB6036C-W
Model: L W
16"
18"
24"
24"
30"
30"
30"
30"
L1
16"
18"
17"
18"
15"
16"
17"
18"
L2
48"
48"
60"
60"
60"
60"
34"
36"
30"
32"
34"
36"
LSB4834RL-W
LSB4836RL-W
LSB6030RL-W
LSB6032RL-W
LSB6034RL-W
LSB6036RL-W
Model: L W
12"
12"
12"
12"
12"
12"
L1
17"
18"
15"
16"
17"
18"
L2
Shower base trays
with center drain opening
Shower base trays
with right/left drain opening
STYLE
C
STYLE
RL

www.lesscare.com
SHOWER BASE TRAYS
INSTALLATION METHODS
4
THREE METHODS TO INSTALL LESSCARE® SHOWER BASE TRAYS:
BEFORE INSTALLATION
• Use the protector printed on the packaging box to protect the bottom of the base during installation
• Cover the drain of the shower so no parts are lost
• Prior to install the shower base, all framing and plumbing work must be completed in accordance with instructions and local codes
• For renovation work, exis ng shower surfaces must be removed to accomodate framing requirements
• To facilitate leveling, it is recommended to apply a layer of mortar on the floor surface where the shower base will be installed
• Clean surfaces with a soft wet cloth before applying any caulking, glue or mortar
Before installation, take the shower base out of the packagingand make sure the base is in good shape.
If there is a problem, report it immediately to the seller!
ALCOVE
Single threshold
installation with
3 tile flanges
WALL CORNER
Double threshold
installation with
2 tile flanges
Aluminum
Tile Flanges
Aluminum
Tile Flanges
WALL
WALL
WALL
WALL
ALCOVE
Shower base tray is installed
against three walls
(for shower doors)
WALL CORNER
Shower base tray is installed
against two walls
(for shower enclosures)
WALL
WALL
WALL
WALL
WALL
WALL
WALL
WALL

ALCOVE (3 WALLS)
INSTALLATION
WALL CORNER
(2 WALLS)
INSTALLATION
www.lesscare.com
SHOWER BASE TRAYS
INSTALLATION STEPS
5
90º
90º
90º
90º
L
W
The shower base tray must be installed directly
against the studs, not against the finished wall.
PREPARE WALL FRAMING
Measure the shower base and construct a plumb stud pocket. The shower base must be installed directly against the studs, not against the
finished wall. See the dimensions according to the model of the shower base on page 3. Construct a leveled subfloor that will adequately
support the shower base.
90º
90º
L
W

www.lesscare.com
SHOWER BASE TRAYS
PLUMBING INSTALLATION
6
PLUMBING INSTALLATION
Mark the drain location. Cut or drill the floor to accommodate plumbing. The 2" drain pipe should be about 3/4" below the floor line.
IMPORTANT: The drain dimensions and installation instructions might vary according to the model of a drain used. Refer to drain manufactur-
er’s instructions for proper installation.
CONCRETE FLOOR WOOD FLOOR
2" waste pipe
5"
3/4"
3/4"
1 1/2"
5"
2" waste pipe
L1
L2
L1
L2
CENTER DRAINRIGHT/LEFT DRAIN
WALL CORNER
(2 WALLS)
INSTALLATION
Distance to center
of drain opening
32"
36"
48"
48"
60"
60"
60"
60"
32"
36"
34"
36"
30"
32"
34"
36"
LSB3232C-W
LSB3636C-W
LSB4834C-W
LSB4836C-W
LSB6030C-W
LSB6032C-W
LSB6034C-W
LSB6036C-W
Model: L W
16"
18"
24"
24"
30"
30"
30"
30"
L1
16"
18"
17"
18"
15"
16"
17"
18"
L2
Model: L W L1 L2
48"
48"
60"
60"
60"
60"
34"
36"
30"
32"
34"
36"
LSB4834RL-W
LSB4836RL-W
LSB6030RL-W
LSB6032RL-W
LSB6034RL-W
LSB6036RL-W
12"
12"
12"
12"
12"
12"
17"
18"
15"
16"
17"
18"
L1
L2
ALCOVE (3 WALLS)
INSTALLATION
STYLE
C
STYLE
RL
Distance to center
of drain opening
Distance to center
of drain opening

Install the drain on the shower base according to the manufacturer’s instructions
www.lesscare.com
SHOWER BASE TRAYS
DRAIN ASSEMBLY (USE AS REFERENCE ONLY)
7
Components might vary according to the model of drain used.
Refer to manufacturer’s instructions for proper installation.
DRAIN ASSEMBLY
Drain cover
Drain body
Gaskets
Drain nut

DETERMINE TILE FLANGE LOCATION
Determine the tiling flange profiles location in accordance to
the shower base installation site. Use 3 tile flanges for alcove
installation or 2 tile flanges for wall corner installation.
www.lesscare.com
SHOWER BASE TRAYS
TILE FLANGES INSTALLATION
8
ATTACH TILE FLANGES TO BASE
Carefully attach all required for installation tile flanges
to the base's edge.
B
APPLY WATERPROOF SILICONE
Apply a bead of waterproof silicone in the groove under
the tiling flange profiles.
APPLY WATERPROOF SILICONE
Apply waterproof silicone at all intersections of the
installed tile flanges.
ALLOW SILICONE TO DRY 24 HOURS
BEFORE PROCEEDING TO THE NEXT
INSTALLATION STEPS
A
Side view
Waterproof silicone
C
IMPORTANT!

www.lesscare.com
SHOWER BASE TRAYS
SHOWER BASE TRAY INSTALLATION
9
A
To prevent water absorption,
lay a polyethylene sheet
on the subfloor.
B
Measure and mark the shower
base feet locations on the stud
pocket floor.
Mark the height
of Tile Flanges.
C
Position 1 1/4" high by 5" wide
mounds of mortar
on the marks.

www.lesscare.com
SHOWER BASE TRAYS
SHOWER BASE TRAY INSTALLATION
10
WOODEN
STUD
Apply 100% waterproof
silicone sealant on the stud
below the mark line.
D
Lower the base over the drainage pipe, Apply
pressure to ensure that the compound or mortar
is in contact with the bottom surface of the base.
E

www.lesscare.com
SHOWER BASE TRAYS
SHOWER BASE TRAY INSTALLATION
11
Fit shims in any gaps
between the studs and
the flange.
F
Level the shower base tray using level tool.
Important: if the shower base tray is not completelly
leveled, water will not drain completelty and will
collect on the shower base tray's floor. Water
collection will create a slippery layer on the floor and
may cause slip-and-fall accidents.
After leveling shower
base tray it is highly
recommended to drill
holes through the tile
flanges and use screws to
secure the tile flanges to
the wooden studs for
extra stability of the
shower base tray.
G
Fill all gaps with a 100% waterproof silicone
ALLOW SILICONE TO DRY 24 HOURS
BEFORE PROCEEDING TO THE NEXT
INSTALLATION STEPS
IMPORTANT!
HIGHLY RECOMMENDED!

www.lesscare.com
SHOWER BASE TRAYS
SHOWER BASE TRAY INSTALLATION
12
Clean the shower base and
cover the drain cover
I
Install backer board across all
walls on top of tile flanges.
J
Connect the drain pipe
H
Caution: The magnetic force is strong. Be careful
while closing the cover as it may hurt your fingers.
Backer Board
Shower Base Tray

www.lesscare.com
SHOWER BASE TRAYS
SHOWER BASE TRAY INSTALLATION
13
Use furring strips to make the
framing flush with the tile flanges.
K
Apply 100% waterproof silicone at
the place of connections
L
ALLOW SILICONE TO DRY 24 HOURS
BEFORE PROCEEDING TO THE NEXT
INSTALLATION STEPS
IMPORTANT!
Backer board
1/8"
Shower Base Tray
Finished Wall
Finished Wall
Shower Base Tray
Shower Base Tray

www.lesscare.com
SHOWER BASE TRAYS
MAINTENANCE & CARE
14
To avoid damage and optimize your product, you must follow the below recommendations when maintaining your product
Damages resulting from inappropriate handling are not covered by the warranty
• Rinse with clean water and dry with a so co on cloth or sponge. Do not use anything abrasive such as a scouring brush or
sponge to clean the surfaces
• For tough stains, use a gentle liquid detergent such as dish soap and hot water. Do not use an abrasive and acidic cleaner.
• Carefully read the label on the cleaning product to make sure it is safe and appropriate. Always try the cleaning solution
on a less visible surface before applying it to the rest
• Completely rinse with water immediately after applying the cleaner
• Regular cleaning prevents the accumulation of dirt and tough stains
Retain these installation instructions for future reference!
Thank you for using LessCare products!
IMPORTANT!
DO NOT USE: Abrasive cleaners such as: acid, ammonia, bleach, and simmilar solutions. Use of such solutions may cause
corrosion, finish peeling, and/or dull the surface.
DO NOT USE: Abrasive sponges or cloth. Never use steel, wool, or wired brushes that will permanently scratch the surface.
/