Page is loading ...

SAVE THESE INSTRUCTIONS
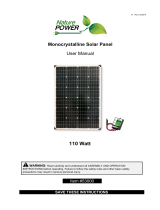
Monocrystalline Solar Panel
User Manual
WARNING: Read carefully and understand all ASSEMBLY AND OPERATION
INSTRUCTIONS before operating. Failure to follow the safety rules and other basic safety
precautions may result in serious personal injury.
V1.1-M 1May2019
!90/100 Watt
165/180 Watt
330Watt Kit

Page 2 of 10
⚠WARNING
Read and understand all instructions. Failure to follow all instructions may result in serious injury
or property damage.
The warnings, cautions, and instructions in this manual cannot cover all possible conditions or
situations that could occur. Exercise common sense and caution when using this tool. Always be
aware of the environment and ensure that the tool is used in a safe and responsible manner.
Do not allow persons to operate or assemble the product until they have read this manual and
have developed a thorough understanding of how it works.
Do not modify this product in any way. Unauthorized modification may impair the function and/or
safety and could affect the life of the product. There are specific applications for which the
product was designed.
Use the right tool for the job. DO NOT attempt to force small equipment to do the work of larger
industrial equipment. There are certain applications for which this equipment was designed. It
will be a safer experience and do the job better at the capacity for which it was intended. DO
NOT use this equipment for a purpose for which it was not intended.
Industrial or commercial applications must follow OSHA requirements.
Important Safety Information
Thank you for choosing a Nature Power Product.
Save the receipt and these instructions. It is important that you read the entire manual to become
familiar with this product before you begin using it.
This product is designed for certain applications only. the distributor cannot be responsible for
issues arising from modification. We strongly recommend this product not be modified and/or used
for any application other than that for which it was designed. If you have any question relative to a
particular application, Do not use the product until you have first contacted the distributor to
determine if it can or should be performed on the product.
For technical question please call 1800-588-0590
WARNING
This product can expose you to chemicals, including Di (2-ethylhexyl) phthalate (DEHP)
which is known to the State of California to cause cancer, birth defects or other reproductive
harm. For more information, go to www.p65warnings.ca.gov
ADVERTENCIA
Este producto puede exponerlo a productos químicos, incluidos Di (2-etilhexil) ftalato (DEHP)
que el estado de California sabe que causa cáncer, defectos de nacimiento u otros daños
reproductivos. Para obtener más información, vaya a www.p65warnings.ca.gov

Cautions
• Never touch the end of output cables with your bare hands when the modules are irradiated. Handle
wires with rubber-gloved hands to avoid electric shock
• Do not wear metallic jewelry when working on electrical equipment
• Product should be installed and maintained by qualified personnel
• Do not drop tools or other items on the glass of the solar module
• Do not scratch the back film of the solar panel
• Avoid exposing solar panels to partial sunlight or shadows. Partial sunlight can cause hot spots on
the panel
• Do not pour chemicals on module when cleaning. To clean use a damp cloth do not apply
excessive pressure to the cells
• Do not expose solar module to sunlight concentrated with mirrors, lenses or similar means
• Keep module away from children
Precautions when working with batteries
• Never smoke or allow a spark or flame near the batteries
• Batteries generate hydrogen and oxygen during charging resulting in evolution of explosive gas
mixture. Care should be taken to ventilate the battery area and follow the battery manufacturer’s
recommendations
• Batteries contain very corrosive diluted acid as electrolyte. Precautions should be taken to prevent
contact with skin, eyes or clothing
• Use caution to reduce the risk of dropping a metal tool on the battery. It could spark or short circuit
the battery or other electrical parts and could cause an explosion
• Remove metal items like rings, bracelets and watches when working with batteries. The batteries
can produce a short circuit current high enough to weld a ring or the like to metal and thus cause a
severe burn
• If you need to remove a battery, always remove the ground terminal from the battery first. Make
sure that all the accessories are off so that you do not cause a spark
• Only use rechargeable 12 Volt batteries, ie. Sealed Lead Acid, Deep Cycle, Gel-Cell etc.
• Use properly insulated tools only when making battery connections
• When working with batteries please follow the battery’s manufacturer manual and precautions
Precautions when working with solar panels
With the incidence of sunlight or other light sources on all solar panels, a voltage appears at the output
terminals of the solar panel turning it into a source of electricity. Do not make contact with the terminals
when the panel is exposed to sunlight or other light sources. To avoid shock hazard make sure the
solar panel is either turned over so the cells are not exposed to light or cover the cells with an opaque
(dark) material such as paper/cloth during the installation process.
WARNING: Ensure that the positive matches the positive and the negative matches the negative.
( Connections are in Parallel) Wrong connection may cause sparks and void the warranty.
Page 3 of 10

Installation
1. Open the packaging and check to make sure that all parts have been received.
2. Arrange to have on hand the proper tools to carry out the mounting installation.
3. Determine the mounting location of the solar panel(s). It is important the solar panel receive the
maximum amount of sunlight during the day and not be shaded.
4. Connecting solar panel to battery for 12V charging.
5. Mount the charge controller within 5 feet of battery or loss of current may occur.
6. Wire the battery to the charge controller and then the solar panel to the charge controller to ensure
that the correct polarity is observed.
7. Secure the solar panel to the desired location, solar panel must be within 20 feet of the battery, or
loss of current may occur.
Page 4 of 10
Technical Specifications
Pmax
90W 165W
330W(
Voltage at Pmax (Vmp)
17.5V 17.5V
*kit consists of
2 165W panels*
Current at Pmax (Imp)
5.14A 9.43A
Open Circuit Voltage
(Voc)
21.6V 21.0V
Short Circuit Current (Isc)
5.49A 9.95A
Dimension
32.6x26.5x1.2”
57.8x26.5x1.4”
Efficiency
18.2% 17.20%
Cell technology
Class
Weight
21.1lbs 25.3lbs
180W
17.5V
10.3A
21.0V
9.95A
57.8x26.5x1.4”
18.9%
25.3lbs
Monocrystalline
100W
17.5V
5.71A
21.6V
5.49A
32.6x26.5x1.2”
19.85%
A
21.1lbs
Rated electrical characteristics are within +10 percent of the indicated values of lsc, Voe, Pmax under
Standard Test Conditions (irradiance of 100 mW/cm 2, AM 1.5 spectrurn, and a cell temperature of
25 {77°F}). The electrical characteristics are based on the results of outgoing test.
Reference Part Description Quantity
Parts List
11
Solar panel with SAE connector wiring
11
2
3
SAE-Battery clamp cable
Mounting Z bracket set
1
4

Easy Electrical Installation
Please confirm that you have all parts to your system
before starting instaIlation. Figure 1 shows how to
connect the solar panel to the 12 Volt batteries
Step 1
Connect the charge controller to the solar panel
Step 2
Connect the battery clamps to the charge controller
Step 3
Connect the battery clamps to the battery in parallel.
(Parallel connections= Positive to Positive and Negative to
Negative)
FIGURE!1!
When installing solar panels configuration and systems, please carefully observe correct cable
connections and polarity. The solar panels can be damaged by not observing the correct electrical
installation and polarity; in addition, this will void the warranty of your solar panel(s). Having a multi-
meter handy will help to confirm correct polarities.
Extending the wiring
If you choose to mount your solar panel further away from the charge controller by extending the
wiring we recommend the following gauges at each specified distance. Use stranded wire instead of
solid wire. Stranded wire does not fatigue or loose connections over time.
Appropriate wire gauge should be used for distance and total amperage, for further
information please consult with a licensed electrician or through an online wiring chart
calculator
Page 5 of 10

Mounting the Solar panels
Choose a site for mounting the solar panels that is free from shade and located in an area that receives
maximum sunlight daily. For maximum solar power absorption throughout the day, a tilt-mounting kit is
recommended.
The solar panels can be permanently installed level using the Z-brackets.
Measure the distance between the mounting site and the battery location. The charge controller should
be mounted in close proximity to the battery bank (within 5 feet). Refer to the DC electrical wire guide to
choose an appropriate gauge wire for the length of the wire.
If you choose to mount your Solar Panel on your RV, be sure you solidly mount your panels to the roof.
If you have a rubber roof over thin plywood you may want to use molly fasteners to get a better grip. If
you have a fiberglass roof, drill some pilot holes through the fiberglass to reach plywood below. This will
prevent cracking or damaging the fiberglass. If your RV is equipped with a metal roof you must mount
the solar panel to the joists supporting the roof. Figure 3 shows an example of how the panel can be
mounted with the z-brackets.
Solar Panel Mounting
FIGURE !3!
FIGURE !4!
The wire from the solar panel can be routed to the interior of the RV through the roof-top refrigerator
vent. In this kind of installation attempt to mount the panel near the refrigerator vent. See Figure 4.
Page 6 of 10

1. To connect 2 Solar Panels together simply remove the SAE connector at the end of each Solar
Panel to reveal at least 2 inches of bare wiring.
2. Once the two wires are exposed they can be connected together by either twisting the wires
together or by using solder. When connecting the wires always ensure the correct polarity is
observed, Negative (- Black) to Negative and Positive(+ Red) to positive.
3. Once the wires are connected they can be place in/on the correct terminals of your charge
controller.
4. Once the wires have been placed on their terminaIs correctly ensure the connection is safe and
secure and that the bare wires cannot come into contact with each other. This can be done by
using insulation tape or electrical tape that can be wrapped around the wires to stop the coming
into contact with one another.
Note: If the Solar Panel wires short while being connected to the Charge Controller it may cause
irreparable damage. Removing the SAE connector will not have the warranty on Solar Panels.
You can also contact nature power for a 2 in 1 SAE cable for 2 panels fast connected.
Selecting the correct Battery
We do not offer batteries. However, please choose a 12 Volt rechargeable battery. Do not attempt to
recharge non-rechargeable batteries. 6 Volt battery configurations may also be used if connected in
series (Negative to Positive). You may choose a Sealed Lead Acid battery, a Gel-Cell or a Deep
Cycle 12 Volt battery. Batteries come in all different sizes, Please converse with your battery dealer
for more information on which type of battery you should use for your system. Note your solar panel
amperage rating when selecting your battery size.
Additional 12V DC Batteries
Addition batteries may be desired for extra electrical storage.
For 12 Volt battery bank configurations; make sure your batteries are connected in parallel (Positive
to Positive and Negative to Negative)
v From the charge controller attach the red battery clamp to the red terminal of the first battery in
the bank, matching the polarities, positive to positive.
v Then connect the black alligator clamp to the black terminal of the second or late battery in the
bank, again matching polarities, negative to negative. This will ensure an equal charging across
both or all batteries.
Operating Instruction
Additional Solar Panels
Page 7 of 10

Page 8 of 10
v Reverse Current
v Over Charge
v Low Voltage
v High Voltage surges
28 Amp Digital PWM Charge Controller
With Pulse Width Modulation (PWM) technology this charge controller helps to maintain a higher
charging efficiency, thus maintaining a higher battery reserve and capacity than the standard on-off 8
Amp charge controller. The 28 Amp Digital PWM Charge Controller features a digital LCD display and
adjustable voltage settings.
Protections:
v Short Circuit
v Low Voltage
v Overloading
v Discharging
v Reverse Current
v Discharging
Selecting the Correct Charge Controller
Charge Controllers may be sold separately and are required for installations of solar systems arrays
that are rated 12 Watts and higher. Charge Controllers help to protect the battery(s) and solar panel(s)
from harmful reverse currents, battery over charging and high wattage surges, addition protections are
found on larger charge controllers.
If two or more solar panels are connected in series/parallel make sure that the sum of the short circuit
current ratings of all panel strings does not exceed 80% of the charge controller's current rating i.e. 8
Amps or 28 Amps.
8 Amp Charge Controller
is an easy to connect and easy to read charge controller with LED light indictors for battery charging
cut-in voltage 13V and battery full cut out voltage 14.2V. The 8 Amp Charge Controller is compatible
with solar system arrays rated up to 130 Watts.
Protections:
Connecting an Inverter
An inverter can be used to converting the 12 Volt energy created to 120 Volt Electricity.
Inverter sizes and types vary depending on your power consumptions needs. Please discuss which
inverter to purchase with your Inverter dealer.

Please refer to the run times chart to choose how much solar power your desired system requires. Note
that all run times and ratings are approximate and may vary depending on your location and time of day
and are based on 7 Hours of full sunlight a day.
Run Times
Rated Hourly
(Maximum output)
90 Watt 165 Watt
330 Watt
5.14 Amp
9.43 Amp 18.86 Amp
Weekly Output
4410 Watts/
251.86 Amps
8085 Watts/
462 Amps
16170 Watts/
924.14 Amps
Weekly Run Times
Laptop 20-50 watts
PC 80-150 watts
Television 19" Color 70 watts
CD Player Radio 35 watts
Fan 10-50 watts
Halogen Light 100 watts
Fluorescent Light 40 watts
Coffee Maker 800 watts
Portable Heater 1500 watts
180 Watt
10.28 Amp
8820 Watts/
501 Amps
100 Watt
5.71 Amp
4900 Watts/
279.79 Amps
88 hr
29 hr
63 hr
126 hr
83 hr
44 hr
110 hr
3 hr
6 hr
98 hr
32 hr
70 hr
140 hr
98 hr
49 hr
122 hr
3 hr
6 hr
160 hr
50 hr
110 hr
230 hr
165 hr
80 hr
200 hr
5 hr
10 hr
176 hr
59 hr
126 hr
252 hr
176 hr
88 hr
220 hr
6 hr
11 hr
320 hr
100 hr
220 hr
460 hr
330 hr
160 hr
400 hr
10 hr
20 hr
Maintenance
Monitoring your Solar System
To confirm your solar panels are generating power we suggest purchasing a multi-meter. Annual
testing and inspections are recommended to confirm all connections are secure and panels are
functioning properly.
Open voltage testing of solar panels may range from 11 Volts up to 21.6 Volts depending on the
intensity of the sun, this is within normal range.
Upon annual inspections it is recommended to wipe all solar panels with a damp towel to remove dust
and debris covering the panels, as layers of dust can affect the solar panel voltage.
Routine Maintenance Check List
v Check and replace damaged components if necessary
v Clean with a damp towel or cloth remove all debris
v Check and maintain the battery electrolyte levels are at regular intervals as per the battery
manufacturer's recommendations if flooded wet cell lead acid batteries are used
v Check solar panel open voltage range
v Check solar panel close circuit range
v Confirm all wiring connections are secure and tight
v Confirm all mounting connections are secure and tight
Page 9 of 10

Please&contact&Nature&Power&Products&to&acquire&more&information:!
1-800-588-0590
info@naturepowerproducts.com!
www.naturepowerproducts.com!
Made in Vietnam
Page 10 of 10
Nature Power warrants our products to the original purchaser that this product is free from defects in
materials and workmanship for the period of 1 year from date of purchase, 25 year warranted to
generate up to 80% of rated power from date of purchase. In the case of product defect, contact
Nature Power customer service to receive troubleshooting. If defective part or unit should be returned,
a Return Authorization Number must be issued by Nature Power and the defective part or unit should
be returned to the authorized location at the purchasers’ expense. A dated proof of purchase is
required to receive warranty service. Once received at authorized location and defect proves to be the
result of defective material and workmanship, the defective part or unit will be replaced at warrantors’
option and returned to the original purchaser at warrantors’ expense. No refunds will be granted by the
warrantor, in the event of buyer’s remorse please contact your point of purchase within and in
adherence to their return policy. Refunds are granted at the retailers’ discretions.
Limited Warranty
/
