Hitachi H 60MR Handling Instructions Manual
- Category
- Power tools
- Type
- Handling Instructions Manual
This manual is also suitable for
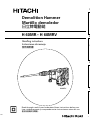
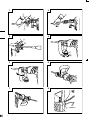
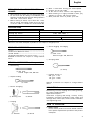
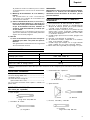
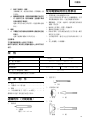
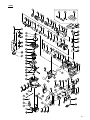
Hitachi H 60MR demolition hammer boasts a powerful 1350W motor and delivers a full-load impact rate of 930 – 1650 blows per minute. The tool can be used for a variety of tasks, including demolishing concrete, chipping off concrete, grooving, bar cutting, and driving piles. It features a tool-less bit holder for quick and easy bit changes, as well as a side handle for improved control and comfort during operation.
Hitachi H 60MR demolition hammer boasts a powerful 1350W motor and delivers a full-load impact rate of 930 – 1650 blows per minute. The tool can be used for a variety of tasks, including demolishing concrete, chipping off concrete, grooving, bar cutting, and driving piles. It features a tool-less bit holder for quick and easy bit changes, as well as a side handle for improved control and comfort during operation.


-
 1
1
-
 2
2
-
 3
3
-
 4
4
-
 5
5
-
 6
6
-
 7
7
-
 8
8
-
 9
9
-
 10
10
-
 11
11
-
 12
12
-
 13
13
-
 14
14
-
 15
15
-
 16
16
-
 17
17
-
 18
18
-
 19
19
-
 20
20
-
 21
21
-
 22
22


Hitachi H 60MR Handling Instructions Manual
- Category
- Power tools
- Type
- Handling Instructions Manual
- This manual is also suitable for
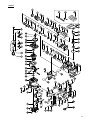
Hitachi H 60MR demolition hammer boasts a powerful 1350W motor and delivers a full-load impact rate of 930 – 1650 blows per minute. The tool can be used for a variety of tasks, including demolishing concrete, chipping off concrete, grooving, bar cutting, and driving piles. It features a tool-less bit holder for quick and easy bit changes, as well as a side handle for improved control and comfort during operation.
Ask a question and I''ll find the answer in the document
Finding information in a document is now easier with AI
in other languages
- español: Hitachi H 60MR
Related papers
-
Hitachi H 60MR User manual
-
-
-
-
-
-
-
-
-
Hitachi H 45MRY User manual