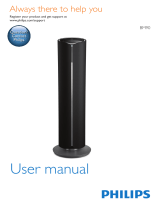
PX840T/12

Philips PX840T/12 User manual

  • Hello! I am an AI chatbot trained to assist you with the Philips PX840T/12 User manual. I’ve already reviewed the document and can help you find the information you need or explain it in simple terms. Just ask your questions, and providing more details will help me assist you more effectively!
  • How many preset radio stations can I store on the device?
    How can I turn on the decorative light on the device?
    Can I use a Bluetooth device with the Philips PX840T/12?
    Can I use batteries to power the device?
    Can I use the device to play CDs?
    How many tracks can I program in total?
    What type of batteries does the device use?
www.philips.com/support
PX840T
User manual
Always there to help you
Register your product and get support at
Question?
Contact
Philips
1
Contents
1 Safety 2
2 Your CD Soundmachine 3
Introduction 3
What's in the box 3
Overview of the main unit 4
3 Get started 6
Power supply 6
Turn on 7
4 Play 8
Play CD 8
Play from USB devices 8
Play from Bluetooth devices 8
Play from external devices 9
5 Play options 10
Control play 10
Program tracks 10
Select a preset sound effect 10
Enhance bass 10
6 Listen to FM/AM radio 11
Tune to FM/AM radio stations 11
Store radio stations automatically 11
Store radio stations manually 11
Select a preset radio station 11
7 Other features 12
Adjust display brightness 12
Enjoy decorative light 12
Use the shoulder strap 12
8 Product information 13
Specications 13
Supported MP3 disc formats 14
USB playability information 14
Maintenance 14
EN
9 Troubleshooting 15
About Bluetooth device 15
10 Notice 16
Compliance 16
Care of the environment 16
Trademark notice 16
2 EN
1 Safety
Warning
Never remove the casing of this product.
Never lubricate any part of this product.
Never place this product on other electrical equipment.
Keep this product away from direct sunlight, naked
amesorheat.
Onlyuseattachments/accessoriesspecied
by the manufacturer.
Unplug this apparatus during lightning
storms or when unused for long periods
of time.
Do not block any ventilation openings. The
minimum distance around the product for
sufcientventilationis10cm.
Referallservicingtoqualiedservice
personnel. Servicing is required when
the apparatus has been damaged in any
way, such as liquid has been spilled or
objects have fallen into the apparatus, the
apparatus has been exposed to rain or
moisture, does not operate normally, or
has been dropped.
Use only power supplies listed in the user
manual.
Battery usage CAUTION – To prevent
battery leakage which may result in bodily
injury, property damage, or damage to the
product:
Install all batteries correctly, + and - as
marked on the product.
Do not mix batteries (old and new or
carbon and alkaline, etc.).
Batteries (packed or installed) shall not
be exposed to excessive heat such as
sunshine,reorthelike.
Remove batteries when the product is
not used for a long time.
Batteries contain chemical substances,
so they should be disposed of properly.
The product shall not be exposed to
dripping or splashing.
The product can be used in both tropical
and moderate climate.
Do not place any sources of danger on the
product(e.g.liquidlledobjects,lighted
candles).
Where the plug of the Direct Plug-in
Adapter is used as the disconnect device,
the disconnect device shall remain readily
operable.
Caution
Use of controls or adjustments or performance of
procedures other than herein may result in hazardous
laser exposure or other unsafe operation.
Note
The type plate is located on the bottom of the
apparatus.
3EN
2 Your CD
Soundmachine
Introduction
With this CD Soundmachine, you can:
listen to FM/AM radio; and
enjoy audio from discs, USB storage
devices, Bluetooth enabled devices, and
other external audio devices.
The product offers you Dynamic Bass Boost
(DBB) and Digital Sound Control (DSC) to
enrich sound.
What's in the box
Check and identify the contents of the package:
Main unit
Power adaptor
Printed materials
Quick Start Guide
4 EN
Overview of the main unit
a Disc compartment
b
Turn on the product.
Switch to standby mode.
c
Stop play.
Erase the programmed list.
d /
Press to skip to the previous or next
track.
a
c
d
e
f
g
h
i
j
k
l
o
n
m
q
p
b
Press and hold to fast-forward or fast-
backward.
Tune to radio stations.
e MODE/DIM
Presstoselectarepeatorshufe
mode.
Press and hold for two seconds to
select different brightness levels.
f DBB
Turn dynamic bass enhancement on
or off.
5EN
g Volume knob
Adjust volume.
h
Connect USB storage devices.
i AUDIO IN
Connect an external audio device.
j DSC
Select a preset sound effect.
k PROG
Program tracks.
Program radio stations.
l -ALB/PRE/ALB/PRE+
Skip to the previous or next album.
Select a preset radio station.
m /PAIRING
Start or pause play.
In Bluetooth mode, press and hold for
two seconds to enter pairing mode.
n LIGHT
Turn decorative light on or off.
Select a lighting effect.
o SOURCE
Select a source.
p Telescopic antenna
Adjust radio reception.
q DC IN
Connect power.
6 EN
3 Get started
Caution
Use of controls or adjustments or performance of
procedures other than herein may result in hazardous
laser exposure or other unsafe operation.
Always follow the instructions in this chapter in
sequence.
If you contact Philips, you will be asked for the
model and serial number of your apparatus. The
model number and serial number are on the
bottom of your apparatus. Write the numbers
here:
Model No. __________________________
Serial No. ___________________________
Power supply
Either AC power or battery can be used as
power supply of this product.
Option 1:AC power
Warning
Risk of product damage! Make sure that the power
supply voltage corresponds to the voltage printed on
the back or the underside of the product.
Risk of electric shock! When you disconnect the AC
power, always pull the plug from the socket. Never pull
the cord.
1 Connect one end of the AC adaptor to
the DC IN socket on the back of the
product.
2 Connect the other end of the AC adaptor
to the wall outlet.
Warning
To save energy, turn off the product after use.
Option 2: Battery power
Caution
Risk of explosion! Keep batteries away from heat,
sunshineorre.Neverdiscardbatteriesinre.
Batteries contain chemical substances, so they should
be disposed of properly.
Note
Batteries are not supplied with the accessories.
1 Open the battery compartment on the
bottom of the product.
2 Insert 8 batteries (type: D/R20 CELL/UM1)
with correct polarity (+/-) as indicated.
3 Close the battery compartment.
7EN
Turn on
Press to turn on the product.
» [POWER ON] scrolls on the display,
and then the product switches to your
last selected source.
Tip
To select a source, press SOURCE repeatedly.
Switch to standby mode
Press again to switch the product to standby
mode.
8 EN
4 Play
Play CD
1 Press SOURCE repeatedly to select [CD]
source.
2 Press down to open the CD compartment.
3 Insert a disc with the printed side facing up,
then close the CD compartment.
» Play starts automatically.
Play from USB devices
Note
Make sure that the USB device contains playable audio
content.
1 Press SOURCE repeatedly to select
[USB] source.
2 Insert the USB device into the socket.
» Play starts automatically. If not, press .
Play from Bluetooth devices
Note
Make sure that your Bluetooth device is compatible
with this product.
Before pairing a device with this product, read its user
manual for Bluetooth compatibility.
Make sure that Bluetooth function is enabled on your
device, and your device is set as visible to all other
Bluetooth devices.
The product can memorize a maximum of four paired
devices.Thefthpaireddevicewillreplacetherstone.
Any obstacle between this product and a Bluetooth
device can reduce the operational range.
Keep away from any other electronic device that may
cause interference.
The operational range between this speaker and a
Bluetooth device is approximately 10 meters (30 feet).
1 Press SOURCE repeatedly to select
[BLUETOOTH] source.
» [PAIRING] beginstoash.
2 On your Bluetooth device, enable
Bluetooth and search for Bluetooth devices
(refer to the user manual of the device).
3 Select [Philips PX8] on your device for
pairing. If necessary, enter default password
“0000”.
» After successful pairing and connection,
the product beeps twice, and
[Connected] is displayed.
4 Play audio on the Bluetooth device.
» Audio streams from your Bluetooth
device to the speaker.
» To pause play, press .
» To skip to the previous or next track,
press / .
Philips PX8
9EN
Tip
Ifyoucannotnd"Philips PX8'' for pairing, press and
hold PAIRING for two seconds to enter pairing mode,
and then try again.
To disconnect the Bluetooth-enabled device:
Press and hold PAIRING for two seconds;
Disable Bluetooth on your device; or
Move the device beyond the
communication range.
To connect another Bluetooth-enabled device:
1 Press and hold PAIRING for two seconds
to enter Bluetooth pairing mode;
2 Connect another device.
Play from external devices
You can also listen to an external audio device
such as an MP3 player through the product.
1 Press SOURCE repeatedly to select
[AUDIO-IN] source.
2 Connect an audio cable (3.5mm, not
supplied) to:
the AUDIO IN socket on the product.
the headphone socket on an external
device.
3 Play the external device (see its user
manual).
10 EN
5 Play options
Control play
In CD or USB mode, you can control play
through the following operations.
/ Press and hold to fast-forward
or fast-reverse the track during
playback, then release to resume
play.
-ALB/PRE/
ALB/PRE+
Skip to the previous or next
MP3 album.
Start or pause play.
Stop play.
MODE [REP ONE]: Play the current
track repeatedly.
[REP ALBUM] (for MP3 tracks
only): Play tracks in the current
album repeatedly.
[REP ALL]: Play all tracks
repeatedly.
[SHUFFLE]: Play tracks randomly.
[OFF]: Resume normal play.
Program tracks
In CD or USB mode, you can program a
maximum of 20 tracks.
1 Press to stop playback.
2 Press PROG to activate the program
mode.
3 For MP3 tracks, press -ALB/PRE/ALB/
PRE+ to select an album.
4 Press / to select a track number,
then press PROGtoconrm.
5 Repeat steps 3-4 to program more tracks.
6 Press to play the programmed tracks.
To erase the program, press twice.
Select a preset sound effect
The DSC (Digital Sound Control) enables you
to enjoy special sound effects.
During play, press DSC repeatedly to
select:
[ROCK]
[TECHNO]
[JAZZ]
[POP]
[SAMBA]
Enhance bass
During play, press DBB repeatedly to turn
dynamic bass enhancement on or off.
11EN
6 Listen to FM/
AM radio
Tune to FM/AM radio stations
Note
For better reception, fully extend and adjust the
position of the telescopic antenna.
To prevent interference, position the antenna as far as
possible from any other electrical appliances.
1 Press SOURCE repeatedly to select FM/
AM radio.
2 Press and hold / for two seconds.
» The product tunes to a station with
strong reception automatically.
3 Repeat step 2 to tune to more stations.
To tune to a radio station manually:
Press / repeatedlyuntilyoundbetter
reception.
Store radio stations
automatically
Note
You can program a maximum of 20 FM/AM radio
stations.
In tuner mode, press and hold PROG for two
seconds.
» The product stores all the available
FM/AM radio stations.
» Therststoredradiostationis
broadcast automatically.
Store radio stations manually
Note
You can store a maximum of 20 FM/AM radio stations.
1 Tune to an FM/AM radio station.
2 Press PROG to activate the storing mode.
3 Press -ALB/PRE/ALB/PRE+ to allocate a
number (1 to 20) to this radio station, then
press PROGtoconrm.
» The preset number and the frequency
of the preset station are displayed.
4 Repeat the above steps to store other
stations.
Note
To remove a pre-stored FM/AM radio station, store
another station in its place.
Select a preset radio station
In FM/AM tuner mode, press -ALB/PRE/ALB/
PRE+ to select a preset number.
12
7 Other features
Adjust display brightness
Note
Make sure that the product is turned on.
1 Press and hold DIM for two seconds.
2 Press DIM repeatedly to select different
brightness levels:
[LOW]
[MEDIUM]
[HIGH]
[OFF]
Enjoy decorative light
Note
Make sure that the product is turned on.
LIGHT
X3
Powerful Peace
Light off
Press LIGHT repeatedly to select:
[Powerful]: The color of decorative
light changes randomly and quickly.
[Peace]: The color of decorative light
changes randomly and slowly.
[Light Off]: Turn off the decorative
light.
Use the shoulder strap
You can use a shoulder strap (not supplied) to
carry this product. Attach the strap to the
built-in pins on both sides on the top of the
product, as shown below.
Note
Mostofthecommonshoulderstrapscantthebuilt-in
pins. It can be purchased from shops which provide bag
accessories. The diameter of the pin is 5 mm and the
length is 12.5 mm.
13
8 Product
information
Note
Product information is subject to change without prior
notice.
Specications
Amplier
Total Output Power Max. 50W
Frequency Response 50-20000 Hz, ±3 dB
Signal to Noise Ratio (A-
weighted)
≥78dBA
Total Harmonic Distortion <1 %
Audio-in Input 650mV±100mV
Disc
Laser Type Semiconductor
Disc Diameter 12cm/8cm
Support Disc CD-DA, CD-R, CD-
RW, MP3-CD
Audio DAC 24Bits / 44.1kHz
Total Harmonic
Distortion
<3% (1 kHz)
Frequency Response 4Hz - 20kHz (44.1kHz)
S/N Ratio
(A-weighted)
≥80dBA
Bluetooth
Bluetooth Version V2.1+EDR
SupportedProles A2DP, AVRCP
Bluetooth Distance 10 m (Free space)
Frequency band/
Output power
2.400GHz -
2.483GHz ISM Band /
≤4dBm(Class2)
Tuner(FM)
Tuning Range 87.5 - 108MHz
Tuning Grid 50 kHz
- Mono, 26dB S/N Ratio <22 dBf
- Stereo, 46dB S/N Ratio >43 dBf
Search Selectivity >28 dBf
Total Harmonic Distortion <3%
Signal to Noise Ratio >45 dB
Tuner(AM)
Tuning Range AM: 530 -
1700 KHz
Tuning Grid 9 KHz
Mono, 26dB S/N Ratio <75 dBuV
Total Harmonic Distortion <5%
Signal to Noise Ratio >45 dB
Amplier
Speaker Impedance 4Ω
Speaker Driver 2x4"fullrange
Sensitivity 83dB@1W/1m
General
Power supply
- AC Power (Power
Adapter A)
Brand name: PHILIPS;
Model: HB40-
1203000SPA;
Input: AC 100-240 V~,
50/60 Hz, 0.8 A;
Output: DC 12 V
3000 mA;
- AC Power (Power
Adapter B)
Brand name: PHILIPS;
Model: GME36A-
120300FGR;
Input: 100-240 V~, 50-
60 Hz, 1.2 A;
Output: 12 V 3 A;
14 EN
- Battery 8 X 1.5V D/R20 CELL/
UM1 batteries (not
supplied)
Operation Power
Consumption
20 W
Eco Standby Power
Consumption
<0.5 W
Dimensions - Main
Unit (W x H x D)
523 x 208 x 223 mm
Weight (Main Unit) 3.8 kg
Supported MP3 disc formats
ISO9660, Joliet
Maximum title number: 512 (depending on
lenamelength)
Maximum album number: 255
Supported sampling frequencies: 32 kHz,
44.1kHz, 48 kHz
Supported Bit-rates: 32~256 (kbps),
variable bit rates
USB playability information
Compatible USB devices:
USBashmemory(USB2.0or
USB1.1)
USBashplayers(USB2.0orUSB1.1)
memory cards (requires an additional
card reader to work with this
apparatus)
Supported formats:
USBormemoryleformatFAT12,
FAT16, FAT32 (sector size: 512 bytes)
MP3 bit rate (data rate): 32-320 Kbps
and variable bit rate
Directory nesting up to a maximum of
8 levels
Number of albums/ folders: maximum
99
Number of tracks/titles: maximum 999
File name in Unicode UTF8 (maximum
length: 128 bytes)
Unsupported formats:
Empty albums: an empty album is an
album that does not contain MP3/
WMAles,andisnotbeshowninthe
display.
Unsupportedleformatsareskipped.
For example, Word documents (.doc)
orMP3leswithextension.dlfare
ignored and not played.
AAC,WAV,PCMaudioles
DRMprotectedWMAles(.wav,.m4a,
.m4p, .mp4, .aac)
WMAlesinLosslessformat
Maintenance
Clean the cabinet
Use a soft cloth slightly moistened with
a mild detergent solution. Do not use a
solution containing alcohol, spirits, ammonia
or abrasives.
Clean discs
When a disc becomes dirty, clean it with
a cleaning cloth. Wipe the disc from the
centre out.
Do not use solvents such as benzene,
thinner, commercially available cleaners,
or antistatic spray intended for analogue
records.
Clean the disc lens
After prolonged use, dirt or dust may
accumulate at the disc lens. To ensure good
play quality, clean the disc lens with Philips
CD lens cleaner or any commercially
available cleaner. Follow the instructions
supplied with cleaner.
15EN
9 Troubleshooting
Warning
Never remove the casing of this device.
To keep the warranty valid, never try to repair
the system yourself.
If you encounter problems when using this
device, check the following points before
requesting service. If the problem remains
unsolved, go to the Philips Web page (www.
philips.com/support). When you contact Philips,
make sure that the device is nearby and the
model number and serial number are available.
No power
Make sure that the AC power plug of the
unit is connected properly.
Make sure that there is power at the AC
outlet.
No sound or poor sound
Adjust the volume.
No response from the unit
Disconnect and reconnect the AC power
plug, then turn on the system again.
As a power-saving feature, the unit
switches off automatically 15 minutes after
track play reaches the end and no control
is operated.
USB device not supported
The USB device is incompatible with the
apparatus. Try another one.
No disc detected
Insert a disc.
Check if the disc is inserted upside down.
Wait until the moisture condensation at
the lens has cleared.
Replace or clean the disc.
UseanalizedCDorcorrectformatdisc.
Poor radio reception
Increase the distance between the product
and other electrical appliances.
Fully extend and adjust the position of the
telescopic antenna.
Adjust the position of the product.
About Bluetooth device
The audio quality is poor after connection
with a Bluetooth-enabled device.
The Bluetooth reception is poor. Move the
device closer to this product or remove
any obstacle between them.
Cannot connect with the device.
The Bluetooth function of the device is not
enabled. Refer to the user manual of the
device for how to enable the function.
This product is already connected with
another Bluetooth-enabled device.
Disconnect that device and then try again.
The product is not in pairing mode. Press
and hold PAIRING for two seconds, and
then try again.
Press and hold PAIRING for ten seconds
to clear Bluetooth pairing history, and then
try again.
The paired device connects and disconnects
constantly.
The Bluetooth reception is poor. Move the
device closer to this product or remove
any obstacle between them.
For some devices, Bluetooth connection
may be deactivated automatically as a
power-saving feature. This does not indicate
any malfunction of this product.
16 EN
10 Notice
Anychangesormodicationsmadetothis
device that are not expressly approved by
Gibson Innovations may void the user’s
authority to operate the equipment.
Compliance
Hereby, Gibson Innovations declares that this
product is in compliance with the essential
requirements and other relevant provisions
ofDirective2014/53/EU.Youcanndthe
Declaration of Conformity on www.philips.com/
support.
Care of the environment
Disposal of your old product
Your product is designed and manufactured
with high quality materials and components,
which can be recycled and reused.
This symbol on a product means that the
product is covered by European Directive
2012/19/EU. Inform yourself about the local
separate collection system for electrical and
electronic products. Follow local rules and never
dispose of the product with normal household
waste. Correct disposal of old products
helps prevent negative consequences for the
environment and human health.
Environmental information
All unnecessary packaging has been omitted.
We have tried to make the packaging easy to
separate into three materials: cardboard (box),
paper pulp (buffer) and polyethylene (bags,
protective foam sheet.)
Your system consists of materials which can
be recycled and reused if disassembled by
a specialized company. Please observe the
local regulations regarding the disposal of
packaging materials, exhausted batteries and old
equipment.
Trademark notice
The Bluetooth
®
word mark and logos are
registered trademarks owned by Bluetooth
SIG, Inc. and any use of such marks by Gibson
Innovations Limited is under license. Other
trademarks and trade names are those of their
respective owners.
This apparatus includes this label:
Copyright © 2015 Gibson Innovations Limited. Revised Edition © 2017
This product has been manufactured by, and is sold under the responsibility of Gibson Innovations Ltd., and
Gibson Innovations Ltd. is the warrantor in relation to this product.
Philips and the Philips Shield Emblem are registered trademarks of Koninklijke Philips N.V. and are used under
license.
PX840T_12_UM_V3.0
/