Roland F-130R Owner's manual

Category
Musical Instruments
Type
Owner's manual

This manual is also suitable for

Owners Manual
Bedienungsanleitung
Mode d’emploi
Manuale dell'utente
Manual del usuario
Manual do proprietário
Gebruikershandleiding
Deutsch Français Italiano Español Português NederlandsEnglish
Operation Guide . . . . . . . . . . . . . . . . . . . . . . . . . . . . . . . . . . . . . . . . . . . . . . . 2
Performing . . . . . . . . . . . . . . . . . . . . . . . . . . . . . . . . . . . . . . . . . . . . . . . . . . 2
Playing Back Songs . . . . . . . . . . . . . . . . . . . . . . . . . . . . . . . . . . . . . . . . . . 4
Using Automatic Accompaniment (Rhythm) That Matches
Your Chords . . . . . . . . . . . . . . . . . . . . . . . . . . . . . . . . . . . . . . . . . . . . . . . . . 5
Recording Performances . . . . . . . . . . . . . . . . . . . . . . . . . . . . . . . . . . . . . 6
Playing Songs from a USB Flash Drive (Sold Separately) . . . . . . . . . 7
Panel Descriptions . . . . . . . . . . . . . . . . . . . . . . . . . . . . . . . . . . . . . . . . . . . . . 8
Front Panel . . . . . . . . . . . . . . . . . . . . . . . . . . . . . . . . . . . . . . . . . . . . . . . . . . 8
Rear Panel Connections . . . . . . . . . . . . . . . . . . . . . . . . . . . . . . . . . . . . . . 9
Bottom Panel (Connecting Headphones or Memory) . . . . . . . . . . . 9
Before You Play . . . . . . . . . . . . . . . . . . . . . . . . . . . . . . . . . . . . . . . . . . . . . . . 10
Opening/Closing the Lid (RP401R) . . . . . . . . . . . . . . . . . . . . . . . . . . . 10
Opening/Closing the Lid (F-130R) . . . . . . . . . . . . . . . . . . . . . . . . . . . . 10
Turning the Power On/O . . . . . . . . . . . . . . . . . . . . . . . . . . . . . . . . . . . 11
Setting the Reference Pitch . . . . . . . . . . . . . . . . . . . . . . . . . . . . . . . . . . 11
Various Settings (Function Mode) . . . . . . . . . . . . . . . . . . . . . . . . . . . . . 12
Basic Operation in Function Mode . . . . . . . . . . . . . . . . . . . . . . . . . . . 12
Adjusting the Keyboard Sensitivity (Key Touch) . . . . . . . . . . . 12
Changing the Way in Which the Sound Is Heard
(Twin Piano Mode) . . . . . . . . . . . . . . . . . . . . . . . . . . . . . . . . . . . . . . 12
Dividing the Keyboard for Two-Person Performance
(Twin Piano) . . . . . . . . . . . . . . . . . . . . . . . . . . . . . . . . . . . . . . . . . . . . 12
Specifying What the Transpose Will Aect
(Transpose Mode) . . . . . . . . . . . . . . . . . . . . . . . . . . . . . . . . . . . . . . . 12
Transposing the Keyboard or Song (Transpose) . . . . . . . . . . . 12
Applying a Headphones 3D Ambience Eect to the Piano
Sound (Headphones 3D Ambience) . . . . . . . . . . . . . . . . . . . . . . 12
Matching the Pitch with Other Instruments (Master Tuning) 12
Changing the Tuning Method (Stretch Tuning) . . . . . . . . . . . . 13
Changing How the Pedals Work . . . . . . . . . . . . . . . . . . . . . . . . . . 13
Specifying How the Bass Part Behaves (Leading Bass) . . . . . . 13
Chord Recognition When Split Is On . . . . . . . . . . . . . . . . . . . . . . 13
Preventing Doubled Notes When Connected to a
Sequencer (Local Control) . . . . . . . . . . . . . . . . . . . . . . . . . . . . . . . 13
Copying a Song (Copy Song) . . . . . . . . . . . . . . . . . . . . . . . . . . . . . 13
Connecting to a Wireless LAN (WPS Connection) . . . . . . . . . . 13
Connecting to a Wireless LAN (Ad-Hoc Connection) . . . . . . . 13
Viewing the Ad-Hoc Key . . . . . . . . . . . . . . . . . . . . . . . . . . . . . . . . . 13
Making the Power Automatically Turn O After a Time
(Auto O ) . . . . . . . . . . . . . . . . . . . . . . . . . . . . . . . . . . . . . . . . . . . . . . 14
Saving the Settings (Memory Backup) . . . . . . . . . . . . . . . . . . . . 14
Restoring the Factory Settings (Factory Reset) . . . . . . . . . . . . . . . . 14
Specifying the Maximum Volume (Volume Limit) . . . . . . . . . . . . . 14
About the Wireless LAN Function . . . . . . . . . . . . . . . . . . . . . . . . . . . . . 15
Basic Connection Method (Connect by WPS) . . . . . . . . . . . . . . . . . . 15
Connecting in Ad-Hoc Mode . . . . . . . . . . . . . . . . . . . . . . . . . . . . . . . . 15
Troubleshooting . . . . . . . . . . . . . . . . . . . . . . . . . . . . . . . . . . . . . . . . . . . . . . 16
When Using the Wireless LAN Function . . . . . . . . . . . . . . . . . . . . . . . 16
Message List . . . . . . . . . . . . . . . . . . . . . . . . . . . . . . . . . . . . . . . . . . . . . . . . . . 17
USING THE UNIT SAFELY . . . . . . . . . . . . . . . . . . . . . . . . . . . . . . . . . . . . . . 18
IMPORTANT NOTES . . . . . . . . . . . . . . . . . . . . . . . . . . . . . . . . . . . . . . . . . . . 18
Contents
Before using this unit, carefully read the sections entitled “USING THE UNIT SAFELY” and “IMPORTANT NOTES” (leaet “USING THE UNIT SAFELY and Owners
Manual p. 18). These sections provide important information concerning the proper operation of the unit. Additionally, in order to feel assured that you have
gained a good grasp of every feature of your new unit, read Owners Manual in its entirety. This manual should be saved and kept on hand as a convenient
reference.
Copyright © 2014 ROLAND CORPORATION
All rights reserved. No part of this publication may be reproduced in any form without the written permission of ROLAND CORPORATION.
Main Specications
Roland RP401R: Digital Piano
Roland F-130R: Digital Piano
Keyboard
88 keys (PHA-4 Standard Keyboard: with Escapement and Ivory
Feel)
Sound Generator
Piano Sound: SuperNATURAL Piano Sound
MIDI Format: Conforms to GM2/GS/XGlite
Power Supply AC adaptor
Power Consumption
9 W (3 W–22 W)
9 W: Average power consumption while piano is played with
volume at center position
3 W: Power consumption immediately after power-up; nothing
being played
22 W: Rated power consumption
Dimensions
RP401R 1,378 (W) x 423 (D) x 992 (H) mm
(with music rest): 54-1/4(W) x 16-11/16 (D) x 39-1/16 (H) inches
F-130R 1,361 (W) x 305 (D) x 778 (H) mm
(
with lid closed): 53-5/8 (W) x 12-1/16 (D) x 30-11/16 (H) inches
Weight
RP401R: 40.0 kg / 8 lbs 14 oz
F-130R: 34.5kg / 76 lbs 1 oz
Accessories
Owners manual, Leaet “USING THE UNIT SAFELY, AC adaptor,
Power cord (for connecting AC adaptor)
Options
(Sold Separately)
USB Flash Memory (*1), Wireless USB Adapter (WNA1100-RL) (*1)
*1: Use USB ash drive and Wireless USB Adapter sold by Roland.
We cannot guarantee operation if other products are used.
* In the interest of product improvement, the specications and/or
appearance of this unit are subject to change without prior notice.
Owners Manual
Deutsch Français Italiano Español Português NederlandsEnglishEnglish
Selecting Tones ([Piano] [Other] Buttons)
Playing Dierent Tones with the Right and Left Hands ([Split] Button)
You can play dierent tones in the left and right sides of the keyboard, divided at a
certain key.
This feature is called “Split Play,“ and the key at which the keyboard is divided is
called the “Split Point.
Turning the split feature on Press the [Split] button so it’s lit.
Changing the keyboard’s
split point
Hold down the [Split] button and press the
key at the desired split point.
Changing the Right-Hand Tone Same as “Selecting Tones.
Changing the Left-Hand Tone
Hold down the [Split] button and use the
steps described in “Selecting Tones.
B1 B6
Left-Hand Tone Right-Hand Tone
Range in which you can specify the split point
Split point when the power is turned on: F#3
* The split point is the highest note of the left-hand tone.
Display
(example)
Pitch
F 3
F 3
A 4
A 4
C 4
C4
MEMO
Separate, independent settings
for Split can be made for the
Song mode (p. 4) and the Rhythm
mode (p. 5).
Layering Two Tones (Dual Play)
You can play two tones simultaneously from each note of the keyboard. This feature
is called “Dual Play.
Turning Dual on
Hold down the [Piano] button and press the
[Other] button.
Turning Dual o Press the [Piano] or the [Other] button.
Selecting tones
Select tones for the [Piano] button and [Other]
button before you turn Dual on.
1. Press the [Piano] button, and then use the [-] [+] buttons to
select a tone.
2. Press the [Other] button, and then use the [-] [+] buttons to
select a tone.
3. Hold down the [Piano] button and press the [Other] button to
turn Dual on.
Tone 1 and tone 2 are heard together.
To turn Dual o, press the [Piano] button or the [Other] button.
Operation Guide
Performing
This digital piano lets you enjoy playing a variety of piano tones (sounds) and other
types of tones.
You can select a tone and adjust the way that it sounds.
Selecting a piano tone Press the [Piano] button.
Selecting other tones Press the [Other] button.
Selecting various tones
Press the [Piano] or [Other] button, and then press
the [-] [+] buttons.
Adjusting the spaciousness
of the sound
(Ambience)
Hold down the [Piano] button and press the [-] [+]
buttons.
* If you’re using headphones and the Headphones
3D Ambience eect (p. 12) is set to “On,“ this lets
you adjust the depth of the Headphones 3D
Ambience eect.
Adjusting the brightness of
the sound
(Brilliance)
Hold down the [Other] button and press the [-] [+]
buttons.
[Piano] button
Display Explanation
1
Concert Piano
The sound of a splendid concert grand piano. This piano sound has our
highest recommendation, and can be used for any style of music.
Display Explanation
2
Ballade Piano
A mellow grand piano sound, recommended for quiet songs.
3
Bright Piano
A brilliant grand piano sound, recommended when you want the piano to
stand out in an ensemble.
4
Magical Piano
A charming sound that layers synth bells with Concert.
5
Piano+Strings
Strings layered with Concert Piano.
6
Piano+Pad
A pad layered with Concert Piano.
7
Piano+Choir
A choir layered with Concert Piano.
8
Rock Piano
A robust piano sound, recommended for boogie-woogie playing.
g
Ragtime Piano
A honky-tonk piano sound, recommended for ragtime playing.
10
Harpsichord
A type of keyboard instrument widely used in Baroque music, producing a
delicate sound.
11
Coupled 8+4
The sound of a harpsichord layered with sound an higher octave.
Settings for items with this icon
are saved by Memory Backup
(p. 12).
Changing the Key (Transpose)
The Transpose function lets you shift the pitch of the keyboard in semitone steps.
You can use this to play the song in a dierent key.
For details, refer to Transposing the Keyboard or Song (Transpose)” (p. 12).
2
Deutsch Français Italiano Español Português NederlandsEnglishEnglish
Using the Metronome ([Metronome] Button)
You can perform while the metronome sounds. You can adjust the
tempo or beat of the metronome.
If a song is playing, the metronome will sound at the tempo and
beat of that song.
Using the Metronome Press the [Metronome] button so it blinks.
Changing the Tempo
Turn on the [Metronome] button to display the
tempo, and then use the [-] [+] buttons.
108
Changing the Beat
Hold down the [Metronome] button and press the
[-] [+] buttons.
4.4
For details on the available time signatures, refer to
“List of Time Signatures.
Adding a count-in
Turn on the metronome, and then press the
[s (Start/Stop)] button.
Dividing the Keyboard in Two (Twin Piano)
You can divide the keyboard into left and right sections so that two people can play
the same pitch ranges.
1. Hold down the [Metronome] button and press the [Split]
button.
2. Use the [-] [+] buttons to choose
F03
and press the [s]
button.
3. Choose the
On
setting.
* Concert Piano is selected.
4. Hold down the [Metronome] button and press the [Split]
button to exit Function mode.
Changing how
Twin Piano
sounds
In function mode, select
F02
and choose
1
or
2
.
1
" Notes in the right section are louder in the right
speaker; notes in the left section are louder in the
left speaker.
2
" Notes in the right section are heard only from the
right speaker; notes in the left section are heard only
from the left speaker.
C4 C5 C6 C7 C8C3C2C1
C4 C5 C6C3C4 C5C3 C6
The damper pedal for
the left area
The damper pedal for
the right area
Conventional
keyboard
Twin Piano
Divide point
List of Time Signatures
Display Beat Display Beat
2.2
2/2
6.4
6/4
0.4
Only weak beats will be
sounded.
7.4
7/4
2.4
2/4
3.8
3/8
3.4
3/4
6.8
6/8
4.4
4/4 (default)
g.8
9/8
5.4
5/4
12.8
12/8
Adjusting the Keyboard Sensitivity (Key Touch)
Here’s how to change the way in which the sound responds to your keyboard
dynamics. You can adjust the response as appropriate for your playing strength.
1. Hold down the [Metronome] button and press the [Split]
button.
2. Use the [-] [+] buttons to choose
F01
and press the [s]
button.
3. Use the [-] [+] buttons to change the settings.
Value Explanation
F
(Fixed)
The sound plays at one set volume, regardless of the
force used to play the keys.
L2
(Super Light) An even lighter setting than
L1
(Light).
L1
(Light)
Sets the keyboard to a light touch.
You can achieve fortissimo ( ) play with a less forceful
touch than
N
(medium), so the keyboard feels lighter.
This setting makes it easy to play, even for children.
N
(Medium)
Sets the keyboard to the standard touch.
This sets the standard keyboard touch. You can play
with the most natural touch. This is the closest to the
touch of an acoustic piano.
H1
(Heavy)
Sets the keyboard to a heavy touch.
You have to nger the keyboard more forcefully than
N
(medium)” in order to play fortissimo ( ), so the
keyboard touch feels heavier. Dynamic ngering adds
even more feeling to what you play.
H2
(Super Heavy) An even heavier setting than
H1
(Heavy).
4. Hold down the [Metronome] button and press the [Split]
button to exit Function mode.
3
Playing Back Songs
Functions of the [x] [y] [s] Buttons
How to Use Song Mode ([Song] Button)
Press the [Song] button to select Song mode.
Selecting a Song
Press the [Song] button, and then use the [-] [+] buttons.
In the middle of a song, pressing the [-] button will return you
to the beginning of the song.
a.01 c.20U.10N.01
Recorded songs Internal songs
Songs indicated by “a, b, c” are internal songs.
For details, refer to “Internal Song List at the end of this manual.
Songs indicated by “U” are songs that were recorded in internal
memory.
Songs indicated by “N” are songs that were recorded on a USB
ash drive.
* To switch between categories
a
,
b
,
c
,
U
,
N
, hold down the
[Song] button and press the [-][+] buttons.
Changing the
number of
measures in a
song
Use the [x] [y] buttons to specify the number of measures.
1.
Operation Guide
Changing the
Tempo
Press the [Metronome] button.
Use the [-] [+] buttons to change the tempo.
108
Changing the
Volume of the
Song
Hold down the [Song] button and use the Volume buttons to
adjust the volume of the song.
g 1
(Song is louder)
1 g
(Manual
performance is
louder)
g g
(Same loudness)
Song volume – Manual performance volume
Playing all songs
Hold down the [Song] button and press the [s] button
(All Song Play).
Starting/Stopping Song
Playback
Press the [s] button.
When the song has nished playing to the end,
it will stop.
Fast-Forward
Press the [y] button.
By holding down the [y] button and pressing
the [x] button, you can fast-forward more
quickly.
Rewind
Press the [x] button.
By holding down the [x] button and pressing
the [y] button, you can rewind more quickly.
Selecting Parts to Play
1. Hold down the [s] button and use the [-] [+] buttons to select
the parts to be played.
Through successive presses of these buttons, you can turn on or o the
accompaniment part, left-hand part, and right-hand part to achieve the
desired arrangement of played/muted parts.
oo
Accompaniment
part
Left-hand part
Right-hand part
o
" Sound will be heard (played)
" Sound will not be heard (muted)
Playback part play/mute status indication
* When using Twin Piano, what you play in the left section is recorded to the left-hand
part, and what you play in the right section is recorded to the right-hand part.
* When using Split, the left-hand tone is recorded to the left-hand part, and the
right-hand tone is recorded to the right-hand part.
* When using Dual, tone 1 is recorded to the right-hand part and tone 2 is recorded to
the accompaniment part.
* When playing anything other than Twin Piano, Split, or Dual, everything is recorded
on the right-hand part.
4
Deutsch Français Italiano Español Português NederlandsEnglishEnglish
Using Automatic Accompaniment (Rhythm) That Matches Your Chords
How to Use Rhythm Mode ([Rhythm] Button)
Press the [Rhythm] button to select Rhythm mode.
Split is turned on.
While the rhythm is playing, the left-hand part will not sound, since that section is
dedicated to the recognition of chords.
Selecting a
Rhythm
Press the [Rhythm] button, and then use the [-] [+] buttons.
1-1 g-6
For details, refer to “Rhythm List” at the end of this manual.
* To switch the genre of rhythm, hold down the [Rhythm] button
and press the [-] [+] buttons.
Changing the
Tempo
Press the [Metronome] button.
Use the [-] [+] buttons to set the tempo.
108
Tempo range
20
250
Changing the
Volume of the
Rhythm
Hold down the [Rhythm] button and use the Volume buttons to
adjust the volume of the rhythm.
g 1
(Rhythm is louder)
1 g
(Manual
performance is
louder)
g g
(Same volume)
Rhythm volume – Manual performance volume
About the rhythm function
This unit contains many built-in rhythms in various musical styles, such as jazz and
rock.
What the [x (Variation)] [y(Intro/Ending)] [s (Start/Stop)] Buttons Do
Rhythms include not only drum sounds, but also accompaniments featuring
instruments such as piano, guitar, bass, and strings.
You can also add intros and endings to your rhythms, and insert ll-ins These
features make it easy to develop eective and expressive rhythmic accompaniment.
Rhythm Flow
Intro
Accompaniment
Ending
There are two types of rhythms: original accompaniment patterns, and variation
accompaniment patterns, which embellish the original patterns.
It can be eective to use the quieter original patterns in the rst half of the song,
and then use the variation patterns in the latter half, when you want to build
excitement.
How to play chords
When a chord is played on the keyboard, a rhythm based
on the chord that was played is sounded. (When the keys
marked with in the illustration are played, the result is
recognized as “C.”)
Note that it is not necessary to press all of the constituent notes of the chord;
chords can be specied using simple ngering. (When the key marked with
in
the illustration is played, it is recognized as “C.”)
For details, refer to “Chord Recognition When Split Is On” (p. 13), and the
“Chord Fingering List” at the rear of this manual.
Cm7 ( 5 )
C C# D E E F
CM7 C#M7 DM7 E M7 EM7 FM7
C7 C#7 D7 E 7 E7 F7
Cm C#m Dm E m Em Fm
Cm7 C#m7 Dm7 E m7 Em7 Fm7
Cdim C#dim Ddim E dim Edim Fdim
Dm7 ( 5 ) Em7 ( 5 )
Caug C#aug Daug E aug Eaug Faug
C7sus4 C#7sus4 D7sus4 E 7sus4 E7sus4 F7sus4
Fm7 ( 5 )E m7 ( 5 )C#m7 ( 5 )
Csus4 C#sus4 Dsus4 E sus4 Esus4 Fsus4
C7/13 C#7/13 D7/13 E 7/13 E7/13 F7/13
CmM7 C#mM7 DmM7 E mM7 EmM7 FmM7
Starting/Stopping the
Rhythm
Press the [s (Start/Stop)] button.
Adding an Intro
Turn on the [y(Intro/Ending)] button, and then play
the rhythm.
Adding an Ending
While the rhythm is playing, turn on the
[y(Intro/Ending)] button.
An ending is played, and then playback stops.
Adding Variation to the
Rhythm
Press the [x (Variation)] button.
O " A simple accompaniment pattern is played.
On " A more amboyant accompaniment pattern is
played.
Inserting a Fill-in When
You Switch Variations
(Auto Fill)
While holding down the [x (Variation)] button, use the
[-] [+] buttons to select “On, and then switch variations.
What’s a “Fill-In?”
A short improvisational phrase inserted at the transition
is called a “Fill-In.
Starting the Rhythm by
Playing a Key (Sync)
Press the [Rhythm] button.
The rhythm starts playing when you play the keyboard.
Snc
Playing Only the Drums or Another Specic Part
1. While holding down the [s (Start/Stop)] buttons, use the [-]
[+] buttons to select the mute setting.
Through successive presses of these buttons, you can turn on or o the
drums, bass, and other instruments to achieve the desired arrangement of
played/muted parts.
oo
Drums
Bass
Other instruments
o
" Sound will be heard (played)
" Sound will not be heard (muted)
Play/mute status indication for the rhythm parts
NOTE
For some rhythms, you’ll hear other instruments even in the bass part.
5
You can record your performance, including accompaniment.
You can play back a recorded performance to check your playing, or to play along with
it.
Getting Ready to Record
1. Select the tone that you want to play on the keyboard (p. 2).
2. Start the metronome if desired.
Press the [Metronome] button.
While the metronome is sounding, specify the tempo and time signature of
the song (p. 3).
If you want rhythm to play
3. If you want a rhythm accompaniment to be heard while you
perform, press the [Rhythm] button.
Specify the rhythm and tempo settings (p. 5).
If you don't want rhythm to play
3. Press the [Song] button so the button is lit.
Entering Recording-standby Mode
4. Hold down the [Song] button and press the [Rhythm] button.
The [Song] button and the [Rhythm] button will light; the unit will enter
recording-standby mode.
MEMO
If you decide not to record (i.e., if you want to exit recording-standby
mode), hold down the [Song] button once again and press the [Rhythm]
button.
Starting Recording
5. Press the [s] button.
A two-measure count will sound, and then recording will start.
During the count, measure numbers
-2
and then
-1
will appear in the
display.
MEMO
Recording will start automatically if you play the keyboard while in
recording-standby mode.
Stopping Recording
6. Press the [s] button.
By pressing the [s] button once again, you can hear the song that you
just recorded.
Selecting the Destination of the Save
7. Use the [-] [+] buttons to select the destination at which to save,
and then press the [Metronome] button.
U
(User)
U.01
U.10
N
(USB)
N.01
N.gg
v01
A song with no recorded data (empty song)
Song number shown with lowercase
v
(User memory)
Song number shown with lowercase
n
(USB ash drive)
No dot shown
U.01
A song with recorded data
Song number shown with uppercase
U
(User memory)
Song number shown with uppercase
N
(USB ash drive)
Dot shown
MEMO
If you decide not to carry out the save, hold down the [Song] button and
press the [Rhythm] button to cancel it.
NOTE
If you select a song that already contains data (song number with an
uppercase
U
or
N
”) and save, the previously recorded data will be
lost.
* While the song is being saved, an animation of a rotating
o
symbol
will appear in the display for several seconds. Do not turn o the
power during this time. Doing so might cause the saved song to
be lost.
Recording Performances
If you want to erase the recorded song
You can erase a song by recording an empty song as follows.
1. Press the [Song] button.
2. Hold down the [Song] button and press the [Rhythm] button.
3. Press the [s] button to hear the two-measure count, and then press the [s] button without playing the keyboard.
4. Select the song number that you want to erase, and press the [Metronome] button.
A song containing no notes will be recorded; the song has been erased.
Operation Guide
6
Deutsch Français Italiano Español Português NederlandsEnglishEnglish
Playing Songs from a USB Flash Drive (Sold Separately)
Connecting a USB Flash Drive
NOTE
If the USB ash drive contains a large number of song les, it may take
some time for the data to be read.
Use only single-byte alphanumeric characters in the le names.
1. Using your computer, copy your favorite songs onto your USB
ash drive (sold separately).
This digital piano is able to play back SMFs (Standard MIDI Files) or audio
les (WAV) from a USB ash drive.
Playable formats
Type Explanation
SMF Standard MIDI les (format 0, 1)
WAV WAV format, 44.1 kHz, 16-bit linear
2. Connect your USB ash drive to the USB MEMORY port of the
digital piano.
Playing Songs
1. Press the [Song] button.
2. Use the [-] [+] buttons to select a song.
N.01
MEMO
If you’ve selected an audio le (WAV le), a dot is displayed following the
last digit.
N.02.
The les on the USB ash drive are shown.
N
indicates a USB ash drive.
The numbers are assigned automatically. If you later add or delete a le,
the numbers will be automatically reassigned.
All les on the USB ash drive begin with
N
.
If you use the [-] [+] buttons to make the display indicate
U
or
a
, les in
the digital piano's internal memory are displayed.
3. Press the [s] button to play the selected song.
The display shows the measure number of the currently playing SMF.
If a WAV le is playing, the elapsed playback time is shown.
1.01
(Example: 1 minute 1 second has elapsed)
Lower the Level of an Audio Files Central Sound
This feature lets you reduce the loudness of the central sound of the audio
(Center Cancel).
1. When a song is selected, hold down the [s] button and use
the [-] [+] buttons to turn this feature
On
.
NOTE
This feature does not work perfectly with every song In some cases it may
be unable to fully eliminate the central sound, or may alter the recordings
tone quality.
About USB Flash Drives
If you’re using a newly purchased USB ash drive, you must rst format it on the digital piano.
NOTE
Never insert or remove a USB ash drive while this unit is turned on. Doing so may corrupt the unit’s data or the data on the
USB ash drives.
Carefully insert the USB ash drives all the way in—until it is rmly in place.
Use USB Flash memory sold by Roland. We cannot guarantee operation if other products are used.
Formatting a USB Flash Drive
Here’s how to initialize (format) the entire contents saved on a USB ash drive.
NOTE
Formatting will erase everything that has been saved on the USB ash drive.
Before using a new USB ash drive with this digital piano for the rst time, you must format the USB ash drive.
1. Connect the USB ash drive that you want to format to the USB MEMORY port.
2. While holding down the [Song] button, turn the power on.
Keep holding down the [Song] button until it indicates as
Svr
on the display.
To cancel, press the [y] button.
3. To execute the format, press the [s] button.
When all the LEDs on the buttons are lit, the operation is complete.
4. Turn the power o, then on again.
Bottom panel of digital piano
7
Rear
Settings for items with this icon
are saved by Memory Backup
(p. 12).
Bottom
Front Panel
* For details on how to use the other buttons, refer to “Operation Guide” (p. 2)–(p. 7).
Panel Descriptions
[L] Switch
This turns the power on/o (p. 11).
With the factory settings, the unit’s power
will automatically be switched o 30 minutes
after you stop playing or operating the unit.
If the unit’s power has been turned o
automatically, you can use the [L] switch to turn the unit back on again. If you
don’t want the power to turn o automatically, change the Auto O setting to
“OFF” as described on “Making the Power Automatically Turn O After a Time
(Auto O )” (p. 14).
About the Display
This indicates the tone number, song number, measure number, tempo, selected
function, or value.
Tone
number
Piano
1
Other
1
Tempo
108
Measure number
1.
Song
number
Internal song
a.01
c.01
User
U.01
USB ash
Drive
N.01
Rhythm
1-1
Adjusting the Volume and Balance (Volume Buttons)
Overall Volume
Use the Volume buttons to adjust the volume.
Volume Balance Between Song/Rhythm and the Keyboard (Song Balance)
While holding down the
[Song] button or [Rhythm]
button, use the Volume
buttons to adjust the
balance.
Relative Balance of Dual Tones (Dual Balance)
This is available if Dual
is on.
While holding down the
[Piano] button and [Other]
button, use the Volume
buttons to adjust the balance.
Relative Balance of Split Tones (Split Balance)
This is available if Split is on.
Hold down the [Split]
button and use the Volume
buttons to adjust the
balance.
g 1
(Song is louder)
1 g
g g
(Same volume)
Volume of the song – Volume of the manual performance
(Manual performance
is louder)
g 1
(Piano is louder)
1 g
g g
(Same volume)
Volume of the piano sound – Volume of the other sound
(Other is louder)
g 1
(Left-hand is
louder)
1 g
g g
(Same
volume)
Left-hand volume – Right-hand volume
(Right-hand is louder)
Headphone Hook
Whenever you
are not using the
headphones, you
can hang them on
the headphone
hook.
You can use the holders
to hold pages in place.
When not using the
holders, leave them
folded down.
Music Holders (RP401R)
RP401R
F-130R
Damper pedal
Use this pedal to sustain the sound. While this pedal is held down, notes will be sustained for an extended time even
if you release your ngers from the keyboard. The length of the sustain will change subtly depending on how deeply
you press the pedal. On an acoustic piano, holding down the damper pedal will cause the strings for notes other
than the ones you actually play to vibrate in sympathy with what you’ve played, producing a rich resonance. This
unit simulates this sympathetic vibration (damper resonance).
Sostenuto pedal
This pedal sustains only the notes of the keys that were already pressed when you pressed the pedal.
Soft pedal
This pedal is used to make the sound softer. Playing with the soft pedal depressed produces a sound that is not
as strong as when otherwise played with the equivalent strength. This is the same function as the left pedal of an
acoustic piano. The softness of the tone can be varied subtly by the depth to which you press the pedal.
Turn the adjuster to lower it until the adjuster is in rm
contact with the oor. In particular, when you’ve placed
the piano on carpet, you must turn the adjuster until it is
pressing rmly against the oor.
Adjuster (RP401R)
8
Deutsch Français Italiano Español Português NederlandsEnglishEnglish
PHONES Jacks
Since this unit has two headphone jacks,
two people can also use headphones
simultaneously.
A Headphones 3D Ambience eect will
be applied, producing the sensation that
the sound is emanating from the piano
itself even when using headphones (p. 12).
Disabling the Buttons ( Panel Lock)
When you activate Panel Lock, all buttons will be disabled. This prevents the
tones or settings from being changed if you inadvertently press a button.
Press the [Other] button for a longer than usual amount of time.
Cancelling Panel Lock
Once again, press the [Other] button for a longer than usual amount of time.
Adjusting a Value ([-] [+] Buttons)
Use the [-] [+] buttons to adjust a value.
Changing a value
continuously
Hold down the [+] button or [−] button.
Changing a value rapidly
While holding down the [+] button, press the [-] button to
rapidly increase the value.
While holding down the [-] button, press the [+] button to
rapidly decrease the value.
Restoring the default value Press the [+] button and [-] button simultaneously.
Rear Panel Connections
Stereo phone plug
Stereo-mini plug
USB MEMORY Port
A separately sold USB
ash drive or wireless USB
adaptor can be connected
here (p. 7, p. 15).
Use a USB ash drive or
wireless USB adapter sold
by Roland.
Bottom Panel (Connecting Headphones or Memory)
* To prevent malfunction and equipment failure, always turn down the volume, and turn o all the units before making any connections.
Input Jack
If you use a cord with a stereo mini-plug to connect a audio
player or similar device, the sound of the connected device will be
heard through this unit. Use the controls of the connected device
(audio player) to adjust the volume.
Output Jack
If you connect this jack to amplied
speakers, the sound of this unit will be heard
through them.
DC In Jack Pedal Connector
Connect the pedal
cord of the dedicated
stand here.
USB Computer Port
By using a commercially available USB
cable to connect the USB Computer
port of this digital piano to a USB port
on your computer, you can produce
and edit music using MIDI-compatible
software on your computer.
Power cord
To AC outlet
Place the AC adaptor so the side with the indicator
(see illustration) faces upwards and the side with textual
information faces downwards.
The indicator will light when you plug the AC adaptor into
an AC outlet.
9
Before You Play
Opening/Closing the Lid (RP401R)
You must use both hands to open or close the lid.
Opening the Lid
1. Use both hands to lift the edge of the lid, and push it away
from yourself.
Edge of lid
Closing the Lid
1. Grasp and gently lower the edge of the lid with both hands.
NOTE
When opening or closing the lid, please be careful not to get your
ngers pinched between the movable part and the panel. In places
where small children are present, make sure that an adult provides
supervision and guidance.
If you need to move the piano, make sure the lid is closed rst to
prevent accidents.
Do not apply undue force to the music stand while it is in use.
Do not open the lid while objects (papers or metal items) are
resting on the lid. The objects could fall into the piano and become
irretrievable.
Opening/Closing the Lid (F-130R)
You must use both hands to open or close the lid.
Opening the Lid
1. Use both hands to lift the edge of the lid, and push it away
from yourself.
Edge of lid
2. Push the lid away from yourself until it stops.
Closing the Lid
1. Grasp and gently lower the edge of the lid with both hands.
NOTE
When opening or closing the lid, please be careful not to get your
ngers pinched between the movable part and the panel. In places
where small children are present, make sure that an adult provides
supervision and guidance.
If you need to move the piano, make sure the lid is closed rst to
prevent accidents.
When opening or closing the lid, take care not to pinch
your ngers between the folding sections.
It is dangerous to close the lid by pressing it from above, since you risk
pinching your ngers between the sections of the lid.
Opening the lid by pushing it may cause this unit to fall over. You must
grasp the edge of the lid when opening or closing it.
10
Deutsch Français Italiano Español Português NederlandsEnglishEnglish
Turning the Power On/O
Once everything is properly connected (p. 9), be sure to follow the
procedure below to turn on their power. If you turn on equipment in
the wrong order, you risk causing malfunction or equipment failure.
Turning the Power On
1. Turn the [L] switch ON.
After a brief interval, you’ll be able to produce sounds by playing the
keyboard.
* This unit is equipped with a protection circuit. A brief interval
(a few seconds) after turning the unit on is required before it will
operate normally.
2. Use the Volume buttons to adjust the volume.
The volume increases when you press the Volume [+] button, and
decreases when you press the Volume [-] button.
This will adjust the volume of the speakers if you’re using the speakers
of the unit, or the volume of the headphones if headphones are
connected. Each volume setting (for speaker or headphone) is saved
automatically.
MEMO
The unit is designed so that nuances in the dynamics of your playing
will be clearly heard even at low volume, and that the sound will
remain clear even at high volume.
Turning the Power O
1. Turn the [L] switch OFF.
Setting the Reference Pitch
When playing ensemble with other instruments and in other such
instances, you can match the standard pitch to another instrument
(Master Tuning).
1. In “Various Settings (Function Mode)” (p. 12), choose
F07
and
then press the [s] button.
2. Use the [-] [+] buttons to set the reference pitch.
Examples:
Reference pitch Display
440.0 Hz (default)
40.0
442.0 Hz
42.0
Press the [s] button to return to the previous screen.
3. If you want to save the setting, carry out the Memory Backup
procedure (p. 12).
4. Hold down the [Metronome] button and press the [Split]
button to exit Function mode.
11
°
Various Settings (Function Mode)
Function settings
Display Value Explanation
F01
F
(Fixed),
L2
(Super Light),
L1
(Light),
N
(Medium),
H1
(Heavy),
H2
(Super Heavy)
Adjusting the Keyboard Sensitivity (Key Touch)
Here’s how to change the way in which the sound responds to your keyboard dynamics. You can adjust the response as appropriate for
your playing strength.
F02
1
(Pair),
2
(Separate)
Changing the Way in Which the Sound Is Heard (Twin Piano Mode)
This setting species how the sound will be heard when Twin Piano is on.
F03
Off
,
On
Dividing the Keyboard for Two-Person Performance (Twin Piano)
This setting turns Twin Piano on/o.
F04
1
(Keyboard & Song),
2
(Keyboard),
3
(Song)
Specifying What the Transpose Will Aect (Transpose Mode)
This setting species what the transpose will aect. You can use the transpose to change the pitch of both the song and the keyboard,
only the pitch of the song, or only the pitch of the keyboard.
F05
-6
0
5
[semitone]
Transposing the Keyboard or Song (Transpose)
Here you can specify the transposition value.
For example, if the song is written in E major but you want to play it using the ngering of the key of C major, you would set Transpose
to “4.
If you play C E G " It will sound E G B
* If this is set to
0
, the Transpose function will be o.
F06
Off
,
On
Applying a Headphones 3D Ambience Eect to the Piano Sound
(Headphones 3D Ambience)
You can apply a Headphones 3D Ambience eect which produces the sensation that the sound is emanating from the piano itself even
when using headphones.
* The Headphones 3D Ambience eect applies only to piano tones; it does not apply to other tones.
On " Headphones 3D Ambience is on.
O " Headphones 3D Ambience is o .
F07
15.3
(415.3)–
40.0
(440.0)–
66.2
(466.2) [Hz]
Matching the Pitch with Other Instruments (Master Tuning)
This setting species the reference pitch for this piano (the pitch of middle A).
page 3
page 3
page 11
Basic Operation in Function Mode
1. Hold down the [Metronome] button and press the [Split]
button.
Function mode is selected.
2. Use the [-] [+] buttons to select the function that you want
to set, and press the [s] button to display the setting
screen.
3. Use the [-] [+] buttons to adjust the setting.
Press the [s] button to return to the previous screen.
4. Hold down the [Metronome] button and press the [Split]
button to exit Function mode.
Memory backup
The settings of this digital piano will return to their default state when you turn o
the power. However, you can save the settings so they will remain unchanged even
after the power has been turned o, then on again.
The settings of items marked with the
symbol in this operating manual can be
saved by using the Memory Backup function.
1. In Function mode, choose
F1g
(Memory Backup) and press
the [s] button.
12
Various Settings (Function Mode)
Deutsch Français Italiano Español Português NederlandsEnglishEnglish
Display Value Explanation
F08
1
,
2
Changing the Tuning Method (Stretch Tuning)
This setting changes the type of stretch tuning, a tuning method that is used specically for pianos, in which the high notes are tuned
slightly sharper and the low notes are tuned slightly atter.
Normally, you should use the “1” setting (standard tuning curve).
F0g
F10
1
(Sostenuto, Soft),
2
(Start/Stop),
3
(Intro/Ending),
4
(Variation),
5
(Fill-in),
6
(Leading Bass)
Changing How the Pedals Work
Here you can assign the functions of the center pedal (
F0g
) and left pedal (
F10
).
1
" Sostenuto pedal (
F0g
), soft pedal (
F10
)
2
" Same function as the [s (Start/Stop)] button
3
" Intro/Ending function on/o (same function as the [y(Intro/Ending)] button)
4
" Variation on/o (same function as the [x (Variation)] button)
5
" Fill-in
6
" Leading Bass function on/o
F11
Off
,
On
Specifying How the Bass Part Behaves (Leading Bass)
The function that sounds the lowest note of a ngered chord as the bass tone is called “Leading Bass.
O " The bass part of the rhythm plays the root of the chord. For example, if you play the chord E-G-C (C major), the note
C is sounded as the bass.
On " The bass part plays the lowest note of the chord you play. If you play the chord E-G-C (C major), the note E is
sounded as the bass.
The Leading Bass feature is always on while Split is o.
F12
1
(Intelligent),
2
(Standard)
Chord Recognition When Split Is On
Sets how the unit recognizes rhythm chords while Split function (p. 2) is on.
Intelligent " Plays chords even when basic chord tones are missing, allowing you to generate chords with very simple keyboard
playing. For details on how to play chords, refer to “Chord Fingering List at the end of this manual.
Standard " Normal chord recognition.
F13
Off
,
On
Preventing Doubled Notes When Connected to a Sequencer
(Local Control)
If a software synthesizer is connected to USB MIDI, turn this item “OFF.
Since most software synthesizer have their Thru function turned on,
notes you play on the keyboard may be sounded in duplicate, or get
dropped. To prevent this, you can enable the “Local O setting so that
the keyboard and internal sound generator will be disconnected.
F14
U.01
U.10
(USER 01–10)
N.01
N.gg
(USB 01–99)
Copying a Song (Copy Song)
A song that you recorded on this unit can be copied to a USB ash drive.
The copy-source song number is displayed; use the [-] [+] buttons to select the desired number, and press the [s] button to conrm
it.
The copy-destination song number is displayed; use the [-] [+] buttons to select the desired number, and press the [s] button to
conrm it.
F15
None
Connecting to a Wireless LAN (WPS Connection)
This lets you establish a WPS connection.
The display indicates
Svr
”; press the [y] (cancel) button or the [s] (execute) button to cancel or connect.
F16
None
Connecting to a Wireless LAN (Ad-Hoc Connection)
This lets you establish an ad-hoc connection.
The display indicates
Svr
”; press the [y] (cancel) button or the [s] (execute) button to cancel or connect.
F17
000
ggg
Viewing the Ad-Hoc Key
Of the ve-digit ad-hoc key, the lower three digits are shown (the upper two digits are 00).
Software
Synthesizer
Local Control
Sound Generator
USB MIDI
In
USB MIDI
Out
Computer
page 15
page 15
page 15
13
Restoring the Factory Settings (Factory Reset)
Display Value Explanation
F18
OFF
,
10
,
30
,
240
[min.]
Making the Power Automatically Turn O After a Time (Auto O )
This species the auto-o setting.
The remaining time blinks before the power turns o. When there is less than one minute remaining, the countdown will be in seconds.
* This setting is saved automatically when you change it.
F1g
None
Saving the Settings (Memory Backup)
The settings of this digital piano will return to their default state when you turn o the power. However, you can
save the settings so they will remain unchanged even after the power has been turned o, then on again.
The display indicates
Svr
”; press the [y] (cancel) button or the [s] (execute) button to cancel or execute.
page 12
°
Restoring the Factory Settings (Factory Reset)
The settings you’ve changed in Function mode can be restored to their factory-set condition. This operation is called “Factory Reset.
NOTE
The “Factory Reset operation will erase all settings stored by the Memory Backup function, as well as all songs you’ve recorded in internal
memory.
1. While holding down the [Metronome] button and the
[Split] button, turn on the power.
Keep holding down the buttons until it indicates as
Svr
on the
display.
To cancel, press the [y] button.
2. To execute the Factory Reset, press the [s] button.
When the Factory Reset has been completed, the display will
indicate “End.
* Never turn o the power before the display indicates “End.
3. Press the [L] switch to turn the power o , then on again.
°
Specifying the Maximum Volume (Volume Limit)
You can specify the maximum Volume setting. This will prevent undesirably high volumes even if the volume buttons are operated unintentionally.
1. Hold down the Volume [-] button and the Volume [+]
button, and press the [-] [+] buttons to adjust the value.
Value 20, 40, 60, 80, 100
MEMO
This setting is saved automatically when you change it.
14
Deutsch Français Italiano Español Português NederlandsEnglishEnglish
°
About the Wireless LAN Function
By inserting the wireless USB Adapter (WNA1100-RL; sold
separately) into this unit’s USB MEMORY port, you’ll be able to
use wireless-compatible applications (iOS apps such as the “Piano
Partner”).
This unit
Wireless USB
Adapter (WNA1100-RL; sold
separately)
Wireless LAN access point
(e.g., wireless LAN router)
Wireless LAN Wireless LAN
iPad, etc
Items required to use the wireless LAN function
* Wireless USB Adapter (sold separately: WNA1100-RL) *3
* Wireless LAN access point (e.g., wireless LAN router) *1 *2
* iPad, etc
*1 The wireless LAN access point you use must support WPS. If you’re
unable to connect to the wireless LAN access point, try connecting
using Ad-Hoc mode.
*2 The ability to connect with all kinds of wireless LAN access points is
not guaranteed.
*3 In some countries, the Wireless USB Adapter is not sold due to
regulations concerning radio-frequency equipment. For information
on whether the Wireless USB Adapter can be used in your country,
please contact the nearest Roland Service Center, or an authorized
Roland distributor, as listed on the “Information page.
Basic Connection Method
(Connect by WPS)
The rst time you connect this unit to a new wireless network, you’ll
need to perform the following procedure (WPS) to join the wireless
network.
This procedure is required only the rst time. (Once you’ve joined
the network, this procedure will no longer be necessary.)
What is WPS?
This is a standard that makes it easy to make security settings when
connecting to a wireless LAN access point. We recommend that you
use WPS when connecting to a wireless LAN access point.
1. In Function mode ([Metronome]+[Split] button), choose
F15
and press the [s] button (p. 12).
2. Press the [s] button once again to execute.
If you decide to cancel, press the [y] button.
3. Perform the WPS operation on your wireless LAN access
point (e.g., press the WPS button on your wireless LAN
access point).
For details on WPS operation of your wireless LAN access point,
refer to the owners manual for your wireless LAN access point.
You can use the wireless connection from an iOS app such as “Piano
Partner. Choose “RP401R or F-130R in the instrument select screen
of your iOS app.
NOTE
The device (e.g., iPad) running the app must be connected to
the same network.
MEMO
• The connection data is stored in memory when you perform
the WPS procedure; the device will automatically connect to the
wireless network from the next time.
• All connection data will be erased if you perform a factory reset.
Connecting in Ad-Hoc Mode
What is Ad-Hoc mode?
Ad-Hoc mode lets you connect this unit directly to an iPad or other
wireless device without using a wireless LAN access point This is
a convenient way to use this unit with an iPad or other wireless
device if you’re in a location where the wireless LAN access point
you normally use is unavailable, such as when you’re away from
home.
Limitations
The iPad or other wireless device connected in Ad-Hoc mode
will be unable to communicate with the Internet or with another
wireless device. However, an iPad or other wireless device that
has cellular capability will be able to connect to the Internet via
the cellular connection. Please be aware that if you use a cellular
connection for Internet connectivity, you may incur costs
depending on your rate plan.
1. In Function mode ([Metronome]+[Split] button), choose
F16
and press the [s] button (p. 12).
2. Press the [s] button once again to execute.
If you decide to cancel, press the [y] button.
3. In Function mode ([Metronome]+[Split] button), choose
F17
and press the [s] button (p. 12).
Of the ve-digit ad-hoc key, the lower three digits are shown.
555
If the display were to show the indication depicted in this
illustration, you would add “00” as the upper two digits, and enter
“00555” as the ad-hoc key.
4. On the iPad or other wireless device to which you’re
connecting, select the ad-hoc SSID shown in the screen
above to establish the connection.
Example: On an iPad, use [Settings] " [Wi-Fi] " [Choose
Network] and select the ad-hoc SSID (RP401R or F-130R).
A password entry screen appears; enter the ad-hoc key
listed above.
For details on how to connect to a wireless LAN from an iPad or
other device, refer to the owner’s manual of that device.
5. When you want to end the Ad-Hoc mode connection,
restore the iPad settings in [Settings] " [Wi-Fi] "
[Choose a Network] to their previous state.
15
°
Troubleshooting
Problem Cause/Action
Even though
you’re using
headphones
and the sound
is muted, a
thumping sound
is heard when
you play the
keyboard
This unit uses a hammer action keyboard in order to simulate an
acoustic pianos playing touch as realistically as possible. For this
reason, you’ll hear the hammers thump when you play the keyboard,
just as you would when playing an acoustic piano. Since this unit
allows you to adjust its volume, you might notice the sound of the
hammers in certain situations, but this does not indicate a malfunc-
tion. If vibration transmitted to the oor or walls is a concern, you may
be able to minimize the vibration by moving the piano away from the
wall, or by laying down a commercially available anti-vibration mat
designed for use with pianos.
Power turns o
on its own
When 30 minutes have elapsed since you last played or operated this
unit, the power will turn o automatically. (This is the factory setting.)
If you don’t need the power to turn o automatically, turn the Auto
O setting o (p. 14).
Power does not
turn on
Is the AC adaptor connected correctly? (p. 9)
Pedal does
not work, or is
“stuck”
Is the pedal connected correctly?
Plug the cord rmly into the pedal connector (p. 9).
If you disconnect the pedal cord from the unit while the power is on,
the pedal eect may remain “stuck” in the On condition.
You must power-o the unit before connecting or disconnecting the
pedal cord.
Could Twin Piano be turned on?
If Twin Piano is on, the right pedal will aect only the right-hand
keyboard zone and the left pedal will aect only the left-hand
keyboard zone (p. 3).
Insucient
volume
Could the volume limit setting have lowered the maximum volume?
The volume can’t be louder than the specied volume limit. Change
the volume limit setting (p. 14).
The volume
level of the
instrument
connected to
Input jack is too
low
Could you be using a connection cable that contains a resistor?
Use a connection cable that does not contain a resistor.
No sound/No
sound when
you play back a
song
Could the unit’s volume or the volume of the connected equipment be
turned down?
Could headphones be connected?
Could there be a plug inserted in a headphone jack?
The speakers will not produce sound if headphones or plug are
connected to the headphone jacks (p. 9).
Has Local Control been set to “O”?
When Local Control is set to O, no sound is produced on the
keyboard. Set Local Control to On (p. 13).
Not all the notes
you play are
sounded
The maximum simultaneous polyphony is 128 voices. If you’re using
the Dual tone (p. 2), if youre playing along with a song, or if you’re
making extensive use of the damper pedal, the performance data may
exceed the available polyphony, possibly causing some of the notes
you play to drop out.
Pitch of the
keyboard or
song is incorrect
Could you have made Transpose settings? (p. 12)
Is the Master Tune setting appropriate? (p. 11)
The notes of a piano are tuned using a unique method
(stretched tuning), which makes upper-range notes slightly higher in
pitch, and lower-range notes slightly lower in pitch. For this reason,
you might perceive the pitch as being incorrect, but this is the way an
acoustic piano should sound.
Sounds are
heard twice
(doubled) when
the keyboard is
played
Could you have selected a dual tone? (p. 2)
When this unit is connected to an external sequencer, set the Local
Control to o. Alternatively, the sequencer could be set so its Soft Thru
feature is O (p. 13).
Reverberation
remains even
though you’ve
turned o the
Ambience eect
The piano sounds of this digital piano faithfully simulate the sense of
depth and resonance of an acoustic piano. For this reason, it may seem
as though there is some reverberation even when the Ambience eect
is turned o.
The sound
of the higher
notes suddenly
changes from a
certain key
On an acoustic piano, the approximately one and a half octaves
of notes at the upper end of the keyboard will continue sounding
regardless of the damper pedal. These notes also have a somewhat
dierent tonal character.
This unit faithfully simulate this characteristic of acoustic pianos. On
this unit, the range that is unaected by the damper pedal will change
according to the transpose setting.
Problem Cause/Action
High-pitched
ringing is heard
If you hear this in headphones:
Piano sounds that have a brilliant and crisp character contain substan-
tial high-frequency components that may sound as though a metallic
ringing has been added. This is because the characteristics of an actual
piano are being faithfully reproduced, and is not a malfunction. This
ringing is more obtrusive if the ambience eect is applied heavily, so
you may be able to minimize it by decreasing the ambience.
If you don’t hear this in headphones:
It is likely that there is some other reason (such as resonances within
the unit). Please contact your dealer, the nearest Roland Service Center,
or an authorized Roland distributor, as listed on the “Information.
Sound wrong, or
are buzzy
If you set the volume to the maximum setting, the sound may be
distorted depending on how you perform. If this occurs, turn down
the volume.
If you don’t hear this in headphones:
Performing at high volumes may cause the speakers or objects
near the unit to resonate. Fluorescent lights or glass doors may also
resonate sympathetically. In particular, this is more likely to occur for
lower notes and higher volumes. You can take the following measures
to minimize resonances.
Locate this unit 10–15 cm (4–6 inch) away from walls or other
surfaces.
Keep the volume down.
Move away from the objects that are resonating.
If you hear this in headphones:
It is likely that there is some other reason. Please contact your dealer,
the nearest Roland Service Center, or an authorized Roland distributor,
as listed on the “Information.
When Using the Wireless LAN
Function
Problem Cause/Action
Can’t connect to
a wireless LAN
access point
Make sure that your wireless LAN access point supports WPS. If your
wireless LAN access point does not support WPS, you can connect
using the procedure described in “Connecting in Ad-Hoc Mode (p. 15).
The 802.11a/b wireless standard is not supported. Please use the
802.11g/n (2.4 GHz) wireless standard.
The WEP authentication method is not supported. Please use the WPA
or WPA2 authentication method.
Make sure that DHCP is enabled for your wireless LAN access point.
The connection might not occur successfully due to the state of the
radio signal. If so, use the procedure described in “Basic Connection
Method (Connect by WPS)” (p. 15), and reconnect your wireless LAN
access point.
There is a limit to the connection data that can be remembered.
Making a new connection may cause older connection data to be
deleted.
All connection data will be deleted if you execute a factory reset. If the
connection data has been deleted, please re-connect to the wireless
LAN access point.
Communication
is unstable
Communication may be unstable depending on the usage of the radio
frequency spectrum.
If communication is unstable, the response may be sluggish, or if using
audio communication, there may be dropouts in the audio.
The following actions may improve the situation.
Move the wireless LAN access point and this unit closer to each
other.
Change the channel setting of the wireless LAN access point.
The unit is not
found in the
instrument
connections
of the iOS app
(such as “Piano
Partner”)
Is the unit turned on?
Is the wireless USB adapter (WNA1100-RL) inserted to the unit?
Is the unit connected to the wireless LAN?
Are the unit and the iPad connected to the same network (the same
wireless LAN access point)?
Is the wireless LAN access point set to allow communication between
wireless LAN devices?
For details on settings, refer to the owner’s manual of your wireless
LAN access point.
16
Deutsch Français Italiano Español Português NederlandsEnglishEnglish
°
Message List
Indication Meaning
E.01
The music le you attempted to save is read-only. It cannot be saved.
E.02
An error occurred while writing. It may be that the protect tab of the
external media is in the “Protect (write prohibit)” position, or that the
external media has not been formatted.
E.10
No USB ash drive connected. Connect a USB ash drive and try the
operation again.
E.11
There is insucient free space at the save destination. Either connect a
dierent USB ash drive, or delete unwanted data (song data) and try
the operation again.
E.14
An error occurred while reading. The USB ash drive may be damaged.
Connect a dierent USB ash drive and try the operation again. You may
also format the USB ash drive (p. 7).
E.15
The le could not be read. The data format is not compatible with the
unit.
E.16
The data could not be read fast enough during song playback. After
waiting several seconds, you may be able to play back the song by
pressing the [s] button once again.
E.18
This audio format is not supported. Please use WAV format, 44.1 kHz,
16-bit linear audio les.
E.30
The unit’s internal memory is full.
E.40
The unit cannot deal with the excessive MIDI data sent from the external
USB MIDI.
Reduce the amount of MIDI data sent to the unit.
E.46
The access point is not supported. Please use WPA or WPA2 authentica-
tion.
E.51
There may be a problem with the system.
Repeat the procedure from the beginning. If it is not solved after you
have tried a number of times, contact the Roland service center.
E.65
The USB ash drive connector was subjected to excessive current.
Make sure that there is no problem with the external media, then turn
the power o, then on again.
- - -
The Panel Lock function is on (p. 9).
PU
When playing back a song, this is shown if the song starts on an upbeat.
Blinking
number
When the Auto O function is activated, the remaining time blinks
before the power turns o.
17
Use only the supplied AC adaptor
and the correct voltage
Be sure to use only the AC
adaptor supplied with the unit.
Also, make sure the line voltage
at the installation matches the
input voltage specied on the
AC adaptor’s body. Other AC
adaptors may use a dierent polarity, or be
designed for a dierent voltage, so their
use could result in damage, malfunction, or
electric shock.
Use only the supplied power cord
Use only the attached power
cord. Also, the supplied power
cord must not be used with any
other device.
CAUTION
Disconnect the power plug
whenever the unit will not be used
for an extended period of time
Fire may result in the unlikely
event that a breakdown occurs.
Cautions when moving this unit
If you need to move the
instrument, take note of the
precautions listed below. At
least two persons are required
to safely lift and move the unit.
It should be handled carefully,
all the while keeping it level. Make sure to
have a rm grip, to protect yourself from
injury and the instrument from damage.
Check to make sure the screws securing
the unit to the stand (RP401R) or the side
boards (F-130R) have not become loose.
Fasten them again securely whenever you
notice any loosening.
Disconnect the power cord.
Disconnect all cords coming from external
devices.
Raise the adjusters on the stand (RP401R).
Close the lid.
Remove the music stand (RP401R).
Take care so as not to get ngers
pinched
When handling the following
moving parts, take care so as
not to get ngers, toes, etc.,
pinched. Whenever a child uses
the unit, an adult should be on
hand to provide supervision
and guidance.
Lid cover (p. 10)
Pedals (p. 8)
Keep small items out of the reach
of children
To prevent accidental ingestion
of the parts listed below,
always keep them out of the
reach of small children.
Included Parts/Removable
Parts
Screws
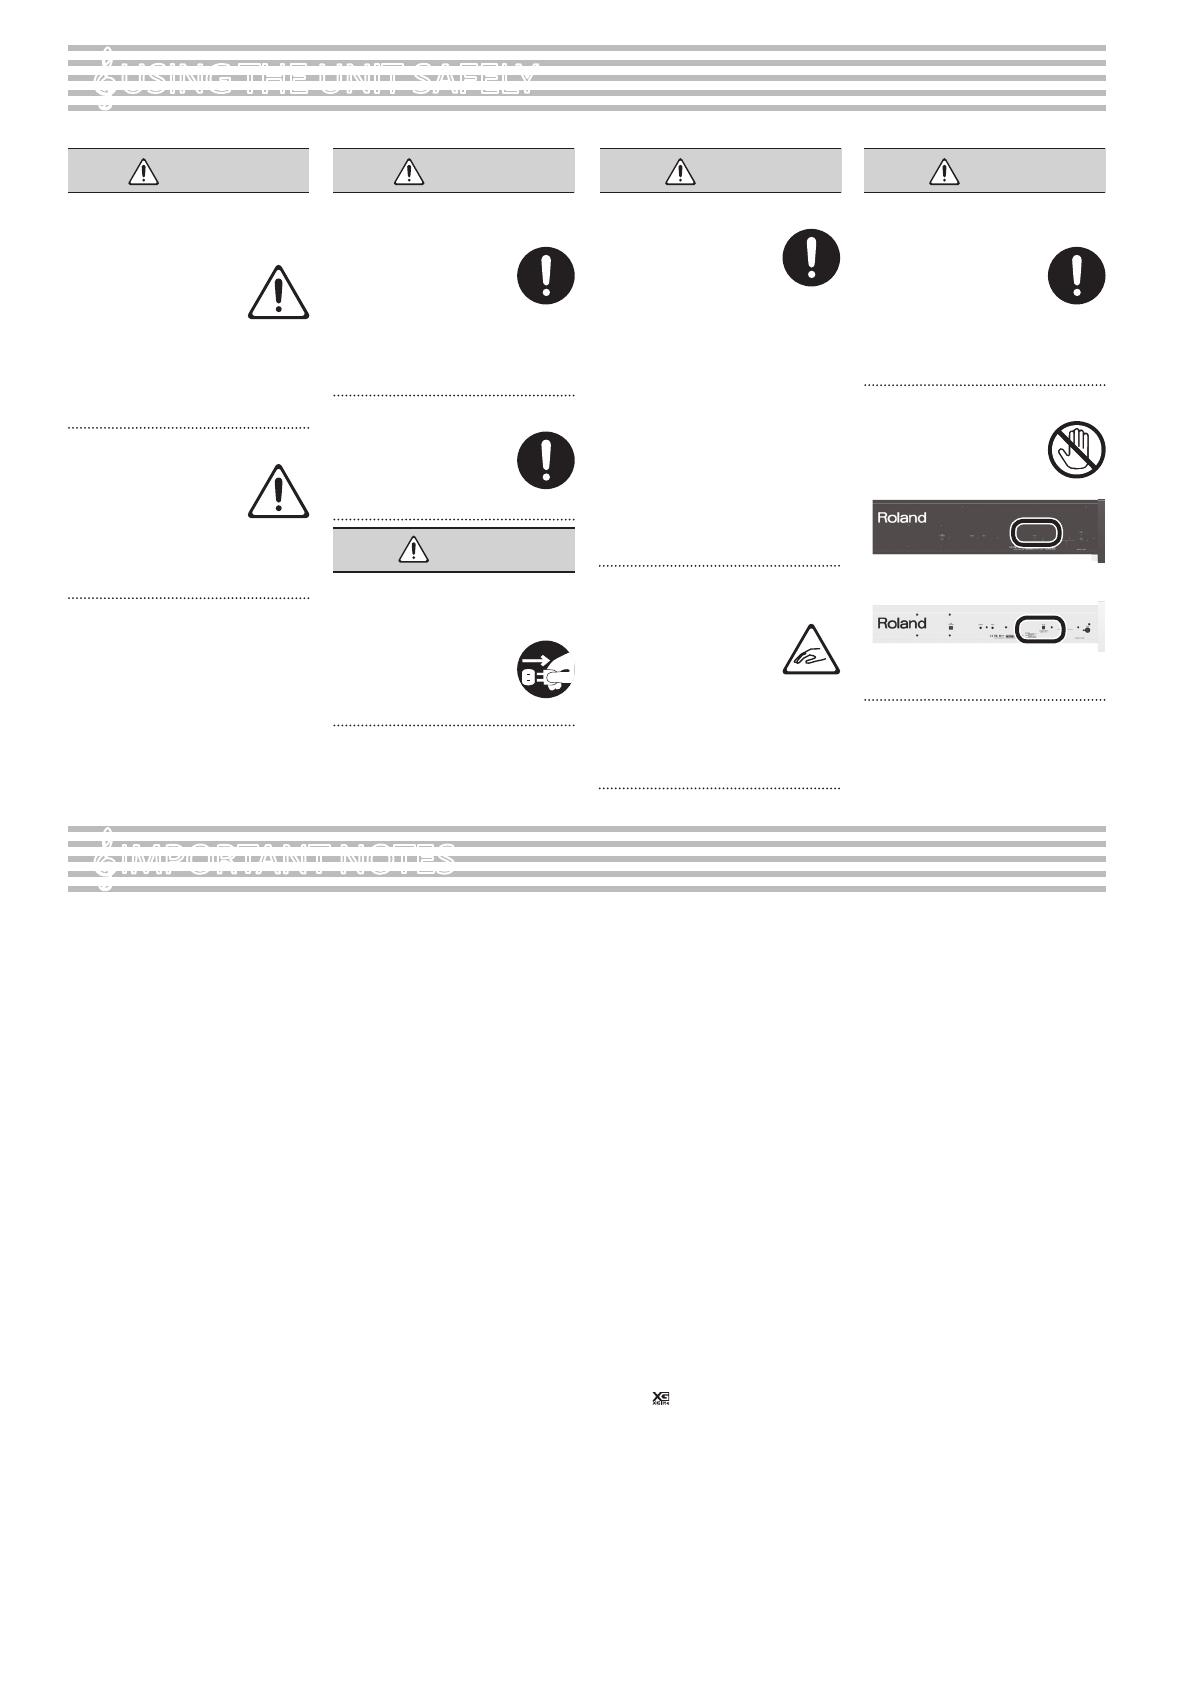
Take care not to get burned
The area shown in the
illustration may become hot, so
take care to avoid burns.
RP401R
F-130R
°
USING THE UNIT SAFELY
To completely turn o power to
the unit, pull out the plug from
the outlet
Even with the power switch
turned o, this unit is not
completely separated from
its main source of power.
When the power needs to be
completely turned o, turn o the power
switch on the unit, then pull out the plug
from the outlet. For this reason, the outlet
into which you choose to connect the
power cord’s plug should be one that is
within easy reach and readily accessible.
Concerning the Auto O function
The power to this unit will be
turned o automatically after
a predetermined amount of
time has passed since it was
last used for playing music, or
its buttons or controls were operated (Auto
O function). If you do not want the power
to be turned o automatically, disengage
the Auto O function (p. 14).
°
IMPORTANT NOTES
Placement
Do not expose the unit to direct sunlight,
place it near devices that radiate heat,
leave it inside an enclosed vehicle, or
otherwise subject it to temperature
extremes. Also, do not allow lighting
devices that normally are used while their
light source is very close to the unit (such
as a piano light), or powerful spotlights to
shine upon the same area of the unit for
extended periods of time. Excessive heat
can deform or discolor the unit.
Do not allow objects to remain on top
of the keyboard. This can be the cause
of malfunction, such as keys ceasing to
produce sound.
Depending on the material and
temperature of the surface on which you
place the unit, its rubber feet may discolor
or mar the surface.
You can place a piece of felt or cloth
under the rubber feet to prevent this from
happening. If you do so, please make
sure that the unit will not slip or move
accidentally (F-130R).
Maintenance
To clean the unit, use a dry, soft cloth; or
one that is slightly dampened. Try to wipe
the entire surface using an equal amount
of strength, moving the cloth along with
the grain of the wood. Rubbing too hard
in the same area can damage the nish.
Repairs and Data
Before sending the unit away for repairs,
be sure to make a backup of the data
stored within it; or you may prefer to write
down the needed information. Although
we will do our utmost to preserve the data
stored in your unit when we carry out
repairs, in some cases, such as when the
memory section is physically damaged,
restoration of the stored content may be
impossible. Roland assumes no liability
concerning the restoration of any stored
content that has been lost.
Additional Precautions
Any data stored within the unit can be
lost as the result of equipment failure,
incorrect operation, etc. To protect
yourself against the irretrievable loss
of data, try to make a habit of creating
regular backups of the data you’ve stored
in the unit.
Roland assumes no liability concerning
the restoration of any stored content that
has been lost.
Never strike or apply strong pressure to
the display.
The sound of keys being struck and
vibrations produced by playing an
instrument can be transmitted through
a oor or wall to an unexpected extent.
Please take care not to cause annoyance
to others nearby.
Do not apply undue force to the music
stand while it is in use (RP401R).
When opening or closing the lid, please
be careful not to get your ngers pinched
between the movable part and the
panel. In places where small children are
present, make sure that an adult provides
supervision and guidance.
Do not hang anything other than
headphones on the headphone hook.
Do not apply undue force to the hook.
Otherwise, you risk damaging the hook.
Using External Memories
Please observe the following precautions
when handling external memory devices.
Also, make sure to carefully observe all
the precautions that were supplied with
the external memory device.
Do not remove the device while
reading/writing is in progress.
To prevent damage from static
electricity, discharge all static
electricity from your person before
handling the device.
Intellectual Property Right
It is forbidden by law to make an audio
recording, video recording, copy or
revision of a third party's copyrighted
work (musical work, video work,
broadcast, live performance, or other
work), whether in whole or in part,
and distribute, sell, lease, perform, or
broadcast it without the permission of the
copyright owner.
Do not use this product for purposes that
could infringe on a copyright held by a
third party. We assume no responsibility
whatsoever with regard to any
infringements of third-party copyrights
arising through your use of this product.
The copyright of content in this product
(the sound waveform data, style data,
accompaniment patterns, phrase data,
audio loops and image data) is reserved
by Roland Corporation.
Purchasers of this product are permitted
to utilize said content (except song data
such as Demo Songs) for the creating,
performing, recording and distributing
original musical works.
Purchasers of this product are NOT
permitted to extract said content in
original or modied form, for the purpose
of distributing recorded medium of said
content or making them available on a
computer network.
XGlite (
) is a registered trademark or a
trademark of Yamaha Corporation.
Roland, SuperNATURAL and GS are either
registered trademarks or trademarks of
Roland Corporation in the United States
and/or other countries.
Apple, iPad are either registered
trademarks or trademarks of Apple Inc.
WARNING WARNING
CAUTION CAUTION
18
°
Tone List
[Piano] button
No. Name
1
Concert Piano
2
Ballade Piano
3
Bright Piano
No. Name
4
Magical Piano
5
Piano + Strings
6
Piano + Pad
No. Name
7
Piano + Choir
8
Rock Piano
g
Ragtime Piano
No. Name
10
Harpsichord
11
Coupled Harpsichord
°
Rhythm List
Genre No. Name
Pop
1-1
Gold Medium
Beat
1-2
Frank's Way
1-3
Gold Slow Beat
1-4
Gold Beat
1-5
Jessie Beat
1-6
US Shue
1-7
Strummin' Pop
1-8
Unplugged Pop
1-g
Amazing Gospel
Ballad
Rock
2-1
Easy Ballad
2-2
Acoustic Ballad
2-3
Love Slow Rock
2-4
Unplugged
Ballad
2-5
Spring Rock
2-6
Joe's Rock
2-7
Breaky Rock
Disco
3-1
Seventies
3-2
Jamiro Dance
Genre No. Name
Disco
3-3
Gold Disco
3-4
Survive Disco
3-5
Hitmix
3-6
Club House
3-7
Baby Beat
3-8
Breath Rap
3-g
Now Hip Hop
Jazz
Blues
4-1
Gold Swing
4-2
Midnight Slow
Swing
4-3
Big Band Medium
4-4
Slow Jazz Waltz
4-5
Cool Soul
4-6
Cool Blues
4-7
Go! Rock'N
4-8
Blue Boogie
4-g
Rock'N Slow
Ball
Room
5-1
It Valzer
5-2
Gold Wien Waltz
Genre No. Name
Ball
Room
5-3
Gold Slow Waltz
5-4
Polka Disco
5-5
Gold Tango
5-6
Gold Foxtrot
5-7
Quick Step
5-8
Go! Twist
Latin
6-1
Gold Rhumba
6-2
Beguine
6-3
Gold Cha Cha
6-4
That's Mambo
6-5
Cuba Salsa
6-6
Acoustic Samba
6-7
Jazz Bossa
6-8
Fast Bossa
6-g
Samba
Tradit
World
7-1
Pop Reggae
7-2
Love Reggae
7-3
Gospel Shue
7-4
Ska
Genre No. Name
Tradit
World
7-5
German Polka
7-6
German Waltz
7-7
6_8 March
7-8
US March
7-g
Orchestral Waltz
Country
8-1
Country Rock
8-2
Country Flyer
8-3
Southern Twang
8-4
Country Ballad
8-5
Country Beat
8-6
Country Pop
Pianist
g-1
P. Arpeggio
g-2
P. Pop
g-3
P. Classic Polka
g-4
P. Waltz
g-5
P. Boogie
g-6
P. Ragtime
No. Name
1
Trem. TineEP
2
Pop E.Piano
3
Tine EP
4
FM E.Piano
5
Bright FM EP
6
Vib. ReedEP
7
Clav.
8
PhaserTineEP
g
Vibraphone
10
Marimba
11
Celesta
No. Name
12
Mallet Isle
13
Morning Lite
14
SymphonicStr
15
Rich Strings
16
OrchestraStr
17
DecayStrings
18
Harp
1g
PizzicatoStr
20
ChurchOrgan1
21
ChurchOrgan2
22
Combo Jz.Org
No. Name
23
Ballad Organ
24
Full Stops
25
Mellow Bars
26
Accordion
27
Aerial Choir
28
Jazz Scat
2g
Female Aahs
30
Male Aahs
31
Decay Choir
32
Thum Voice
33
Soft Pad
No. Name
34
Dcy ChoirPad
35
Nylon-str.Gt
36
Steel-str.Gt
37
Jazz Guitar
38
AcousticBass
3g
A.Bass+Cymbl
40
FingeredBass
41
:
305
GM2 tones
[Other] button
  • Page 1 1
  • Page 2 2
  • Page 3 3
  • Page 4 4
  • Page 5 5
  • Page 6 6
  • Page 7 7
  • Page 8 8
  • Page 9 9
  • Page 10 10
  • Page 11 11
  • Page 12 12
  • Page 13 13
  • Page 14 14
  • Page 15 15
  • Page 16 16
  • Page 17 17
  • Page 18 18
  • Page 19 19
  • Page 20 20
  • Page 21 21
  • Page 22 22
  • Page 23 23
  • Page 24 24
  • Page 25 25
  • Page 26 26
  • Page 27 27
  • Page 28 28
  • Page 29 29
  • Page 30 30
  • Page 31 31
  • Page 32 32
  • Page 33 33
  • Page 34 34
  • Page 35 35
  • Page 36 36
  • Page 37 37
  • Page 38 38
  • Page 39 39
  • Page 40 40
  • Page 41 41
  • Page 42 42
  • Page 43 43
  • Page 44 44
  • Page 45 45
  • Page 46 46
  • Page 47 47
  • Page 48 48
  • Page 49 49
  • Page 50 50
  • Page 51 51
  • Page 52 52
  • Page 53 53
  • Page 54 54
  • Page 55 55
  • Page 56 56
  • Page 57 57
  • Page 58 58
  • Page 59 59
  • Page 60 60
  • Page 61 61
  • Page 62 62
  • Page 63 63
  • Page 64 64
  • Page 65 65
  • Page 66 66
  • Page 67 67
  • Page 68 68
  • Page 69 69
  • Page 70 70
  • Page 71 71
  • Page 72 72
  • Page 73 73
  • Page 74 74
  • Page 75 75
  • Page 76 76
  • Page 77 77
  • Page 78 78
  • Page 79 79
  • Page 80 80
  • Page 81 81
  • Page 82 82
  • Page 83 83
  • Page 84 84
  • Page 85 85
  • Page 86 86
  • Page 87 87
  • Page 88 88
  • Page 89 89
  • Page 90 90
  • Page 91 91
  • Page 92 92
  • Page 93 93
  • Page 94 94
  • Page 95 95
  • Page 96 96
  • Page 97 97
  • Page 98 98
  • Page 99 99
  • Page 100 100
  • Page 101 101
  • Page 102 102
  • Page 103 103
  • Page 104 104
  • Page 105 105
  • Page 106 106
  • Page 107 107
  • Page 108 108
  • Page 109 109
  • Page 110 110
  • Page 111 111
  • Page 112 112
  • Page 113 113
  • Page 114 114
  • Page 115 115
  • Page 116 116
  • Page 117 117
  • Page 118 118
  • Page 119 119
  • Page 120 120
  • Page 121 121
  • Page 122 122
  • Page 123 123
  • Page 124 124
  • Page 125 125
  • Page 126 126
  • Page 127 127
  • Page 128 128
  • Page 129 129
  • Page 130 130
  • Page 131 131
  • Page 132 132
  • Page 133 133
  • Page 134 134
  • Page 135 135
  • Page 136 136

Roland F-130R Owner's manual

Category
Musical Instruments
Type
Owner's manual
This manual is also suitable for

Ask a question and I''ll find the answer in the document

Finding information in a document is now easier with AI