Page is loading ...

3G+ Modem/Router with
Wireless-N and Phone Port
USER MANUAL


NOTICE
This document contains proprietary information protected by copyright, and this Manual
and all the accompanying hardware, software, and documentation are copyrighted. No
part of this document may be photocopied or reproduced by mechanical, electronic, or
other means in any form.
The manufacturer does not warrant that the hardware will work properly in all
environments and applications, and makes no warranty or representation, either
expressed or implied, with respect to the quality, performance, merchantability, or fitness
for a particular purpose of the software or documentation. The manufacturer reserves
the right to make changes to the hardware, software, and documentation without
obligation to notify any person or organization of the revision or change.
All brand and product names are the trademarks of their respective owners.
© Copyright 2012
All rights reserved.

MENT
Contents
Contents........................................................................................................................4
Getting Started.............................................................................................................7
Where to Go Next................................................................................................. 7
Installing the Hardware ..............................................................................................8
Resetting the Modem/Router to the Factory Configuration ................................. 9
Using the Modem/Router’s Configuration Manager..............................................10
Launching the Modem/Router's Configuration Manager................................... 10
Launching the Configuration Manager's Setup Wizard...................................... 12
Step 1. Setup Login..................................................................................... 12
Step 2. Setup Time Zone............................................................................. 13
Step 3. WAN Type Setup ............................................................................ 14
Selecting the WAN Type............................................................................. 14
Step 4. Wireless Settings............................................................................. 21
Step 5. Summary......................................................................................... 25
Step 6. Finish .............................................................................................. 26
Connecting Devices Wirelessly to the Modem/Router............................................28
Establishing your Wireless Network........................................................... 28
Connecting a Windows 7 Computer with Built-in Wireless Capabilities... 29
Connecting a Windows Vista Computer with Built-in Wireless Capabilities
..................................................................................................................... 30
Connecting a Windows XP Computer with Built-in Wireless Capabilities 31
Connecting a Macintosh OS X Computer with Built-in Wireless
Capabilities ................................................................................................. 32
Connecting a Wireless-enabled Computer or Device (including the iPhone
or other cellular phones, the iPod Touch, etc.) to the Modem/Router........ 33
Connecting a Computer with a Wireless adapter to the Modem/Router .... 34
Setting up your Network using WPS.................................................................. 35
Configuration Methods............................................................................... 35
Method One ................................................................................................ 35
Method Two................................................................................................ 35
Method Three.............................................................................................. 36
Understanding your Modem/Router’s Voice Features...........................................37
Missed Calls................................................................................................ 38
Received Calls ............................................................................................ 39
Outgoing Calls............................................................................................ 40
Telephone Settings...................................................................................... 41
Call Forwarding.......................................................................................... 42
Call Waiting ................................................................................................ 43
Speed Dial................................................................................................... 44
Working with Text Messages.....................................................................................45
Using your Modem/Router to Send Text Messages............................................ 45
Working with your Inbox.................................................................................... 47
4 3G+ Modem/Router with Wireless-N and Phone Port User Manual

The Management Settings Page.......................................................................... 48
Using the Configuration Manager's Advanced Program.......................................53
Changing Default Settings.................................................................................. 53
Online Help......................................................................................................... 54
Launching the Configuration Manager's Advanced Program............................. 54
Configuring Basic Settings......................................................................... 55
The Basic Setup Page.................................................................................. 55
Using your 3G+ modem as a Backup......................................................... 57
The DHCP Server Page............................................................................... 58
The Wireless Setting Page .......................................................................... 59
WPA2/WPA Configuration......................................................................... 61
WEP Configuration..................................................................................... 63
The Change Password Page........................................................................ 64
Configuring Forwarding Rules................................................................... 64
The Virtual Server Page.............................................................................. 65
The Port Triggering Page............................................................................ 67
The Miscellaneous Page ............................................................................. 68
Configuring Security Settings................................................................. 69
Status Page.................................................................................................. 70
Packet Filtering Page .................................................................................. 70
The Domain Filters Page ............................................................................ 71
The URL Blocking Page............................................................................. 72
The MAC Control Page.............................................................................. 73
The VPN-L2TP Client Page........................................................................ 74
You can use the VPN-L2TP Client page to set up a L2TP client to securely
access your corporate network.................................................................... 74
The VPN-PPTP Client Page........................................................................ 74
The Miscellaneous Page ............................................................................. 75
Configuring Advanced Settings.................................................................. 76
The System Log Page ................................................................................. 76
The Dynamic DNS Page............................................................................. 77
The QoS Page ............................................................................................. 78
The SNMP Page.......................................................................................... 79
The Routing Table Page.............................................................................. 80
The System Time Page................................................................................ 81
The Schedule Rule and Schedule Rule Setting Pages ................................ 82
Configuring Toolbox Settings..................................................................... 84
The System Information Page..................................................................... 84
The Pin Control Page.................................................................................. 85
The USSD Page .......................................................................................... 86
The Firmware Upgrade Page...................................................................... 86
The Backup Setting Dialog......................................................................... 87
The Reset to Default Dialog ....................................................................... 87
The Reboot Dialog...................................................................................... 87
The Miscellaneous Page ............................................................................. 88
Appendix A: Mobile Broadband Settings................................................................89
Contents 5

Appendix B: Troubleshooting Tips...........................................................................92
Appendix C: Front Panel Lights ..............................................................................96
Appendix D: Registering Your Product and Getting Help.....................................98
Limited Warranty................................................................................................ 98
CE Declaration of Conformity.......................................................................... 100
6 3G+ Modem/Router with Wireless-N and Phone Port User Manual

1
Getting Started
The Modem/Router package contains the 3G+ Modem/Router, a 12V 1.0A Power
Cube, an Ethernet cable, a Quick Start flyer, and a CD that contains additional
documentation and warranty information. If anything is missing or damaged, please
contact Zoom Customer Support or whoever provided the Modem/Router.
Before installing the 3G+ Modem/Router you will need a SIM card for the built-in
3G+ modem. This SIM card may have been provided to you by your service
provider or you may need to purchase one. To use the Modem/Router for both data
and voice, you will need a SIM that supports both data and voice. If you just want to
use the Modem/Router for Internet access, a SIM that only supports data will work.
Where to Go Next
If you have already followed the steps in the Quick Start to install your Modem/Router
3G+ Modem/Router with Phone Port and want to learn how to:
¾ Add additional wireless devices to your network, go to Chapter 4: Connecting
Devices Wirelessly to the Modem/Router.
¾ Learn about the Modem/Router’s voice features including viewing a list of
incoming, outgoing or missed calls, or setting up advanced voice features like
call forwarding, call waiting, or speed dialing, go to
Chapter 5: Understanding
your Modem/Router’s Voice Features.
¾ Use the Modem/Router for text messaging, go to Chapter 6: Working with Text
Messages.
¾ Use the Modem/Router’s advanced routing features, go to Chapter 7: Using
the Modem/Router’s Advanced Features. Here you can learn about features
such as setting the Modem/Router up for online gaming, changing the default
wireless settings including security, backing up your Modem/Router’s
configuration and setting up scheduling rules to limit when the Modem/Router
may be used.
If you have not done the initial setup of your 3G+ Modem/Router with Phone Port,
continue on to
Chapter 2: Installing the Hardware.
Chapter 1: Getting Started 7

2
Installing the Hardware
This chapter explains installing the Modem/Router hardware. Before installing the
hardware you will need a SIM card to use the Modem/Router’s cellular modem. If you
want to use the Modem/Router for both voice and data you will need a SIM card that
supports voice and data. If you just want to use the Modem/Router for data, then
you will need a SIM card that at least supports data.
To Install the Modem/Router, follow these steps:
1 Place the Modem/Router near a computer to be used for setup. This computer needs
an Ethernet (LAN) port.
2 Turn off the computer.
3 Attach the antenna to the Modem/Router if the antenna isn’t already attached.
(Remove the antenna from the package. Place the end of the detachable antenna on
the open antenna connection port and rotate the antenna clockwise by hand until it
no longer turns easily. It may take many turns before the antenna is completely
connected). Move the antenna into an upright orientation. The antenna should snap
into place.
4 Insert the SIM card into the slot on the back of the Modem/Router as shown below.
You should hear the SIM card click into place.
5 Connect one end of the supplied Ethernet cable to any of the computer’s Ethernet
ports and the other end to any of the Modem/Router‘s LAN ports.
6 Plug the supplied power cube into the Modem/Router, and then into a power outlet.
The Modem/Router has completed powering up when the Status light
starts
blinking.
8 3G+ Modem/Router with Wireless-N and Phone Port User Manual

Important: Use only the power cube shipped with the Modem/Router. Other power
cubes may damage the device
.
7 Check that the Signal Strength light has changed from red to green or amber. If
the light remains red, please go to
Troubleshooting your Internet Connection. A red
light means that the Modem/Router can not talk to the mobile broadband network. A
green light means you have strong signal, and an amber light means you have a
weak signal. If your light is amber, you may try changing the antenna orientation or
moving the unit to another location. Normally best cellular performance occurs
when the antenna is vertical and when the Modem/Router is not too deep inside a
building. For best performance, the Modem/Router should not be on top of a metal
surface.
8 Turn on the computer. An Ethernet (LAN) LED on your Modem/Router’s front panel
should light up sometimes, corresponding to the Ethernet (LAN) port you used. If it
doesn’t light up, please see
Appendix B: Troubleshooting Tips.
Resetting the Modem/Router to the Factory Configuration
In the unlikely event that you need to reset the Modem/Router to the factory default
configuration, insert the blunt end of a paper clip into the RESET hole on the front
panel of the Modem/Router. Hold the clip in place for ten (10) seconds. The Status
light will begin blinking rapidly. Once it does release the reset button.
Now continue on to
Chapter 3: Using the Modem/Router’s Configuration Manager to
configure the Modem/Router.
Chapter 2: Installing the Hardware 9

3
Using the Modem/Router’s Configuration
Manager
The Modem/Router includes a built-in Install Wizard that walks you through
configuring the Modem/Router’s software. For most users running the Install Wizard
is all that is needed to configure the Modem/Router. If you are experienced with
networking devices and their configuration, you may prefer to use the Advanced
Configuration program to tailor the Modem/Router's configuration to your needs. In
that case go to
Using the Configuration Manager's Advanced Program on page 53.
Launching the Modem/Router's Configuration Manager
To launch the Configuration Manager, please follow these steps:
1 If you haven't already done so, plug the supplied Ethernet cable into the
Ethernet port on the Modem/Router’s back panel and into your computer’s
Ethernet port.
2 Turn on your Modem/Router first, then your computer. Once the computer is
on, launch the computer’s Web browser.
3 In the computer’s Web browser address bar, type the Modem/Router's default
IP address, http://192.168.2.1 and then press
Enter.
When the USER’S MAIN MENU opens for the first time, it displays a
System Status page that summarizes the current settings and values for
your system. If the Status page doesn’t appear, please see
Appendix B:
Troubleshooting Tips.
10 3G+ Modem/Router with Wireless-N and Phone Port User Manual

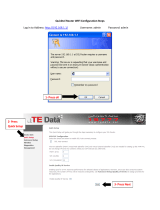
4 On the Toolbar, type admin (the default password) in the System Password
field, then click Login.
Note: Later, if you change the System Password, you will use the new password to
log in.
5 By default the configuration manager is set to English. If you wish to change it
to Spanish select Español from the drop down box on the Toolbar
Chapter 3: Using the Modem/Router’s Configuration Manager 11

Launching the Configuration Manager's Setup Wizard
When you start the Configuration Manager (http://192.168.2.1 on your Web browser)
and log in, the ADMINISTRATOR'S MAIN MENU opens.
Click Wizard on the Toolbar to launch the Setup Wizard, which will guide you through
the configuration process.
The Setup Wizard page opens.
Each of the six Steps guides you in configuring a specific setting or group of settings.
When you click Next or Back, you move from one step to another. If there is a setting
that you don’t want to change, simply click Next to go to the next setting.
Step 1. Setup Login
To view or change configuration settings, you must enter a password. Your
Modem/Router has a default password (admin) that was set by the factory and that
you used to access the Configuration Manager initially. If you want to keep the
default password, click Next to skip this step. Otherwise, to safeguard your
configuration, we strongly recommend that you change the login password.
1 On the Setup Login Password page, type the old password in the Old Password field.
12 3G+ Modem/Router with Wireless-N and Phone Port User Manual

2 Type the new password in the New Password field.
3 Type the new password in the Retype Password field, then click Next.
Note: If you forget the new password, you won't have access to the Configuration
Manager and will need to restore the device to its factory settings, thus losing any
changes you made to your Modem/Router's configuration. To avoid this problem, we
recommend that you write the new password here and on the bottom of your
Modem/Router, and also save it elsewhere such as a settings document.
PASSWORD:______________________________________
Please refer to Resetting the Modem/Router to the Default Configuration on page 9 or
The Reset to Default Dialog on page 87 for more information in the unlikely event that
you need to restore the Modem/Router's default settings.
Step 2. Setup Time Zone
The Time Zone setting is used to track your incoming, outgoing, and missed calls,
and for fairly sophisticated functions, such as changing Modem/Router access rules
depending on the time of day. We recommend that you set your time zone now.
To set the time zone, select the time zone that applies to your location from the
dropdown menu, and then click Next.
Chapter 3: Using the Modem/Router’s Configuration Manager 13

Step 3. WAN Type Setup
The WAN Type refers to the protocol used by your Internet Service Provider in
establishing your Internet connection. By default, WAN Type is set to use the built-in
mobile broadband modem. If that is what you want, you can select Next to skip this
section.
Selecting the WAN Type
Please check with your service provider if you read the discussion below and are still
unsure which WAN Type to choose.
•
Mobile Broadband Modem - Select this if you want to use the
Modem/Router’s built-in 3G+ modem for voice and data. (If you want to use
the 3G+ modem as the backup to an ADSL or Cable modem, you'll need to
use the Configuration Manager's Advanced program to configure this setup.
Please refer to 3G Failover on
The Basic Setup Page on page 55.) You
should select your primary connection type using the Setup Wizard. (To
access the Setup Wizard, refer to page
12 for instructions.)
•
Configuring the Dynamic IP Address – This is only used by Cable modem
users and by DSL modem users who are not using PPPoE. (ADSL service
providers will typically tell you whether you are using PPPoE, which requires
you to enter an PPPoE-related password into the Modem/Router. If you are
using ADSL with 1483 routed, bridged, or PPPoA modes, you are not using
PPPoE.)
•
Static IP Address - Typically you have to request and pay extra for a static IP
address, so this is not typically used.
•
PPPoE – Only use this if you are plugging an ADSL modem into the
14 3G+ Modem/Router with Wireless-N and Phone Port User Manual

Modem/Router, and if your ADSL service provider uses PPPoE.
•
PPTP - The Point to Point Tunneling Protocol is more common in corporate
environments and most users will not use this setting.
•
L2TP - The Layer 2 Tunneling Protocol is more common in corporate
environments and most users will not use this setting.
The relevant section immediately below depends on the WAN Type you selected.
Configuring the Built-in 3G+ Modem
The page shown below only appears if you select the Built-in Mobile Broadband
modem button on the Select WAN Type menu. Otherwise skip this section.
On the Setup 3G+ page, Auto-Detection is enabled by default to automatically detect your
SIM card provider. A message will show whether auto-detection was successful or not. If
auto-detection was successful, click Next. If auto-detection failed to detect your SIM card
provider, click OK to close the message box and then select Manual Setup. On the Manual
Setup page select your Country, and then select the name of your Service Provider from
the drop down list. The rest of the fields on the page are automatically filled in. If a field is
left empty, don’t worry since that field is not used for your provider. Click Next.
Note: If your country or service provider does not appear in the dropdown list you
must manually enter your service providers settings. This can be done by selecting
Manual Setup and entering your settings manually or by using the Basic Setup page.
Please see
Chapter 7, Using the Configuration Manager’s Advanced Program for
how to configure the Basic Setup page.
Go to
Step 4. Wireless Settings.
Chapter 3: Using the Modem/Router’s Configuration Manager 15

Configuring the Static IP Address
The page shown below will only appear in the unlikely event that you select the Static
IP Address button on the Select WAN Type menu. Otherwise skip this section.
• Static IP Address
This is the IP address that is given to you by your service provider when you
sign up for a Static IP address. This address identifies your Modem/Router
when seen from the Internet.
• Static Subnet Mask
This is the Modem/Router's subnet mask. Your service provider supplies
this address.
• Static Gateway
This is the IP address of the ISP Gateway. Your service provider supplies
this address.
• Static Primary DNS
This is the Domain Name System (DNS) server's IP address. Your service
provider supplies this address.
• Static Secondary DNS
This is the IP address of an alternate Domain Name System (DNS) server.
Your service provider supplies this address.
Go to
Step 4. Wireless Settings on page 21.
16 3G+ Modem/Router with Wireless-N and Phone Port User Manual

Configuring the Dynamic IP Address
The page shown below only appears if you select the Dynamic IP Address button on
the Select WAN Type menu. Otherwise skip this section.
• Host Name
This is the name that identifies your Modem/Router. Some service providers
require a host name. Your service provider supplies this name, if needed.
• ISP registered MAC Address
This is the 12-digit Media Access Control (MAC) address of your
Modem/Router. Cable modem users should click the Clone button to get the
MAC address that was registered with your service provider for your device.
Go to
Step 4. Wireless Settings on page 21.
Chapter 3: Using the Modem/Router’s Configuration Manager 17

Configuring PPPoE
The page shown below only appears if you select the PPPoE button on the Select
WAN Type menu. Otherwise skip this section.
• PPPoE Account
This is the PPPoE username supplied by your service provider.
• PPPoE Password
This is PPPoE password supplied by your service provider.
• Primary DNS
This is the Domain Name System (DNS) server's IP address. Your service
provider supplies this address, if needed. Most users should not need to
enter a DNS value.
• Secondary DNS
This is the IP address of an alternate Domain Name System (DNS) server.
Your service provider supplies this address, if needed.
• Service Name
This is the name assigned by your service provider to identify your service.
The Service Name is optional.
• Assigned IP Address
This is the optional IP address assigned by your service provider. The
Assigned IP Address is optional.
18 3G+ Modem/Router with Wireless-N and Phone Port User Manual

Go to Step 4. Wireless Settings on page 21.
.
Configuring PPTP
The page shown below only appears if you select the PPTP button on the Select
WAN Type menu. Otherwise skip this section.
• IP Mode
This is the mode used to generate the IP address. Select an option from the
dropdown menu, based on your service provider's requirements.
• My IP Address
This is the private IP address that your service provider assigned to your
Modem/Router. Only used if Static IP Address is selected as the IP Mode.
• My Subnet Mask
This is the private subnet mask that your service provider assigned to your
Modem/Router. Only used if Static IP Address is selected as the IP Mode.
• Gateway IP
This is the IP address of the service provider's server. Your service provider
supplies this address. Only used if Static IP Address is selected as the IP
Mode.
• Server IP Address/Name
This is the name and IP address of the PPTP server. Your service provider
supplies this information, if needed.
• PPTP Account
This is the PPTP account name that your service provider assigned to you.
Chapter 3: Using the Modem/Router’s Configuration Manager 19

• PPTP Password
This is PPTP password that your service provider assigned to you.
Go to Go to
Step 4. Wireless Settings on page 21.
Configuring L2TP
The page shown below only appears if you select the L2TP button on the Select
WAN Type menu. Otherwise skip this section.
• IP Mode
This is the mode used to generate the IP address. Select an option from the
dropdown menu, based on your service provider's requirements.
• IP Address
This is the IP address that identifies the L2TP server. Your service provider
supplies this address. Only used if Static IP Address is selected as the IP
Mode.
• Subnet Mask
This is the Modem/Router's subnet mask. Your service provider supplies this
address. Only used if Static IP Address is selected as the IP Mode.
• WAN Gateway IP
This is the WAN Gateway IP address of the L2TP server. Your service
provider supplies this address. Only used if Static IP Address is selected as
the IP Mode.
• Server IP Address/Name
This is the name and IP address of the L2TP server. Your service provider
supplies this information, if needed.
20 3G+ Modem/Router with Wireless-N and Phone Port User Manual
/