Black & Decker D6000 User manual

Category
Irons
Type
User manual

This manual is also suitable for

2
1
When using your iron, basic safety precautions should always be followed,
including the following:
READ ALL INSTRUCTIONS BEFORE USING.
Use iron only for its intended use.
To protect against a risk of electric shock, do not immerse the iron
in water or other liquid.
The iron should always be turned off (refer to HOW TO USE section)
before plugging or unplugging from outlet. Never yank cord to disconnect
from outlet; instead grasp plug and pull to disconnect.
Do not allow cord to touch hot surfaces. Let iron cool completely before
putting away. Loop cord loosely around the iron when storing.
Always disconnect iron from electrical outlet when filling with water or
emptying, and when not in use.
Do not operate iron with a damaged cord, or if the iron has been dropped
or damaged. To avoid the risk of electric shock, do not disassemble the
iron, take it to a qualified service person for examination and repair.
Incorrect reassembly can cause a risk of electric shock when the iron
is used.
Close supervision is necessary for any appliance being used by or near
children. Do not leave iron unattended while connected or on an ironing
board.
Burns can occur from touching hot metal parts, hot water, or steam.
Use caution when you turn a steam iron upside down or use the surge
of steam there may be hot water in the water tank. Avoid rapid
movement of iron to minimize hot water spillage.
IMPORTANT SAFEGUARDS
SPECIAL INSTRUCTIONS
To avoid a circuit overload, do not operate another high-wattage
appliance on the same circuit.
If an extension cord is absolutely necessary, a cord rated at 15-amperes
and 120-volt, or a 7-ampere and 220-volt cord should be used. Cords
rated for less amperage may overheat. Care should be taken to arrange
the cord so that it cannot be pulled or tripped over.
SAVE THESE INSTRUCTIONS.
This product is for household use only.
POLARIZED PLUG
This appliance has a polarized plug (one blade is wider than the other). To
reduce the risk of electric shock, this plug will fit into a polarized outlet only
one way. If the plug does not fit fully in the outlet, reverse the plug. If it still
does not fit, contact a qualified electrician. Do not attempt to modify the plug
in any way.
TAMPER-RESISTANT SCREW
Warning: This appliance is equipped with a tamper-resistant screw to
prevent removal of the outer cover. To reduce the risk of fire or electric
shock, do not attempt to remove the outer cover. There are no user-
serviceable parts inside. Repair should be done only by authorized service
personnel.
Note: If the power supply cord is damaged, it should be replaced by
qualified personnel. In Latin America, by an authorized service center.
3
Product may vary slightly from what is illustrated.
1. Spray nozzle
2. Water-fill cover
3. Backlit LCD display
4. Steam ON/OFF button
5. Surge-of-steam button
6. Spray button
7. Comfort Grip™ handle
8. Change language button (not shown)
9. 360-degree swivel cord
10. Non-skid heel rest
11. AUTO CLEAN® button
12. Water tank
13. Temperature control buttons
14. Soleplate
Surge-of-Steam
Spray
Symbols
AUTO OFF LOW TEMP HIGH TEMP
SELF CLEAN STANDBY
READY
FABRIC NO.
TEMP
UP/DOWN
FABRIC NAME
LCD Display Symbols
4
0
VERTICAL STEAM
3-WA Y AUTO OFF
AUTO CLEA
A
LL-TEMP STEAM
ANTI DRIP
DIGITAL CONTROLS
FEATURES
STEAM SELECTION
1. The steam symbol can be displayed by pressing the Steam ON/
OFF button, which is located just behind the LED display and in
front of the steam and spray buttons (F).
2. ALL-TEMP STEAM™ enables you to use steam on all settings.
There will be one burst of steam displayed on the LCD when
using fabric settings 1 through 3 (G). There will be two bursts of
steam displayed when using fabric settings 4 through 7 (H).
3. The steam symbol on the LCD display will blink until the iron
reaches the appropriate temperature. It then remains constant.
4. If changing the setting from 1 through 3, the
symbol will
flash until the iron is fully heated to the next selection, and
then remain constant. If changing to a setting higher than 3, a
symbol appears and flashes until the selected temperature is
reached, then remains constant.
5. If the Steam ON/OFF button is pressed at any time during use,
the iron stops producing steam and the steam symbol disappears
from the LCD display.
IRONING WITH STEAM
When using steam, be sure the iron is filled with water before you
begin to iron.
ALL-TEMP STEAM™
ALL-TEMP STEAM™ utilizes Smart Steam™ technology and enables you to utilize steam on
all fabrics and temperature settings even LOW.
Smart Steam™ Technology
The Smart Steam™ system automatically generates the right amount of steam for the fabric
type selected. Once you select the temperature, the Smart Steam™ technology detects the
set temperature and adjusts the steam power accordingly.
Suggestions for each setting:
Acrylic: scarves, blouses, knits iron on the wrong side•
Nylon: lingerie, robes, sleepwear, raincoats iron on the wrong side•
Polyester: knits, dresses, blouses, skirts, travel wear - iron on the wrong side•
Blends: shirts, blouses, knits, uniforms, bed and table linens•
Wool: trousers, slacks, jackets, silk scarves and blouses•
Cotton: 100% cotton blouses and shirts, table linens•
Linen: slacks, summer wear, jackets, blouses•
Press the Steam ON/OFF button to turn on the steam function. The
Steam symbol on the LCD display flashes during heat-up, and then
appears constant when the steam function is ready (I).
Surge-of-Steam
1. Use to remove stubborn creases.
2. Press the surge-of-steam button
to generate a burst of steam
(J). For best results, allow at least 5 seconds between bursts.
How to Use
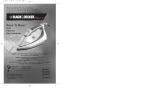
This appliance is intended for household use only.
GETTING STARTED
1. Remove all labels, tags and stickers attached to the body, cord or soleplate of the iron.
2. Remove and save literature.
3. If ironing dry, place appliance on its heel rest on a stable ironing board.
4. Uncoil cord and plug into standard electrical outlet.
Important: For optimum performance, allow the iron to stand for 90 seconds until the
Standby
symbol in the bottom right of the LCD display changes to Ready .
FILLING WATER TANK
1. With iron on flat surface with soleplate down, open water-fill
cover (A).
2. Tilt the iron and using a clean measuring cup, pour water into
opened chamber until water reaches the MAX level mark on the
side of the water tank (B). Do not overfill.
Note: This iron can be filled with ordinary tap water; if your water
is hard or soft, you may want to use distilled water. Do not use
water processed through a home softening system.
3. Close the water-fill cover.
Note: If you need to add water while ironing, unplug the iron and
follow the above steps.
4. Plug the iron into an electrical outlet
•Theironbeeps.
•Thebacklightilluminatesandturnsoff.
•TheStandby
symbol remains on the LCD display (C).
5. Turn on the iron by pressing the (+) temperature control button,
located to the left of the LCD display (D).
•Theironbeeps.
•TheLCDbacklightturnson.
•TheironbeginstoheatupandtheLCDdisplaysthelowest
heat setting.
SELECTING FABRIC TEMPERATURE
1. Read fabric labels to help determine fabric type to be ironed.
Tip: If unsure of fabric’s fiber content, test a small area (on the
inside seam or hem) before proceeding to iron the entire garment or
cloth.
2. Once you determine the fabric type, press the (+) and (-) fabric
selector buttons on either side of the LCD display to select the
appropriate fabric setting (E). The LCD display will light up and
the fabric type will appear at the top with the corresponding
number for the setting below it to the left. There will be a
flashing arrow
to show the iron is heating. When the iron is
heated, the iron will beep and the Standby
symbol will
change to Ready
and the arrow will disappear.
3. Whenever the temperature setting is changed, the
or
symbols will appear on the LCD to show that the iron is either
heating up or cooling down to the newly selected setting.
Important: Always stand the iron on its heel when powered on but
not in use.
5
6
C
E
D
A
B
I
J
G
H
F
7
Using the Spray Button
Use to dampen tough wrinkles at any setting.
1. Be sure the iron is filled with water.
2. On first use, pump the Spray button
several times (K).
Ironing without Steam
1. Ironing without steam can be performed at any setting.
2. It is not necessary to empty the water tank; simply press the
steam button to the OFF position. The steam symbol(s)
will disappear from the LCD display (L).
3. If desired, empty the water tank following the directions
below and press the steam button
to turn off the steam.
VERTICAL STEAM
Use for removing wrinkles from hanging garments, curtains and
drapes.
1. Be sure water tank is filled to maximum capacity.
2. Hang garment to be steamed on a clothes hanger. Curtains and drapes can be steamed
where they are hung.
3. Press fabric selection button to reach appropriate fabric setting. Allow the iron to stand
for 90 seconds until the Standby
symbol in the bottom right of the LCD display
changes to Ready
.
4. Hold the iron close, but not touching the fabric.
5. Using your free hand, pull the fabric tight and pump the surge-of-
steam button as you move the iron over the fabric (M).
Emptying the Water Tank (optional)
Note: It is not necessary to empty the water tank after each use.
1. Unplug the iron and let it cool.
2. Open the water-fill cover.
3. To release the water, hold the iron over a sink with the tip
pointing down. Water will empty out of the water-fill
opening (N).
SPECIAL FEATURES
Language Settings
Your iron has a multilingual digital display that lets you select from
English, French and Spanish.
To change the language (O):
1. Press and hold the (-) button for 2 seconds; the digital display
shows EN (for English).
2. Press the (-) button again, the display changes to FR (for French).
3. Press the (-) button one more time and the digital display changes
to ES (Spanish).
Note: The languages will change in the order listed above.
3-Way Automatic Shutoff
The automatic shutoff feature in your iron works as follows:
• Theironwillshutoffafter30secondsofinactivityifleftonits
soleplate or tipped over on its side. If left vertically on its heel
rest, it will shut off after 8 minutes of inactivity (P).
K
L
• TheunitbeepsonceandtheAUTOOFFsymbol on the LCD
display appears to let you know the iron has stopped heating (Q).
Important: Although the iron has turned off, it is still hot.
• Afterafewseconds,thebacklightontheLCDdisplayturnsoff.
• Ifyoupickuptheiron,aninternalmotiondetectorisactivated
and the iron starts heating gain.
Tip: You might have to move the iron or shake it gently.
• Theunitbeepsonce,thedigitaldisplaylightcomeson,andthepreviouslyset
temperature is displayed again.
Note: Wait for iron to reheat completely before resuming operation.
ANTI-DRIP System
0
VERTICAL STEAM
3-WA Y AUTO OFF
AUTO CLEAN®
ALL-TEMP STEAM
ANTI DRIP
DIGITAL CONTROLS
The anti-drip system prevents water from spotting at low temperatures.
AUTO CLEAN® System
Note: If the AUTO CLEAN® symbol appears on the LCD display, the unit needs
cleaning. Follow the procedure under AUTO CLEAN® System.
Care and Cleaning
This product contains no user-serviceable parts. Refer service to qualified service personnel.
CLEANING OUTSIDE SURFACES
1. Make sure iron is unplugged and has cooled completely. Wipe the soleplate and outer
surfaces with a soft cloth dampened with water. Add mild household detergent. Never
use abrasives, heavy-duty cleansers, vinegar or scouring pads that may scratch or
discolor the iron.
2. After cleaning, steam iron over an old cloth to remove any residue from the steam vents.
AUTO CLEAN® SYSTEM
To keep the steam vents free of any buildup, follow these instructions about once a month.
1. Fill the water tank well below the MAX line. Plug in the iron.
2. Select fabric temperature setting 6 and stand the iron on its heel rest.
3. Wait for the iron to beep and display temperature number with corresponding fabric.
4. Unplug the iron and hold over a sink with the soleplate facing down.
5. Press and hold the AUTO CLEAN® button. Be careful, as after
several seconds, hot water and steam will come out of the
steam vents (R). Continue to hold the AUTO CLEAN® button
until all the water has emptied. If necessary, rock iron side-to-
side and front-to-back.
6. When finished, release the button, stand the iron on its heel
rest and plug it in. Heat for about 2 minutes to dry out any
remaining water.
STORING YOUR IRON
1. Unplug the iron and allow it to cool.
2. Store vertically on its heel to prevent water leaking from the soleplate.
M
N
O
30 SECONDS
8 MINUTES
P
30 SECONDS
8 MINUTES
Q
R
8
26
25
Entretien et nettoyage
L’utilisateur ne peut effectuer lui-même l’entretien d’aucune pièce de ce produit. Confier
l’entretien à un technicien qualifié.
NETTOYAGE DES SURFACES EXTÉRIEURES
1. S’assurer que le fer est débranché et complètement froid. Essuyer la semelle et les surfaces
externes à l’aide d’un linge humide (d’eau) et doux. Ajouter du détergent doux domestique.
Ne jamais utiliser de produits nettoyants abrasifs ou pour service intensif, de vinaigre ou de
tampons à récurer qui peuvent égratigner ou décolorer le fer.
2. Après le nettoyage, faire évacuer la vapeur sur un vieux linge pour enlever tous les résidus
situés dans les évents à vapeur.
SYSTÈME D’AUTONETTOYAGE AUTO CLEAN
MD
Pour garder les évents à vapeur exempts de toute accumulation, procéder comme suit environ
une fois par mois :
1. Remplir le réservoir d’eau de sorte que le niveau se trouve bien au-dessous de la marque
MAX. Brancher le fer.
2. Mettre le sélecteur de température pour tissu à 6 et laisser le fer reposer sur son
talon d’appui.
3. Attendre que le fer émette un bip et affiche le chiffre correspondant à la température désirée
pour le tissu.
4. Débrancher le fer et le tenir au-dessus d’un évier, la semelle vers le bas.
5. Maintenir enfoncé le bouton AUTO CLEAN
MD
, mais soyez prudent,
car l’eau chaude et la vapeur sortiront des évents (R) après quelques
secondes. Continuer de maintenir enfoncé le bouton AUTO
CLEAN
MD
jusqu’à ce que le fer soit vide. Au besoin, faire basculer le
fer sur les côtés et de l’avant vers l’arrière.
6. Une fois le fer vide, relâcher le bouton, laisser reposer le fer sur son
talon d’appui et le brancher. Laisser le fer chauffer pendant environ 2
minutes afin de bien l’assécher.
RANGEMENT DU FER
1. Débrancher le fer et le laisser refroidir.
2. Ranger le fer en position verticale sur son talon d’appui pour empêcher les fuites d’eau de la
semelle.
NEED HELP?
For service, repair or any questions regarding your appliance, call the appropriate
"800" number on the cover of this book. Do not return the product to the place
of purchase. Do not mail the product back to the manufacturer nor bring it to a
service center. You may also want to consult the website listed on the cover of this
manual.
One-Year Limited Warranty
(Applies only in the United States and Canada)
What does it cover?
•Anydefectinmaterialorworkmanship;provided;however,Applica’sliability
will not exceed the purchase price of the product.
For how long?
•Oneyearafterthedateoforiginalpurchase.
What will we do to help you?
•Provideyouwithareasonablysimilarreplacementproductthatiseithernew
or factory refurbished.
How do you get service?
•Saveyourreceiptasproofofthedateofsale.
•Checkouron-lineservicesiteatwww.prodprotect.com/applica,orcallour
toll-free number, 1-800-231-9786, for general warranty service.
•Ifyouneedpartsoraccessories,pleasecall1-800-738-0245.
What does your warranty not cover?
•Damagefromcommercialuse
•Damagefrommisuse,abuseorneglect
•Productsthathavebeenmodifiedinanyway
•Productsusedorservicedoutsidethecountryofpurchase
•Glasspartsandotheraccessoryitemsthatarepackedwiththeunit
•Shippingandhandlingcostsassociatedwiththereplacementoftheunit
•Consequentialorincidentaldamages(Pleasenote,however,thatsomestates
do not allow the exclusion or limitation of consequential or incidental damages,
so this limitation may not apply to you.)
How does state law relate to this warranty?
•Thiswarrantygivesyouspecificlegalrights,andyoumayalsohaveotherrights
that vary from state to state or province to province.
R
is a trademark of The Black & Decker Corporation, Towson, Maryland, USA
Marca registrada de The Black & Decker Corporation, Towson, Maryland, E.U.
Marque de commerce déposée de la société The Black & Decker Corporation, Towson, Maryland, É.-U
R12007/7-9-23E/S/F
Copyright © 2007 - 2008 Applica Consumer Products, Inc.
Made in People’s Republic of China
Printed in People’s Republic of China
Importado por:
Applica Manufacturing, S. de R. L. de C.V.
Presidente Mazarik No111, 1er Piso
Col. Chapultepec Morales, Mexico D.F
Deleg. Miguel Hidalgo
CP 11570
MEXICO
Servicio y Reparación
Art. 123 No. 95
Col. Centro, C.P. 06050
Deleg. Cuauhtemoc
Servicio al Consumidor,
VentadeRefaccionesyAccesorios
01 800 714 2503
Del interior marque sin costo
01 (800) 714 2503
Fabricado en la República Popular de China
Impreso en la República Popular de China
Fabriqué en République populaire de Chine
Imprimé en République populaire de Chine
1 / 1

Black & Decker D6000 User manual

Category
Irons
Type
User manual
This manual is also suitable for

Ask a question and I''ll find the answer in the document

Finding information in a document is now easier with AI

Ask the document