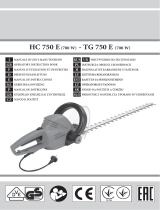
Oleo-Mac Oleo-Mac HC 605 E Owner's manual

Category
Power hedge trimmers
Type
Owner's manual

This manual is also suitable for

8
GB
General Power Tool Safety Warnings
WARNING - Read all safety warnings and all
instructions. Failure to follow all instructions
listed below may result in electric shock, fire
and/or serious injury. Save all warnings and
instructions for future reference.
The term "power tool" in the warnings refers to your
mains-operated (with power cable) power tool or
battery-operated (without power cable) power tool.
1) Work area safety
- Keep work area clean and well lit. Cluttered and
dark areas invite accidents.
- Do not operate the power tool in explosive
atmospheres, such as in the presence of flammable
liquids, gases or dust. Power tools create sparks
which may ignite the dust or fumes.
- Keep children and bystanders away while
operating the power tool. Distractions can cause
you to lose control.
2) Electrical safety
- Power tool plugs must match the wall outlet.
Never modify the plug in any way. Unmodified
plugs and matching outlets will reduce risk of
electric shock.
- Avoid body contact with earthed or grounded
surfaces such as pipes, radiators, ranges and
refrigerators. There is an increased risk of electric
shock if your body is earthed or grounded.
- Do not expose the tools to rain or moisture. Water
entering a power tool will increase the risk of
electric shock.
- Do not abuse the cord. Never use the power
cable to carry, drag or unplug the tool. Keep cord
away from heat, oil, sharp edges or moving parts.
Damaged or entangled cords increase the risk of
electric shock.
- When operating a power tool outdoors, use an
extension cable suitable for outdoor use. Use of a
cord suitable far outdoor use reduces the risk of
electric shock.
- Before starting the motor, make certain the power
socket incorporates a residual current device with
a tripping current not greater than 30 mA.
3) Personal safety
- Stay alert, watch what you are doing and use
common sense when operating a power tool.
Do not use the tool while you are tired or under
the influence of drugs, alcohol or medication. A
moment of inattention while operating the tool
may result in serious personal injury.
- Use approved safety equipment. Always wear
eye protection. Safety equipment such as dust
mask, non-skid safety shoes, hard hat, or hearing
protection used far appropriate conditions will
reduce personal injuries.
- Avoid accidental starting. Make sure the switches
are set to OFF before plugging the tool into the
mains outlet, before taking hold of the tool, and
before carrying it. Carrying power tools with
your finger on the switch or connecting power to
power tools when their on/off switch is in the ON
position can cause accidents.
- Remove the blades adjustment key or wrench
before switching on the power tool. A wrench or a
key left attached to a rotating part of the tool may
cause personal injury.
- Do not overreach. Keep proper footing and
balance at all times. This enables better control of
the power tool in unexpected situations.
- Dress properly. Do not wear loose clothing or
jewellery. Keep your hair, clothing and gloves
away from moving parts. Loose clothes, jewellery
or long hair can be caught in moving parts.
- If devices are provided for the connection of
dust extraction and collection systems, ensure
these are connected and properly used. Use of
dust collection equipment can reduce dust-related
hazards.
4) Power tool use and care
- Do not force the power tool. Use the correct
power tool for your application. The correct
power tool will do the job better and safer at the
rate for which it was designed.
- Do not use the tool if the switch is not functioning
correctly. Any power tool that cannot be
controlled with the switch is dangerous and must
be repaired.
- Unplug the power cable plug from the electrical
outlet before adjusting, servicing or storing the
tool. Such preventive safety measures reduce the
risk of starting the hedge trimmer accidentally.
- Store the tool out of the reach of children and do
not allow persons unfamiliar with the tool or with
these instructions to operate it. The tool may be
dangerous in the hands of inexpert users.
- Maintain power tools. Make sure the moving parts
of the tool are not misaligned or jammed and that
there are no broken parts or other conditions that
could prevent the tool from operating correctly. If
damaged, have the power tool repaired before use.
Many accidents are caused by poorly maintained
power tools.
- Keep cutting accessories clean and sharp at all
times. Properly maintained cutting accessories
with sharp cutting edges are less likely to bind and
are easier to control.
- Use the tool and cutting accessories in accordance
with these instructions and in the manner
intended for this particular type of tool, taking
into account the working conditions and the job
in hand. Using the tool for operations other than
the intended ones is potentially hazardous.
5) Service
- Have your hedge trimmer serviced by a qualified
repair person using only original replacement
parts. This will ensure that the safety of the hedge
trimmer is maintained.
Hedge trimmer safety warnings
- Keep all parts of the body away from the cutter
blade. Do not remove cut material or hold
material to be cut when blades are moving. Make
sure the switch is off when clearing jammed
material. A moment of inattention while operating
the hedge trimmer may result in serious personal
injury.
- Carry the hedge trimmer by the handle, with the
cutter blade stopped and with the cutting device
guard fit. Proper handling of the hedge trimmer
will reduce possible personal injury from the
cutter blades.
- Keep cable away from cutting area. During
operation the cable may be hidden in shrubs and
can be accidentally cut by the blade.
- Check the hedge for foreign objects, e.g. wire
fences.
- Before starting the motor, make certain the power
socket incorporates a residual current device with
TRANSLATION OF ORIGINAL INSTRUCTIONS
9
GB
a tripping current not greater than 30 mA.
- Hold the hedge trimmer properly, e.g. with both
hands on the handles.
- Hold the power tool by insulated gripping
surface only, because the cutter blade may
contact hidden wiring. Cutter blades contacting
a ”live” wire may make exposed metal parts of the
power tool ” live” and could give the operator an
electric shock.
Additional safety rules
- The term “hedge trimmer” in all of the
warnings listed below refers to your mains-
operated (corded) hedge trimmer. THIS HEDGE
TRIMMER CAN CAUSE SERIOUS INJURIES.
Read the instructions carefully for the correct
handling, preparation, maintenance, starting
and stopping of the machine. Be familiar with all
controls and the proper use of the hedge trimmer.
Note: Illustrations and specifications in
this manual may vary according to Country
requirements and are subject to change without
notice by the manufacturer.
- Remove plug from the mains immediately if the
cable is damaged or cut.
WARNING: The power supply system on your unit
produces a very low-intensity electromagnetic
field. This field could interfere with certain
pacemakers. To reduce the risk of serious or fatal
injury, persons with pacemakers should consult
their doctor or the manufacturer of the pacemaker
before using this machine.
- Only loan your hedge trimmer to expert users
who are completely familiar with hedge trimmer
operation and correct use. Give other users the
manual with operating instructions, which they
should read before using the hedge trimmer.
- Never allow children to use the hedge trimmer.
- Do not use the hedge trimmer as a lever to
lift, move or break objects, nor lock it on fixed
supports.
- Beware of overhead power lines.
- Stop the engine and disconnect the hedge trimmer
from mains before cleaning or checking, when
clearing a blockage and before maintenance or
working on.
- While operating the hedge trimmer be always sure
of a safe and secure operating position especially
when using steps or a ladder.
- Do not use fuel for cleaning the hedge trimmer.
- Do not attempt to repair the machine unless you
are qualified to do so.
- Do not operate the hedge trimmer with a
damaged or excessively worn cutting device.
- Never use a damaged, modified, or improperly
repaired or assembled hedgetrimmer. Do not
remove, damage or deactivate any of the safety
devices.
- When transporting or storing the hedge trimmer
always fit the cutting device guard.
- It is forbidden to apply tools or applications that
are not the ones indicated by the manufacturer
onto the hedge trimmer’s power take-off.
- The hedge trimmer must only be used to trim
hedges or small bushes. It is forbidden to cut other
types of material.
- Always be aware of your surroundings and stay
alert for possible hazards that you may not hear
due to the noise of the hedge trimmer.
WARNING: – National regulations could limit use
of the machine.
- Do not operate the machine unless you have
received specific instruction on its use. First time
users must familiarise themselves thoroughly with
the operation of the machine before working in
the field.
- All labels with health hazards must be kept
in good conditions. In case of damage or
deterioration, immediately substitute them (see
pag.2).
- Please note that the owner or the user is
responsible for any accidents or damage to third
parties or their property.
- Keep this manual on hand and consult it before
each use of the tool.
- The use of protections for the ear requests
much more attention and caution, because the
perception of danger audio signals (screamings,
alarms, etc.) is limited.
- Never use the machine in bad weather, for
instance in fog, in rain, strong winds, intense cold,
etc. Extremely hot weather may cause overheating
of the machine.
- If you encounter a situation where you are
uncertain how to proceed you should ask an
expert. Avoid all usage which you consider to be
beyond your capability. Contact your dealer or
your service workshop.
WARNING - Watch out for thrown objects. Always
wear approved eye protection. Never lean over the
cutting attachment guard. Stones, rubbish, etc. can
be thrown up into the eyes causing blindness or
serious injury.
2. HEDGE TRIMMER COMPONENTS
(see Fig. 1
)
1. Blades
2. Hand guard
3. Eyelet for extension cable
4. Power cable
5. Rear handle with on/o switch
6. Front handle with on/o switch
7. Cutting device guard
8. Handle locking lever
3. EXPLANATION OF SYMBOLS AND
SAFETY WARNINGS (see Fig. 2
)
1. Warning
2. Pull out the plug immediately if the power
cable is damaged or severed.
3. Read the operating instructions before you
use the hedge trimmer.
4. Wear goggles and ear-muffs or similar
protection.
5. Keep away from the rain and damp
conditions.
6. CE conformity marking
7. Double insulation device
8. Guaranteed sound power level
9. Type of machine: HEDGETRIMMER
10. Specications
11. Year of manufacture
12. Serial number
10
GB
5. POWER SUPPLY
Before starting the motor, make certain the power
socket incorporates a residual current device with a
tripping current not greater than 30 mA.
The hedge trimmer is designed for use only with
single-phase alternating current from a 230 V~ – 50
Hz AC supply. It is totally insulated, enabling it to be
connected also to socket-outlets without a PE con-
ductor. Before you use the hedge trimmer for the
rst time, check that your mains voltage is the same
as the operating voltage specied on the machines
rating plate.
6. START UP AND OPERATION
Assembly of the protection shield (Fig. 3)
Slide the included protection shield (2, Fig. 1)
over the blade rail and x it from both sides at the
housing using 1 screw on each side as shown in
Fig. 3.
CAUTION! - is hedge trimmer is designed to cut
hed ges, bushes and shrubs. Any other use which is
not expressly permitted in these instructions may
cause damage to the hedge trimmer and place the
user at serious risk. Your hedge trimmer is equipped
with a two-hand safety circuit (Fig. 4). is means
that it works only when the switch button on the
guide handle (B) is pressed with the one hand while
the switch on the handle (A) is being pres sed with
the other hand. If you let go of either swit ching
element, the blades will stop moving.
e blades take time to slow down to a standstill.
Please make allowance.
- Since the machine is equipped with an electric
brake which locks the blade, a harmless flash of
light may be seen in the top part of the machine
when the switch is released.
- Check that the blades are working properly. High
cutting performance and smooth operation are
guaranteed by the counter-rotating, dual-edge
blades.
- Fasten the extension cable in the corresponding
cable holder (see Fig.5) each time before you use
the hedge trimmer.
- Use only approved extension cables for outdoor
use.
EXTENSION CABLE RECOMMENDED LENGHT
(230 V)
Lenght Minimum conductor section
0 ÷ 20 meters 1 mm
2
20 ÷ 50 meters 1,5 mm
2
50 ÷ 100 meters 4 mm
2
7. PRACTICAL TIPS
HANDLE (Fig.6) - To reduce fatigue when
trimming hedges, the handle can be swivelled
through 45° or 90° to the left or right.
Proceed as follows: free the handle by pressing
the locking lever (C). Please bear in mind that the
locking pin (C) can only be pulled back when the
switch (A) is not activated (held down). Make sure
that the locking pin locks into place again after
repositioning the turning handle. Only then the
switch can be activated anew.
The hedge trimmer can be used to cut shrubs and
bushes as well as hedges.
For the best performance, hold the hedge trim mer
with its teeth at an angle of approx. 15° to the
hedge (see Fig.7).
Cutting in both directions is possible with the
dual-edge blades.
To trim your hedge to a uniform height, run a
length of string along the hedge for guidance and
cut off the projecting branches.
Cut the sides of the hedge with sweeping
move ments from the bottom up (see Fig.8).
4. TECHNICAL DATA
Oleo-Mac HC 605 E Efco TG 605 E
Voltage V~ 230
Frequency Hz 50
Current imput A 2.6
Power W 600
Cutting length mm 550
Blade pitch mm 30
Cutting thickness max. mm 15
Revolution min
-1
3400
Weight kg 3.6
Pressure level L
pA
av EN 60745-1 – EN 60745-2-15
dB (A) 78.0 (Uncertainty 3.0)
Measured sound power level
2000/14/EC – EN 60745-1 – EN 60745-2-15 – EN ISO 3744
dB (A) 95.4 (Uncertainty 2.6)
Guaranteed sound power level
L
WA
2000/14/EC - EN 60745-1 – EN 60745-2-15 – EN ISO 3744
dB (A) 98.0
Vibration level EN 60745-1 – EN 60745-2-15 m/s
2
2.3 (sx) - 2.9 (dx) (Uncertainty 1.5)
11
GB
8. MAINTENANCE AND STORAGE
Switch off the hedge trimmer and pull out its
power plug before you put it down and clean it.
For the best cutting performance at all times,
clean and lubricate the blades ate regular intervals.
Remove deposits with a brush and apply a thin
film of oil (see Fig.9).
Use bio-degradable oils.
Clean the plastic housing and parts with a mild
household detergent and a damp cloth. Never use
aggressive agents or solvents.
Be particularly careful not to allow any water to
get inside the machine.
The supplied storage case can be fastened to the
wall. This is the best place to store your hedge
trimmer.
If the power cable is defective it must be replaced
immediately. If necessary have the cord replace by
a Servicing Dealer.
9. DISPOSAL (Fig. 2A)
In accordance with Directives 2011/65/CE and
2012/19/CE on the reduction of hazardous
substances in electrical and electronic equipment
(ROHS) and the disposal of waste from such
equipment (WEEE).
When the symbol depicting a crossed-out refuse bin
appears on equipment, this means that it must be
collected separately from other waste at the end of its
working life.
When the equipment is no longer serviceable,
accordingly, it should be taken by the user to a
special sorted collection centre for electrical and
electronic waste, or if purchasing a new product of
similar type, returned to the dealer on a one-for-
one basis (take back scheme).
Proper sorted collection ensures that the discarded
equipment can be sent subsequently for eco-friendly
recycling, treatment and disposal; this helps to avoid
any possible negative impact on the environment
and on health, besides enabling the reclamation of
materials used in manufacturing the equipment.
Unauthorized dumping of waste is irresponsible, and
punishable under statutory regulations.
10. WARRANTY CERTIFICATE
This machine has been designed and manufactured
using the most modern techniques. The manufacturer
guarantees its products for 24 months from the date of
purchase, for private and hobby use. The warranty is
limited to 12 months in case of professional use.
Limited warranty
1) The warranty period starts on the date of sale.
The manufacturer, acting through the sales and
technical assistance network, shall replace free
of charge any parts proven defective in material,
machining or manufacturing. The warranty does
not affect the purchaser’s rights as established
under legislation governing the consequences of
defects in the machine.
2) Technical personnel will undertake the necessary
repairs in the minimum time possible, compatible
with organisational needs.
3) To make any claim under the warranty, this
certificate of warranty, fully compiled, bearing
the dealer’s stamp, and accompanied by the
invoice or receipt showing the date of purchase,
must be displayed to the personnel authorised
to approve work.
4) The warranty shall be null and void if:
- the machine has evidently not been serviced
correctly,
- the machine has been used for improper
purposes or has been modified in any way,
- unsuitable lubricants and fuels have been used,
- non-original spare parts and accessories have
been fitted,
- work has been done on the machine by
unauthorised personnel.
5) The warranty does not cover consumables or parts
subject to normal wear.
6) The warranty does not cover work to update or
improve the machine.
7) The warranty does not cover any preparation
or servicing work required during the warranty
period.
8) Damage incurred during transport must be
immediately brought to the attention of the
carrier: failure to do so shall render null and void
the warranty.
9) The warranty does not cover injury or damage
caused directly or indirectly to persons or things
by defects in the machine or by periods of
extended disuse of the machine resulting from the
said defects.
MODEL
BOUGHT BY Mr.
SERIAL No
DATE
DEALER
Do not send! Only attach to requests for technical warranties.
84
DICHIARAZIONE DI
CONFORMITÁ
DECLARATION OF
CONFORMITY
DECLARATION DE
CONFORMITE'
KONFORMITATS -
ERKLARUNG
DECLARACION DE
CONFORMIDAD
CONFORMITEITS-
VERKLARING
Italiano English Français Deutsch Español Nederlands
Il sottoscritto, e undersigned, Je soussigné,
Der Unterzeichnende
im Namen der,
El abajo rmante, Ondergetekende,
EMAK spa via Fermi, 4 - 42011 Bagnolo in Piano (RE) ITALY
dichiara sotto la
propria responsabilità
che la macchina:
declares under its own
responsibility that the
machine:
déclare sous sa propre
responsabilité que la
machine:
erklärt auf eigene
Verantwortung daß die
Maschine:
declara bajo su
responsabilidad
que la máquina:
verklaart, onder eigen
verantwoordelijkheit,
dat de machine:
1. Genere:
tagliasiepe
1. Type:
hedgetrimmer
1. Catégorie:
taille-haies
1. Baurt:
Heckenschere
1. Género:
cortasetos
1. Type:
heggenschare
2. Marca: / Tipo: 2. Trademark: / Type: 2. Marque: / Type: 2. Marke: / Typ: 2. Marca: / Tipo: 2. Merk: / Type:
Oleo-Mac HC 605 E - Efco TG 605 E
3. identicazione di serie 3. serial identication 3. identication de série 3. Serien-Identizierung 3. identicación de serie 3. serie - identiceren
932XXX0001÷932XXX9999 (HC 605 E - TG 605 E)
è conforme alle
prescrizioni della
direttiva
complies with
the requirements
established by directive
est conforme aux
spécications de la
directive
den Bestimmungen
des Erlasses
cumple los
requisitos de la
directiva
voldoet aan de
voorschrien van
richtlijn
2006/42/EC - 2000/14/EC - 2014/30/EU - 2011/65/EC
è conforme alle
disposizioni delle
seguenti norme
armonizzate:
conforms with the
provisions of the
following harmonised
standards:
est conforme aux
recommandations des
normes harmonisées
suivantes:
ist konform mit
den Bestimmungen
der folgenden
harmonisierten
Normen:
cumple las siguientes
normas armonizadas:
is conform de
bepalingen van
de volgende
geharmoniseerde
regelgeving:
EN 60745-1 - EN 60745-2-15 + A1 - EN 55014-1 - EN 55014-2 - EN 61000-3-2 - EN 61000-3-3 - EN 50581
Procedure per
valutazione di
conformità seguite
Conformity assessment
procedure followed
Procédures suivies
pour l’évaluation de la
conformité
Verfahren zur Konfor-
mitätsbeurteilung
durchgeführt
Procedimientos
utilizados para
determinar la
conformidad
Procedure om de
gelijkvormigheid te
evalueren werden
nageleegd.
ANNEX V
Livello di potenza
acustica misurato
Measured sound
power level
Niveau de puissance
acoustique mesuré
Schallleistungspegel
gemessen
Nivel de potencia
acústica medido
Het geluidsniveau werd
gemeten.
95.4 dB (A)
Livello di potenza
acustica garantita:
Guaranteed sound
power level:
Niveau de puissance
acoustique assuré:
Garantierter
akustischer
Schalleistungspegel:
Nivel de potencia
acústica garantizado:
Gegarandeerd
acoustisch
vermogensniveau:
98.0 dB (A)
Fatto a / made at / Fait à / Aufgesetzt in / Hecho en / Gemaakt in: Bagnolo in piano (RE) Italy - via Fermi, 4
Data / Date / Datum / Fecha / Dátum / Data: 20/04/2016
Documentazione Tecnica depositata in Sede Amministrativa. - Direzione Tecnica
Technical documentation available by the administrative headquarter. - Technical Department
Documentation technique déposée auprès du Siège Administratif. - Direction Technique
Am Geschässitz hinterlegte technische Dokumentation. - Technische Leitung
Documentación técnica depositada en sede administrativa. - Dirección técnica
Technische documentatie neergelegd op de Hoofdzetel. - Technische Directie
Fausto Bellamico - President
s.p.a.
  • Page 1 1
  • Page 2 2
  • Page 3 3
  • Page 4 4
  • Page 5 5
  • Page 6 6
  • Page 7 7
  • Page 8 8
  • Page 9 9
  • Page 10 10
  • Page 11 11
  • Page 12 12
  • Page 13 13
  • Page 14 14
  • Page 15 15
  • Page 16 16
  • Page 17 17
  • Page 18 18
  • Page 19 19
  • Page 20 20
  • Page 21 21
  • Page 22 22
  • Page 23 23
  • Page 24 24
  • Page 25 25
  • Page 26 26
  • Page 27 27
  • Page 28 28
  • Page 29 29
  • Page 30 30
  • Page 31 31
  • Page 32 32
  • Page 33 33
  • Page 34 34
  • Page 35 35
  • Page 36 36
  • Page 37 37
  • Page 38 38
  • Page 39 39
  • Page 40 40
  • Page 41 41
  • Page 42 42
  • Page 43 43
  • Page 44 44
  • Page 45 45
  • Page 46 46
  • Page 47 47
  • Page 48 48
  • Page 49 49
  • Page 50 50
  • Page 51 51
  • Page 52 52
  • Page 53 53
  • Page 54 54
  • Page 55 55
  • Page 56 56
  • Page 57 57
  • Page 58 58
  • Page 59 59
  • Page 60 60
  • Page 61 61
  • Page 62 62
  • Page 63 63
  • Page 64 64
  • Page 65 65
  • Page 66 66
  • Page 67 67
  • Page 68 68
  • Page 69 69
  • Page 70 70
  • Page 71 71
  • Page 72 72
  • Page 73 73
  • Page 74 74
  • Page 75 75
  • Page 76 76
  • Page 77 77
  • Page 78 78
  • Page 79 79
  • Page 80 80
  • Page 81 81
  • Page 82 82
  • Page 83 83
  • Page 84 84
  • Page 85 85
  • Page 86 86
  • Page 87 87
  • Page 88 88

Oleo-Mac Oleo-Mac HC 605 E Owner's manual

Category
Power hedge trimmers
Type
Owner's manual
This manual is also suitable for

Ask a question and I''ll find the answer in the document

Finding information in a document is now easier with AI