18
EN
Starting the dishwasher
1. Turn the water tap on.
2. Press the ON/OFF button: the indicator light will
illuminate.
3. Open the door and pour in a suitable amount of
detergent (see below).
4. Load the racks (see Loading the racks) and shut
the door.
5. Select the wash cycle end time by turning the
SELECTOR knob between:
30 min, 60 min, 90 min, 3h*,6h*,9h* (see
delayed start section), setting the type of wash
required based on the crockery and how soiled it is
(see table of wash cycles).
Auto4you wash cycle:helps to achieve the best
washing and drying results in a short space of time
(see table of wash cycles).
6. Select the wash options (see below).
7. Start the cycle by pressing the START/RESET
button: the machine will emit a confirmation beep.
the WASH CYCLE IN PROGRESS indicator light will
illuminate.
8. During the cycle the REMAINING TIME indicator
lights illuminate to show:
o 20 minutes from the end of the wash cycle
o 10 minutes from the end of the wash cycle
9. At the end of the cycle three short beeps will
sound and the WASH CYCLE COMPLETE indicator
light will flash.
10. Switch off the appliance by pressing the ON/OFF
button, shut off the water tap and unplug the
appliance from the electricity socket.
11. Open the door and wait for a few minutes before
removing the crockery, in order to avoid burns.
Unload the racks, beginning with the lower level.
Modifying the duration of a wash cycle already in
progress
If the wrong programme was chosen originally, it
may be changed within one minute from when the
WASH CYCLE IN PROGRESS indicator light
illuminates: Press and hold the START/RESET button
for 4 seconds; you will hear one long beep followed
by three short ones. Restart the machine by
pressing the START/RESET button.
Adding extra crockery
Press the ON/OFF button and open the door, taking care to
avoid the escaping steam, and place the crockery inside the
dishwasher. Press the ON/OFF button again: the cycle starts
from the point at which it was interrupted.
Accidental interruptions
If the door is opened during the wash cycle, or if there is a
power cut, the cycle stops. It starts again from the point at
which it was interrupted once the door has been shut or the
electricity supply is restored.
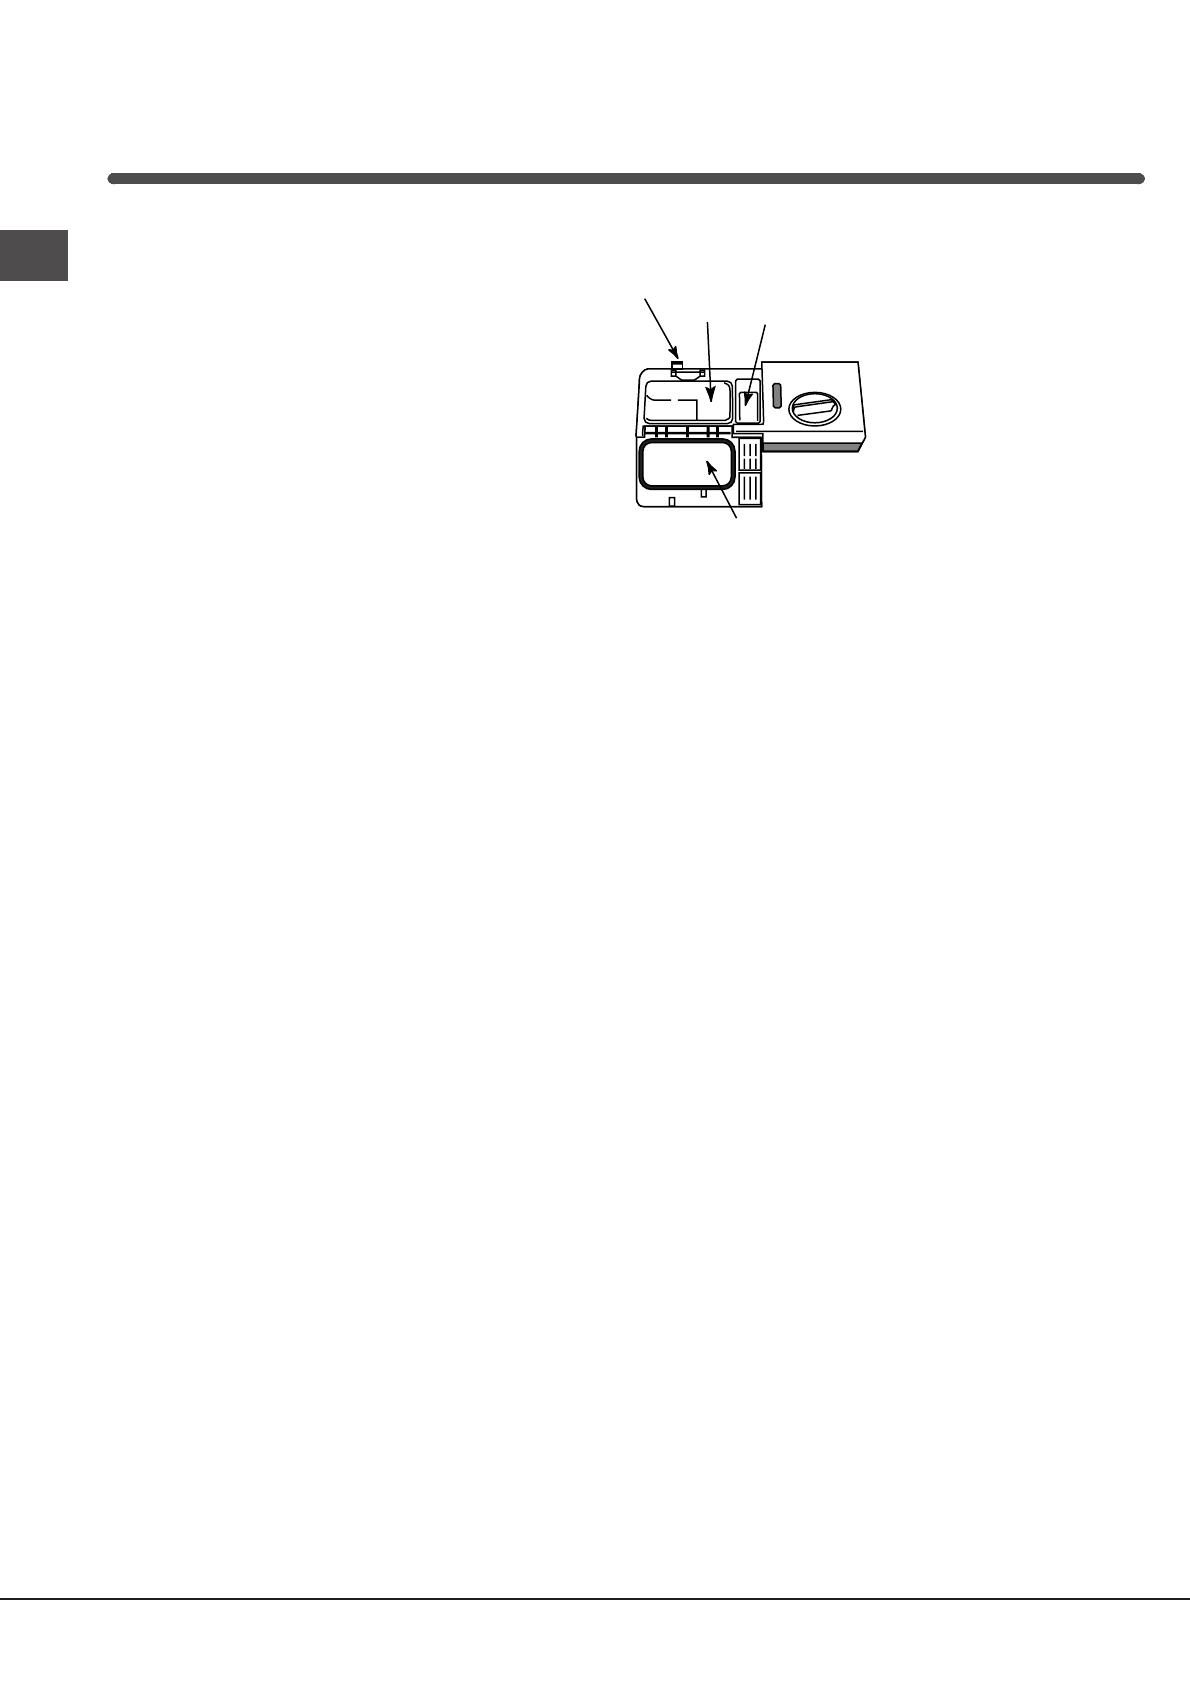
Loading the detergent
A successful wash also
depends on the correct
amount of detergent being
used, as recommended by
the manufacturer. Exceeding
the recommended amount
does not result in a more
effective wash and pollutes
the environment.
compartment A: Washing
detergent
compartment B: Pre-wash
detergent
1. Open cover C by pressing button D.
2. Pour in the detergent after consulting the Wash cycle table:
for powder detergent use compartments A and B
for tablets, use compartment A and the bottom of the
appliance, i.e. when the cycle requires 1 tablet, place it in
compartment A and close the cover; when it requires 2,
place the second tablet at the bottom of the appliance.
3. Remove detergent residues from the edges of the
compartment and close the cover until it clicks.
Washing options
Delayed start
This dishwasher gives the user complete control
over the wash cycle timing. The 3h, 6h and 9h
cycles enable the dishwasher to achieve its best
performance, at the exact time required, by using
the AUTO4YOU programme.
It is important to remember that:
if the 3h cycle has been selected the dishwasher
will wail for 30 minutes and then wash for the
remaining 150 minutes
if the 6h cycle has been selected the dishwasher
will wail for 3 hours and 30 minutes and then wash
for the remaining 150 minutes
if the 9h cycle has been selected the dishwasher
will wail for 6 hours and 30 minutes and then wash
for the remaining 150 minutes
To cancel or change the cycle, press the START/
RESET button and after the beeps have been
emitted reselect a new cycle. Restart the cycle
using the START/RESET button.
3in1 button*
When using multi-use tablets (2-in-1, 3-in-1, 4-in-1),
press the 3in1 button. The overall duration of the
programme increases by approximately 10 minutes
when this function is used.
This option is incompatible with the 30-minute
cycle.
Start-up and use
* Only available in selected models.


